Table des Matières
Publicité
Les langues disponibles
Les langues disponibles
Liens rapides
Publicité
Chapitres
Table des Matières

Manuels Connexes pour Teuco SEASIDE T07


Sommaire des Matières pour Teuco SEASIDE T07
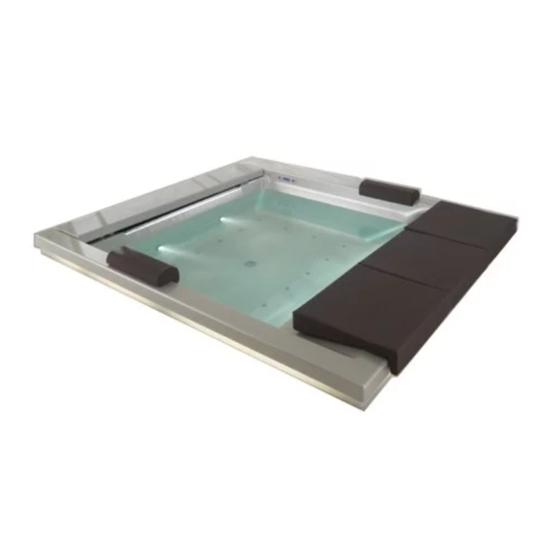
- Page 1 SEASIDE T07...
-
Page 2: General Notes - Safety Requirements
When disposing of the remote control batteries, follow the current legislation in the destination country. The data and the features indicated in this manual are not binding on Teuco Guzzini S.p.A. which reserves the right to make any modifications it believes appropriate without the obligation of prior notice or replacement. -
Page 3: Table Des Matières
GENERAL INFORMATION . . . . . . . . . . . . . . . . . . . . . . . . . . . . . . . . . . . . . . . . . . . . . . . . . . . . . . . . . . . . . . . . . . . . . . . 4 - TEUCO QUaliTy - TEUCO - TECHNOlOGy aND SaFETy - WaRNiNGS INSTRUCTIONS FOR USE - paRTS OF THE SEaSiDE . -
Page 4: General Information
Teuco is extremely careful about the materials used for its When you choose Teuco, you know you can rely on the products and it follows a policy of constant technological professionalism of a company that is able to offer you... -
Page 5: Hydromassage In Total Safety
Only use original Teuco spares for repairs or interventions requiring the replacement of parts. • Any interventions or operations not expressly dealt with in this manual should be performed by a Teuco authorised technical assistance centre. • The manufacturer cannot be held responsible for any... -
Page 6: Instructions For Use
Instructions for use PARTS OF ThE SEASIDE Bath filler Waterlight illuminated (backlit) waterfall pop-up waste handle Opens and closes the pop-up waste Dispenser cap Cleansing fluid container . Hand-held shower moonlight Rim lighting SEASIDE SEASIDE... - Page 7 Taps Control panel incorporates the display indi- cating operation of the system, the alarm button and the Quick Start button . Sunlight Chromo experience Remote control Waterproof and unsinkable Blower jet SEASIDE SEASIDE...
-
Page 8: Preliminary Operations
PRELIMINARy OPERATIONS POWERING-UP ThE SySTEM Position the isolating switch (fitted during installation) to “ON” . 2 0 : 3 0 The display goes into STaND-By mode, showing the exact time . Display in STAND-By mode FILLING ThE TUB Fill the tub until the water covers is at least 10 cm above the suction valve . DETAILS OF CONTROL PANEL AND DISPLAy QUICK START Display... -
Page 9: Quick Start
QUICK START Once the system has been powered up, the Waterlight (illuminated waterfall), Sunlight and moonlight functions can be activated by pressing a single button at the control panel . To start the functions, press the “QUiCK STaRT” button . 3 0 3 6 °... -
Page 10: Details Of The Remote Control
DETAILS OF REMOTE CONTROL Infrared emitter - ON/OFF button Switches the control panel ON and OFF BLOWER: WATERLIGhT ON/OFF button ON/OFF button BlOWER function Waterlight function ADJUSTMENTS ”t” and ”s”: Buttons used to select/adjust functions MOONLIGhT: ON/OFF button ENTER: Button used to confirm rim lighting selections/settings hEATER:... -
Page 11: Automatic Shutoff
SWITChING ON FROM ThE REMOTE CONTROL To switch on, press the “0/i” button; the welcome message will appear in the control panel display w e l C O M e t O for a few seconds . S e a S i D e Thereafter, the display switches to REaDy;... -
Page 12: Blower Function
BLOWER function Special whirlpool essences made by Teuco can be used when the Blower is in operation. Do not use soaps, bath oils or other foamable products. STARTING ThE BLOWER pressing the “O/i” button to switch on, 3 6 ° C 2 0 : 3 0 the display goes into REaDy mode . - Page 13 BLOWER SETTINGS With the BlOWER in operation, the user can: 1 5 3 6 ° C 2 0 : 3 0 - adjust the air flow B l O w e r Display indicating Blower - Change the duration of the Blower session in progress Press “ENTER”...
- Page 14 ChANGING ThE DURATION OF ThE BLOWER SESSION Select TimER from the Blower menu . B l O w e r t i M e r 3 0 M Blower menu Press “ENTER” the display will show the Timer . B l O w e r t i M e r 3 0 M Use the “s and t”...
-
Page 15: Waterlight Function
WATERLIGhT function Special bath essences made by Teuco can be used when the waterfall is in operation. Do not use soaps, bath oils or other foamable products. STARTING ThE WATERLIGhT pressing the “O/i” button to switch on, 3 6 ° C 2 0 : 3 0 the display goes into REaDy mode . - Page 16 ChANGING ThE DURATION OF ThE WATERLIGhT SESSION The duration can be changed while the WaTERliGHT is in 1 5 3 6 ° C 2 0 : 3 0 operation . w a t e r l i g h t Display indicating Waterlight in progress Press “ENTER”...
-
Page 17: Waterlight + Blower
WATERLIGhT + BLOWER The Waterlight and Blower functions can be used together . 3 0 3 6 ° C 2 0 : 3 0 w a t e r l i g h t Display indicating Waterlight in progress Press the “BlOWER” button to activate the function . The letters Bl are displayed alongside the selected massage . -
Page 18: Additional Functions (Sunlight - Moonlight - Heater)
ADDITIONAL functions Having switched on by pressing the “O/i” button, the user can activate certain additional functions . SUNLIGhT - CROMOExPERIENCE While enabling a function or while the system is on standby (Display in REaDy mode) it is possible to switch on the chro- mo experience mode . - Page 19 MOONLIGhT - RIM LIGhTING Whenever a function is activated, or the system is ready (Display showing REaDy) the user can switch on the rim light . Switch on by pressing the “mOONliGHT” button . 1 5 3 6 ° C 2 0 : 3 0 as the light comes on, the display will indicate its “on”...
-
Page 20: Display Settings - Info (Clock - Language)
Display settings - INFO Whenever a function is activated, or the system is ready (Display showing REaDy) the user can: - set the ClOCK - Change the language of the display Press the “iNFO” button i N F O 2 0 : 3 0 the display will show the info menu . - Page 21 LANGUAGE Select laNGUaGE from the info menu . i N F O 2 0 : 3 0 l a N g u a g e Info menu Press “ENTER” the display shows the language currently selected . i N F O 2 0 : 3 0 l a N g u a g e Use the “s and t”...
-
Page 22: Disinfection
DISINFECTION When the system is switched off using the “O/i” button after at least one Waterlight or Blower cycle has been selected, a DiSiNFECTiON cycle will follow . During Disinfection, both the remote control and the control panel are deactivated except for the “O/I”... - Page 23 Remove the Disinfectant dispenser cap, turning anticlockwise . Fill the container with Disinfectant so that the function can start . Replace and secure the dispenser cap . Use ONly disinfectant solution supplied by Teuco . POSTPONING ThE DISINFECTION CyCLE S t a r t To postpone the disinfection cycle, press the “O/i”...
-
Page 24: Replacing The Remote Control Batteries
MAINTENANCE REPLACING ThE REMOTE CONTROL BATTERIES To replace the batteries of the Remote Control, undo the four screws and remove the protective cover . Remove the spent batteries and replace with two new ones, type aaa-1 .5v . Be certain to maintain the polarity as indicated when fitting the new batteries to the remote control . -
Page 25: Repairs
REPAIRS if any part of the appliance fails to operate as it should, call the nearest Teuco authorized Service Centre (see list attached) . DIAGNOSTICS MESSAGES The appliance is equipped with various safety features which monitor the operation of the system . -
Page 26: Informations Générales - Sécurité
Les lampes et les groupes d’éclairage doivent être remplacés exclusivement par Teuco. En cas de panne ou de dysfonctionnement du produit ou d’entretien extraordinaire contacter Teuco. Le fabricant n’est pas responsable des dommages causés par des produits falsifiés ou mal réparé. - Page 27 INFORMATIONS GÉNÉRALES . . . . . . . . . . . . . . . . . . . . . . . . . . . . . . . . . . . . . . . . . . . . . . . . . . . . . . . . . . . . . . . . . . . 28 - la QUaliTé TEUCO - TEUCO - TECHNOlOGiE ET SéCURiTé - avERTiSSEmENTS MODE D’EMPLOI...
-
Page 28: Informations Générales
10 minutes enveloppés dans un peignoir et de Les personnes qui choisissent Teuco se confient à la nourrir ensuite la peau avec une bonne crème hydratante. professionnalité d’une entreprise qui en mesure de fournir tous les conseils sur l’utilisation et l’entretien: des... -
Page 29: Hydromassage En Toute Securite
Teuco et disponibles auprès des points de vente et des Centres après-vente agréés Teuco. Il est important de ne jamais utiliser de bains moussants ou autres substances émulsifiantes; ces derniers peuvent être employés quand on prend un bain normal. -
Page 30: Mode D'emploi
Mode d’emploi LES COMPOSANTS DE SEASIDE Buse de baignoire Waterlight Cascade d’eau avec rétro-éclairage poignée de vidage permet d’ouvrir et de fermer le montant de vidage Bouchon de la réserve Contenant le liquide désinfectant Douchette manuelle moonlight éclairage bord de baignoire SEASIDE SEASIDE... - Page 31 Robinetterie panneau de contrôle il renferme l’afficheur qui visualise les phases de fon- ctionnement de l’installation, la touche d’alarme et la touche Quick Start . Sunlight Cromoexperience Télécommande imperméable et flottante . Jet Blower SEASIDE SEASIDE...
-
Page 32: Opérations Préliminaires
OPÉRATIONS PRÉLIMINAIRES METTRE L’INSTALLATION SOUS TENSION Mettre l’interrupteur général programmé en phase d’installa- 2 0 : 3 0 tion sur “ON” . l’afficheur se met en STaND-By et visualise l’heure exacte . Afficheur en condition de STAND-By REMPLIR LA BAIGNOIRE Remplir la baignoire jusqu’à... -
Page 33: Quick Start
QUICK START après avoir mis l’installation sous tension, il est possible de lancer les fonctions Waterlight (cascade d’eau rétro-éclairée), Sunlight et moonlight en appuyant sur un seul bouton du panneau de contrôle . pour lancer les fonctions, appuyer sur la touche 3 0 3 6 °... -
Page 34: Caractéristiques De La Télécommande
CARACTÉRISTIQUES DE LA TÉLÉCOMMANDE Émetteur à infrarouges - Touche marche/arrêt miSE EN maRCHE - aRRÊT du panneau de contrôle BLOWER : WATERLIGhT Touche marche/arrêt Touche marche/arrêt de la fonction Blower fonction Waterlight RÉGLAGES “t” et “s”: Touches pour la sélection/réglage des fonctions MOONLIGhT: Touche marche/arrêt ENTER : Touche permettant de... -
Page 35: Mettre L'installation En Marche À L'aide De La Télécommande
METTRE L’INSTALLATION EN MARChE À L’AIDE DE LA TÉLÉCOMMANDE pour mettre en marche l’installation, appuyer sur la touche “0/i” ; B i e N V e N u e D a N S l’afficheur du panneau de contrôle visualise le message de S e a S i D e bienvenue pendant quelques secondes . -
Page 36: Fonction Blower
Fonction BLOWER Lorsque le Blower est en marche, il est possible d’utiliser les produits phytocosmétiques Teuco. Ne pas utiliser de savons, huiles de bains ou produits moussants. COMMENT METTRE EN MARChE LE BLOWER après avoir mis l’installation en marche à l’aide de la touche “O/i””, 3 6 °... -
Page 37: Réglages Du Blower
RÉGLAGES DU BLOWER lorsque la fonction BlOWER est en cours, il est possible de 1 5 3 6° C 2 0 : 3 0 B l O w e r Afficheur indiquant - Régler le flux de l’air Blower en cours - modifier la durée du Blower Appuyer sur la touche “ENTER””... -
Page 38: Modifier La Durée Du Blower
MODIFIER LA DURÉE DU BLOWER après avoir choisi TimER dans le menu du Blower . B l O w e r t i M e r 3 0 M Menu Blower Appuyer sur la touche “ENTER” l’afficheur visualise le Timer (minuterie) . B l O w e r t i M e r 3 0 M... -
Page 39: Fonction Waterlight
Fonction WATERLIGhT Durant le fonctionnement de la cascade, il est possible d’utiliser les produits phytocosmétiques Teuco. Ne pas utiliser de savons, huiles de bain ou produits moussants. COMMENT METTRE EN MARChE LA FONCTION WATERLIGhT après avoir mis l’installation en marche à l’aide de la touche “O/i”, 3 6 °... -
Page 40: Modifier La Durée De La Fonction Waterlight
MODIFIER LA DURÉE DE LA FONCTION WATERLIGhT lorsque la fonction WaTERliGHT est en cours, il est possi- 1 5 3 6 ° C 2 0 : 3 0 ble d’en modifier la durée . w a t e r l i g h t Afficheur indiquant Waterlight en cours Appuyer sur la touche “ENTER”... -
Page 41: Waterlight + Blower
WATERLIGhT + BLOWER lorsque la fonction Waterlight est en cours, il est possible de 3 0 3 6 ° C 2 0 : 3 0 lancer la fonction Blower . w a t e r l i g h t Afficheur indiquant Waterlight en cours Lancer la fonction Blower en appuyant sur la touche... -
Page 42: Fonctions Supplémentaires (Sunlight - Moonlight - Heater)
Fonctions SUPPLÉMENTAIRES après avoir mis l’installation en marche à l’aide de la touche “O/i”, il est possible de lancer certaines fonctions sup- plémentaires . SUNLIGhT - CROMOExPERIENCE lors de l’actionnement d’une fonction ou quand l’installation est en attente (afficheur sur REaD y) il est possible d’allumer la chromoexpérience . -
Page 43: Moonlight - Éclairage Bord De Baignoire
MOONLIGhT - ÉCLAIRAGE BORD DE BAIGNOIRE lorsqu’une fonction est en cours ou l’installation est en condi- tion d’attente (afficheur sur REaDy), il est possible d’éclairer le bord de la baignoire . Allumer les spots en appuyant sur la touche “mOONliGHT” . 1 5 3 6 °... -
Page 44: Réglages De L'afficheur - Info (Horloge - Langue)
Réglages de l’afficheur - INFO lorsqu’une fonction est en cours ou lorsque l’installation est en condition d’attente (afficheur indiquant REaDy), il est possible de - Régler l’horloge ClOCK - modifier la langue affichée Appuyer sur la touche “iNFO” i N F O 2 0 : 3 0 l’afficheur visualise le menu info . - Page 45 LANGUE après avoir choisi laNGUE dans le menu info . i N F O 2 0 : 3 0 l a N g u e Menu Info Appuyer sur la touche “ENTER” l’afficheur visualise la langue utilisée . i N F O 2 0 : 3 0 l a N g u e Utiliser les touches “s et t”...
-
Page 46: Désinfection
DÉSINFECTION lorsque l’on éteint l’installation en appuyant sur la touche “O/i” après avoir conclu au moins un cycle de Waterlight ou Blower, la baignoire est prête pour le cycle de DéSiNFECTiON . Durant la Désinfection, la télécommande et le panneau de contrôle sont désactivés à... -
Page 47: Pour Ne Pas Effectuer Le Cycle De Désinfection
Remplir le récipient de désinfectant de sorte que la fonction puisse démarrer . Refermer le bouchon . Utiliser ExClUSivEmENT la solution désinfectante Teuco . POUR NE PAS EFFECTUER LE CyCLE DE DÉSINFECTION D e M a r r a g e pour NE PAS effectuer la Désinfection, appuyer sur la touche... -
Page 48: Remplacement Des Piles De La Télécommande
MAINTENANCE REMPLACEMENT DES PILES DE LA TÉLÉCOMMANDE pour remplacer les piles de la télécommande, retirer le couvercle de protec- tion en desserrant les quatre vis . Enlever les piles et les remplacer par deux neuves de type aaa-1,5v . attention! respecter la polarité en installant les piles dans la télécommande . Reposer le couvercle de protection en faisant attention au joint d’étanchéité... -
Page 49: Réparations
- couper l’alimentation électrique de l’appareil - le remettre sous tension au bout de quelques secondes - relancer la fonction qui s’était bloquée . Si l’anomalie persiste, s’adresser au Centre assistance Technique Teuco agréé (voir liste C .a .T . Teuco) . SEASIDE SEASIDE... - Page 50 Zur Entsorgung der Fernbedienungsbatterien, sich an die Verordnungen der geltenden Gesetze des Bestim- mungslandes halten. Daten und Eigenschaften dieses Handbuches sind für Firma Teuco Guzzini S.p.a. nicht verpflichtend; diese behält sich das Recht vor, alle für notwendig erachtete Änderungen ohne Vorankündigung oder Austauschpflicht, vorzunehmen.
- Page 51 ALLGEMEINE INFORMATIONEN . . . . . . . . . . . . . . . . . . . . . . . . . . . . . . . . . . . . . . . . . . . . . . . . . . . . . . . . . . . . . . . . . 52 - TEUCO QUaliTäT - TEUCO - TECHNOlOGiE UND SiCHERHEiT - HiNWEiSE BEDIENUNGSANLEITUNGEN - SEaSiDE im DETail .
-
Page 52: Allgemeine Informationen
Die Hydromassage kann auch jeden Tag genossen Marke, die seit Jahren in aller Welt Schule macht. werden. Wer Teuco wählt gönnt sich die Freude, Tag für Tag die wohltuenden Wirkungen der totalen Wellness- • Die beste Wassertemperatur liegt bei 37 Grad Celsius, Behandlungen zu entdecken, die eigens geschaffen d.h. -
Page 53: Whirlpool Mit Absoluter Sicherheit
(Drucksensor): wenn Ausführung außerordentlicher Instandhaltungsarbeiten Ansaugstutzen durch Gegenstände oder Körperteile wenden Sie sich bitte ausschließlich an der von Teuco verschlossen wird, desaktiviert das Sicherheitssystem zugelassene Fachpersonal, um die Gültigkeit der sofort die Anlage. Garantie nicht zu beeinträchtigen. Bei Reparatur- und... -
Page 54: Bedienungsanleitungen
Bedienungsanleitungen SEASIDE IM DETAIL Einlauföffnung Waterlight Wasserfall mit Hinterbeleuchtung Griff der ablaufgarnitur Õffnet und schließt den ablauf Stöpsel Behälter für Desinfektionsmittel Handbrause moonlight Wannenrandbeleuchtung SEASIDE SEASIDE... - Page 55 armaturen Schaltdisplay mit anzeige des anlagebetriebs und den Tasten alarm sowie Quick Start Sunlight Cromoexperience Fernbedienung Wasserdichte und schwimmende ausführung Blower Düse SEASIDE SEASIDE...
-
Page 56: Erste Arbeitsschritte
ERSTE ARBEITSSChRITTE DIE STROMVERSORGUNG DER ANLAGE EINSChALTEN Stellen Sie den Hauptschalter auf die Position “ON” . 2 0 : 3 0 Das Display geht auf STaNDBy und zeigt die genaue Uhrzeit an . Display auf STANDBy DEN WhIRLPOOL FÜLLEN Lassen Sie Wasser in den Whirlpool einlaufen, bis die ansaugöffnung um mindestens 10 cm bedeckt ist . - Page 57 QUICK START Nachdem Sie die Stromversorgung eingeschaltet haben, können Sie vom Schaltdisplay aus mit nur eine Taste die Funktionen Waterlight (hinterbeleuchteter Wasserfall), Sunlight und moonlight direkt starten . Drücken Sie zum Start der Funktionen die Taste “QUiCK 3 0 3 6 ° C 2 0 : 3 0 STaRT”...
-
Page 58: Eigenschaften Der Fernbedienung
EIGENSChAFTEN DER FERNBEDIENUNG IR-Sender - EIN/AUS Taste EiNSCHalTEN - aUSSCHalTEN des Schaltdisplays BLOWER: WATERLIGhT EiN/aUS Taste EiN/aUS Taste Blower Funktion Waterlight Funktion EINSTELLUNGEN “t” und “s”: Wahl-/Einstelltasten der Funktionen MOONLIGhT: EiN/aUS Taste ENTER: Taste zur Übernahme der Wannenrandbeleuchtung Wahl/Einstellung der Funktionen hEATER: EiN/aUS Taste der Zusatzheizung... - Page 59 DIE ANLAGE VON DER FERNBEDIENUNG EINSChALTEN Zum Einschalten der anlage drücken Sie die Taste “0/i”; am Schaltdisplay erscheint kurz die Begrüßungsmeldung . w i l k O M M e N i N S e a S i D e anschließend stellt sich das Display in den Wartezustand REaDy .
-
Page 60: Blower Funktion
BLOWER Funktion Bei der Blower Funktion können Sie die TEUCO Kräuteressenzen verwenden. Benutzen Sie keine Seife, Badeöle oder andere schäumende Produkte. EINSChALTEN DER BLOWER FUNKTION Nachdem Sie die anlage mit der Taste “O/i” eingeschaltet 3 6 ° C 2 0 : 3 0... - Page 61 BLOWER EINSTELLUNGEN Während der BlOWER Funktion können Sie: 1 5 3 6 ° C 2 0 : 3 0 - die luftbeimischung einstellen B l O w e r Displayanzeige Blower - die Dauer der Funktion ändern im Gang Drücken Sie die Taste “ENTER” B l O w e r am Schaltdisplay erscheint das Blower menü...
- Page 62 DIE DAUER DER BLOWER FUNKTION ÄNDERN Wählen Sie die Option TimER im Blower menü aus . B l O w e r t i M e r 3 0 M Blower Menü Drücken Sie die Taste “ENTER” am Display erscheint der Timer . B l O w e r t i M e r 3 0 M...
-
Page 63: Waterlight Funktion
Waterlight Funktion Beim Betrieb des Wasserfalls können Sie die TEUCO Kräuteressenzen verwenden. Benutzen Sie keine Seife, Badeöle oder andere schäumende Produkte. WATERLIGhT STARTEN Nachdem Sie die anlage mit der Taste “O/i” eingeschaltet 3 6 ° C 2 0 : 3 0... - Page 64 DIE DAUER DER WATERLIGhT FUNKTION EINSTELLEN Während der WaTERliGHT Funktionen können Sie die 1 5 3 6 ° C 2 0 : 3 0 Dauer ändern . w a t e r l i g h t Displayanzeige Waterlight im Gang Drücken Sie die Taste “ENTER”...
-
Page 65: Waterlight + Blower
WATERLIGhT + BLOWER Beim Waterlight Betrieb können Sie die Blower Funktion ein- 3 0 3 6 ° C 2 0 : 3 0 schalten . w a t e r l i g h t Displayanzeige Waterlight im Gang Starten Sie die Blower Funktion mit der Taste “BlOWER” . am Schaltdisplay erscheint Bl neben der ablaufenden 3 0 3 6 °... -
Page 66: Zusatzfunktionen (Sunlight - Moonlight - Heater)
ZUSATZFUNKTIONEN Nachdem Sie die anlage mit der Taste “O/i” eingeschaltet haben, können Sie einige Zusatzfunktionen aufrufen . SUNLIGhT - CROMOExPERIENCE Während der aktivierung einer Funktion bzw . bei betriebsbe- reiter anlage (Display meldet REaDy), kann Cromoexperience eingeschaltet werden . Cromoexperience anhand der Taste “SUNliGHT” einschalten. 1 5 3 6 °... - Page 67 MOONLIGhT - WANNENRANDBELEUChTUNG Beim Einschalten einer Funktion bzw . bei anlage im Wartezustand (Displayanzeige auf REaDy) können die Wannenrand beleuchten . Schalten Sie die Beleuchtung mit der Taste “mOONliGHT” ein . 1 5 3 6 ° C 2 0 : 3 0 Die Beleuchtung schaltet sich ein, das Display blendet kurz die M O O N l i g h t O N Displayanzeige Moonlight...
-
Page 68: Einstellungen Des Displays - Info (Uhr - Sprache)
Einstellungen des Displays - INFO Beim Einschalten einer Funktion bzw . mit anlage im Wartezustand (Displayanzeige auf REaDy) können Sie: - Die ClOCK Uhr einstellen - Die Displaysprache ändern Drücken Sie die Taste “iNFO” i N F O 2 0 : 3 0 am Display erscheint das menü... - Page 69 SPRAChE Wählen Sie die Option SpRaCHE im menü info aus . i N F O 2 0 : 3 0 S P r a C h e Menü Info Drücken Sie die Taste “ENTER” am Schaltdisplay erscheint die verwendete Sprache . i N F O 2 0 : 3 0 S P r a C h e...
-
Page 70: Desinfektion
DESINFEKTION Wenn Sie die anlage mit der Taste “O/i” nach mindestens einem Waterlight oder Blower Zyklus abschalten, richtet sich der Whirlpool auf die DESiNFEKTiON ein . Bei der Desinfektion werden Fernbedienung und Schaltdisplay deaktiviert, mit Ausnahme der Tasten “O/I” und “ALARM”, mit denen Sie die Desinfektion beenden können. - Page 71 Füllen Sie den Behälter mit Desinfektionsmittel bis zum Einschalten der Funktion auf . Schrauben Sie den vorab abgenommenen Stöpsel wieder auf . verwenden Sie aUSSCHliESSliCH die von TEUCO gestellte Desinfektionslösung . DIE DESINFEKTION ÜBERSPRINGEN D e S i N F e k t i O N Drücken Sie zum ÜBERSpRiNGEN der Desinfektion die Taste...
-
Page 72: Austausch Der Batterien Für Diefernbedienung
WARTUNG AUSTAUSCh DER BATTERIEN FÜR DIE FERNBEDIENUNG Nehmen Sie hierzu den Schutzdeckel durch abdrehen der vier Schrauben ab . Entfernen Sie die entladenen Batterien und tauschen Sie diese durch 2 akkus der Größe aaa-1,5v aus . legen Sie die neuen Batterien mit der richtigen polarität in die Fernbedienung . Bringen Sie den Schutzdeckel wieder an und achten Sie hierbei auf das her- metische abschließen der Dichtung . -
Page 73: Reparatur
- schalten Sie die versorgung nach einigen Sekunden wieder ein - führen Sie die gestörte Funktion erneut aus . Sollte die Störung weiterhin bestehen, wenden Sie sich an das autorisierte TEUCO Servicezentrum (siehe TEUCO C .a .T . verzeichnis) . - Page 76 Teuco Guzzini S.p.A. Via Virgilio Guzzini, 2 62010 Montelupone (MC) - Italia T. 0039-0733-2201 F. 0039-0733-220391 www.teuco.com teuco@teuco.it...