Metz MECABLITZ 44 AF-1 digital Mode D'emploi
Masquer les pouces
Voir aussi pour MECABLITZ 44 AF-1 digital:
- Mode d'emploi (164 pages) ,
- Mode d'emploi (174 pages)
Chapitres
Table des Matières

Manuels Connexes pour Metz MECABLITZ 44 AF-1 digital


Sommaire des Matières pour Metz MECABLITZ 44 AF-1 digital
- Page 1 MECABLITZ 44 AF-1 digital für/for Sony-D-SLR Kameras mit/with ADI / Preflash-TTL Bedienungsanleitung Mode d’emploi Gebruiksaanwijzing Operating instruction Manuale istruzioni Manual de instrucciones...
-
Page 2: Table Des Matières
1 Sicherheitshinweise ..... . . 3 9 Blitztechniken ......15 9.1 Indirektes Blitzen . -
Page 3: Sicherheitshinweise
Vorwort 1 Sicherheitshinweise Vielen Dank, dass Sie sich für ein Metz • Das Blitzgerät ist ausschließlich zur Produkt entschieden haben. Verwendung im fotografischen Bereich Wir freuen uns, Sie als Kunde begrüßen vorgesehen und zugelassen! zu dürfen. • In Umgebung von entflammbaren Natürlich können Sie es kaum erwarten,... - Page 4 • Verbrauchte Batterien / Akkus nicht • Blitzgerät nicht zerlegen! ins Feuer werfen! HOCHSPANNUNG ! Im Geräteinneren befinden sich keine • Aus verbrauchten Batterien kann Lauge austre- Bauteile, die von einem Laien repariert ten, was zur Beschädigung der Kontakte führt. werden können.
-
Page 5: Dedicated-Blitzfunktionen
2 Dedicated-Blitzfunktionen Im Rahmen dieser Bedienungsanleitung ist es nicht möglich, alle Kameratypen Die Dedicated-Blitzfunktionen sind spe- mit den einzelnen Blitzfunktionen ziell auf das Kamerasystem abgestimmte detailliert zu beschreiben. Beachten Sie Blitzfunktionen. In Abhängigkeit vom deshalb die Hinweise zum Blitzbetrieb Kameratyp werden dabei verschiedene in der Bedienungsanleitung Ihrer Blitzfunktionen unterstützt. -
Page 6: Stromversorgung
Blitzfolgezeiten und sparsamen Blitzgerät von der Kamera abnehmen Betrieb, da sie wiederaufladbar sind. Kamera und Blitzgerät vor der Montage Wenn Sie das Blitzgerät längere Zeit oder Demontage ausschalten. nicht benutzen, entfernen Sie bitte die • Rändelmutter bis zum Anschlag Batterien aus dem Gerät. gegen das Blitzgerät drehen. -
Page 7: Ein- Und Ausschalten Des Blitzgerätes
Batterien. 3.4 Automatische Geräteabschal- Ersetzen Sie immer alle Batterien durch tung / Auto - OFF gleiche, hochwertige Batterien eines Das Blitzgerät ist so eingestellt, dass es Herstellertyps mit gleicher Kapazität! ca. 3 Minuten - Verbrauchte Batterien bzw. Akkus • nach dem Einschalten, gehören nicht in den Hausmüll! Leisten •... -
Page 8: Led-Anzeigen Am Blitzgerät
Wenn das Blitzgerät längere Zeit nicht 4.2 Belichtungskontrollanzeige benötigt wird, sollte das Gerät grund- Bei einer richtigen Belichtung leuchtet die sätzlich immer mit der Taste ausge- Taste für ca. 3 Sekunden rot auf, schaltet werden! wenn die Aufnahme in den TTL–Blitzbetriebsarten richtig belichtet wurde! 4 LED-Anzeigen am Blitzgerät... -
Page 9: Blitzbetriebsarten
passt (näheres siehe 5 Blitzbetriebsarten Kamerabedienungsanleitung). Bei der Je nach Kameratyp stehen verschiedene ADI-Messung gehen zusätzlich TTL–Blitzbetriebsarten, der manuelle Entfernungsdaten des Objektivs in die Blitzbetrieb und der Blitzbelichtung mit ein. Die Auswahl Remote–Slave–Blitzbetrieb zur bzw. Einstellung der Betriebsarten Verfügung zur Verfügung. Vorblitz-TTL und ADI-Messung erfolgt an Die Einstellung der Blitzbetriebsart der Kamera (siehe... -
Page 10: Automatischer Ttl-Aufhellblitzbetrieb
5.2 Automatischer Einstellvorgang • Blitzgerät mit der Taste einschal- TTL–Aufhellblitzbetrieb ten. Bei den meisten Kameratypen wird in der Programmautomatik P, und den Vari- • Am Blitzgerät die Taste „TTL“ drü- bzw. Motiv-Programmen bei Tageslicht cken um die Betriebsart TTL einzustel- der automatische TTL-Aufhellblitzbetrieb aktiviert (siehe Kamerabedienungsanlei- •... -
Page 11: Manueller Blitzbetrieb
Ein dunkler Hintergrund, der viel Licht Vergessen Sie nicht die TTL–Blitzbelich- absorbiert oder ein heller Hintergrund, tungskorrektur nach der Aufnahme an der stark reflektiert (z.B. Gegenlichtauf- der Kamera wieder zu löschen! nahmen), können zu Über- bzw. Stark reflektierende Gegenstände im Unterbelichtung des Motivs führen. -
Page 12: Motorzoom-Hauptreflektor
Einstellvorgang 6 Motorzoom-Hauptreflektor • Blitzgeräte mit der Taste ein- Der Motorzoom-Hauptreflektor des schalten. Blitzgerätes kann Objektivbrennweiten ab 24 mm (Kleinbild-Format) ausleuch- • Taste „M“ drücken um die manuelle ten. Betriebsart M einzustellen. Durch Einsatz der integrierten Manuelle Teillichtleistungen Weitwinkelstreuscheibe erweitert sich Im manuellen Blitzbetrieb M kann eine die Ausleuchtung auf 12 mm. -
Page 13: Weitwinkelstreuscheibe
6.1 Weitwinkelstreuscheibe 6.2 Mecabounce 52-90 Mit der integrierten Weitwinkelstreu- Wenn der Mecabounce (Sonderzubehör; scheibe können Brennweiten ab siehe 16) am Hauptreflektor des 12 mm ausgeleuchtet werden (Kleinbild- Blitzgerätes montiert ist, wird der Format). Hauptreflektor automatisch in die erfor- derliche Position gesteuert. Weitwinkelstreuscheibe aus dem Hauptreflektor nach vorne bis zum... -
Page 14: Remote-Slave-Blitzbetrieb „Sl
7 Remote-Slave-Blitzbetrieb „SL“ Einstellvorgang für den Remote–Slave–Blitzbetrieb Das Blitzgerät unterstützt das drahtlose • Blitzgerät mit der Taste einschalten. Sony-Remote-System (CTRL und CTRL+) im Slave-Blitzbetrieb. • Am Blitzgerät die Taste „SL“ drü- cken um die Remote–Slave–Betriebsart Dabei können ein oder mehrere Slave- SL einzustellen. -
Page 15: Einstelllicht („Ml")
8 Einstelllicht („ML“) 9 Blitztechniken Das Einstelllicht kann nur dann ausge- 9.1 Indirektes Blitzen löst werden, wenn die Kamera diese Durch indirektes Blitzen wird das Motiv Funktion bietet. weicher ausgeleuchtet und eine ausge- prägte Schattenbildung verringert. Beim Einstelllicht (ML = Modelling Light) Zusätzlich wird der physikalisch beding- handelt es sich um ein Stroboskop–Blitz- te Lichtabfall vom Vordergrund zum... -
Page 16: Indirektes Blitzen Mit Reflektorkarte
Verschiedene Kameras verfügen über 9.2 Indirektes Blitzen mit einen Synchronzeitbereich, z.B. 1/60s Reflektorkarte bis 1/250s (siehe Kamerabedienungs- Durch indirektes Blitzen mit der integrierten anleitung). Welche Synchronzeit die Reflektorkarte können bei Personen Kamera einsteuert, ist dann von der Spitzlichter in den Augen erzeugt werden: Kamerabetriebsart, vom Umgebungslicht •... -
Page 17: Normalsynchronisation
einen Lichtschweif hinter sich herziehen, 10.2 Normalsynchronisation anstatt ihn - wie beim Synchronisieren Bei der Normalsynchronisation wird das auf den 1.Verschlussvorhang - vor sich Blitzgerät zum Beginn der Verschlusszeit aufzubauen. Dadurch wird bei beweg- ausgelöst (Synchronisation auf den ten Lichtquellen eine „natürlichere“ 1.Verschlussvorhang). -
Page 18: Langzeitsynchronisation (Slow)
10.4 Langzeitsynchronisation 10.5 Vorblitzfunktion gegen den (SLOW) „Rote-Augen-Effekt“ Mit der Langzeitbelichtung SLOW wird Verschiedene Kameras verfügen über der Bildhintergrund bei geringer die Möglichkeit zur Aktivierung einer Umgebungshelligkeit stärker zur Geltung Vorblitzfunktion gegen den „Rote- gebracht. Augen-Effekt“ (Red-Eye-Reduction). Erreicht wird dies durch Kameraver- Diese Funktion unterstützt nur das in der schlusszeiten, die dem Umgebungslicht Kamera eingebaute Blitzgerät. -
Page 19: Automatischer Af-Messblitz
Zoomobjektive mit geringer 11 Automatischer Anfangsblendenöffnung schränken die AF-Messblitz Reichweite des AF-Messblitzes zum Teil Sobald die Umlichtverhältnisse für eine erheblich ein! automatische Fokussierung nicht mehr Verschiedene Kameratypen unterstützen ausreichen, wird von der Kamera auto- nur mit dem zentralen AF–Sensor der matisch der AF-Messblitz Kamera den AF–Messblitz Blitzgerät aktiviert. -
Page 20: Wartung Und Pflege
1/1 1/2 1/8 1/64 Die Anzahl der Blinkimpulse zeigt die Softwareversion an, z.B. 1/1 LED blinkt 1 mal und die 1/64 LED blinkt 3 mal so ist die Softwareversion 1.3 installiert. Nähere Informationen finden Sie im Internet auf der Metz-Homepage: www.metz.de... -
Page 21: Hilfe Bei Störungen
• Die Kamera unterstützt nur den eige- 14 Hilfe bei Störungen nen internen AF-Meßblitz. Sollte es einmal vorkommen, dass das • Verschiedene Kameratypen unterstüt- Blitzgerät nicht so funktioniert wie es zen nur mit dem zentralen AF–Sensor soll, so schalten Sie das Blitzgerät für der Kamera den AF–Meßblitz im ca. - Page 22 Es findet keine automatische Umschaltung Die Aufnahmen sind zu dunkel. auf die Blitzsynchronzeit statt • Das Motiv liegt außerhalb der Reichweite des Blitzgerätes. • Die Kamera hat einen Zentralver- Beachten Sie: schluss (die meisten Kompaktkameras). Beim indirekten Blitzen verringert sich Die Umschaltung auf Synchronzeit ist die Reichweite des Blitzgerätes.
-
Page 23: Technische Daten
Blitzfolgezeit bei jeweils voller Lichtleistung: 15 Technische Daten ca. 3 s - 4 s. Maximale Leitzahl bei ISO 100; Ausleuchtung des Motorzoom- Zoom 105 mm: Hauptreflektors: Im Meter-System: 44 Im Feet-System: Ab 24 mm (Kleinbild-Format 24 x 36). Ab 12 mm mit integrierter Weitwinkel- Blitzbetriebsarten: streuscheibe (Kleinbild-Format 24 x 36). -
Page 24: Sonderzubehör
16 Sonderzubehör Batterie-Entsorgung Batterien/Akkus gehören nicht in den Für Fehlfunktionen und Schäden am Hausmüll! Bitte bedienen Sie sich bei der Blitzgerät, verursacht durch die Rückgabe verbrauchter Batterien/Akkus Verwendung von Zubehör anderer eines vorhandenen Rücknahmesystems. Hersteller, wird keine Gewährleistung Bitte geben Sie nur entladene übernommen! Batterien/Akkus ab. -
Page 25: Garantiebestimmungen
Gebrauchsanleitung, mechanische Beschädigung, ausge- Kaufbeleg entweder über den Fachhändler oder direkt laufene Batterien oder durch höhere Gewalt, Wasser, an die Firma Metz-Werke GmbH & Co KG - Zentral- Blitz etc. entstanden sind. Ferner sind Verschleiß, kundendienst - Ohmstrasse 55, 90513 Zirndorf, trans- Verbrauch sowie übermäßige Nutzung von der Garantie... - Page 26 1 Consignes de sécurité..... 27 9 Techniques de photographie au flash ..40 9.1 Éclairage indirect au flash .
-
Page 27: Consignes De Sécurité
1 Consignes de sécurité Nous vous remercions d’avoir choisi un • Le flash est conçu et agréé pour l’em- produit Metz et sommes heureux de vous ploi exclusif en photographie. saluer au sein de la grande famille de • Ne déclenchez en aucun cas un éclair nos clients. - Page 28 • Sortez immédiatement les piles usées • Ne démontez pas le flash ! du flash ! En effet, les piles usées DANGER HAUTE TENSION ! peuvent „couler“ et provoquer une Le flash ne renferme pas de pièces dégradation du flash. susceptibles de pouvoir être réparées par un non-spécialiste.
-
Page 29: Fonctions Flash Dédiées
2 Fonctions flash dédiées Dans le cadre du présent mode d’em- ploi, il n’est pas possible d’aborder en Les fonctions flash dédiées sont des fonc- détail tous les types d’appareils photo tions de flash adaptées spécialement à et leurs fonctions flash correspondan- un système d’appareil photo. -
Page 30: Alimentation
• 4 accus NiCd de 1,2 V, type CEI KR6 Retirer le flash de l’appareil photo (AA / Mignon), ils procurent des Éteindre l’appareil photo et le flash temps de recyclage très courts et sont avant le montage ou le démontage du économiques à... -
Page 31: Mise En Marche Et Coupure Du Flash
À la mise en place des piles ou accumu- 3.3 Mise en marche et coupure du lateurs, respectez la polarité conformé- flash ment aux symboles de piles figurant • Appuyez sur l’interrupteur dans le compartiment à piles. Une principal et allumez le flash. inversion de polarité... -
Page 32: Del De Signalisation Sur Le Flash
• après l’arrêt du système de mesure 4 DEL de signalisation sur le d’exposition de l’appareil photo... flash ...pour éviter une consommation inutile d’énergie et protéger les sources de 4.1 Affichage de disponibilité du courant contre tout déchargement flash involontaire. Lorsque le condensateur du flash est L’interrupteur principal clignote... -
Page 33: Témoin De Bonne Exposition Avec Flash
4.2 Témoin de mode de 5 Modes de fonctionnement fonctionnement du flash du flash Le témoin de bonne exposition Selon le modèle d’appareil photo, vous dispo- s’allume en rouge pendant 3 secondes sez de différents mode flash TTL et de la mode environ si la prise effectuée avec les flash manuel. -
Page 34: Dosage Automatique Flash/ Ambiance En Mode Ttl
photo) en fonction de cette évaluation. 5.2 Dosage automatique flash/ Lors de la mesure ADI, des données de ambiance en mode TTL distance de l'objectif sont en plus inté- Le dosage automatique flash/ambiance grées dans l'exposition au flash. TTL s’active avec la plupart des modèles La sélection ou le paramétrage des d’appareil photo en mode programme P modes pré-éclair TTL et mesure ADI se... -
Page 35: Correction Manuelle D'exposition Au Flash En Mode Flash Ttl
Procédure de réglage 5.3 Correction manuelle d’exposi- • Allumez le flash en appuyant sur tion au flash en mode flash TTL l’interrupteur principal Cette fonction doit être réglée au niveau • Appuyez sur la touche «TTL» de l’appareil photo, voir instructions de flash pour régler le mode de fonction- service de l’appareil photo. -
Page 36: Mode Flash Manuel
prise de vue s’effectue par exemple en jouant Une correction de l’exposition au flash en sur le réglage de l’ouverture au niveau de l’ap- jouant sur l’ouverture de l’objectif n’est pareil photo ou en sélectionnant une puissance pas possible parce que l’automatisme partielle manuelle adaptée. -
Page 37: Asservissement De La Tête Zoom Motorisée
être éclairée intégralement. Utilisez alors 6 Asservissement de la tête le diffuseur grand angle zoom motorisée L’asservissement de la tête zoom motori- 6.1 Diffuseur grand angle sée du flash permet d’éclairer des Le diffuseur grand angle intégré per- distances focales d’au moins 24 mm met de couvrir des distances focales (film de petit format). -
Page 38: Mecabounce
6.2 Mecabounce 52-90 7 Mode flash remote slave „SL“ Lorsque le mecabounce (accessoires en Le flash prend en charge le système sans option ; voir 16) est monté sur le réflec- fil Sony dans les modes «CTRL» et teur principal du flash, le réflecteur prin- «CTRL »... -
Page 39: Lumière Pilote «Ml
Procédure de réglage pour le mode flash 8 Lumière pilote («ML») remote slave La lumière pilote peut être déclenchée • Allumez le flash en appuyant sur uniquement si l’appareil photo propose l’interrupteur principal cette fonction. • Appuyez sur la touche «SL» La lumière pilote (ML = Modelling Light) flash pour régler le mode de fonction- est une séquence d’éclairs stroboscopi-... -
Page 40: Techniques De Photographie Au Flash
9 Techniques de photogra- 9.2 Éclairage indirect au flash avec carte-réflecteur phie au flash L’éclairage indirect au flash avec carte- réflecteur intégrée permet de générer 9.1 Éclairage indirect au flash des reflets de lumière dans les yeux des Avec l’éclairage indirect, le sujet est éclairé personnes : en douceur et les ombres portées sont moins nombreuses. -
Page 41: Synchronisation Du Flash
10 Synchronisation du flash Sur les appareils photo qui disposent d’un obturateur focal, il ne se produit pas de commutation automatique sur la 10.1 Commutation automatique sur vitesse de synchro-flash. Il est ainsi pos- la vitesse de synchro-flash sible d’opérer au flash à toutes les Suivant le modèle d’appareil photo et le vitesses d’obturation. -
Page 42: Synchronisation Sur Le 2Ème Rideau (Rear)
ment effacé ou n’est pas exécuté (voir 10.3 Synchronisation sur le mode d’emploi de l’appareil photo). 2e rideau (REAR) Le mode REAR est réglé sur l’appareil Certains appareils photo offrent la possi- photo (voir mode d’emploi de l’appareil bilité de synchroniser sur le 2e rideau photo). -
Page 43: Fonction De Pré-Éclairs Réducteurs D'yeux Rouges
Le réglage de la synchronisation en 11 Illuminateur AF vitesse lente SLOW se fait au niveau de automatique l’appareil photo (voir mode d’emploi de Dès que la lumière ambiante est insuffi- l’appareil photo) ! Pour les longs temps sante pour permettre une mise au point de pose, utilisez un pied afin d’éviter automatique, l’appareil photo active tout flou sur la prise de vue. -
Page 44: Commande Automatique Du Flash (Flash Automatique)
Vous trouverez des informations plus gramme «P» ou doit être activée sur détaillées sur Internet sur la page l’appareil photo (voir mode d’emploi de d’accueil de Metz: www.metz.de l’appareil photo). -
Page 45: Formation Du Condensateur De Flash
13.2 Formation du condensateur de 14 Remède en cas de flash mauvais fonctionnement Si le flash reste longtemps sans être mis Si le flash ne fonctionne pas comme il sous tension, le condensateur de flash devrait, éteignez le flash pendant subit une modification physique. - Page 46 • Différents types d’appareils photo Pas de commutation automatique sur la prennent en charge l’illuminateur AF vitesse de synchro flash du flash seulement avec le capteur AF • L’appareil photo est doté d’un obtura- central. L’illuminateur AF du flash n’est teur focal (la plupart des appareils pas activé...
- Page 47 Les prises de vue sont trop sombres. • Le sujet est situé en dehors de la por- tée du flash. Tenez compte du fait que l’éclairage indirect réduit la portée du flash. • Le sujet comprend des parties très clai- res ou réfléchissantes.
-
Page 48: Caractéristiques Techniques
Éclairage de l’asservissement de la tête zoom 15 Caractéristiques motorisée: techniques À partir de 24 mm (film de petit format Nombre-guide max. pour ISO 100/21°, 24 x 36). Zoom 105 mm: À partir de 12 mm avec diffuseur grand pour mètres : 44 pour pieds : 144 angle intégré... -
Page 49: Accessoires En Option
16 Accessoires en option Elimination des batteries Ne pas jeter les batteries dans les ordu- Nous déclinons toute responsabilité res ménagères. pour le mauvais fonctionnement et Veuillez rendre vos batteries usées là où l’endommagement du flash dus à elles sont éventuellement reprises dans l’utilisation d’accessoires d’autres votre pays. - Page 50 1 Veiligheidsinstructies ......51 9 Flitstechnieken ......63 9.1 Indirect flitsen .
-
Page 51: Veiligheidsinstructies
1 Veiligheidsinstructies Wij bedanken u voor uw beslissing een • De flitser is uitsluitend bedoeld en toe- Metz-product aan te schaffen. gelaten voor gebruik bij fotografie! Wij verheugen ons u als klant te kunnen • In de omgeving van ontvlambare gas- begroeten. - Page 52 • Gooi verbruikte batterijen / accu’s niet • Raak het venster van de reflector niet in vuur! aan als u een serie van meerdere flitsen achterelkaar ontstoken heeft. • Uit verbruikte batterijen kan loog lek- Gevaar voor verbranding! ken, wat beschadiging van de contact- punten tot gevolg heeft.
-
Page 53: Dedicated Flitsfuncties
2 Dedicated flitsfuncties In het kader van deze gebruiksaanwij- zing is het niet mogelijk, alle camera- Dedicated flitsfuncties zijn speciaal op modellen met hun individuele flitsfunc- het camerasysteem ingestelde flitsfunc- ties gedetailleerd te beschrijven. ties. Afhankelijk van het type camera Zie daarvoor de aanwijzingen in de worden daarbij verschillende flitsfuncties gebruiksaanwijzing van uw camera... -
Page 54: Voeding
• 4 NiCd-accu’s, 1,2 V, type IEC KR6 Flitser van de camera afnemen (AA / Penlight), deze bieden zeer kor- Camera en flitser vóór het aanbrengen te flitsvolgtijden en zijn spaarzaam in of afnemen uitschakelen. het gebruik omdat ze herlaadbaar •... -
Page 55: In- En Uitschakelen Van De Flitser
Let bij het inzetten van de batterijen, Als u denkt, de flitser gedurende lange- c.q. accu’s op de juiste polariteit in re tijd niet te gebruiken, bevelen wij overeenstemming met de symbolen in aan om de stroombronnen (batterijen, het batterijvak. Verwisselde polen kun- accu’s) uit het apparaat te nemen. -
Page 56: Led Aanduidingen Aan De Flitser
na het inschakelen direct weer ter beschikking. me verkeerd belicht wanneer de camera reeds naar de flitssynchronisatietijd is Druk voor het opwekken van de flitser geduren- omgeschakeld (zie 10). de 1 sec. op een willekeurige toets of tip de ont- spanknop op de camera even aan (Wake-up 4.2 Aanduiding van de belichtings- functie). -
Page 57: Flitserfuncties
details de gebruiksaanwijzing van uw 5 Flitsfuncties camera). Bij de ADI-meting worden Afhankelijk van het type camera staan u bovendien gegevens betreffende de verschillende TTL-flitsfuncties ter beschik- afstandsinstelling van het objectief bij het king en de functie van met de hand in te flitsen meegerekend. -
Page 58: Automatische Ttl-Invulflits
5.2 Automatische TTL– invulflits Het instellen Bij de meeste cameramodellen wordt in • Schakel de flitser via de functies van automatisch gepro- grammeerd P en de vari-, c.q. onder- • druk op de flitser de toets ‘TTL’ werpsprogramma's de automatische om de TTL-flitsfunctie in te schakelen;... -
Page 59: Met De Hand In Te Stellen Correctie In De Ttl-Flitsfunctie
5.3 Met de hand in te stellen Correctie op de belichting door het veran- deren van de diafragmawaarde aan het (manual) correctie in de objectief is niet mogelijk, omdat de TTL–flitsfunctie belichtingsautomatiek van de camera de Deze functie moet op de camera zelf veranderde waarde weer als normaal worden ingesteld, zie de gebruiksaan- werkdiafragma ziet. -
Page 60: Manual Flitsfunctie
5.4 Manual flitsfunctie Sommige camera’s ondersteunen de manual flitsfunctie M alleen als op de In de manual flitsfunctie M, wordt er, ten- camera de functie manual M ingesteld zij u een deelvermogen hebt ingesteld, door de flitser een flits met volle energie ontstoken. -
Page 61: Groothoekdiffusor
De automatische aanpassing vindt plaats 6.2 Mecabounce 52-90 bij brandpuntsafstanden vanaf 24 mm. Als de Mecabounce (accessoire; zie 16) op de zoomhoofdreflector is aangeb- Als een objectief met een brandpuntsaf- racht wordt deze automatisch in de stand van minder dan 24 mm wordt vereiste stand gestuurd. -
Page 62: Remote-Slaafflitsfunctie Sl
7 Remote slaaffunctie „SL“ Het instellen voor de remote-slaaffunctie • schakel de flitser met de toets De flitser ondersteunt het draadloos in;. Sony-Remote-Systeem in de functies ‚CTRL’ und ‚CTRL ´. • druk op de flitser op de toets ‘SL’ om de remote-slaaffunctie in te stellen; Hier bij kunnen een of meer flitsers door De instelling treedt onmiddellijk in wer- een master- c.q. -
Page 63: Instellicht ('Ml')
8 Instellicht („ML“) 9 Flitstechnieken Het instellicht kan alleen worden ont- 9.1 Indirect flitsen stoken als de camera die functie aan- Door indirect te flitsen wordt het onderwerp biedt. zachter verlicht en een anders nadrukkelijke Bij het instellicht (ML = Modelling Light) schaduw gemilderd. -
Page 64: Indirect Flitsen Met De Reflectiekaart
9.2 Indirect flitsen met een 10 Flitssynchronisatie reflectiekaart 10.1 Automatische sturing naar de Door indirect te flitsen met de ingebouw- de reflectiekaart kunnen bij personen flitssynchronisatietijd spitslichtjes in de ogen worden verkre- Afhankelijk van de camera en de gen: daarop ingestelde camerafunctie wordt, zodra de flitser opgeladen is de belich- •... -
Page 65: Normale Synchronisatie
Bij camera’s met centraalsluiter vindt 10.3 Synchronisatie bij het dicht- geen automatische sturing naar de flits- gaan van de sluiter (REAR) synchronisatietijd plaats. Daardoor kan Sommige camera’s bieden de mogelij- met alle belichtingstijden worden geflitst. kheid tot synchronisatie bij het dichtgaan Als u het volle vermogen van de flitser van de sluiter (REAR). -
Page 66: Synchronisatie Bij Lange Belichtingstijden (Slow)
De REAR-functie moet op de camera Het instellen voor de synchronisatie bij worden ingesteld (zie de gebruiksaan- lange belichtingstijden SLOW moet op wijzing van de camera). Op de flitser de camera plaatsvinden (zie de ge-bru- wordt de REAR-functie niet aangegeven iksaanwijzing van de camera)! Gebruik bij lange belichtingstijden een statief 10.4 Synchronisatie bij lange... -
Page 67: Automatische Af-Meetflits
Zoomobjectieven met een lage grootste 11 Automatische AF-meetflits opening beperken de reikwijdte van de Zodra de omgeving zo donker is dat AF-meetflits soms behoorlijk! automatisch scherpstellen niet meer Verschillende cameramodellen onder- mogelijk is, wordt door de camera auto- steunen alleen met de centrale AF-sensor matisch de AF-meetflits in de flitser van de camera de AF-meetflits... -
Page 68: Onderhoud En Verzorging
1/1 1/2 1/8 1/64 De knipperinterval geeft de softwarever- sie aan, bijv. 1/1 LED knippert 1 maal en de 1/64 LED knippert 3 maal, dan is de softwareversie 1.3 geïnstalleerd. Nadere informaties vindt u in het inter- net op de Metz-homepage: www.metz.de... -
Page 69: Troubleshooting
14 Troubleshooting De AF-meetflits van de flitser wordt niet geactiveerd. Mocht het eens voorkomen dat de flit- • De flitser is niet paraat. ser niet zo functioneert als u op grond • De camera staat niet in de functie van de instellingen zou mogen ver- „Single AF“... - Page 70 • Voor de hoofdreflector is een De opname zijn te donker. Mecabounce aangebracht. • Het onderwerp ligt buiten het bereik van de flits. Let op: bij indirect flitsen De automatische omschakeling naar de flits- vermindert de reikwijdte van de flits. synchronisatietijd vindt niet plaats.
-
Page 71: Technische Gegevens
Uitlichting van de motorisch gestuurde 15 Technische gegevens zoomhoofdreflector: Richtgetallen bij ISO 100/21°, vanaf 24 mm Zoom 105 mm: (kleinbeeldformaat 24 x 36). in het metersysteem: 44 in het feet- systeem: 144 vanaf 12 mm met ingebouwde groo- thoekdiffusor Flitsfuncties: (kleinbeeldformaat 24 x 36). -
Page 72: Bijzondere Toebehoren
De gelaatskleur van personen de batterijpolen met plakband worden wordt natuurlijker weergegeven. afgeplakt. De flitsreikwijdte wordt ongeveer de Uw Metz-product is ontworpen voor en helft korter. gebouwd uit hoogwaardige materialen en • Reflexschirm 58-23 componenten die gerecycled kunnen wor- (Bestelnr. - Page 74 1 Safety instructions ......9 Flash techniques ......9.1 Bouncing flash.
-
Page 75: Safety Instructions
Introduction 1 Safety instructions Thank you for choosing a Metz product. • The flash unit is intended and appro- We are delighted to welcome you as a ved exclusively for photographic use! customer. You will of course be impatient • Never fire a flash in the vicinity of to start using the flash unit. - Page 76 • Never recharge dry cell batteries! • When taking flash shots at full light output and in rapid succession an • Do not expose the flash unit or battery interval of at least 10 minutes after 15 charger to dripping or splashing water flashes must be observed ! such as rain! •...
-
Page 77: Dedicated Flash Functions
2 Dedicated flash functions camera’s operating instructions to find out which functions are supported and Dedicated flash functions are flash func- which ones have to be set manually on tions that have been specially adapted to the camera. a given camera system. Depending on the type of camera, different flash func- tions are supported. -
Page 78: Power Supply
3.2 Power supply Replacing the batteries The rechargeable batteries/batteries are Suitable batteries/rechargeable batteries empty or flat when the flash delay The flash unit can be operated with any exceeds 60 seconds (interval between of the following batteries: triggering a full output flash, e.g. in M, •... -
Page 79: Switching The Flash Unit On And Off
Do your bit for the environment and 3.4 Automatic unit shut-off / Auto dispose of used batteries/rechargeable batteries at designated collections The flash unit is configured so that points. 3 minutes after - • switching on, 3.3 Switching the flash unit on and •... -
Page 80: Flash Unit Led Displays
The flash unit should always be turned 4.2 Correct exposure display off using the main switch if it is not When the shot is correctly lit in TTL ope- going to be used for an extended peri- rating modes, the correct exposure is displayed by means of the button lighting up red for 3 seconds. -
Page 81: Flash Modes
ce data from the lens is incorporated into 5 Flash modes the flash exposure process. The selection Depending on the type of camera diffe- and/or setting of the preflash TTL and rent TTL flash modes and manual flash ADI metering operating modes are car- mode are available ried out on the camera (see camera ope- Flash mode can be configured via the... -
Page 82: Automatic Ttl Fill-In Flash Mode
Configuration procedure Automatic TTL Fill-in flash mode The automatic TTL fill-in flash mode is • Switch on the flash unit by pressing the activated by most cameras when the button automatic programme P is selected and by Vari or subject programmes during •... -
Page 83: Manual Flash Exposure Correction In Ttl Flash Mode
5.3 Manual flash exposure correc- Exposure correction through alteration of the lens aperture is not possible, as the tion in TTL flash mode camera’s automatic exposure views the This function must be configured on the altered aperture as the normal working camera, see camera operating instruc- one. -
Page 84: Manual Flash Mode
5.4 Manual flash mode 6 Motor zoom main reflector In manual flash mode M , full flash output The flash unit motor zoom main reflector is deployed if no partial lighting is set. By can illuminate lens focal lengths from selecting a suitable partial light output or 24mm (135 format). -
Page 85: Wide-Angle Diffuser
6.1 Wide-angle diffuser 7 Remote slave flash mode With the integrated wide-angle diffuser The flash unit supports the wireless Sony remote , focal lengths from 12mm can be system in the “CTRL” and “CTRL ” modes. exposed (135 format). This means that one or more slave flash Flip the wide-angle diffuser out of the units can be controlled remotely from a... -
Page 86: Modelling Light (Ml)
Configuration procedure for remote slave 8 Modelling light (ML) flash mode Modelling light is only possible if the • Switch on the flash unit by pressing the function is integrated into the camera. button Modelling light (ML) uses a high frequen- •... -
Page 87: Flash Techniques
9 Flash techniques 9.2 Bounce flash with a reflector card 9.1 Bounce flash The use of bounce flash with the integra- Bounce flash illuminates the subject more ted reflector card can bring out high- softly and reduces dense shadows. It also lights in the eyes of human subjects: reduces the drop in light from foreground to •... -
Page 88: Flash Synchronisation
10 Flash synchronisation speeds. If you need the full light output of the flash unit, you should not select a shutter speed that is any faster than 10.1 Automatic flash sync speed 1/125 sec. control Depending on the camera model and 10.2 Normal synchronisation camera mode, the shutter speed is swit- In normal synchronisation the flash unit... -
Page 89: Second Curtain Synchronisation (Rear)
The REAR mode is set on the camera 10.3 Second curtain synchronisa- (see camera’s operating instructions). tion (REAR) There is no display for REAR mode in the Some cameras offer the option of flash unit. second-curtain synchronisation (REAR), in which the flash unit is not triggered 10.4 Slow synchronisation (SLOW) until the end of the exposure time. -
Page 90: Preflash Function For Red-Eye Reduction
10.5 Preflash function for red-eye 11 Automatic AF measuring reduction beam Various cameras offer the possibility to The automatic AF measuring beam activate a preflash for red-eye reduction. activated in the flash unit by the camera This function only supports the flash unit when the ambient lighting conditions integrated in the camera. -
Page 91: Triggering Control (Auto-Flash)
1/1 LED flashes once „P“ program or must be activated on the and the 1/64 LED 3 times to install soft- camera (see camera operating instruc- ware version 1.3. tions). Further information can be found on the Metz website: www.metz.de... -
Page 92: Flash Capacitor Forming
13.2 Flash capacitor forming The flash capacitor built into the flash unit undergoes physical change if the unit is not switched on for a prolonged period. For this reason it is necessary to switch the unit on for approximately 10 minutes at least once every three months. - Page 93 peripheral AF sensor is selected, then 14 Troubleshooting the AF measuring beam will not be If the flash unit does not function as it activated in the flash unit. should, switch it off for approx. Activate the central AF sensor. 10 seconds via the button.
- Page 94 Automatic switching to the flash sync speed The shots are too dark. fails to occur. • The subject is beyond the range of the • The camera has a between-the-lens flash unit. Note: Using bounce flash shutter (as do most compact cameras). reduces the range of the flash unit.
-
Page 95: Technical Data
Motor zoom main reflector illumination: 15 Technical data from 24mm (135 format 24 x 36). Max. guide numbers at ISO 100/21°, zoom 105 mm: from 12mm with integrated wide-angle diffuser (135 format 12 x 36). In the metric system: In the imperial system: Reflector head pivot range and holding posi- Flash modes: tions:... -
Page 96: Optional Accessories
16 Optional accessories Disposal of batteries Do not dispose of spent batteries with We accept no liability for malfunctions domestic rubbish. of or damage to the flash unit caused Please return spent batteries to collecting by the use of accessories of other points should they exist in your country! manufacturers. - Page 98 1 Avvertenze sulla sicurezza ....75 9 Tecniche lampo ......87 9.1 Lampo riflesso .
-
Page 99: Avvertenze Per La Sicurezza
Premessa 1 Avvertenze per la sicurezza Grazie per aver scelto un prodotto Metz. E’ un piacere per noi accogliervi tra i • L’uso del lampeggiatore è previsto ed nostri clienti. Sicuramente non vedete ammesso esclusivamente nell’ambito l’ora di iniziare ad usare il vostro flash. - Page 100 • Non gettare nel fuoco le batterie o le • Non smontare il lampeggiatore! ALTA pile esaurite! TENSIONE! Le riparazioni devono essere effettuate esclusivamente da • Un’eventuale fuoriuscita di acido dalle personale esperto e autorizzato. batterie esaurite può provocare danni al flash.
-
Page 101: Funzioni Flash Dedicate
• Aggiornamento del software 2 Funzioni flash dedicate Le funzioni flash dedicate sono funzioni In questo manuale non è possibile des- messe a punto specificatamente per i crivere dettagliatamente le singole fun- diversi sistemi di camera. Le funzioni del zioni dedicate ai rispettivi tipi di fotoca- flash supportate dipendono dal tipo di mere, pertanto vi invitiamo a consultare camera. -
Page 102: Alimentazione
• 4 batterie al NiCd 1,2 V, tipo IEC KR6 Smontaggio del flash dalla camera (AA/Mignon), offrono il vantaggio di Spegnete la camera e il flash con l’in- tempi di ricarica particolarmente brevi terruttore principale! e un esercizio economico, in quanto •... -
Page 103: Accensione E Spegnimento Del Flash
batterie. Invertire i poli può causare 3.4 Spegnimento automatico danni all’apparecchio! L’installazione dell'apparecchio/Auto - OFF inadeguata delle batterie può provoca- Il flash è impostato in modo tale che ca. re il rischio di esplosioni. 3 minuti - Sostituire sempre tutte le batterie con •... -
Page 104: Indicazioni Led Sul Flash
premere leggermente il pulsante di scatto 4.2 Indicazione di corretta della fotocamera (Funzione „Wake up“). esposizione Con la giusta esposizione, il tasto Se si prevede di non utilizzare il flash si accende rosso per ca. 3 secondi se la per lungo tempo, è opportuno spegnere foto risulta ben esposta in modalità... -
Page 105: Modalità Flash
zioni d’uso della camera). In caso di 5 Modalità flash misurazione ADI vengono considerati A seconda della camera sono disponibili nell’esposizione flash anche i dati relativi diverse modalità flash TTL e il modo flash alla distanza dell’obiettivo. automatico. La selezione o l’impostazione dei modi La modalità... -
Page 106: Modo Automatico Lampo Di Schiarita Ttl
Procedura per l’impostazione Modo automatico lampo di schiarita • Accendere il flash mediante il tasto principale In presenza di luce diurna nella maggior parte dei tipi di fotocamere impostate su • Premere il tasto „TTL“ per impostare programma automatico P e su pro- la modalità... -
Page 107: Funzionamento Manuale Del Flash
per soggetti con flash). impostazione (vedi istruzioni per l’uso Uno sfondo più scuro che assorbe molta della fotocamera). luce o uno sfondo più chiaro che riflette Non dimenticare di disattivare la corre- fortemente (ad es. in caso di scatti in zione dell’esposizione flash TTL sulla controluce) possono causare sovraespo- fotocamera dopo lo scatto! -
Page 108: Parabola Con Zoom Motorizzato
Procedura per l’impostazione 6 Parabola con zoom motorizzato • Accendere il flash mediante il tasto La parabola con zoom motorizzato principale del flash è in grado di illuminare com- pletamente distanze focali a partire da • Premere il tasto „M“ per impostare 24 mm (formato piccolo). -
Page 109: Diffusore Grandangolare
6.1 Diffusore grandangolare 6.2 Mecabounce 52-90 Con il diffusore grandangolare Quando sulla parabola del flash è mon- possono illuminare completamente tato il Mecabounce (vedere punto 16 – distanze focali a partire da 12 mm (for- Accessori opzionali), la parabola si mato piccolo). - Page 110 7 Modalità di controllo a distanza Procedura per l’impostazione del funziona- mento Slave a distanza Il flash supporta il sistema Sony con con- • Accendere il flash mediante il tasto trollo a distanza senza cavo nelle moda- principale lità “CTRL” e “CTRL ”. In questo caso possono essere controllati •...
-
Page 111: Luce Pilota (Ml)
8 Luce pilota („ML“) 9 Tecniche lampo La luce pilota può funzionare solo se la 9.1 Lampo riflesso fotocamera prevede tale funzione. Utilizzando il lampo riflesso la luce sul Si tratta (ML = Modelling Light) di un soggetto risulta più morbida e le ombre lampo stroboscopico ad alta frequenza. -
Page 112: Lampo Riflesso Con Pannello Riflettente
soggetto venga illuminato da un’ulteriore luce 10 Sincronizzazione del lampo diffusa. 10.1 Sincronizzazione automatica 9.2 Lampo riflesso con pannello del lampo riflettente A seconda del tipo di fotocamera e alle Utilizzando il lampo riflesso con pannel- sue impostazioni, il tempo di posa viene lo riflettente integrato , possono commutato sul tempo sincro-flash, una... -
Page 113: Sincronizzazione Normale
sto modo è possibile lavorare con tutti i 10.3 Sincronizzazione sulla tempi di posa. Se doveste aver bisogno seconda tendina (REAR) della potenza piena del flash, non sele- Con alcune fotocamere è possibile anche la zionate tempi di posa più brevi di sincronizzazione sulla seconda tendina 1/125s. -
Page 114: Sincronizzazione Con Tempi Più Lunghi (Slow)
La funzione REAR viene impostata sulla L’impostazione per la sincronizzazione fotocamera (vedi il manuale di istruzioni con tempi lunghi SLOW avviene sulla della fotocamera). Sul flash non vi è fotocamera (vedi il manuale di istruzio- alcuna indicazione per questa funzione. ni della fotocamera)! Con tempi di posa lunghi utilizzate un treppiede per evita- 10.4 Sincronizzazione con tempi... -
Page 115: Controllo Automatico Dell'illuminatore Af
Obiettivi zoom con apertura ridotta del 11 Controllo automatico diaframma iniziale limitano a volte con- dell’illuminatore AF siderevolmente la portata del flash di Non appena la luce dell’ambiente non è misurazione AF! più sufficiente per una messa a fuoco Alcuni tipi di fotocamere supportano il automatica, la fotocamera attiva auto- flash di misurazione AF incorporato... -
Page 116: Cura E Manutenzione
(ad es., se l’indicatore 1/1 lampeggia una volta e l’1/64 tre volte, significa che è installata la versio- ne 1.3. Per ulteriori informazioni, consultare la Homepage Metz su internet: www.metz.de... -
Page 117: In Caso Di Anomalie Di Funzionamento
flash di misurazione AF incorporato. 14 In caso di anomalie di • Diversi tipi di fotocamere supportano il funzionamento flash AF del lampeggiatore solo con il Qualora il flash non dovesse funziona- sensore AF centrale della camera. re come dovuto, spegnere l’apparec- Quando viene selezionato un sensore chio per ca. - Page 118 Non ha luogo la commutazione automatica Le riprese sono troppo scure. sul tempo sincro. • Il soggetto si trova al di fuori del cam- po d’utilizzo del flash. • La fotocamera ha un otturatore centra- Ricordate: con il lampo riflesso si le (la maggior parte delle fotocamere riduce il campo d’utilizzo del flash.
-
Page 119: Dati Tecnici
Tempo di ricarica (sempre a piena potenza): 15 Dati tecnici ca. 3 s - 4 s. Numero guida massimo per ISO Illuminazione completa della parabola prin- 100/21°, Zoom 105 mm: cipale con zoom motorizzato: in metri: 44 a partire da 24 mm n piedi: 144 (formato piccolo 24 x 36). -
Page 120: Accessori Opzionali
Si prega di utilizzare un sistema di smal- ri non prodotti dalla Metz non sono timento adeguato, p. es. portandole al coperti dalla nostra garanzia! negozio dove le si è acquistate o ad un •... - Page 122 1 Indicaciones de seguridad ....123 9 Técnicas de destello ....136 9.1 Destellos indirectos .
-
Page 123: Indicaciones De Seguridad
1 Indicaciones de seguridad Le agradecemos que se haya decidido • Este flash ha sido diseñado para uso por un producto Metz y nos complace exclusivo en el sector de la fotografía. saludarle como usuario de nuestra mar- • No disparar nunca el flash en las pro- ximidades de gases o líquidos infla-... - Page 124 • Las pilas usadas pueden tener fugas • No desmontar el flash. de ácido, lo que podría dañar los con- ¡ALTA TENSIÓN! tactos. Por lo tanto, deben retirarse En el interior del equipo no hay nin- siempre las pilas gastadas del apara- gún componente que pueda ser repa- rado por personas no especializadas.
-
Page 125: Funciones Dedicadas Del
2 Funciones dedicadas del En el marco de estas instrucciones no es posible describir detalladamente todos flash los modelos de cámara y cada una de Las funciones dedicadas del flash son las sus funciones de flash dedicadas. Por que se adecuan de manera especial al ese motivo, es aconsejable consultar las sistema de la cámara. -
Page 126: Alimentación De Energía
• 4 baterías NC de 1,2 V, tipo IEC KR6 Extraer el flash de la cámara (AA / Mignon), para lograr intervalos Desconectar la cámara y el flash antes de muy cortos entre destellos y un funcio- montarlos o desmontarlos. namiento económico por ser recarga- •... -
Page 127: Conexión Y Desconexión Del Flash
Al colocar las pilas o baterías, observar 3.3 Conexión y desconexión del la polaridad correcta indicada por los flash símbolos del compartimento de las • Pulsar la tecla y conectar el pilas. Si se confunden los polos, el apa- flash. rato puede quedar inutilizable. -
Page 128: Indicadores Led En El Flash
...pase al modo Standby (Auto- OFF) 4 Indicadores LED en el flash para ahorrar energía y proteger las fuentes de energía de descargas acci- 4.1 Indicación de disponibilidad del dentales. flash La tecla parpadea en el modo Cuando el condensador del flash está Standby. -
Page 129: Indicación Del Control De La Exposición
4.2 Indicación del control de la 5 Modos de funcionamiento exposición del flash Con una exposición correcta, la tecla Según el modelo de cámara, se encuen- se ilumina rojo durante unos 3 segun- tran disponibles distintos modos de flash dos si en los modos de flash TTL la toma TTL y el modo manual. -
Page 130: Modo Automático De Flash De Relleno Ttl
En la medición ADI, para la exposición 5.2 Modo automático de flash de del flash se toman además en cuenta los relleno TTL datos de distancia del objetivo. La selec- En la mayoría de los modelos de cáma- ción o ra, el modo automático de flash de configuración de los modos de funciona- relleno TTL se activa en el programa... -
Page 131: Corrección Manual De La Exposición Del Flash En El Modo Ttl
del flash). Un fondo oscuro que absorba Configuración mucha luz o un fondo claro con fuerte • Conectar el flash con la tecla reflexión (p. ej., tomas a contraluz) pue- de conducir a sobreexposiciones o sub- • Pulsar la tecla “TTL” en el flash exposiciones del motivo. -
Page 132: Modo De Flash Manual
Tras la toma, ¡no olvide volver a borrar Configuración en lacámara la corrección de la exposi- • Conectar los flashes con la tecla ción del flash TTL! • Pulsar la tecla “M” para ajustar el modo de flash manual Los objetos fuertemente reflectantes en la imagen del motivo pueden perturbar Potencias parciales manuales el sistema automático de flash. -
Page 133: Reflector Principal Con Zoom Motorizado
Si se ha introducido una distancia focal 6 Reflector principal con inferior a 24 mm, la tecla LED del modo zoom motorizado ajustado parpadea como señal de En el flash, el reflector principal con advertencia de que la toma no puede zoom motorizado es capaz de iluminar quedar iluminada completamente. -
Page 134: Mecabounce
6.2 Mecabounce 52-90 7 Modo remoto esclavo Cuando el Mecabounce (accesorio espe- El flash soporta el sistema inalámbrico cial; consultar 16) se halla montado en Sony Remote en los modos de funciona- el reflector principal del flash, el reflector miento "CTRL" y "CTRL ". principal se coloca automáticamente en Ello permite controlar a distancia de la posición adecuada. -
Page 135: Luz De Modelado ("Ml")
Configuración para el modo remoto esclavo 8 Luz de modelado (”ML”) • Conectar el flash con la tecla La luz de modelado sólo se podrá • Pulsar la tecla “SL” en el flash para disparar, si la cámara ofrece esta ajustar el modo remoto esclavo SL. -
Page 136: Técnicas De Destello
9 Técnicas de destello principal una posición mayor / igual a 70 mm, con lo que no habrá luz difusa directa iluminando adicionalmente el 9.1 Destellos indirectos motivo. Mediante los destellos indirectos, el moti- vo recibe una iluminación más suave y 9.2 Destellos indirectos con tarjeta se atenúa la formación pronunciada de sombras. -
Page 137: Sincronización Del Flash
de funcionamiento de la cámara y de la 10 Sincronización del flash sincronización del flash seleccionada (consultar 10.3 y 10.4). 10.1 Control automático de la sin- cronización del flash En cámaras con obturador central no se realiza ningún control automático de la Según el modelo de cámara y el modo sincronización del flash. -
Page 138: Sincronización Con La Segunda Cortinilla (Rear)
REAR no se puede seleccionar, se borra 10.3 Sincronización con la segunda automáticamente o no se lleva a cabo cortinilla (REAR) (consultar manual de instrucciones de la Algunas cámaras ofrecen la posibilidad cámara). de la sincronización con la segunda cor- El modo REAR se ajusta en la cámara tinilla (modo REAR). -
Page 139: Función Predestello Contra El "Efecto De Ojos Rojos
Para este modo, no es necesario ningún 11 Destello automático de ajuste en el flash ni aparecen otras indi- medición AF caciones en la pantalla. Tan pronto como las condiciones de iluminación sean insuficientes para el La configuración para la sincronización enfoque automático, la cámara activa de velocidad lenta SLOW se realiza en automáticamente el destello de medición... -
Page 140: Control De Encendido (Auto-Flash)
LED 1/1 parpadea 1 vez y el LED varlo en la cámara (consultar manual de 1/64 parpadea 3 veces, así pues, la instrucciones de la misma). versión de software instalada es 1.3. Consultar más información en la pági- na web de Metz: www.metz.de... -
Page 141: Formación Del Condensador De Destellos
13.2 Formación del condensador 14 Ayuda en caso de de destellos problemas El condensador de destellos incorporado Si el flash no funciona debidamente, en el flash se deforma físicamente si el desconéctelo durante unos 10 segundos aparato no se conecta durante largos mediante la tecla . - Page 142 modelos de cámara sólo es compatible No tiene lugar una conmutación automática con el sensor AF central de la cámara. a la velocidad de sincronización del flash Si se selecciona un sensor AF descen- • La cámara tiene un obturador central tralizado, el destello de medición AF (como la mayoría de las cámaras no se activa en el flash.
- Page 143 La imagen aparece demasiado oscura. • El motivo se encuentra fuera del alcan- ce del flash. Recordar que con los destellos indirectos se reduce el alcan- ce del flash. • El motivo contiene partes muy claras o reflectantes. Esto confunde al expo- símetro de la cámara o del flash.
-
Page 144: Características Técnicas
Iluminación: 15 Características técnicas Reflector principal a partir de 24 mm Máximo número guía con ISO 100/21°, (pequeño formato 24 x 36). zoom 105 mm:: Reflector principal con difusor de gran En metros: En pies: 144 angular a partir de 12 mm (pequeño formato 24 x 36). -
Page 145: Accesorios Especiales
16 Accesorios especiales Eliminación de las baterías No se deben tirar las baterías a la basu- Metz no asume ninguna garantía por ra casera. funcionamientos erróneos o da–os en el Para la devolución de sus baterías flash, causados al utilizar accesorios de gastadas, sírvase utilizar uno de los... -
Page 149: Tabel 1: Richtgetallen Bij Vol Vermogen (P 1)
Zoom 6/9° 8/10° 10/11° 12/12° 16/13° 20/14° 25/15° 32/16° 40/17° 50/18° 64/19° 80/20° 100/21° 125/22° 160/23° 200/24° 250/25° 320/26° 400/27° 500/28° 650/29° 800/30° Tabelle 1: Leitzahlen bei maximaler Lichtleistung (P 1/1) 1000/31° 54 Tableau 1: Nombres-guides pour la puissance maximale (P 1/1) 1250/32°... -
Page 150: Tabel 2: Flitsduur En Deelvermogensstappen
Teillichtleistung Blitzleuchtzeit (s) Leitzahl Leitzahl Niveaux de puissance Durée d’éclair (s) Nombre-guide Nombre-guide Deelvermogensstappen Flitsdur (s) Richtgetal Richtgetal Partial light output Flash duration Guide number Guide number Livello di potenza Durata del lampo Numero guida Numero guida Potencia parcial Duración de destello Número-guía Número-guía (P=Flash Power) ISO 100/50 mm... -
Page 151: Verschillende Voedingstypes
Batterietyp Blitzfolgezeiten Blitzanzahl Type de pile/accu Temps de recyclage Nombre d’éclairs Type voeding Flitsvolgtijden Aantal flitsen Battery type Recycling times Number of flashes Tipo batterie Tempi di ricarica Numero ampi Tipo de pila Tiempo de secuencia de dest. Número de destellos min. - Page 152 Ihr Metz-Produkt wurde mit hochwerti- Votre produit Metz a été conçu et fabri- gen Materialien und Komponenten ent- qué avec des matériaux et composants worfen und hergestellt, die recycelbar de haute qualité, susceptibles d'être sind und wieder verwendet werden kön- recyclés et...
- Page 153 Uw Metz-product is ontworpen voor en Your Metz product was developed and gebouwd uit hoogwaardige materialen manufactured with high-quality materials en componenten die gerecycled kunnen and components which can be recycled worden en dus geschikt zijn voor herge- and/or re-used.
- Page 154 Il vostro prodotto Metz è stato progettato Su producto Metz ha sido concebido y e realizzato con materiali e componenti fabricado con materiales y componentes pregiati che possono essere riciclati e de alta calidad, que pueden ser recicla- riutilizzati. dos y reutilizados.
- Page 155 Hinweis: Opmerking: Avvertenza: In het kader de CE-markering werd Nell’ambito delle prove EMV per il Im Rahmen des CE-Zeichens wurde bei bij de EMV-test de correcte be-lich- segno CE è stata valutata la corretta der EMV-Prüfung die korrekte ting bepaald. esposizione.
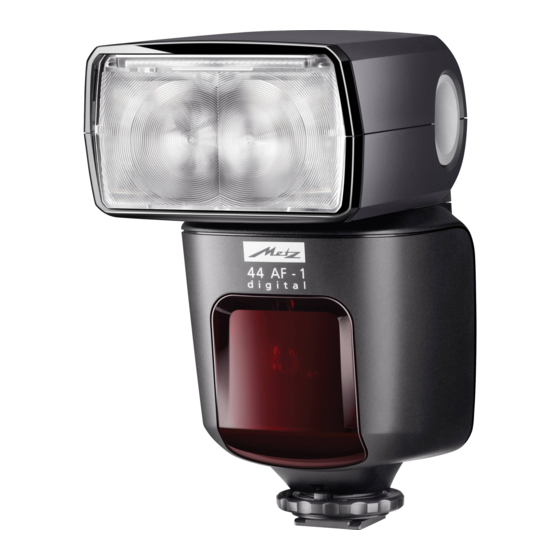
- Page 156 Teillichtleistung Puissances partielles Deelvermogen Partial light output Taste für manuellen Blitzbetrieb Potenza ridotta Touche de mode flash manuel Potencias parciales Toets voor manual flitsfunctie Taste für Remote-Slave-Betrieb Button for manual flash mode Touche de mode multi-flash sans fill Tasto per modo flash manuale Toets voor Remote-slaafflitsfunctie Tecla para modo flash manual Button for Remote slave flash mode...
- Page 157 Reflektorkarte Carte-réflecteur Reflecterende kaart Reflector card Pannello riflettente Riflettente integrato Weitwinkelstreuscheibe Diffuseur grand angle Groothoekdiffusorschijf Wide-angle diffuser Diffusore grandangolare Difusor gran angular AF-Messblitz Firmwareupdate-Buchse Illuminateur AF Mise à jour du micrologiciel AF-meetflits Updaten van de firmware AF measuring beam Firmware updates Illuminatore di assist.
- Page 158 Metz - Werke GmbH & Co KG • Postfach 1267 • D-90506 Zir ndorf • info@metz.de • www .metz.de 709 47 0323.A1 Metz - always first class.