Metz MECABLITZ 48 AF-1 digital Mode D'emploi
Masquer les pouces
Voir aussi pour MECABLITZ 48 AF-1 digital:
- Mode d'emploi (125 pages) ,
- Mode d'emploi (140 pages)
Table des Matières
Publicité
Les langues disponibles
Les langues disponibles
Liens rapides
Publicité
Chapitres
Table des Matières
Dépannage

Manuels Connexes pour Metz MECABLITZ 48 AF-1 digital


Sommaire des Matières pour Metz MECABLITZ 48 AF-1 digital
- Page 1 MECABLITZ 48 AF-1 digital für/for Olympus-, Panasonic-, Leica-Digitalkameras mit/with FourThird-Standard Bedienungsanleitung Mode d’emploi Gebruiksaanwijzing Operating instruction Manuale istruzioni Manual de instrucciones...
-
Page 2: Table Des Matières
1 Sicherheitshinweise ........3 9.8 Synchronisation auf den 2.Verschlussvorhang (REAR) . -
Page 3: Sicherheitshinweise
• Verbrauchte Batterien / Akkus nicht ins Feuer werfen! • Batterien / Akkus nicht kurzschließen! Vielen Dank, dass Sie sich für ein Metz Produkt entschieden haben. Wir freuen uns, Sie als Kunde begrüßen zu dürfen. • Aus verbrauchten Batterien kann Lauge austreten, was zur Beschädigung der Kontakte führt. -
Page 4: Dedicated-Blitzfunktionen
2 Dedicated-Blitzfunktionen 3 Blitzgerät vorbereiten Die Dedicated-Blitzfunktionen sind speziell auf das Kamerasystem abgestimmte 3.1 Montage des Blitzgerätes Blitzfunktionen. In Abhängigkeit vom Kameratyp werden dabei verschiedene Blitzgerät auf die Kamera montieren Blitzfunktionen unterstützt. Kamera und Blitzgerät vor der Montage oder Demontage ausschalten. •... -
Page 5: Ein- Und Ausschalten Des Blitzgerätes
Wenn Sie das Blitzgerät längere Zeit nicht benutzen, entfernen Sie bitte 3.4 Automatische Geräteabschaltung / Auto - OFF die Batterien aus dem Gerät. Werksseitig ist das Blitzgerät so eingestellt, dass es ca. 10 Minuten - Batterien austauschen • nach dem Einschalten, •... -
Page 6: Belichtungskontrollanzeige
4.2 Belichtungskontrollanzeige 5.1 Anzeige der Blitzbetriebsart Die Belichtungskontrollanzeige „o.k.“ leuchtet für ca. 5 Sekunden, wenn die Im Display wird die eingestellte Blitzbetriebsart angezeigt. Dabei sind je nach Aufnahme in den TTL-Blitzbetriebsarten ( HSS; siehe 7) richtig belichtet Kameratyp verschiedene Anzeigen für die jeweils unterstützte TTL-Blitzbetriebsart wurde! (z.B. -
Page 7: Anzeigen Im Kamerasucher
Reichweitenanzeige im manuellen Blitzbetrieb M 7.1 TTL-Betriebsarten In den TTL-Blitzbetriebsarten erreichen Sie auf einfache Art sehr gute Im manuellen Blitzbetrieb M wird im Display der Entfernungswert angezeigt, der Blitzlichtaufnahmen. In diesen Blitzbetriebsarten wird die für eine korrekte Blitzbelichtung des Motivs einzuhalten ist. Die Anpassung an Blitzbelichtungsmessung von einem Sensor in der Kamera vorgenommen. -
Page 8: Manueller Blitzbetrieb
Die Einstellung wird sofort wirksam. Nach ca. 5 Sekunden hört die Anzeige Manuelle Teillichtleistungen auf zu blinken und die Einstellung wird automatisch gespeichert. Im Display Im Manuellen Blitzbetrieb mit den Tasten ( + ) und ( - ) die gewünschte wird „... -
Page 9: Manuelle Blitzbelichtungskorrektur
Einstellvorgang Einstellvorgang • Taste „Mode“ so oft drücken, bis im Display „ HSS“ bzw. „ HSS“ • Taste ( - ) bzw. ( + ) so oft drücken, bis „EV“ blinkt. blinkt. Mit den Tasten ( + ) und ( - ) die gewünschte Einstellung vornehmen: Die Einstellung wird sofort wirksam. -
Page 10: Sonderfunktionen („Select")
9 Sonderfunktionen („Select“) Manueller Zoom-Betrieb Bei Kameras die keine Daten der Objektivbrennweiten übertragen, muss die Je nach Kameratyp stehen verschiedene Sonderfunktionen zur Verfügung. Zum Zoom-Position des Hauptreflektors manuell an die Objektivbrennweite angepasst Aufrufen und Einstellen der Sonderfunktionen muss deshalb vorher ein werden. -
Page 11: Remote-Slave-Blitzbetrieb ( Sl )
Beispiel: Mecabounce 58-90 Sie benutzen ein Zoomobjektiv mit einem Brennweitenbereich von 35 mm bis Wenn der Mecabounce 58-90 (Sonderzubehör; siehe 17) am Hauptreflektor 105 mm. In diesem Beispiel stellen Sie die Position des Hauptreflektors des des Blitzgerätes montiert ist, wird der Hauptreflektor automatisch in die erfor- Blitzgerätes auf 35 mm. -
Page 12: Blitzbelichtungsreihen ("Fb")
- Bei der Anzeige „OFF“ ist der Remote-Slave-Betrieb deaktiviert. Prüfen des Remote-Blitzbetriebes Die Einstellung wird sofort wirksam. Nach ca. 5 Sekunden hört die Anzeige auf • Slave-Blitzgeräte so positionieren, wie für die spätere Aufnahme gewünscht. zu blinken und die Einstellung wird automatisch gespeichert. Nach der Verwenden Sie zum Aufstellen des Slave-Blitzgerätes einen Blitzgeräte- Aktivierung des Remote-Slave-Betriebes wird im Display angezeigt. -
Page 13: Automatische Geräteabschaltung
Eine Blitzbelichtungsreihe kann nur dann erfolgen, wenn die Kamera die • Bei der Anzeige „OFF“ ist die automatische Geräteabschaltung deaktiviert. Einstellung einer manuellen Blitzbelichtungskorrektur am Blitzgerät Die Einstellung wird sofort wirksam. Nach ca. 5 Sekunden hört die Anzeige auf zu unterstützt (siehe Kap. -
Page 14: Meter-Feet-Umschaltung („M" / „Ft")
Einstellvorgang 9.8 Synchronisation auf den 2.Verschlussvorhang (REAR) Einige Kameras bieten die Möglichkeit zur Synchronisation auf den • Tastenkombination „Select“ so oft drücken, bis „Zoom“ angezeigt wird und 2.Verschlussvorhang (siehe 11.3). „Ex“ blinkt. Mit den Tasten ( + ) und ( - ) die gewünschte Einstellung vorneh- men. -
Page 15: Aufnahmeformat-Anpassung (S.zoom)
9.9 Aufnahmeformat-Anpassung (S Zoom) 60° Rastposition schwenken. Bei geschwenktem Reflektorkopf wird der Hauptreflektor in eine Position von größer / gleich 70 mm gesteuert, damit Auf Wunsch kann die Anzeige für die Position des Hauptreflektors mit der Zoom- kein direktes Streulicht zusätzlich das Motiv beleuchten kann. Dabei erfolgt Size-Funktion an das FourThirds-System angepasst werden. -
Page 16: Blitzsynchronisation
11 Blitzsynchronisation 11.3 Synchronisation auf den 2.Verschlussvorhang (REAR) Einige Kameras bieten die Möglichkeit zur Synchronisation auf den 11.1 Automatische Blitzsynchronzeitsteuerung 2.Verschlussvorhang (REAR, 2nd curtain, SLOW2). Dabei wird das Blitzgerät Je nach Kameratyp und Kamerabetriebsart wird bei Erreichen der erst zum Ende der Verschlusszeit ausgelöst. Dies ist vor allem bei Belichtungen Blitzbereitschaft die Verschlusszeit auf die Blitzsynchronzeit umgeschaltet (siehe mit langen Verschlusszeiten (>... -
Page 17: Automatischer Af-Messblitz
Rahmen an die Funktionen zukünftiger Kameras Standardobjektiv 1,7/50 mm). Wegen der Parallaxe zwischen Objektiv und angepasst werden. AF–Messblitz im Blitzgerät beträgt die Naheinstellgrenze mit AF-Messblitz ca. Nähere Informationen finden Sie im Internet auf der Metz-Homepage: 0,7m bis1m. www.metz.de Damit der AF-Messblitz von der Kamera aktiviert werden kann, muss an der Kamera die Autofokus-Betriebsart „Single-AF (S)“... -
Page 18: Hilfe Bei Störungen
15 Hilfe bei Störungen Die Zoom-Position des Hauptreflektors wird nicht automatisch der aktuellen Zoom-Position des Objektivs angepasst. Sollte es einmal vorkommen dass z.B. im Display des Blitzgerätes unsinni- • Die Kamera überträgt keine Daten an das Blitzgerät. ge Anzeigen erscheinen oder das Blitzgerät funktioniert nicht so wie es soll, so schalten Sie das Blitzgerät für ca. -
Page 19: Technische Daten
Die Aufnahmen sind zu dunkel. Blitzanzahlen: • Das Motiv liegt außerhalb der Reichweite des Blitzgerätes. Beachten Sie: Beim Mit NiCd-Akkus (600 mAh) ca. 90 indirekten Blitzen verringert sich die Reichweite des Blitzgerätes. Mit Hochleistungs-Alkali-Mangan-Batterien ca. 210 • Das Motiv enthält sehr helle oder reflektierende Bildpartien. Dadurch wird das Mit NiMH-Akkus (1600 mAh) ca. -
Page 20: Sonderzubehör
17 Sonderzubehör Batterie-Entsorgung Batterien/Akkus gehören nicht in den Hausmüll! Bitte bedienen Sie sich bei der Für Fehlfunktionen und Schäden am Blitzgerät, verursacht durch die Rückgabe verbrauchter Batterien/Akkus eines vorhandenen Rücknahmesystems. Verwendung von Zubehör anderer Hersteller, wird keine Gewährleistung übernommen! Bitte geben Sie nur entladene Batterien/Akkus ab. Batterien sind in der Regel dann entladen, wenn das damit betriebene Gerät •... -
Page 21: Garantiebestimmungen
6. Beanstandete Geräte bitten wir zusammen mit dem Kaufbeleg entweder über Metz-Werke GmbH & Co KG den Fachhändler oder direkt an die Firma Metz-Werke GmbH & Co KG - Zentralkundendienst - Ohmstrasse 55, 90513 Zirndorf, transportsicher ver- packt unter genauer Schilderung der Beanstandung einzusenden. Sie können unter den gleichen Bedingungen auch an die autorisierten Kundendienststellen der Firma Metz-Werke GmbH &... - Page 22 1 Consignes de sécurité ........23 9.7 Commutation mètres - pieds («m»...
-
Page 23: Avant-Propos
• Sortez immédiatement les piles usées du flash ! En effet, les piles usées peu- vent „ couler“ et provoquer une dégradation du flash. Nous vous remercions d’avoir choisi un produit Metz et sommes heureux de vous • Ne rechargez pas les piles sèches ! saluer au sein de la grande famille de nos clients. -
Page 24: Fonctions Flash Dédiées
2 Fonctions flash dédiées 3 Préparation du flash Les fonctions flash dédiées sont des fonctions de flash adaptées spécialement à 3.1 Montage du flash un système d’appareil photo. Les fonctions de flash supportées dépendent alors Fixation du flash sur l’appareil du type d’appareil. -
Page 25: Mise En Marche Et Coupure Du Flash
• 4 piles au lithium de 1,5 V, type CEI FR6 (AA / Mignon), source de courant 3.4 Coupure automatique du flash / Auto - OFF sans entretien à haute performance et avec une perte de capacité minime. En usine, le flash est réglé pour se mettre en veille (Auto-OFF) 10 minutes envi- Si le flash reste inutilisé... -
Page 26: Témoin De Bonne Exposition Avec Flash
4.2 Témoin de bonne exposition avec flash Éclairage de l’écran Le témoin de bonne exposition «o.k.» s’allume pendant 5 secondes environ si la L’écran s’allume pour environ 10 secondes dès que vous appuyez sur une touche prise effectuée avec le mode flash TTL ( HSS;... -
Page 27: Signalisations Dans Le Viseur
distance minimale flash-sujet à respecter pour éviter toute surexposition devrait 7 Modes de fonctionnement du flash (menu «Mode» ) être égale à 10 % de la valeur affichée ! L’adaptation à la situation de prise de Selon le modèle d’appareil photo, vous disposez de différents modes flash TTL, vue est possible par exemple en modifiant l’ouverture du diaphragme. -
Page 28: Mode Flash Manuel
En fonction du modèle de l'appareil photo, les pré-éclairs de mesure sont l’appareil photo ou en sélectionnant une puissance partielle manuelle adaptée. La déclenchés tout juste avant le flash principal si bien qu'il est pratiquement plage de réglage s’étend entre P 1/1 - P1/128 c.q. P 1/1 - P 1/32 avec impossible de les différencier du flash principal ! Les pré-éclairs de mesu- M-HSS. -
Page 29: Correction Manuelle D'exposition Au Flash
portée du flash sont parfois considérablement limités par la synchronisation hau- Conseil : te vitesse ! C’est pourquoi vous devez tenir compte de l’indication de la portée sujet sombre sur fond clair : valeur de correction positive : sujet clair sur fond qui s’affiche à... -
Page 30: Fonctions Spéciales (Menu «Select» )
N’oubliez pas d’effacer la correction d’exposition au flash TTL sur l’appareil Si vous le souhaitez, vous pouvez alors déplacer manuellement la position du photo, après la prise de vue ! réflecteur principal afin d’obtenir certains effets d’éclairage (par exemple effet spot, etc.). 9 Fonctions spéciales (menu «Select»... -
Page 31: Mode Flash Remote Slave ( Sl )
vous épargnez par là l’adaptation permanente à la focale variable de l’objectif. Mecabounce 58-90 Exemple : Lorsque le Mecabounce 58-90 (accessoires en option ; voir 17) est monté sur le réflecteur principal du flash, le réflecteur principal est amené automatique- Vous utilisez un objectif zoom avec une distance focale comprise entre 35 et 105 ment dans sa position requise. -
Page 32: Séries D'expositions Au Flash («Fb» - Flash Bracketing)
Lorsque le flash fonctionne comme un flash maître dans le Le réglage prend immédiatement effet. Après 5 secondes environ, l’indication système remote sans fil Metz, le déclenchement de la lumière pilote s’arrête de clignoter et le réglage est enregistré automatiquement. Après activa- déclenche également la lumière pilote du flash esclave. -
Page 33: Coupure Automatique Du Flash
Procédure de réglage s’arrête de clignoter et le réglage est enregistré automatiquement. Après l’acti- vation de la coupure automatique du flash, le symbole s’affiche à l’écran. • Appuyez à plusieurs reprises sur la combinaison de touches «Select» jusqu’à ce que «FB» clignote sur l’écran. 9.5 Lumière pilote («ML»... -
Page 34: Commutation Mètres - Pieds («M» / «Ft» )
Procédure de réglage Procédure de réglage • Appuyez à plusieurs reprises sur la combinaison de touches «Select» jusqu’à • Enfoncez à mi-course le déclencheur de l’appareil photo pour provoquer un ce que «Zoom» s’affiche et que «Ex» clignote. Procédez au réglage souhaité à échange de données entre le flash et l’appareil photo. -
Page 35: Techniques De Photographie Au Flash
- Lorsque « S Off » s’affiche à l’écran, la fonction « zoom size » est désacti- 10.2 Éclairage indirect au flash avec carte-réflecteur vée. La position du réflecteur principal s’affiche au format film de petit for- L’éclairage indirect au flash avec carte-réflecteur intégrée permet de générer mat. -
Page 36: Synchronisation Normale
flash de l’appareil photo ou alors, elle est commutée automatiquement sur cette ment à ce qui se passe avec la synchronisation sur le 1er rideau où la «traînée» vitesse. Certains appareils photo disposent d’une plage de synchronisation, par précède la source lumineuse. La synchronisation sur le 2e rideau permet donc de exemple entre 1/30e s et 1/125e s (voir mode d’emploi de l’appareil photo). -
Page 37: Illuminateur Af Automatique
AF est comprise entre 0,7 et 1 m Vous trouverez de plus amples informations à ce sujet sur Internet, sur le environ. site Metz à l’adresse www.metz.de. Afin que l’illuminateur AF puisse être activé par l’appareil photo, le 14.2 Réinitialisation... -
Page 38: Remède En Cas De Mauvais Fonctionnement
15 Remède en cas de mauvais fonctionnement Il est impossible de régler automatiquement la position du réflecteur à la posi- tion actuelle du zoom de l’objectif. S’il devait arriver que l’écran de contrôle ACL du flash affiche des valeurs • L’appareil photo ne transmet aucune donnée au flash aberrantes ou que le flash ne fonctionne pas comme il le devrait dans les différents modes, coupez le flash pendant environ 10 secondes au moyen •... -
Page 39: Caractéristiques Techniques
Les prises de vue sont trop sombres. Autonomie (à pleine puissance lumineuse) : • env. 90 avec des accus NiCd 600mAh • Le sujet est situé en dehors de la portée du flash. Tenez compte du fait que l’é- clairage indirect réduit la portée du flash. •... -
Page 40: Accessoires En Option
17 Accessoires en option Elimination des batteries Ne pas jeter les batteries dans les ordures ménagères. Nous déclinons toute responsabilité pour le mauvais fonctionnement et l’endommagement du flash dus à l’utilisation d’accessoires d’autres con- Veuillez rendre vos batteries usées là où elles sont éventuellement reprises dans structeurs ! votre pays. - Page 42 1 Veiligheidsinstructies ........43 9.7 Meter-Feet-omschakeling ( ‘m’...
-
Page 43: Veiligheidsinstructies
• Uit verbruikte batterijen kan loog lekken, wat beschadiging van de contact- punten tot gevolg heeft. Haal daarom verbruikte batterijen altijd uit het Hartelijk dank voor uw beslissing om een product van Metz aan te schaffen. Wij apparaat. verheugen ons, u als klant te mogen begroeten. -
Page 44: Dedicated Flitsfuncties
2 Dedicated flitsfuncties 3 Flitser gereedmaken Dedicated flitsfuncties zijn speciaal op het camerasysteem ingestelde flitsfuncties. 3.1 Het aanbrengen van de flitser Afhankelijk van het type camera worden daarbij verschillende flitsfuncties onder- Flitser op de camera monteren steund. Camera en flitser vóór het aanbrengen of afnemen uitschakelen. •... -
Page 45: In- En Uitschakelen Van De Flitser
• 4 Lithiumbatterijen 1,5 V, type IEC FR6 (AA / Penlight), onderhoudsvrije voe- 3.4 Automatische uitschakeling / Auto – OFF ding met hoge capaciteit en geringe zelfontlading. In de fabriek wordt de flitser zo ingesteld, dat hij ong. 10 minuten – Als u denkt, de flitser gedurende een langere tijd niet te gebruiken, haal •... -
Page 46: Aanduiding Van De Belichtingscontrole
onder bepaalde omstandigheden verkeerd worden belicht als op de camera Displayverlichting reeds naar de flitssynchronisatietijd is omgeschakeld (zie 11.1). Telkens als u op een toets van de flitser drukt, wordt gedurende ong. 10 sec. de verlichting van het display van de flitser geactiveerd. Bij het ontsteken van een 4.2 Aanduiding van de belichtingscontrole flits via de camera of via de ontspanknop voor handbediening op de flit-... -
Page 47: Aanduidingen In De Zoeker Van De Camera
reikwijdte van het flitslicht beïnvloeden. 7 Flitsfuncties (‘Mode’) Het onderwerp moet zich in een bereik van ongeveer 40% tot 70% van de aan- Afhankelijk van het type camera staan u verschillende TTL-flitsfuncties ter gegeven waarde bevinden. De elektronica heeft dan voldoende speelruimte voor beschikking, de functie van met de hand in te stellen flitser (manual) en de flitsre- een goede belichting. -
Page 48: Manual Flitsfunctie
Afhankelijk van het type camera komen de meetflitsen zo vlak voor de P1/32 in de M-HSS functie. In het display wordt de afstand aangegeven waarbij hoofdflits, dat ze praktisch niet van de hoofdflits kunnen worden onder- het onderwerp correct wordt belicht (zie 5.2). scheiden! De meetflitsen dragen niet bij aan de eigenlijke belichting van Het instellen de opname. -
Page 49: Met De Hand In Te Stellen Correctie Op De Flitsbelichting
camera met de hand, of automatisch door het belichtingsprogramma, een korte- Een belichtingscorrectie door veranderen van de diafragmaopening van re belichtingstijd dan de flitssynchronisatietijd is ingesteld. het objectief is niet mogelijk, omdat de belichtingsautomatiek van de camera het veranderde diafragma weer als werkdiafragma ziet. Bij het Let er op, dat het richtgetal van de flitser bij de synchronisatie bij korte instellen van een correctiewaarde kan de aanduiding van de reikwijdte in belichtingstijden mede afhangt van de gekozen belichtingstijd: hoe korter... -
Page 50: Bijzondere Functies ('Select')
9 Bijzondere functies (‘Select’) Manual zoomfunctie Bij camera's die geen gegevens van de brandpuntsafstand van het objectief Afhankelijk van het type camera staan verschillende, bijzondere functies ter doorgeven moet de zoomstand van de hoofdreflector met de hand aan de beschikking. Voor het oproepen en instellen van de bijzondere functies moet er brandpuntsafstand van het objectief worden aangepast. -
Page 51: Remote-Slaafflitsfunctie ( Sl )
Voorbeeld: Mecabounce 58-90 U gebruikt een zoomobjectief met een bereik aan brandpuntsafstanden van 35 Als op de hoofdreflector van de flitser een Mecabounce 58-90 (accessoire; tot 105 mm. In dit voorbeeld stelt u de stand van de zoomreflector van de flitser zie 14) is gemonteerd, wordt de hoofdreflector automatisch naar de vereiste in op 35 mm. -
Page 52: Flitsbelichtingstrapje ('Fb')
- Bij de aanduiding ‘OFF’ is de remote-slaaffunctie gedeactiveerd. He testen van de remote flitsfunctie De instelling treedt onmiddellijk in werking. Na ong. 5 seconden houdt de aan- • Zet de slaafflitsers net zo neer als u ze voor de latere opname wilt gebruiken. duiding op te knipperen en wordt de instelling automatisch opgeslagen. -
Page 53: Automatische Uitschakeling
Het instellen activeren van de automatische uitschakeling wordt in het display aangege- ven. • Druk zo vaak op de toetscombinatie ‘Select’, dat in het display ‘FB’ knipperend wordt aangegeven. 9.5 Instellicht ( ‘ML’) • Stel met de toetsen ( + ) en ( - ) de gewenste instelling in. De mogelijke correc- Bij het instellicht (ML = Modelling Light) gaat het om stroboscopisch flitslicht met tiewaarden reiken van 1/3 tot 3 diafragmawaarden in stappen van 1/3 stop. -
Page 54: Meter-Feet-Omschakeling ( 'M' /'Ft')
- Bij de aanduiding ‘Ex On’ is de extended-zoomfunctie geactiveerd. • Stel met de toetsen (+) en (-) dan de gewenste instelling in. - Bij de aanduiding ‘Ex OFF’ is de extended-zoomfunctie gedeactiveerd. - Bij de aanduiding 'REAR On' is de synchronisatie bij het dichtgaan van de sluiter geactiveerd (REAR-functie). -
Page 55: Flitstechnieken
duiding op te knipperen en wordt de instelling automatisch opgeslagen. Na het 10.2 Indirect flitsen met een reflectiekaart activeren van de instelling van de zoommaat wordt in het display 'S' aangege- Door indirect te flitsen met de ingebouwde reflectiekaart kunnen bij personen ven. -
Page 56: Flitssynchronisatie
11 Flitssynchronisatie 11.3 Synchronisatie bij het dichtgaan van de sluiter (REAR) Sommige camera’s bieden de mogelijkheid tot synchronisatie bij het dichtgaan 11.1 Automatische sturing naar de flitssynchronisatietijd van de sluiter (REAR, 2nd curtain, SLOW2). Daarbij wordt de flits aan het einde Afhankelijk van de camera en de daarop ingestelde camerafunctie wordt, zodra van de belichtingstijd ontstoken. -
Page 57: Automatische Af-Meetflits
AF-meetflits ong. 0,7 m Firmware-update). tot 1 m. Nadere informaties vindt u in het internet op de Metz-homepage: Om de AF-meetflits door de camera te laten activeren, moet daarop de www.metz.de autofocusfunctie ‘Single-AF (S)’... -
Page 58: Troubleshooting
15 Troubleshooting De stand van de zoomreflector wordt niet automatisch aangepast aan de actuele zoomstand van het objectief. Zou het ooit voorkomen, dat bijv. in het display van de flitser onzinnige • De camera geeft geen gegevens door naar de flitser. aanduidingen verschijnen of dat de flitser niet functioneert zoals hij op grond van zijn instellingen zou behoren te doen, schakel de flitser dan •... -
Page 59: Technische Gegevens
De opnamen vertonen aan de onderzijde een schaduw. Lichtgevoeligheid: ISO 6 tot ISO 6400 • Door de parallax tussen objectief en flitser kan het onderwerp in het dichtbij- Synchronisatie: bereik, afhankelijk van de brandpuntsafstand, aan de onderzijde van het Laagspannings-IGBT-ontsteking beeld niet geheel worden uitgelicht. -
Page 60: Bijzondere Toebehoren
17 Bijzondere toebehoren Afvoeren van de batterijen Batterijen horen niet bij het huisvuil. Voor foute werking van en schades aan de mecablitz, veroorzaakt door het gebruik van accessoires van andere fabrikanten, zijn wij niet aan- S.v.p. de batterijen bij een daarvoor bestemd inzamelpunt afgeven. sprakelijk. - Page 62 1 Safety instructions .........63 9.7 Meter-feet changeover („m“...
-
Page 63: Safety Instructions
• Never recharge dry cell batteries! • Do not expose the flash unit or battery charger to dripping or splashing Thank you for purchasing a Metz product. We are happy to welcome you as a water such as rain! customer. -
Page 64: Dedicated Flash Functions
2 Dedicated flash functions 3 Preparing the flash unit for use Dedicated flash functions are flash functions that have been specially adapted to 3.1 Mounting the flash unit a given camera system. Depending on the type of camera, different flash func- Mounting the flash unit on the camera tions are supported. -
Page 65: Switching The Flash Unit On And Off
If your flash unit is not going to be used for an extended period of time, 3.4 Auto OFF for the flash unit remove the batteries. To save battery power and prevent inadvertent battery drain, the flash unit is fac- Replacing batteries tory-set to automatically switch to standby mode (Auto OFF) 10 minutes after The batteries are flat or dead if the recycling time (elapsing from the triggering of... -
Page 66: Correct Exposure Indication
4.2 Correct exposure indication 5.2 Range display The correct exposure indication „OK“ only lights up for about 5 seconds if the The flash range is displayed when using cameras that transmit ISO, lens focal shot was correctly exposed in TTL flash mode ( HSS;... -
Page 67: Displays In The Camera Viewfinder
Exceeding the display range flash modes is that all factors influencing exposure (filters, change of aperture and focal length with zoom objectives, extensions for close-ups, etc.) are auto- The flash unit can indicate flash ranges of up to 199 m or 199 ft. This display matically taken into account in adjusting the flash light. -
Page 68: Manual Flash Mode
Ensure that the contre-jour light source does not shine directly into the For physical reasons, however, high-speed synchronisation significantly reduces lens, as this will interfere with the camera’s TTL metering system! the number and the maximum flash range. Be sure to note, therefore, the flash range on the display of the flash unit. -
Page 69: Special Functions („Select")
Tip: 9 Special functions („Select“) Dark subject against light background: positive correction factor. Light subject Depending on the camera model, various special functions are available. For against dark background: negative correction factor. this purpose, data exchange must first occur between the flash unit and camera Exposure correction by means of alteration of the lens aperture setting is to access and set the special functions, for example by tapping the shutter impossible, since the camera’s automatic exposure program regards the... -
Page 70: Remote Slave Flash Mode ( Sl )
the lens focal length. In this case auto-zoom mode is not possible! After switching • Press the button ( + ) until the 105 mm position has been exceeded. The flas- on the flash unit, „Zoom“ appears in the display and the current zoom position hing display „M.Zoom“... - Page 71 So that multiple remote systems in the same room do not interfere with one anot- Setting of the remote channel her, there are four independent remote channels available (CH 1, 2, 3 or 4). The same remote channel must be set on the slave flash unit as on the Master, controller and slave flash units belonging to the same remote system must master or controller flash unit! be set to the same remote channel.
-
Page 72: Flash Bracketing Series („Fb")
9.3 Flash bracketing series („FB“) 9.4 Auto OFF for the flash unit A series of flash exposures FB (flash bracketing) can be carried out in the TTL The auto OFF for the flash unit can be set so that it occurs after 10 minutes, 1 flash modes ( HSS;... -
Page 73: Extended Zoom Mode („Ex")
9.6 Extended Zoom Mode („Ex“) - When „m“ is displayed, the distance display is in metres. In extended zoom mode the zoom position of the main reflector is reduced to - When „ft“ is displayed, the distance display is in feet. one level below the focal length of the camera lens. -
Page 74: Flash Techniques
• repeatedly press button combination „Select“ until „Zoom“ appears in the 10.2 Bounce flash with a reflector card display and „S“ flashes. The use of bounce flash with the integrated reflector card can bring out high- lights in the eyes of human subjects: •... -
Page 75: Flash Synchronisation
11 Flash synchronisation speeds (slower than 1/30 sec.) and moving subjects that have their own source of light. With second-curtain synchronisation, a moving light source will trail a 11.1 Automatic flash sync speed control light streak instead of building one up ahead itself, as it does when the flash is Depending on the camera model and camera mode, the shutter speed is swit- synchronised with the first shutter curtain. -
Page 76: Automatic Af Measuring Beam
(Firmware Update). flash range is reached with the camera’s central AF sensor. Parallax error bet- For more information, visit the Metz homepage at www.metz.de. ween lens and AF measuring beam limits the close-up range with the AF measu- ring beam to approximately 0.7 m to 1 m. -
Page 77: Troubleshooting
15 Troubleshooting • The flash unit is set to manual zoom setting “MZoom”. The indicator for the zoom position of the main reflector is blinking on display Should the flash unit fail to function properly or meaningless content panel appear on the flash unit display panel, switch the flash unit off with the main switch for approximately 10 seconds. -
Page 78: Technical Data
The shots are too bright. Recycling time (at full light output): Approx. 3,5 sec Light coverage: • In close-up shots, overexposure (shots that are too bright) may result if the shut- ter speed is faster than the flash sync speed. The minimum distance from the Main reflector from 24 mm (35 mm format) subject should be at least 10% of the maximum flash range indicated on the Main reflector with wide-angle diffuser from 18 mm (35 mm format) -
Page 79: Optional Accessories
17 Optional accessories Disposal of batteries Do not dispose of spent batteries with domestic rubbish. We accept no liability for malfunctions of or damage to the flash unit cau- sed by the use of accessories of other manufacturers. Please return spent batteries to collecting points should they exist in your country! •... - Page 80 1 Per la vostra sicurezza ........81 9.7 Conversione Metri - Piedi („m“/“ft“) .
-
Page 81: Per La Vostra Sicurezza
• Un’eventuale fuoriuscita di acido dalle batterie esaurite può provocare danni al flash. Rimuovere subito le batterie esaurite dall’apparecchio! Grazie per aver scelto un prodotto Metz! Siamo lieti di potervi dare il benvenuto • Le batterie a secco non possono essere ricaricate. -
Page 82: Funzioni Flash Dedicate
2 Funzioni flash dedicate 3 Preparazione del flash Le funzioni flash dedicate sono funzioni messe a punto specificatamente per i 3.1 Montaggio del flash diversi sistemi di camera. Le funzioni del flash supportate dipendono dal tipo di Montaggio del flash sulla camera camera. -
Page 83: Accensione E Spegnimento Del Flash
• 4 batterie al litio 1,5 V, tipo IEC FR6 (AA/Mignon), una fonte di energia esen- 3.4 Spegnimento automatico dell’apparecchio/Auto - OFF te da manutenzione, ad elevata capacità e autoscarica contenuta. Il flash è impostato di fabbrica in modo tale che circa 10 minuti Se prevedete di non usare il flash per lungo tempo, togliete le batterie •... -
Page 84: Indicazione Di Corretta Esposizione
no, il flash non si aziona e la foto potrebbe avere un’esposizione non corretta Illuminazione del display nel caso in cui la fotocamera sia già passata sul tempo sincro-flash (Vedi 11.1) Premendo qualsiasi tasto del flash il display del flash si illumina per circa 10 secondi. -
Page 85: Indicazioni Sul Mirino Della Camera
Il soggetto dovrebbe trovarsi fra il 40% e il 70% circa del valore indicato. Ciò 7 Modalità flash („Mode“) consente al sistema elettronico di avere sufficiente margine di compensazione. A seconda della camera sono disponibili diverse modalità flash TTL, il modo La distanza minima dal soggetto non dovrebbe essere inferiore al 10% del valo- flash automatico e la sincronizzazione con tempi corti FP oppure HSS. -
Page 86: Modo Flash Manuale
A seconda del modello di fotocamera, i pre-lampi di misurazione vengo- ne si estende da P1/1 fino a P1/128 in mode M o P1/1 fino a P1/32 in mode no emessi con un anticipo così ridotto rispetto al flash principale da risul- M-HSS. -
Page 87: Correzione Manuale D'esposizione Flash
mite il programma di esposizione un tempo di posa inferiore al tempo di sincro- su sfondo scuro: Valore di correzione negativo. nizzazione del lampo. Non è possibile correggere l’esposizione modificando l’apertura del dia- framma sull’obiettivo, poiché l’esposizione automatica della fotocamera Ricordatevi che con la sincronizzazione a tempi corti il numero guida del considera il diaframma modificato comunque come normale diaframma flash dipende anche dal tempo di posa: più... -
Page 88: Funzioni Speciali („Select")
9 Funzioni speciali („Select“) Modo Zoom manuale In caso di camere che non trasmettono i dati relativi alla distanza focale dell’o- In base al tipo di fotocamera sono disponibili diverse funzioni speciali. Per richi- biettivo è necessario regolare manualmente la posizione zoom della parabola amare e impostare le funzioni speciali deve pertanto prima esservi stato uno principale in funzione della distanza focale. -
Page 89: Modo Con Controllo A Distanza ( Sl )
Ripristino dello zoom automatico 9.2 Modo con controllo a distanza ( • Premete leggermente il pulsante di scatto della fotocamera per permettere uno Il flash supporta il sistema remoto senza fili TTL nel modo flash slave. Così è pos- scambio dati fra il flash e la fotocamera. sibile controllare a distanza senza cavo uno o più... -
Page 90: Serie Di Esposizioni Flash („Fb")
Impostazioni del Gruppo-Slave a seconda del gruppo slave a cui appartengono. Se un flash slave non emana un flash di prova, verificate l’impostazione del canale remote e del gruppo-sla- Per attivare la funzione controllo a distanza, premete la combinazione tasti ve. -
Page 91: Spegnimento Automatico Dell'apparecchio
lampeggiare e l’impostazione viene automaticamente memorizzata. la distribuzione della luce e la creazione di ombre. La luce pilota viene fatta scattare premendo sul tasto per lo scatto Per la prima foto della serie di esposizioni flash vengono visualizzati sul display “FB”... -
Page 92: Conversione Metri - Piedi („M"/"Ft")
Per motivi di sistema il modo zoom esteso è supportato per focali d’obiet- zione della sincronizzazione sulla seconda tendina sul display verrà visualizzata tivo a partire da 28 mm (formato piccolo). La fotocamera deve essere la scritta “REAR”. dotata di obiettivo CPU e trasmettere i dati per la distanza focale al flash. Se sul flash è... -
Page 93: Tecniche Lampo
10 Tecniche lampo 10.3 Riprese da vicino/Riprese macro Nei primi piani e nelle riprese macro possono verificarsi zone d’ombra sul bor- 10.1 Lampo riflesso do inferiore dell’immagine a causa di un errore parallattico tra flash e obiettivo. Utilizzando il lampo riflesso la luce sul soggetto risulta più morbida e le ombre Per compensare tale errore, la parabola può... -
Page 94: Sincronizzazione Normale
re con tutti i tempi di posa. Se doveste aver bisogno della potenza piena 11.4 Sincronizzazione con tempi più lunghi (SLOW) del flash, non selezionate tempi di posa più brevi di 1/125s. La sincronizzazione con tempi lunghi consente di mettere più in luce lo sfondo in presenza di scarsa luminosità... -
Page 95: Soppressione Del Lampo (Auto-Flash)
• Non ha avuto luogo lo scambio dati tra flash e fotocamera. Premere legger- ware). mente lo scatto della fotocamera. Per maggiori informazioni consultate il sito internet Metz: www.metz.de • La parabola principale non si trova nella posizione normale. Il flash di misurazione AF del lampeggiatore non si attiva. - Page 96 sensore AF centrale della camera. Quando viene selezionato un sensore AF Le riprese sono oscurate sul bordo inferiore della foto. decentrato il flash di misurazione AF del lampeggiatore non si attiva! • A causa della parallasse tra obiettivo e proiettore le riprese da vicino, in base Selezionate il sensore AF centrale! alla focale, possono non essere completamente illuminate sul bordo inferiore.
-
Page 97: Dati Tecnici
16 Dati tecnici Tempo di ricarica (sempre a potenza luminosa piena): Circa 3,5 secondi Illuminazione: Numero guida massimo per ISO 100/21°, Zoom 105 mm: Parabola principale, a partire da 24 mm (formato piccolo 24x36) in metri: 48 in piedi: 157 Parabola principale con diffusore grandangolare, a partire da 18 mm (formato Modalità... -
Page 98: Accessori Opzionali
Le batterie non vanno gettate insieme ai rifiuti domestici. l cattivo funzionamento e i danni eventualmente provocati al flash dall’u- tilizzo di accessori non prodotti dalla Metz non sono coperti dalla nostra Si prega di utilizzare un sistema di smaltimento adeguato, p. es. portandole al garanzia! negozio dove le si è... - Page 100 1 Indicaciones de seguridad ........101 9.7 Conmutación de metros a pies („m“ / „ft“) .....112 9.8 Sincronización con la segunda cortinilla (REAR) .
-
Page 101: Indicaciones De Seguridad
Por lo tanto, deben retirarse siempre las pilas gastadas del aparato. • Las pilas secas no pueden recargarse. Le agradecemos que se haya decidido por un producto Metz y nos complace saludarle como usuario de nuestra marca. • No exponer el flash ni el cargador a gotas o salpicaduras de agua, por ejemplo, a la lluvia. -
Page 102: Funciones Dedicadas Del Flash
2 Funciones dedicadas del flash 3 Preparación del flash Las funciones dedicadas del flash son las que se adecuan de manera especial al 3.1 Montaje del flash sistema de la cámara. Así, las funciones del flash serán compatibles dependien- Colocar el flash en la cámara do del modelo de cámara. -
Page 103: Conexión Y Desconexión Del Flash
• 4 pilas de litio de 1,5 V, tipo IEC FR6 (AA/ Mignon), que suministran energía 3.4 Desconexión automática del flash (Auto - Off) sin necesidad de mantenimiento con una capacidad mayor y una menor auto- El flash está ajustado de fábrica de manera que, aprox. 10 minutos descarga. -
Page 104: Indicación Del Control De La Exposición
4.2 Indicación del control de la exposición 5.1 Indicación del modo de funcionamiento de flash ¡La indicación de control de la exposición „o.k.“ se ilumina durante unos 5 En la pantalla se indica el modo de funcionamiento que se ha configurado. A segundos cuando la toma se ha iluminado correctamente en los modos TTL ( este respecto, dependiendo del modelo de cámara, se dispone de distintas indi- HSS;... -
Page 105: Indicaciones En El Visor De La Cámara
Indicación de alcance en modo manual M 7.1 Modos TTL En el modo manual M de funcionamiento del flash se indicará en la pantalla el Los modos de flash TTL le permitirán conseguir de forma sencilla muy buenas tomas valor de distancia que debe respetarse para una correcta exposición de flash con luz de flash. -
Page 106: Modo De Flash Manual
Modo automático de flash de relleno TTL Potencias parciales manuales En el modo de flash manual , ajustar mediante las teclas ( + ) y ( - ) la poten- En la mayoría de los modelos de cámara, el modo automático de flash de relle- cia parcial que se desee. -
Page 107: Corrección Manual De La Exposición Del Flash
Configuración Configuración • Pulsar la tecla ( - ) o ( + ) hasta que parpadee „EV“. Mediante las teclas ( + ) y • Pulsar la tecla „Mode“ hasta que en la pantalla parpadee „ HSS“ o ( - ), proceder a ajustar la configuración deseada: bien „... -
Page 108: Reflector Principal Con Zoom Motorizado („Zoom")
cada función especial se llevarán a cabo a continuación individualmente medi- Configuración ante la tecla ( - ) o ( + ). • Pulsar la combinación de teclas „Select“ hasta que aparezca indicado „Zoom“ ¡La configuración tiene que efectuarse inmediatamente después de acce- parpadeando junto a la posición de zoom (mm). -
Page 109: Modo Remoto Esclavo ( Sl )
• Pulsar la combinación de teclas „Select“ hasta que aparezca indicado „Zoom“ 9.2 Modo remoto esclavo ( parpadeando junto a la posición de zoom (mm). El flash es compatible con el sistema remoto inalámbrico TTL de Olympus en • Pulsar la tecla ( + ) hasta que se sobrepase la posición de 105 mm. Entonces, modo de flash esclavo. -
Page 110: Horquillado De Flash („Fb")
deja de parpadear, y la configuración queda guardada automáticamente. Una • Esperar a que se encienda la indicación de disponibilidad de todos los flas- vez activado el modo remoto esclavo, aparece en la pantalla la indicación „ hes. Cuando los flashes esclavos están listos para disparar, parpadea la indi- “. -
Page 111: Desconexión Automática
• Mediante las teclas ( + ) y ( - ), proceder a ajustar la configuración deseada. 9.5 Luz de modelado („ML“) Los valores posibles de corrección van de 1/3 a 3 diafragmas en pasos de La luz de modelado (ML = Modelling Light) es una secuencia de destellos estro- 1/3 de diafragma. -
Page 112: Conmutación De Metros A Pies („M" / „Ft")
Configuración 9.8 Sincronización con la segunda cortinilla (REAR) • Pulsar la combinación de teclas “Select” hasta que aparezca indicado “Zoom” Algunas cámaras ofrecen la posibilidad de sincronizar con la segunda cortinilla y “Ex” parpadee. Mediante las teclas ( + ) y ( - ), proceder a ajustar la confi- (consultar 11.3).. -
Page 113: Técnicas De Destello
• Mediante las teclas ( + ) y ( - ), proceder a ajustar la configuración deseada. vo. No se produce entonces ninguna indicación del alcance ni de la posi- ción del reflector principal. - La indicación “S On” significa que la función de grado de zoom se encuen- tra activada. -
Page 114: Sincronización Del Flash
11 Sincronización del flash tre. Son normales velocidades entre 1/30s y 1/125s (consultar manual de instrucciones de la cámara). En el flash no aparece ninguna indicación en refe- 11.1 Control automático de la sincronización del flash rencia a este modo. Según el modelo de cámara y el modo de funcionamiento de la misma, al apa- 11.3 Sincronización con la segunda cortinilla (REAR) recer la indicación de disponibilidad de flash, la velocidad de obturación se... -
Page 115: Destello Automático De Medición Af
AF, el límite de medición con el flash de medición AF es de aprox. 0,7 m a 1 m. Consultar más información en la página web de Metz: www.metz.de Para que la cámara pueda activar el destello de medición AF , debe 14.2 Reset... -
Page 116: Ayuda En Caso De Problemas
15 Ayuda en caso de problemas La posición del reflector no se ajusta automáticamente a la posición real de zoom del objetivo. Si alguna vez aparecen en la pantalla, por ejemplo, indicaciones sin sen- • La cámara no está transmitiendo datos al flash. tido o el flash no funciona como es debido, debe apagarse durante aprox. -
Page 117: Características Técnicas
Aparece un sombreado en el lado inferior de la imagen. 16 Características técnicas • Debido al paralaje del objetivo y el flash puede ocurrir que los primeros pla- Máximo número guía con ISO 100/21°, zoom 105 mm: nos no aparezcan totalmente iluminados en el lado inferior dependiendo de la En metros: 48 En pies: 157 distancia focal. -
Page 118: Accesorios Especiales
17 Accesorios especiales Hacia arriba -7° 45° 60° 75° 90° Metz no asume ninguna garantía por funcionamientos erróneos o daños En sentido contrario a las agujas del reloj 30° 60° 90° 120° 150° 180° en el flash, causados al utilizar accesorios de otros fabricantes. -
Page 119: Eliminación De Las Baterías
Eliminación de las baterías No se deben tirar las baterías a la basura casera. Para la devolución de sus baterías gastadas, sírvase utilizar uno de los sistemas de reciclaje existente eventualmente en su país. Sírvase devolver unicamente baterías descargadas. Por regla general, las baterías están descargadas cuando el aparato alimentado por ellas - se apaga y señala „baterías gastadas“... - Page 120 Zoom 6/9° 8/10° 10/11° 12/12° 16/13° 20/14° 25/15° 32/16° 40/17° 50/18° 64/19° 80/20° 100/21° 125/22° 160/23° 200/24° 250/25° 320/26° 400/27° 500/28° 650/29° 800/30° 1000/31° 65 1250/32° 73 Tabelle 1: Leitzahlen bei maximaler Lichtleistung (P 1/1) 1600/33° 83 Tableau 1: Nombres-guides pour la puissance maximale (P 1/1) 2000/34°...
- Page 121 Teillichtleistung Blitzleuchtzeit (s) Leitzahl Leitzahl Niveaux de puissance Durée d’éclair (s) Nombre-guide Nombre-guide Deelvermogensstappen Flitsdur (s) Richtgetal Richtgetal Partial light output Flash duration Guide number Guide number Livello di potenza Durata del lampo Numero guida Numero guida Potencia parcial Duración de destello Número-guía Número-guía (P=Flash Power) ISO 100/50 mm...
- Page 122 Zoom Batterietyp Blitzfolgezeiten Blitzanzahl Type de pile/accu Temps de recyclage Nombre d’éclairs Type voeding Flitsvolgtijden Aantal flitsen Battery type Recycling times Number of flashes Tabelle 4: Maximale Leitzahlen* im HSS-Betrieb Tipo batterie Tempi di ricarica Numero ampi Tipo de pila Tiempo de secuencia de dest.
- Page 123 Hinweis: Opmerking: Avvertenza: In het kader de CE-markering werd Nell’ambito delle prove EMV per il Im Rahmen des CE-Zeichens wurde bei bij de EMV-test de correcte be-lich- segno CE è stata valutata la corretta der EMV-Prüfung die korrekte ting bepaald. esposizione.
- Page 124 Bitte helfen Sie mit die Umwelt, in der wir leben, zu erhalten. This will help to protect the environment in which we all live. Votre produit Metz a été conçu et fabriqué avec des matériaux et Il vostro prodotto Metz è stato progettato e realizzato con materi- composants de haute qualité, susceptibles d'être recyclés et réutili-...
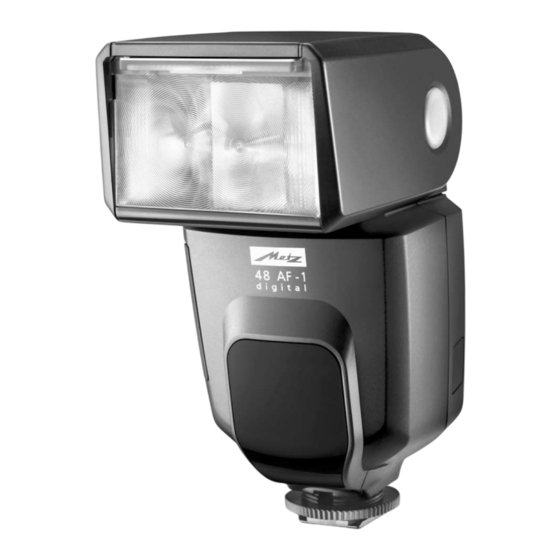
- Page 125 Hauptreflektor Réflecteur principale Hoofdreflector Main-reflector Parabola principale Reflector principal Batteriefachdeckel Couvercle du compartiment des piles Deksel batterijvak Battery compartment cover Coperchio del vano batteria Tapa del compartimento de pilas Firmwareupdate-Buchse Mise à jour du micrologiciel AF-Messblitz Rändelmutter Updaten van de firmware Illuminateur AF Écrou moleté...
- Page 126 Reflektorkarte Carte-réflecteur Reflecterende kaart Reflector card Pannello riflettente Tarjeta reflectante Weitwinkelstreuscheibe Diffuseur grand angle Handauslösetaste und Blitzbereitschaftsanzeige Groothoekdiffusorschijf Betriebsartenwahl Bouton du flash et témoin de disponibilité Wide-angle diffuser Entriegelungsknopf Hauptreflektor Sélecteur de mode Ontspanknop voor handbediening en flitsaparaat-aanduiding Diffusore grandangolare Bouton de déverrouillage pour réflecteur Functieschakelaar Manual firing button and exposure ok indicator...
- Page 127 Metz - Werke GmbH & Co KG • Postfach 1267 • D-90506 Zirndorf • info@metz.de • www.metz.de Consumer electronics Photoelectronics Plastics technology Industrial electronics 707 47 0065.A1 Metz - always first class.