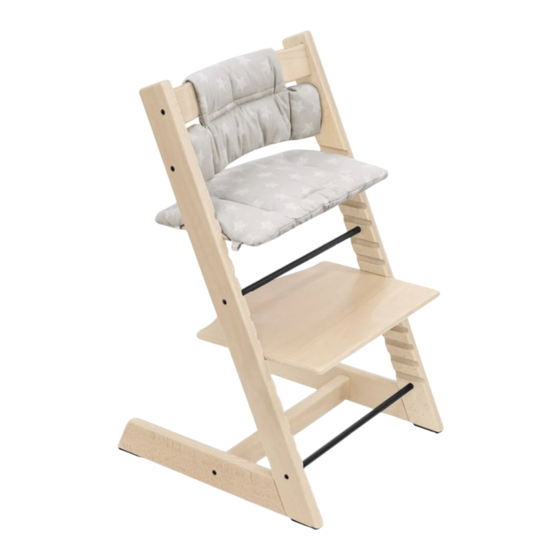
Stokke Tripp Trapp Notice D'utilisation
Masquer les pouces
Voir aussi pour Tripp Trapp:
- Notice d'utilisation (69 pages) ,
- Mode d'emploi (12 pages) ,
- Notice d'utilisation (27 pages)
Sommaire des Matières pour Stokke Tripp Trapp
- Page 1 Tripp Trapp ® USER GUIDE US/CA INSTRUCCIONES DE USO NOTICE D’UTILISATION USER GUIDE AU/NZ...
- Page 2 (“Extended Glider”) has been developed for the Tripp Trapp® highchair. For the period when the chair is used with a harness and the Tripp Trapp® Baby Set, we recommend that you always use it with the Tripp Trapp® Exten- Warning ded Glider.
-
Page 3: Product Information
36 months Parts AND is able to sit safely on Tripp Trapp®. Use a tool to remove the clip under the seat plate to detach the crotch strap. Use a screwdriver to detach the rest 10 Metal screws •... - Page 4 ”Extended Warranty”: owner to an ”Extended Warranty” as follows: • 7-year warranty against any manufacturing • Replace or – if STOKKE® thus prefers – repair defect in the product. the defective part, or the product in its entirety (if necessary), provided that the product is The ”Extended Warranty”...
- Page 5 Glider”), el cual puede reemplazarse cuando sea necesario. Recomendamos Cuando el descansapiés esté colocado cerca que, en conjunto con el arnés y el Tripp Trapp® Baby Set, siempre utilice el de la barra metálica, quedará un pequeño deslizador trasero extendido Tripp Trapp®. Esto es especialmente importante si espacio entre la barra y el lado interior de la silla se coloca sobre una carpeta suave y/o frente a una mesa donde el niño...
-
Page 6: Limpieza Y Mantenimiento
Puede remover el sistema de sujeción cuando su hijo haya cumplido 36 ranuras inferiores. meses Y sea capaz de sentarse de modo seguro en la periquera Tripp Trapp®. 5. Deslice el asiento y el descansapiés por las ranuras, con el borde recto hacia Utilice una herramienta para quitar el clip que se encuentra debajo de la base adelante. - Page 7 DERECHO DE RECLAMACIÓN Y GARANTÍA EXTENDIDA Derecho de reclamación y ampliación Cómo hacer uso de la Stokke® y con el fin de usarse en o junto con de garantía «Ampliación de Garantía»: el producto. Cualquier modificación de esta condición requerirá el consentimiento previo De aplicación en todo el mundo en lo concerniente...
-
Page 8: Repose-Pied
Cela pourrait rendre la chaise Pour éviter que la chaise Tripp Trapp® ne bascule vers l’arrière en poussant dessus, instable au moment de monter et descendre de la chaise Tripp Trapp®. - Page 9 36 mois ET est en mesure de s’asseoir en toute sécurité sur la Tripp Trapp®. Utilisez un outil pour retirer le 1. Fixez la barre transversale de base aux pieds (encoches vers l’intérieur). Il est impor- clip sous le plateau du siège afin de parvenir à...
-
Page 10: Comment Invoquer " L'extension De Garantie "
Garantie » peut être invoquée par toute personne propriétaire du produit, à un moment donné, au • Remplacera ou – si Stokke® préfère – réparera cours de la période de garantie, et sous réserve la pièce défectueuse ou le produit dans son de la présentation du certificat de garantie par le... - Page 11 • Do not leave child unattended furniture when the chair is not being used at a table • The Tripp Trapp® Baby Set™ should only be used with with a tray removed. the seat plate in the first groove from the top of the •...
- Page 12 • 1 Wooden base cross bar • 1 Seat • 1 Footrest • 2 Legs • 5 point AND is able to sit safely on Tripp Trapp®. Use a tool to remove the clip under harness • Extended gliders (V3).
- Page 13 TRAPP®, hereinafter referred to as the product. instruction manual. • Upon the ”Extended Warranty” being invoked, • Replace or – if STOKKE® thus prefers – repair Right of complaint the warranty certificate shall be presented, the defective part, or the product in its entirety...
- Page 14 Assembling your Tripp Trapp® chair. 10 Metal screws 6 Metal nuts 1 Allen key 1 Footrest 1 Seat 2 Curved Backrests 2 Metal backrests 1 Wooden base cross bar 2 Legs Important to insert the shallow end of nut first!
- Page 15 Assembling Tripp Trapp® Baby Set™ 1 High back 1 Baby rail REMOVAL...
- Page 16 Assembling Tripp Trapp® extended glider Extender Glider x2 Restraint system operation Shoulder strap Waist strap Crouch strap The child shall be secured in the high chair at all times by both the harness and the Baby set.
- Page 17 Seat and footrest adjustment ✕ ✕...
- Page 20 Shevtov LTD. 3a Haazmaut st. Even Yehuda. Tel: 09 8912314. E-mail: reissg@netvision.net.il ITALY Stokke Customer Service , Tel: +49 7031 611 580, Fax: +49 7031 611 58 60, Email: info.it@stokke.com JAPAN Stokke Ltd. Tel: +81 3 6222 3630, Fax. +81 3 6222 3636, Email: info.jp@stokke.com LUXEMBOURG Stokke Customer Service Tel: +49 7031 611 580, Fax: +49 7031 611 58 60, Email: info-belux@stokke.com...


