Table des Matières
Publicité
Les langues disponibles
Les langues disponibles
Liens rapides
INSTALLATION INSTRUCTIONS
GUIDE D'INSTALLATION
GUÍA DE INSTALACIÓN
Read all instructions carefully before proceeding.
Lire toutes les instructions attentivement avant de commencer
l'installation.
Leer detenidamente todas las instrucciones antes de comenzar
la instalación.
IMPORTANT
• Record the serial number
IMPORTANT
• Noter le numéro de série
IMPORTANTE
MODEL • MODÈLE • MODELO
137240 • 137250 • 137260
• Registre el número de serie
FOR DOOR INSTALLATION
POUR INSTALLATION DE PORTE
PARA LA INSTALACIÓN DE PUERTA
SAVE THIS GUIDE FOR FUTURE REFERENCE.
CONSERVER POUR UN USAGE ULTÉRIEUR.
CONSERVE ESTE MANUAL COMO REFERENCIA.
Serial number • Numéro de série • Número de Serie
Publicité
Table des Matières

Manuels Connexes pour MAAX 137240


Sommaire des Matières pour MAAX 137240
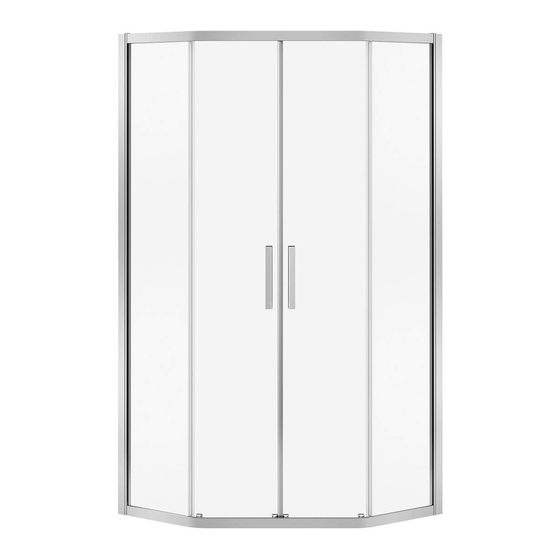
- Page 1 POUR INSTALLATION DE PORTE PARA LA INSTALACIÓN DE PUERTA GUÍA DE INSTALACIÓN MODEL • MODÈLE • MODELO 137240 • 137250 • 137260 Read all instructions carefully before proceeding. SAVE THIS GUIDE FOR FUTURE REFERENCE. CONSERVER POUR UN USAGE ULTÉRIEUR. Lire toutes les instructions attentivement avant de commencer l’installation.
- Page 2 • Unpack the unit and, before discarding it, make sure that the unit is in good condition. If inspection reveals damages to the unit, or a finish defect, please contact the distributor. The warranty does not cover damages or finish defects once the unit is installed. MAAX responsibility with respect to shipping damages stops when the unit is transferred to the shipper.
-
Page 3: Identification Of Components
IDENTIFICATION OF COMPONENTS NEO-ANGLE FRAMELESS CORNER SHOWER DOOR Handle assembly 9 - Hardware Kit... -
Page 4: Hardware Kit
PARTS ILLUSTRATION Wall bracket Adjustable wall bracket PVC seal Handle assembly Upper and lower rail Glass clip tab HARDWARE KIT Anchoring plug Wall bracket screw #8 x 1’’ ‘‘A’’ glass clip ‘‘B’’ glass clip Wall bracket screw Assembly screw M4 x 7/16’’ #8 x 3/4’’... - Page 5 UNIT INSTALLATION UNIT INSTALLATION 1 - STRUCTURE ASSEMBLY This task requires two people. Assemble the structure as indicated on the figure below, using #8 x 3/4’’ screws, as indicated. Note: Use the help of a second person to support the rails during assembly, or perform the assembly flat on the ground, after protecting the surfaces with a blanket.
- Page 6 2 - WALL POST POSITIONING AND INSTALLATION Lift the frame assembly and position Using a pencil, makes sure that Reinstall the wall posts on the wall it on the base. Center the frame the wall posts are plumb, and mark at the marked location.
- Page 7 3 - STRUCTURE AND FIXED PANEL INSTALLATION Then, rotate [the shelf] until the other panel post engages Lift the frame and maneuver it so that a panel post engages into the other wall profile, as indicated on the figure. Center into the wall profile, as indicated on the figure.
- Page 8 4 - SECURE THE STATIONARY PANELS AND THE STRUCTURE Wide side toward glass panel Working inside the shower cabin, install the window tabs, as indicated on the right hand figure. Install from the bottom of the glass panel the tab [sic]. If necessary, use a flat and dull tool (paint mixer, for example) to push the tab between the glass panel and the panel post GROOVE.
- Page 9 5 - INSTALLATION OF HANDLES Turn the screw clockwise to raise, and counterclockwise to lower. Roller top view. 1- Enter the shower cabin. Lift the door and tilt it forward to be able Groove for rollers. to rest the top rollers in the upper rail grooves.
- Page 10 7 - INSTALLATION OF SEALS With the sliding doors fully open, install the door seal on the edge of the stationary panel, as indicated on the figure. Cut it as required. NOTE: The door seal lip must face inside the cabin, as indicated. Repeat the procedure for the other stationary panel. 8 - SILICONE APPLICATION To ensure tightness of the shower door, apply a high-quality silicone caulk, as indicated.
- Page 11 9 - TROUBLESHOOTING If you experience any fo the following difficulties while installing your shower door, use this troubleshooting guide to help remedy the problem before contacting our support department. Should the problem persist, please contact our support department. Problem Cause Solution The aluminum frame is not level...
- Page 12 La garantie ne couvre pas les dommages ou les défauts de finition une fois l’unité installée. La responsabilité de MAAX quant aux dommages dus au transport cesse lorsque l’unité est transférée au transporteur.
-
Page 13: Identification Des Composantes
IDENTIFICATION DES COMPOSANTES PORTE DE DOUCHE EN COIN SANS CADRE NÉO-ANGLE Assemblage de la poignée 9 - Kit de Quincaillerie... -
Page 14: Illustrations Des Pièces
ILLUSTRATIONS DES PIÈCES Montant montant mural mural ajustable Joint d’étanchéité en Assemblage de la poignée Rail supérieur et inférieur Languette de vitre KIT DE QUINCAILLERIE Cheville d’ancrage Vis de montant mural n° 8 x 1 po Clip de vitre Clip de vitre «A»... - Page 15 INSTALLATION DE L’UNITÉ INSTALLATION DE L’UNITÉ 1 - ASSEMBLAGE DE LA STRUCTURE Cette étape nécessite deux personnes. Monter la structure comme indiqué sur la figure ci-dessous utilisant les vis #8 x 3/4 po, comme indiqué. Note: Utiliser l’aide d’une deuxième personne pour supporter les rails durant l’assemblage, ou faire le montage à...
-
Page 16: Positionnement Et Installation Des Montants Muraux
2 - POSITIONNEMENT ET INSTALLATION DES MONTANTS MURAUX Soulever l’ensemble du cadre et le Avec un niveau, s’assurer que les Replacer les montants muraux placer sur la base. Centrer le cadre montants muraux sont d’aplomb sur le mur à la position marquée. de gauche à... -
Page 17: Installation De La Structure Et Des Panneaux Fixes
3 - INSTALLATION DE LA STRUCTURE ET DES PANNEAUX FIXES Ensuite, pivotez-le jusqu’à ce que l’autre montant de Soulever le cadre et manoeuvrez-le de manière qu’un panneau s’emboîte dans l’autre profilé mural, comme montant de panneau s’emboîte dans le profilé mural, indiqué... -
Page 18: Sécuriser Les Panneaux Fixes Et La Structure
4 - SÉCURISER LES PANNEAUX FIXES ET LA STRUCTURE Côté large vers la vitre En travaillant de l’intérieur de la cabine de douche, monter les languettes de vitre, comme indiqué à la figure de droite. En partant du bas du panneau vitré, servez-vous d’un outil plat et non coupant (mélangeur à... -
Page 19: Instalation Des Portes
5 - INSTALATION DES PORTES Tournez la vis dans le sens des aiguilles d’une montre pour lever, et vice-versa pour baisser Vue de haut des roulettes 1- Placez-vous à l’intérieur de la cabine de douche. Soulevez la porte et penchez la vers l’avant pour être Rainure pour les roulettes capable d’appuyer les roullettes... -
Page 20: Installation Des Joints D'étanchéité
7 - INSTALLATION DES JOINTS D’ÉTANCHÉITÉ Avec les portes coulissantes complètement ouvertes, installez le joint de porte sur le bord du panneau fixe, comme indiqué à la figure. Coupez-le à la dimension nécessaire. NOTE: La lèvre du joint de porte doit être dirigée vers l’intérieur de la cabine, comme indiqué. -
Page 21: Résolution De Problèmes
9 - RÉSOLUTION DE PROBLÈMES Si vous éprouvez une des difficultés suivantes pendant l’installation de votre porte de douche, utiliser le tableau de résolution de problèmes pour vous aidez à régler le problème avant de contacter notre département de support. Si le problème persiste, s’il vous plaît contacter notre département de support. - Page 22 Una vez que haya instalado la unidad, la garantía no cubrirá los daños y defectos de acabado. Una vez que la unidad ha sido trasferida al transportista, MAAX no es responsable por ningún daío debido al transporte.
-
Page 23: Identificación De Los Componentes
IDENTIFICACIÓN DE LOS COMPONENTES MAMPARA PARA DUCHA DE ESQUINA, SIN MARCO, DE MEDIA CAÑA Ensamble manija 9 - Conjunto de herrajes... - Page 24 ILUSTRACIONES DE LAS PIEZAS Montante Montant mural de pared ajustable Junta de estanqueidad de PVC Ensamble de la manija Rail superior e inferior Lengüeta para el vidrio CONJUNTO DE HERRAJES Clavija de anclaje Tornillo para el montante de pared N.° 8 X 1 pulgada Presilla sujeta- Presilla sujeta- vidrio «A»...
- Page 25 INSTALACIÓN DE LA UNIDAD INSTALACIÓN DE LA UNIDAD 1 - ENSAMBLE DE LA ESTRUCTURA Para realizar esta tarea se necesitan dos personas. Monte la estructura tal como se indica en la figura siguiente, para ello utilice los tornillos N.o 8 X 3/4 pulg., según se indica. Nota: Solicite ayuda a otra persona para sujetar los rieles durante el montaje.
- Page 26 2 - POSICIONAMIENTO E INSTALACIÓN DE LOS MONTANTES DE PARED Levante el ensamble del cuadro y Use un nivel para asegurarse de Vuelva a colocar los montantes de colóquelo sobre la base. Centre el que los montantes de pared estén pared y fíjelos a la pared con los cuadro de izquierda a derecha, tal a plomo y, con un lápiz, trace una...
- Page 27 3 - INSTALACIÓN DE LA ESTRUCTURA Y DE LOS PANELES FIJOS Luego, pivótelo hasta que el otro montante del panel se Levante el cuadro y dispóngalo de manera tal que un encastre dentro del otro perfil de pared, tal como se ilustra montante del panel se encastre en el perfil de pared, tal en la figura.
- Page 28 4 - ASEGURE LOS PANELES FIJOS Y LA ESTRUCTURA Lado ancho hacia el vidrio Trabaje desde el interior de la mampara para ducha para colocar las lengüetas para vidrio, tal como se ilustra en la figura de la derecha. Para colocar la lengüeta, comience desde la parte inferior del panel vidriado.
-
Page 29: Instalación De Las Puertas
5 - INSTALACIÓN DE LAS PUERTAS Girar el destornillador en sentido horario para levantar y en sentido antihorario para bajar Vista superior de las ruedillas 1- Trabaje ahora desde el interior de Ranura para la mampara para ducha. Levante la las ruedillas puerta e inclínela hacia adelante para poder apoyar las ruedillas superiores... - Page 30 7 - INSTALACIÓN DE LAS JUNTAS DE ESTANQUEIDAD Con las puertas corredizas completamente abiertas, instale la junta de la puerta sobre el borde del panel fijo, tal como se ilustra en la figura. Corte a la longitud necesaria. NOTA: El labio de la junta de la puerta se debe dirigir hacia el interior de la mampara, tal como se indica.
-
Page 31: Resolución De Problemas
MAAX reserves the right to modify this MAAX se réserve le droit de modifi er cette MAAX se reserva el derecho de modifi car warranty at any time, it being understood that garantie en tout temps;... - Page 32 Technical Services / Service technique / Servicio técnico T. 1 877 GET-MAAX (1 877 438-6229) F. 1 888 361-2045 10049111 © 2008 MAAX Bath Inc. PRINTED IN CANADA / IMPRIMÉ AU CANADA / IMPRESO EN CANADA 2015-10-23...