Table des Matières
Publicité
Les langues disponibles
Les langues disponibles
Liens rapides
TUTTAPIASTRA A GAS
PER USO PROFESSIONALE
GAS-GLÜHPLATTENHERDEN
FÜR GROSSKÜCHEN
CUISINIERES A GAZ, AVEC
PLAQUE ROUGEOYANTE
USAGE PROFESSIONNEL
GAS SOLID TOP RANGES FOR
PROFESSIONAL USE
COCINAS A GAS DE PLACA
INCANDESCENTE PARA USO
PROFESIONAL
TP-98G
IT
DE
FR
GB
TPF-98G
TPF2-912G V
TPF2-912GEV
TPT-98G
TPFV-98GE
Categorie Kategorien Catégories Categories Categorías
II2H3B/P
II2E+3+
II2ELL3B/P
II2H3B/P
I2E
I3B/P
CH
per l'installazione e l'uso
AT
CH
und Bedienungsanleitung
BE
Pour l'installation et l'emploi
IE
Guia para la intalación e
ES
Mod.
TPF-98GE
TPF2-912G
TPF2-912GE
TP2T-912G
TPFV2-912GEV
II2H3+
II2H3B/P
II2L3B/P
I3+
II2E3B/P
Istruzioni
Aufstellungs
Instructions
Instructions
for installation and use
instrucciones de uso
TP2-912G
563009202.doc
LIBR.ISTR.TP90G
II2E3P
Publicité
Chapitres
Table des Matières

Manuels Connexes pour Lotus TP-98G


Sommaire des Matières pour Lotus TP-98G
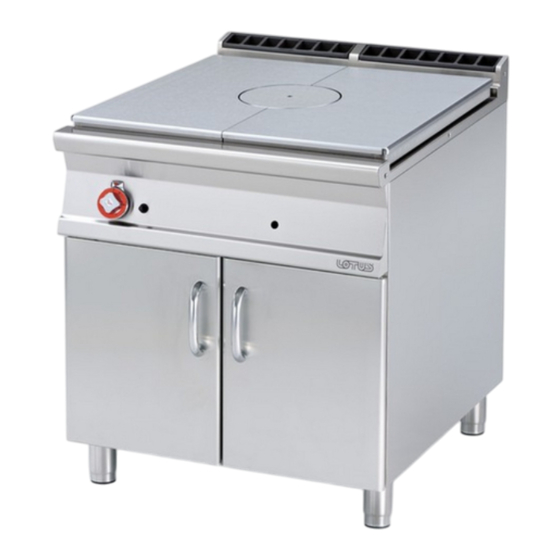
- Page 1 GAS SOLID TOP RANGES FOR Instructions PROFESSIONAL USE for installation and use COCINAS A GAS DE PLACA Guia para la intalación e INCANDESCENTE PARA USO instrucciones de uso PROFESIONAL Mod. TP-98G TPF-98G TPF-98GE TP2-912G TPF2-912G V TPF2-912G TPF2-912GEV TPF2-912GE TPT-98G TP2T-912G...
- Page 2 FIG. A, TP… 562006601 M00_00 Targhetta caratteristiche Allacciamento elettrico Attacco gas Typenschild Elektroanschluß Gasanschluss Plaque des caractéristiques Raccordement electrique Raccord gaz Data Plate Electrical connection Gas Connection Chapa de características Conexión eléctrica Conexión gas FIG. B TP...T 562015301 M00_00 Targhetta caratteristiche Attacco gas Typenschild Gasanschluss...
- Page 3 FIG. B By-pass fuochi aperti Bypass flamme By-pass feux Cooking rings by-pass By-pass fuegos By-pass forno Backofen Bypass By-pass four Oven by-pass By-pass horno...
- Page 4 FIG.C (FUOCHI, FLAMME, FEUX, COOKING RINGS, FUEGOS) Iniettore fuochi Einspritzventil flamme Injecteur feux Injector cooking rings Inyector fuegos Regolazione aria Luftregelung Réglage d'air Air regulation Regulación aire Gruppo pilota ZündBrenner Veilleuse Pilot Piloto FIG. D (FUOCHI, FLAMME, FEUX, COOKING RINGS, FUEGOS) Schraube für Bügel der Vis bride veilleuse Pilot bracket screw...
- Page 5 FIG.D (TUTTAPIASTRA, GLÜHPLATTENHERDEN, PLAQUE, SOLID TOP, PLACA) Iniettore Einspritzventil Injecteur Injector Inyector Gruppo pilota ZündBrenner Veilleuse Pilot Piloto...
- Page 6 FIG. E (FORNO, FOUR, BACKOFEN, OVEN, HORNO) Einspritzventil backofen Injecteur four Oven Injector Inyector horno Iniettore forno Regolazione aria forno Luftregelung Backofen Réglage d'air four Oven air regulation Regulación aire horno FIG.F (FORNO, FOUR, BACKOFEN, OVEN, HORNO) Iniettore pilota Einspritzv. ZündBrenner Injecteur veilleuse Pilot Injector Inyector piloto...
- Page 7 SCHEMA ELETTRICO – SCHALTPLAN – SCHEMA ELECTRIQUE WIRING DIAGRAM – ESQUEMA ELECTRICO FORNO 2/1 , BACKOFEN 2/1 , FOUR 2/1 , OVEN 2/1 , HORNO 2/1 Commutatore Schalter Commutateur Commutator Conmutador Tablero de Morsettiera Klemm-leiste Bornier Junction-box bornes Resistenza Widerstand Résistance Element Resistencia...
- Page 8 FORNO ELETTRICO VENTILATO, HEISSLÜFT-ELEKTROOFEN, FOUR ÉLECTRIQUE VENTILE, ELECTRIC FAN OVEN, HORNO ELÉCTRICO VENTILADO FIG.L 230Vac3 50/60 Hz 400Vac/3N 50/60 Hz Commutatore Schalter Commutateur Commutator Conmutador Condensatore Kondensator Condensateur Capacitor Condensador Morsettiera Stromversorgung Terminal de suministro de Borne d'alimentation Power supply terminal alimentazione Terminal energía...
- Page 9 FIG. H...
- Page 10 ESEMPIO DI FISSAGGIO PER APPARECCHI BEISPIEL DER FESTSETZUNG FUER GERAETE EXEMPLE DE MONTAGE POUR EQUIPEMENTS EXAMPLE OF FIXING FOR EQUIPMENT EJEMPLO FIJACIÓN DE APARATO 562026000 M00_00...
- Page 11 Pag. Seite Page Page Pàg.
-
Page 12: Table Des Matières
INDICE DICHIARAZIONE DI CONFORMITA’ ........................13 TABELLA DATI TECNICI GAS ..........................13 TABELLA DATI TECNICI ELETTRICI ........................13 INSTALLAZIONE ................................. 13 VERIFICA DELLA CORRETTA VENTILAZIONE ....................14 TUBO PER IL COLLEGAMENTO DEL GAS ......................14 ALLACCIAMENTO ELETTRICO ..........................14 EQUIPOTENZIALE ..............................14 CONTROLLO DELLA POTENZA TERMICA ...................... -
Page 13: Dichiarazione Di Conformita
DIMENS. BRUCIAT MODELLO FUOCHI FUOCHI FORNO FORNO FUMI TP 12 kW 10 kW 7 KW 8,5 KW 13 KW (KW) ISO R7 TIPO TP-98G 80x90x90h R3/4GM 80x90x90h 20,5 R3/4GM TPF-98G TPF-98GE 80x90x90h R3/4GM 120x90x90h R3/4GM TP2-912G TPF2-912GV 120x90x90h 37,5 R3/4GM... -
Page 14: Verifica Della Corretta Ventilazione
Attenzione: come da disposizioni internazionali, durante l'allacciamento dell'apparecchio è da prevedere a monte dello stesso un dispositivo automatico che permetta di staccare in modo omnipolare l'apparecchio dalla rete, questo dispositivo deve avere un'apertura dei contatti di almeno 3mm. VERIFICA DELLA CORRETTA VENTILAZIONE Assicurarsi che le prese d'aria verso l'esterno presenti nel locale di lavoro siano sufficienti a garantire il necessario ricambio d'aria, come citato al paragrafo 4.3 della norma UNI-CIG. -
Page 15: Controllo Della Potenza Termica
Attenzione: il costruttore non è responsabile, e non risarcisce in garanzia danni provocati e che sono dovuti ad installazioni inadeguate e non conformi alle istruzioni. CONTROLLO DELLA POTENZA TERMICA Gli apparecchi devono essere controllati per poter verificare che la potenza termica sia corretta: •... -
Page 16: Tabella Dati Tecnici "Bruciatori
TABELLA DATI TECNICI “BRUCIATORI” 12.68 kWh/KG 12.87 kWh/KG 9.45 kWh/m BUTANO PROPANO METANO H Bruciatore max 7 kW - min. 1,8 kW 30 mbar 37 mbar 20 mbar Iniettore bruciatore 1/100 mm Regolazione minimo 1/100 mm regolabile Iniettore pilota 1/100 mm Consumi kg/h 0,552 kg/h 0,544... -
Page 17: Sostituzione Dell'ugello Del Bruciatore Forno
Regolare il minimo girando la vite del by-pass a destra o a sinistra finché la potenza termica raggiunge 7 kW Il bruciatore del tutta piastra non necessita di regolazione dell’aria primaria. Avviso: Per il funzionamento con gas liquido, la vite di regolazione del minimo va bloccata a fondo. SOSTITUZIONE DELL'UGELLO DEL BRUCIATORE FORNO Per sostituire l’ugello del bruciatore forno bisogna procedere in questo modo: •... -
Page 18: Accensione E Regolazione Dei Fuochi Aperti E Del Tutta Piastra
ACCENSIONE E REGOLAZIONE DEI FUOCHI APERTI E DEL TUTTA PIASTRA Nel pannello anteriore, sopra ogni manopola è indicato il bruciatore a cui corrisponde contrassegnato dall'indice Per l’accensione, munirsi di un accenditore, girare la manopola verso sinistra dalla posizione "0" fino al segno (vedi figura);... -
Page 19: Timer Meccanico
TIMER MECCANICO Note: le cucine sono dotate di un segnalatore acustico a tempo, atto alla segnalazione di un tempo massimo di 120 minuti. Ruotare la manopola verso destra, posizionandola sul tempo prescelto, compreso tra 0 e 120 minuti (vedi figura); trascorso il tempo stabilito entra in funzione l'avvisatore acustico. -
Page 20: Provvedimenti Da Eseguire In Caso Di Lunga Interruzione Del Funzionamento
PROVVEDIMENTI DA ESEGUIRE IN CASO DI LUNGA INTERRUZIONE DEL FUNZIONAMENTO Chiudere il rubinetto del gas, pulire l’impianto come sopra specificato TABELLA DI COTTURA FORNO ELETTRICO VENTILATO Tipo di pietanza Nr. Guida Quantità Temperatura Tempo di dal basso °C cottura min. Dolci Con impasto sbattuto, in stampo Con impasto sbattuto, senza stampo... - Page 21 I tempi di cottura possono variare secondo la natura delle vivande, la loro omogeneità e il loro volume. È consigliabile alla prima cottura, scegliere il valore inferiore del campo di regolazione del termostato dato dalla tabella. Il tempo di cottura verrà prolungato in funzione del calore inferiore.
- Page 22 INHALTSANGABE KONFORMITÄTSERKLÄRUNG ..........................23 GAS TABELLE TECHNISCHE DATEN ........................23 ELEKTRISCHE TABELLE TECHNISCHE DATEN ....................23 AUFSTELLUNG ................................23 ÜBERPRÜFUNG DER EINWANDFREIEN BELÜFTUNG ..................24 GASANSCHLUSSROHR .............................. 24 ELEKTROANSCHLUSS ............................... 24 ÄQUIPOTENZIAL ................................ 25 KONTROLLE DER WÄRMELEISTUNG ......................... 25 Anschluss für Flüssiggas G30/G31 ........................25 Anschluss für Methangas H G20 ...........................
-
Page 23: Konformitätserklärung
BACKOFEN ABMESSUN NENN MODELL BRENNER BRENNER ANSCHLUSS GEN cm LEISTUNG 12 KW 10 kW 7 KW 8,5 KW 13 KW ISO R7 (KW) TP-98G 80x90x90h R3/4GM 80x90x90h 20,5 R3/4GM TPF-98G TPF-98GE 80x90x90h R3/4GM 120x90x90h R3/4GM TP2-912G TPF2-912GV 120x90x90h 37,5 R3/4GM... -
Page 24: Überprüfung Der Einwandfreien Belüftung
• Die Gasinstallationen, elektrischen Anschlüsse sowie die, für die Aufstellung der Geräte vorgesehenen Räume müssen den geltenden Vorschriften des jeweiligen Landes entsprechen; besonders wichtig ist die Aufstellung des Geräts in einem ausreichend belüfteten Raum und möglichst unter einer Abzugshaube, um die vollständige Ableitung der während der Verbrennung entstehenden Abgase zu gewährleisten. -
Page 25: Äquipotenzial
ÄQUIPOTENZIAL Das Gerät muss mit einem Äquipotenzial-System verbunden werden. Die Verbindungsschraube ist auf der Rückseite des Geräts angebracht und mit dem Symbol gekennzeichnet. Achtung!: Der Hersteller übernimmt für Schäden, die durch eine unsachgemäße, nicht den Anleitungen entsprechende Installation verursacht wurden, keinerlei Haftung und leistet auch innerhalb der Garantie keinen Schadenersatz. KONTROLLE DER WÄRMELEISTUNG Die Geräte müssen hinsichtlich ihrer korrekten Wärmeleistung überprüft werden: •... -
Page 26: Tabelle Technische "Brenner - Daten
TABELLE TECHNISCHE “BRENNER - DATEN” 12.8 kwh/KG 9.45 kwh/m 8,12 kwh/m G30/G31 FLUSSIGGASS ERDGAS H ERDGAS L Brenner max 7 kW-min 1,8 kW 50 mbar 20 mbar 20 mbar Brennerdüse 1/100 mm Kleinstellung 1/100 mm einstellbar einstellbar Einspritzv. ZündBrenner 1/100 mm Verbrauch kg/h 0,547 st./h 0,740... -
Page 27: Austausch Der Brenndüse Des Grossflächengrills
AUSTAUSCH DER BRENNDÜSE DES GROSSFLÄCHENGRILLS Die Bedienblende entfernen, die Düse mit dem passenden Schraubenschlüssel lösen und durch eine geeignete Düse ersetzen. Durch Drehen der By-pass-Schraube nach rechts oder links die kleinste Flamme einstellen, bis eine Wärmeleistung von 7 kW erreicht wird . Der Brenner des Grossflächengrills benötigt keine Primärluftregelung. -
Page 28: Zünden Und Einstellen Der Offenen Flammen Und Des Grossflächengrills
ZÜNDEN UND EINSTELLEN DER OFFENEN FLAMMEN UND DES GROSSFLÄCHENGRILLS Auf dem Bedienfeld auf der Vorderseite ist über jedem Einstellknopf der Brenner angegeben, auf den er sich bezieht, durch das Symbol gekennzeichnet Drehen Sie zum Zünden den Einstellknopf von der Position “0” nach links bis auf das Symbol (siehe Abbildung), drücken Sie den Knopf nieder und zünden Sie den Brenner mit einem Gasanzünder.. -
Page 29: Mechanische Timer
Das Aufleuchten der weißen Kontroll-Lampe zeigt den Betrieb des Heizelements an, ihr Erlöschen bedeutet, dass die gewünschte Temperatur erreicht wurde. Zum Ausschalten des Geräts ist der Drehknopf wieder auf die Position “O” zu drehen. MECHANISCHE TIMER Zur Beachtung: Die Herde sind mit einem akustischen Signalgeber ausgestattet, der eine Zeit von max. -
Page 30: Vorgangsweise Im Schadensfall
Wichtiger Hinweis: Es wird empfohlen, die Anlage neben der regelmäßigen Reinigung und Wartung einmal jährlich von einem Installateur überprüfen zu lassen. Es ist daher ratsam, einen Servicevertrag abzuschließen. VORGANGSWEISE IM SCHADENSFALL Den Gasanschlusshahn schließen, die Stromzufuhr mittels der oberhalb des Geräts angebrachten Vorrichtung unterbrechen und den Kundendienst verständigen.. -
Page 31: Gartabelle Des Heissluftofens
GARTABELLE DES HEISSLUFTOFENS Art der Speisen Einschub- Menge Temperatur Garzeit ebene °C Min. von unten Kuchen Geschlagener Teig, in Kuchenform Geschlagener Teig, ohne Kuchenform 1-3-4 Mürbeteig, Tortenboden 1-3-4 Mürbeteig mit Schmorfüllung Mürbeteig mit Trockenfüllung 1-3-4 Teig mit natürlicher Säuerung Gebäck 1-3-4 Fleisch Grill - Braten... - Page 32 Die Garzeiten können sich je nach Art der Speisen, ihrer Gleichmäßigkeit und ihres Umfangs ändern. Beim ersten Backen sollte stets der untere Wert des in der Tabelle aufgeführten Einstellbereichs der Temperaturregelung gewählt werden. Die Garzeit verlängert sich in Abhängigkeit von der Unterhitze.
- Page 33 TABLE DES MATIÈRES DÉCLARATION DE CONFORMITÉ ......................... 34 TABLEAU DES DONNÉES TECHNIQUES GAZ ..................... 34 TABLEAU DES DONNÉES TECHNIQUES ELECTRIQUE ................... 34 INSTALLATION ................................34 CONTRÔLE DE LA VENTILATION ......................... 35 TUYAU DE RACCORDEMENT À L'ALIMENTATION DE GAZ ................. 35 BRANCHEMENT ÉLECTRIQUE ..........................
-
Page 34: Déclaration De Conformité
DIMENSIO BRÛLEUR BRÛLEUR BRÛLEUR MODÈLE FOUR FOUR NS cm TP 12 kW 10 kW 7 KW TOTALE 8,5 KW 13 KW (kW) ISO 7-1 TP-98G 80x90x90h R3/4GM 80x90x90h 20,5 R3/4GM TPF-98G TPF-98GE 80x90x90h R3/4GM 120x90x90h R3/4GM TP2-912G TPF2-912GV 120x90x90h 37,5... -
Page 35: Contrôle De La Ventilation
local bien aéré, si possible sous une hotte d'aspiration pour garantir la bonne évacuation des produits de combustion. Le volume d'air nécessaire à la combustion est de 2 m /h par kW de puissance installée. Attention!: conformément aux dispositions internationales applicables, durant le branchement de l'appareil, il est nécessaire de prévoir en amont de celui-ci un dispositif automatique assurant la coupure omnipolaire de l'alimentation de secteur;... -
Page 36: Circuit Équipotentiel
N.B. Le câble d'alimentation doit avoir les caractéristiques suivantes: de type silicone pour résister à une température de 180°C et d'une section adaptée à la puissance de l'appareil (voir tableau des données techniques page 6). CIRCUIT ÉQUIPOTENTIEL L'appareil doit être raccordé à un circuit équipotentiel. La vis de raccordement est positionnée sur la partie postérieure de l'appareil et est marquée du symbole Attention!: le fabricant décline toute responsabilité... -
Page 37: Tableau Des Données Techniques "Brûleurs
TABLEAU DES DONNÉES TECHNIQUES “BRÛLEURS” 12.68 kWh/KG 12.87 kWh/KG 9.45 kWh/m 8,12 kWh/m BUTANE PROPANE MÉTHANE H METHANE L Brûleur max 7 kW-min 1,8 kW 28 mbar 37 mbar 20 mbar 25 mbar Injecteur brûleur 1/100 mm Réglage minimum 1/100 mm réglable réglable Injecteur veilleuse 1/100 mm... -
Page 38: Contrôle Du Fonctionnement
Régler le minimum en tournant la vis du by-pass vers la droite ou vers la gauche jusqu'à ce que soit atteinte une puissance thermique de 7 kW. Le brûleur de la plaque grill ne nécessite aucun réglage de l'air primaire. Attention: pour le fonctionnement au gaz liquide, la vis de réglage du minimum doit être bloquée à... -
Page 39: Allumage Et Réglage Du Brûleur Du Four A Gaz
ALLUMAGE ET RÉGLAGE DU BRÛLEUR DU FOUR A GAZ Pour l'allumage, tourner la commande vers la gauche en l'amenant de la position "0" à la position (voir figure); la maintenir enfoncée et appuyer sur le bouton marqué du symbole jusqu'à ce que le four s'allume. -
Page 40: Instructions Pour L'évacuation Des Produits De Combustion
INSTRUCTIONS POUR L'ÉVACUATION DES PRODUITS DE COMBUSTION Appareils de type "A" (voir plaque des caractéristiques) Pour les appareils de type "A", les produits de combustion doivent être évacués par l'intermédiaire de hottes ou dispositifs similaires raccordés à une conduite de sécurité d'un tirage suffisant ou bien directement sur l'extérieur (évacuation naturelle - Fig. -
Page 41: Tableau Des Cuissons Four Ventile
TABLEAU DES CUISSONS FOUR VENTILE Type de préparation n° guide (à Quantité Température Temps de partir du bas) (kg) (°C) cuisson (min.) Gâteaux/Pâtisseries A pâte fouettée, dans moule A pâte fouettée, sans moule 1-3-4 Pâte brisée, fond de tarte 1-3-4 Pâte brisée avec appareil humide Pâte brisée avec appareil sec 1-3-4... - Page 42 INDEX DECLARATION OF COMPLIANCE ......................... 43 GAS TECHNICAL DATA TABLE ..........................43 ELECTRIC TECHNICAL DATA TABLE ........................43 INSTALLATION ................................43 CHECKING FOR CORRECT VENTILATION ......................44 PIPE FOR GAS CONNECTION ..........................44 ELECTRIC CONNECTION ............................44 EQUIPOTENTIAL................................. 44 CHECKING HEAT OUTPUT ............................45 Connection for liquid gas G30/G31 ........................
-
Page 43: Declaration Of Compliance
TOTAL DIMENS. BURNER BURNER MODEL BURNER BURNER BURNER POWER CONNECTION 10 kW 7 KW 12 kW 8,5 KW 13 KW (KW) ISO R7 TP-98G 80x90x90h R3/4GM 80x90x90h 20,5 R3/4GM TPF-98G TPF-98GE 80x90x90h R3/4GM 120x90x90h R3/4GM TP2-912G TPF2-912GV 120x90x90h 37,5 R3/4GM... -
Page 44: Checking For Correct Ventilation
emissions which are formed during combustion. The air necessary for combustion is 2m3 /h per kW of power installed. Attention! In accordance with international rules, when connecting the appliance, an automatic device enabling the disconnection of all contacts from the mains, must be installed above it; this device must have a contacts opening of at least 3 mm. -
Page 45: Checking Heat Output
CHECKING HEAT OUTPUT The appliances must be checked in such a way as to verify that the heat output is correct: • The heat output (thermal power) is indicated on the data plate of the appliance. • Firstly, check that the appliance can be used with the type of gas supplied; then check that the indication on the plate corresponds to the gas to be used. -
Page 46: Rules For Converting And Installing For Other Types Of Gas
RULES FOR CONVERTING AND INSTALLING FOR OTHER TYPES OF GAS Our appliances are tested and regulated with liquid gas (see data plate). The conversion or adaptation to another type of gas must be carried out by a specialised technician. The nozzles for the various types of gas are supplied in a packet and are marked in hundredths of mm (see “burners”... -
Page 47: Open Rings
Open rings: The cocks can be changed by removing the front panel; to change the thermocouples and burners you have to remove the rungs and trays. Gas oven the gas-cock, timer, thermocouples, burners and ignition plugs can be changed by accessing them inside the oven and/or by removing the bottom oven panel or control panel. -
Page 48: Turning On And Adjusting The Fan Oven
TURNING ON AND ADJUSTING THE FAN OVEN The hot air made to circulate by the fan is distributed in all parts of the oven chamber to ensure even cooking results. Since the oven chamber is heated evenly, different foods can be cooked together on different rungs Turn the knob from ”O”... -
Page 49: What To Do In The Event Of A Breakdown
Important: As well as ordinary cleaning and maintenance, it is advisable to have the installation checked by an installer at least once a year. It is therefore suggested to draw up an after-sales assistance contract. WHAT TO DO IN THE EVENT OF A BREAKDOWN Turn off the gas tap and notify the after sales service. -
Page 50: Cooking Table For The Fan Oven
COOKING TABLE FOR THE FAN OVEN Type of food Slot no. Quantity Temperature Cooking time from the °C in minutes bottom Cakes, pastries With a beaten mixture, in a mould With a beaten mixture, without a mould 1-3-4 Short pastry, cake base 1-3-4 Short pastry with a wet filling Short pastry with a dry filling... - Page 51 When cooking for the first time in the oven we suggest opting for the lower value in the thermostat adjustment range given in the table. Cooking time will be longer if the heat is lower.
- Page 52 ÍNDICE DECLARACIÓN DE CONFORMIDAD ........................53 TABLA DATOS TÉCNICOS GAS ..........................53 TABLA DATOS TÉCNICOS ELÉCTRICOS ......................53 INSTALACIÓN ................................53 COMPROBACIÓN DE LA CORRECTA VENTILACIÓN ..................54 TUBO PARA LA CONEXIÓN DEL GAS ........................54 CONEXIÓN ELÉCTRICA ............................54 EQUIPOTENCIAL ................................
-
Page 53: Declaración De Conformidad
QUEMA QUEMA QUEMA QUEMA EMPALME DIMENS. MODELO HORNO HORNO TP 12 kW 10 kW 7 KW (KW) ISO 7-1 8,5 KW 13 KW TP-98G 80x90x90h R3/4GM 80x90x90h 20,5 R3/4GM TPF-98G TPF-98GE 80x90x90h R3/4GM 120x90x90h R3/4GM TP2-912G TPF2-912GV 120x90x90h 37,5 R3/4GM... -
Page 54: Comprobación De La Correcta Ventilación
¡Atención!: como indican las disposiciones internacionales, antes del aparato se debe instalar un dispositivo automático que permita desconectar de manera omnipolar el aparato de la red; este dispositivo tiene que tener una abertura de los contactos de al menos 3mm. COMPROBACIÓN DE LA CORRECTA VENTILACIÓN Asegurarse que las tomas de aire hacia fuera presentes en el local de trabajo sean suficientes para garantizar el cambio de aire necesario, tal y como se indica en el párrafo 4.3 de la norma UNI-CIG. -
Page 55: Control De La Potencia Térmica
¡Atención!: el fabricante no es responsable, y la garantía no cubre, daños provocados y que se deben a instalaciones inadecuadas y no conformes a las instrucciones. CONTROL DE LA POTENCIA TÉRMICA Es necesario controlar los aparatos para poder comprobar que la potencia térmica sea correcta: •... -
Page 56: Tabla Datos Técnicos Quemadores
TABLA DATOS TÉCNICOS QUEMADORES 12.68 kWh/KG 12.87 kWh/KG 9.45 kWh/m BUTANO PROPANO METANO H Quemador max 7 kW-min 1,8 kW 30 mbar 37 mbar 20 mbar Inyector quemador 1/100 mm Regulación mínimo 1/100 mm regulable Inyector piloto 1/100 mm Consumos kg/h 0,552 kg/h 0,544 st./h 0,740... - Page 57 CAMBIO DE LA BOQUILLA DEL QUEMADOR HORNO Para cambiar la boquilla del quemador horno, es necesario seguir los siguientes pasos: • Quitar la solera del horno; • Destornillar los tornillos de fijación de la protección de la boquilla quemador , •...
- Page 58 ENCENDIDO Y REGULACIÓN DEL QUEMADOR HORNO A GAS Para el encendido, girar el mando hacia la izquierda de la posición "0" a la posición (ver figura); mantener el mando apretado y accionar el pulsador con el símbolo hasta que el gas se encienda.
-
Page 59: Limpieza Y Mantenimiento
Si falta ésta, se admite el uso de un aspirador de aire conectado directamente al exterior (Evacuación forzada) Fig.2, de capacidad no inferior a cuanto establecido en el punto 4.3 de la norma UNI-CIG 8723. En el caso de evacuación forzada La alimentación del gas del aparato debe ser directamente esclavizada al sistema y debe interrumpirse en el caso que la capacidad de éste descienda por debajo de los valores prescritos en el punto 4.3 de la norma UNI-CIG 8723. -
Page 60: Tabla De Cocción Con Horno Ventilado
TABLA DE COCCIÓN CON HORNO VENTILADO Tipo de alimento Nº Guía Cantidad Temperatura Tiempo de desde abajo °C cocción min. Dulces Con pasta batida, en molde Con pasta batida, sin molde 1-3-4 Pasta flora, fondo pastel 1-3-4 Pasta flora con relleno húmedo Pasta flora con relleno seco 1-3-4 Con pasta con levadura natural...