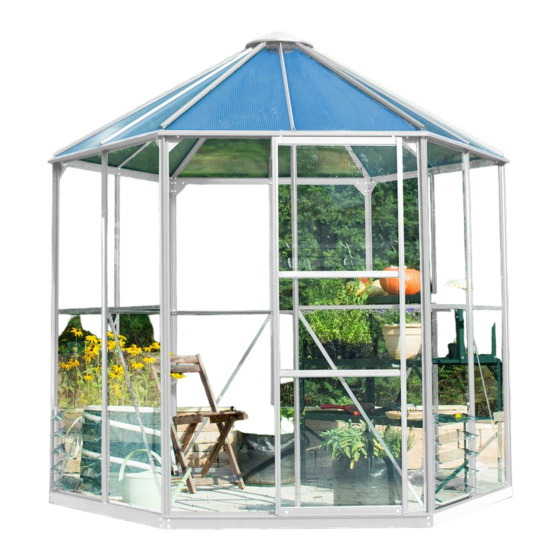
Sommaire des Matières pour Vitavia HERA 4500
- Page 1 assembly instructions Montageanleitung Notice de Montage Montagevejledning Monteringsanvisning Montasjeveiledning Kokoonpano-ohjeet Hera 4500 014.02.0902...
- Page 2 Quantity Quantity Item Sect. Size Item Sect. Size Part Part Ref. Ref. 4500 4500 ø 32 1001 1 - 5 M6 x 10 6049 1002 1 - 6 6051 ø 6 / 23 1011 6052 M6 x 55 1012 6054 1020 5 &...
- Page 3 Quantity Item Sect. Size Part Ref. 4500 6111 1374 6112 1204 6114 6115 6117 6135 ø 198 9523 9524 014.02.0902...
-
Page 4: Sicherheitsvorkehrungen
SICHerHeITSVOrKeHrUNGeN Safety Warning 1. PLEASE READ THESE INSTRUCTIONS CAREFULLY AND COMPLETELY BEFORE ASSEMBLING YOUR GREENHOUSE. 2. Sharp edges and corners can cause injury. Always wear protective glasses, gloves, shoes and headgear when handling the aluminium profiles, glass and polycarbonate sheets. Broken glass is a safety hazard – always clear up immediately and dispose of with care. 3. -
Page 5: Safety Notice
suring the diagonals. A full range of greenhouse accessories, to help you make the most of this product, is Loosely connect the door wheels (6049) and available from your stockist. Please inform door jump clips (6039) to bottom bar (6117) yourself as to the possibilities. - Page 6 SICHerHeITSVOrKeHrUNGeN Sicherheitsvorkehrungen 1. BITTE LESEN SIE DIESE MONTAGEANLEITUNG VoR BegINN DES AUFBAUS KOMPLETT DURCH! 2. Bei der Handhabung von Polycarbonatplatten oder von Glas sollten Sie immer handschuhe tragen. Scharfe Kanten können zu Verletzungen führen. Beschädigte Glassscheiben sind auszuwechseln. Auch scharfe Kanten oder Ecken der Aluminiumprofile können zu Verletzungen führen, also auch hier immer Handschuhe tragen! 3.
- Page 7 Die mittlere Glasscheibe (2) einsetzen und dabei durch die Freiräume im Dach arbeiten. mittleres Profil (6115) lose mit den vertikalen Die Scheiben mittels Glasfederklammern Türprofilen (6023) verbinden. (1011) (7.3) (7.4) und Glashalteklammern Die obere Scheibe (1) einsetzen und mittleres (1012) (7.5) befestigen. Sicherstellen, dass die Profil (6115) lose mit den vertikalen Türprofilen Scheiben (5) (6) so überlappen, dass kein (6023) (5.3b) verbinden.
-
Page 8: Précautions D'emploi
SICHerHeITSVOrKeHrUNGeN Précautions d’emploi 1. VEUILLEZ LIRE ENTIEREMENT CETTE NOTICE DE MONTAGE aVaNt DE COMMENCER L’INSTALLATION ! 2. Portez toujours des gants lorsque vous maniez des plaques de polycarbonate ou du verre. Les bords tranchants peuvent entraîner des blessures. On peut aussi se blesser avec les bords et coins tranchants des profilés en aluminium, il faut donc là encore toujours porter des gants ! 3. -
Page 9: Consigne De Securite
fixer sans serrer le profilé (6017) sur les pro- est dessous le bord du bas du verre 6 retenu filés de cotés (6023) avec les boulons (1001) par les cavaliers (1012) (7.5). déjà coulissés, les et les rondelles (6060) et Pour les cotés, commencer par les verres du écrous (1002). -
Page 10: Sikkerhedsforskrifter
SICHerHeITSVOrKeHrUNGeN Sikkerhedsforskrifter 1. LÆS VENLIGST DENNE VEJLEDNING, INDEN DE GÅR I GANG MED SAMLING AF DERES DRIVHUS. 2. De bør altid bruge handsker, når De arbejder med glas. Skarpe kanter kan forårsage skader; der kan også fore-komme skarpe kanter på kanter og hjørner på... - Page 11 Jalousivinduet kan kun monteres i den ne- derste del af en sektion, hvori der ikke sidder I hver profil (6023) anbringes 6 bolte. en tværstiver (6107). Tryk gummilisten (1020) fast på profil (6023) Fastgør jalousivinduets lodrette sideprofiler som vist i (5.1) og tilpas længden med en kniv. (9523) og (9524) til henholdsvis hjørnestolpe (6022) og mellemstolpe (6013) ved hjælp af Anbring det nederste glasstykke og monter...
- Page 12 6101 6102 30 x 20 mm 52 x 20 mm 2528 mm 1264 mm 120° 2189 mm 22 mm hera 4500 dIaNa 014.02.0902...
- Page 13 5 x 1 6101 5 x 1 6103 5 x 1 6107 6013 6022 5 x 1 6110 5 x 1 6107 6101 6013 6013 6110 6107 6101 6103 6013 6022 6022 6022 6110 6107 6103 hera 4500 dIaNa 6101 1092 014.02.0902...
- Page 14 1092 6110 1002 6005 6013 1092 6104 6005 6013 6022 6107 6102 6104 6022 6107 6102 6110 6110 6005 6013 6104 6013 6005 6107 6005 6102 6013 6107 6022 6110 6022 6102 6022 6104 hera 4500 dIaNa dIaNa 1092 014.02.0902...
- Page 15 1001 1002 1092 6022 6110 6022 6107 6022 1092 6103 hera 4500 dIaNa 6101 014.02.0902...
- Page 16 6036 1001 1002 6036 6052 6054 6061 6111 6112 6135 6112 6111 6052 6061 6036 6054 6111 6135 6112 6061 1002 6112 6111 hera 4500 dIaNa 014.02.0902...
- Page 17 1001 1002 6111 6112 6110 6110 6110 hera 4500 dIaNa 014.02.0902...
- Page 18 6023 6057 6060 6115 6115 6060 6062 6114 1002 6117 6115 6057 6060 6117 5.7/5.8 6114 4500 6023 3679011 610 x 610 3679181 610 x 442 1002 total 6117 6062 6110 6057 6023 6102 6102 hera 4500 dIaNa 6039 014.02.0902...
- Page 19 1002 2001 9523 9524 9523 9524 4500 3679251 549 x 100 2 x 5 total 9523 9524 1002 2001 hera 4500 dIaNa 014.02.0902...
- Page 20 1012 1020 7.2/7.3 7.2/7.4 6013 6022 4500 6112 6111 3679011 610 x 610 1020 3679921 610 x 150 3679391 610/326 x 610/20 1020 1020 3679381 332/38 x 610 total 6022 6013 6111 6112 1012 1011 1011 hera 4500 dIaNa 014.02.0902...
- Page 24 E.P.H. Schmidt u. Co. GmbH OPJ A/S Sporbecker Weg 28 A Volderslevvej 36 A D-58089 Hagen Postboks 480 Postfach 3320 DK-5260 Odense S D-58033 Hagen Danmark Tel.: +49 2331 37555 0 Tel.: +45 66 15 10 30 Fax: +49 2331 37555 55 Fax: +45 66 15 00 84 www.eph-schmidt.de www.opj.dk...


