Publicité
Les langues disponibles
Les langues disponibles
Liens rapides
All manuals and user guides at all-guides.com
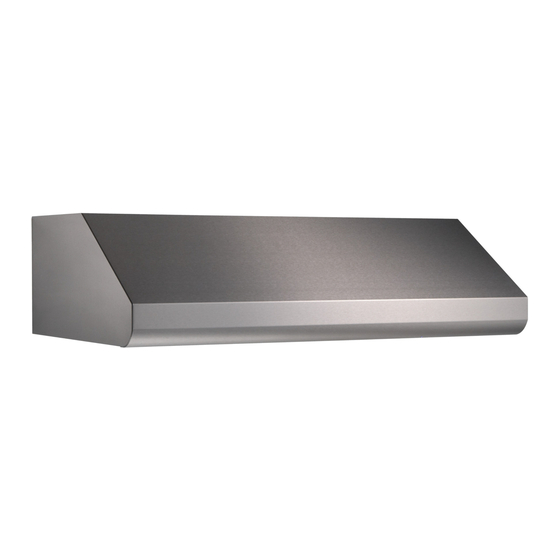
INSTALLATION INSTRUCTIONS
HH0005
64000 SERIES
INTENDED FOR DOMESTIC COOKING ONLY
!
!
READ AND SAVE THESE INSTRUCTIONS
INSTALLER: LEAVE THIS MANUAL TO HOMEOWNER.
HOMEOWNER: USE AND CARE INFORMATION ON PAGES 10 TO 12
Broan-NuTone LLC, 926 West State Street, Hartford, WI 53027 (1-800-637-1453)
NuTone Inc., 4820 Red Bank Road, Cincinnati, OH 45227 (1-800-543-8687)
Broan-NuTone Canada Inc., 1140 Tristar Drive, Mississauga, ON L5T 1H9 (1-888-882-7626)
V03515 rev G
Publicité

Manuels Connexes pour Broan-NuTone RANGEMASTER 64000 Serie


Sommaire des Matières pour Broan-NuTone RANGEMASTER 64000 Serie
- Page 1 HOMEOWNER: USE AND CARE INFORMATION ON PAGES 10 TO 12 Broan-NuTone LLC, 926 West State Street, Hartford, WI 53027 (1-800-637-1453) NuTone Inc., 4820 Red Bank Road, Cincinnati, OH 45227 (1-800-543-8687) Broan-NuTone Canada Inc., 1140 Tristar Drive, Mississauga, ON L5T 1H9 (1-888-882-7626) V03515 rev G...
- Page 2 All manuals and user guides at all-guides.com WARNING WARNING TO REDUCE THE RISK OF FIRE, ELECTRIC TO REDUCE THE RISK OF INJURY TO PERSONS SHOCK OR INJURY TO PERSONS, OBSERVE THE IN THE EVENT OF A RANGE TOP GREASE FIRE, FOLLOWING: OBSERVE THE FOLLOWING*: Use this unit only in the manner intended by the...
- Page 3 All manuals and user guides at all-guides.com 64000 SERIES RANGE HOOD SYSTEM Model 335 (1200 cfm) Model 647 Model 634 or 644 Model 643 Model 634 or 644 Model 331H (600 cfm) or 336 (1500 cfm) (7” Rd wall cap) (roof cap) (8”...
- Page 4 All manuals and user guides at all-guides.com 1. INSTALL DUCTWORK 2. MEASURE INSTALLATION Plan where and how the ductwork will be installed. Dimensions for the most common installations are shown below. Install proper-sized ductwork, elbows and roof or wall cap for the type of blower you are installing. If We recommend you to install the hood at a using 7”...
- Page 5 All manuals and user guides at all-guides.com 3. PREPARE THE INSTALLATION Make sure that the following items are included: - Range hood - Accessories: • Filters • Bag of parts including: (4) lock nuts, (1) wire clamp, (8) 1/2” double thread screws, (2) wire connectors, (2) 1/2”...
- Page 6 All manuals and user guides at all-guides.com 6. CHOOSE THE OPENING (INTERIOR BLOWER) Remove the knockout for the chosen opening (horizontal at the back of the hood or vertical on rough-in plate). See pictures below. CAUTION When using P5 blower, remove the 10’’ wide knockout (smaller part). If using P8 blower, remove the knockout corresponding to the ducting installed (10’’...
- Page 7 All manuals and user guides at all-guides.com 9. INSTALL THE ADAPTER (INTERIOR BLOWER) Using two (2) standard 1/2’’ screws, secure the adapter to the top (or back) of the hood. Seal the adapter to the hood using duct tape. HD0005 HD0006 10.
- Page 8 All manuals and user guides at all-guides.com 11. CONNECT WIRING (INTERIOR BLOWER) WARNING Risk of electrical shock. Electrical wiring must be done by qualified personnel in accordance with all applicable codes and standards. Before connecting wires, switch power off at service panel and lock service disconnecting means to prevent power to be switched on accidentally.
- Page 9 All manuals and user guides at all-guides.com 12. INSTALL THE BLOWER (INTERIOR BLOWER) (CONT’D) Install screws into the location as shown in the pictures below (single blower or dual blower). Do not tighten screws down fully, leave a 1/8” gap. Hang blower unit onto blower plate (screws through the large part of the keyhole).
- Page 10 All manuals and user guides at all-guides.com 13. LIGHT BULBS This range hood uses 50W halogen lamps. (120V, 50W, PAR 20) Install the lamps by rotating them clockwise into their socket holder. 14. HEAT LAMPS The heat lamps required are 120V, 175W max, infrared bulbs. (120V, IR 175W, PAR 38) You can use white halogen lights if warming shelves are not used.
- Page 11 All manuals and user guides at all-guides.com 16. USE AND CARE (CONT’D) Hood cleaning Stainless steel cleaning: How to maintain its « BRIGHT LOOK » - Regularly wash surfaces with clean cloth or rag soaked with warm water and mild soap or liquid dish detergent.
- Page 12 This warranty supersedes all prior warranties. To qualify for warranty service, you must (a) notify Broan-NuTone LLC at one of the addresses or telephone number stated below, (b) give the model number and part identification and (c) describe the nature of any defect in the product or part.
- Page 13 All manuals and user guides at all-guides.com WIRING DIAGRAMS HALOGEN LAMP (50W PAR20) HALOGEN LAMP (50W PAR20) GANG SPST ROCKER SWITCH Rangemaster HEAT LAMP 175W OR HALOGEN LAMP 90W 30” and 36” SPST HEAT LAMP 175W ROCKER OR HALOGEN LAMP SWITCH TERMINAL BLOCK 8 POSITIONS...
- Page 14 All manuals and user guides at all-guides.com SERVICE PARTS 64000 Series 10 11 HL0002 QTY (hood width) PART NUMBER DESCRIPTION 30” 36” 42” 48” "RANGEMASTER" LOGO V03493 SOCKET LAMP V02264 MALE CONNECTOR V02773 FEMALE CONNECTOR V02772 THERMOSTAT V03435 THERMOSTAT BRACKET V03436 V03501 SPEED CONTROLLER...
- Page 15 All manuals and user guides at all-guides.com SERVICE PARTS SINGLE BLOWER/ROUGH-IN (Model P5) HL0021 PART NUMBER DESCRIPTION V13296 ADAPTER AND DAMPER 3 1/4’’ x 10’’ V03500 AIR DEFLECTOR V12997 SINGLE BLOWER ROUGH-IN PLATE ASSEMBLY V03577 FOAM 1/2” X 1/2” X 12” V02160 CAPACITOR 15MFD V01869...
- Page 16 All manuals and user guides at all-guides.com SERVICE PARTS DUAL BLOWER/ROUGH-IN (Model P8) HL0022 PART NUMBER DESCRIPTION V14971 ADAPTER AND DAMPER 3 1/4 ‘’ x 14’’ V13296 ADAPTER AND DAMPER 3 1/4 ‘’ x 10’’ V03500 AIR DEFLECTOR V14975 DUAL BLOWER ROUGH-IN PLATE ASSEMBLY V03577 FOAM 1/2”...
- Page 17 PROPRIÉTAIRE : INSTRUCTIONS D’UTILISATION ET D’ENTRETIEN EN PAGES 26 À 28 Broan-NuTone LLC, 926 West State Street, Hartford, WI 53027 (1-800-637-1453) NuTone Inc., 4820 Red Bank Road, Cincinnati, OH 45227 (1-800-543-8687) Broan-NuTone Canada Inc., 1140 Tristar Drive, Mississauga, ON L5T 1H9 (1-888-882-7626) V03515 rév. G...
- Page 18 All manuals and user guides at all-guides.com AVERTISSEMENT AVERTISSEMENT AFIN DE RÉDUIRE LES RISQUES D’INCENDIE, AFIN D’ÉVITER TOUT RISQUE DE BLESSURES D’ÉLECTROCUTION OU DE BLESSURES CORPORELLES, DANS LE CAS D’UN FEU DE CUISINIÈRE, SUIVEZ SUIVEZ LES INSTRUCTIONS SUIVANTES : CES INSTRUCTIONS* : N’utilisez cet appareil que de la façon prévue par Étouffez les flammes avec un couvercle hermétique, le manufacturier.
- Page 19 All manuals and user guides at all-guides.com SÉRIE 64000 SYSTÈME DE HOTTE DE CUISINIÈRE Ventilateur extérieur Ventilateur extérieur modèle 331H (600 pcm) modèle 335 (1200 pcm) Modèle 647 Modèle 634 ou 644 Modèle 643 Modèle 634 ou 644 ou 332H (900 pcm) ou 336 (1500 pcm) (Capuchon de (Capuchon de toit)
- Page 20 All manuals and user guides at all-guides.com 1. INSTALLER LES CONDUITS 2. MESURER L’INSTALLATION Déterminer à quel endroit et de quelle façon les Voici les dimensions pour les installations les conduits seront installés. plus courantes. Installer des conduits de bonnes dimensions, Nous recommandons que vous installiez la coude(s) et capuchon de mur ou de toit selon le hotte à...
- Page 21 All manuals and user guides at all-guides.com 3. PRÉPARER L’INSTALLATION S’assurer que les items suivants sont inclus : - Hotte - Accessoires : • Filtres • Sac de pièces incluant: (4) écrous dentelés, (1) serre-fils, (8) vis 1/2” à doubles filets, (2) connecteurs (genre “marette”), (2) vis 1/2”...
- Page 22 All manuals and user guides at all-guides.com 6. CHOISIR L’OUVERTURE (VENTILATEUR INTÉRIEUR) Enlever l’ouverture préamorcée choisie pour la sortie d’air de la hotte (horizontale à l’arrière de la hotte ou verticale sur la plaque du ventilateur). Voir les photos ci-dessous. ATTENTION Si un ventilateur P5 est installé, enlever l’ouverture préamorcée de 10’’...
- Page 23 All manuals and user guides at all-guides.com 9. INSTALLER L’ ADAPTATEUR (VENTILATEUR INTÉRIEUR) En utilisant les 2 vis standard 1/2’’, installer l’adaptateur sur le dessus (ou à l’arrière) de la hotte. Sceller ensuite l’adaptateur à l’aide de ruban adhésif à conduit. HD0005 HD0006 10.
- Page 24 All manuals and user guides at all-guides.com 11. BRANCHEMENTS ÉLECTRIQUES AVERTISSEMENT Risque de chocs électriques. Le raccordement électrique doit être effectué par du personnel qualifié conforméments aux codes et standards. Avant d’effectuer le branchement, coupez l’alimentation électrique au panneau de service et verrouillez-le pour éviter une mise en marche accidentelle. Connecter les fils à...
- Page 25 All manuals and user guides at all-guides.com 12. INSTALLER LE VENTILATEUR (VENTILATEUR INTERNE) (SUITE) Installer les vis aux endroits indiqués sur les photos ci-dessous (ventilateur simple ou double) en laissant un espace d’environ 1/8’’. Accrocher ensuite le ventilateur à la plaque ventilateur (passer les têtes de vis à...
- Page 26 All manuals and user guides at all-guides.com 13. AMPOULES HALOGÈNES Cette hotte de cuisinière utilise des ampoules halogènes de 50W. (120V, 50W, PAR 20). Installer les ampoules en les tournant dans le sens horaire. 14. LAMPES CHAUFFANTES Les lampes chauffantes requises sont des ampoules infrarouges de 175W max. (120V, IR175W, PAR 38). Vous pouvez utiliser des ampoules halogènes blanches si les tablettes réchauds ne sont pas utilisées (120V, 90W, PAR 38).
- Page 27 All manuals and user guides at all-guides.com 16. ENTRETIEN (SUITE) Nettoyage de la hotte Acier inoxydable : Comment maintenir son apparence étincelante À faire : - Laver régulièrement les surfaces à l’aide d’un chiffon ou linge propre imbibé d’eau tiède et de savon doux ou détergent à...
- Page 28 état ou d’une province à l’autre. Cette garantie annule toutes les autres garanties précédentes. Pour le service sous garantie, vous devez (a) aviser Broan-NuTone LLC à l’une des adresses ou numéros de téléphone mentionnés plus bas, (b) donner le numéro du modèle et l’identification de la pièce et (c) décrire la nature de tout défaut dans le produit ou la pièce.
- Page 29 All manuals and user guides at all-guides.com SCHÉMAS ÉLECTRIQUES LAMPE HALOGÈNE (50W PAR20) LAMPE HALOGÈNE (50W PAR20) LAMPE CHAUFFANTE INTERRUPTEUR UPST Rangemaster 175W DOUBLE À BASCULE OU HALOGÈNE 90W 30” et 36” INTERRUPTEUR UPST LAMPE CHAUF- À BASCULE FANTE 175W OU HALOGÈNE 90W BLOC DE JONCTION 8 POSITIONS...
- Page 30 All manuals and user guides at all-guides.com PIÈCES DE REMPLACEMENT Série 64000 10 11 HL0002 NO. DE LA QTÉ (largeur de hotte) DESCRIPTION REF. PIÈCE 30” 36” 42” 48” V03493 LOGO "RANGEMASTER" V02264 DOUILLE V02773 CONNECTEUR MÂLE V02772 CONNECTEUR FEMELLE V03435 THERMOSTAT V03436...
- Page 31 All manuals and user guides at all-guides.com PIÈCES DE REMPLACEMENT PLAQUE ET VENTILATEUR SIMPLE (Modèle P5) HL0021 NO. DE LA DESCRIPTION QTÉ REF. PIÈCE V13296 ADAPTATEUR ET VOLET 3 1/4’’ x 10’’ V03500 DÉFLECTEUR D’AIR V12997 PLAQUE VENTILATEUR SIMPLE ASSEMBLÉE V03577 MOUSSE 1/2”...
- Page 32 All manuals and user guides at all-guides.com PIÈCES DE REMPLACEMENT PLAQUE ET VENTILATEUR DOUBLE (Modèle P8) HL0022 NO. DE LA DESCRIPTION QTÉ RÉF. PIÈCE V14971 ADAPTATEUR ET VOLET 3 1/4’’ x 14’’ V13296 ADAPTATEUR ET VOLET 3 1/4’’ x 10’’ V03500 DÉFLECTEUR D’AIR V14975...
- Page 33 PROPRIETARIO: INSTRUCCIONES DE UTILIZACIÓN Y MANTENIMIENTO EN LAS PÁGINAS 42 A 44 Broan-NuTone LLC, 926 West State Street, Hartford, WI 53027 (1-800-637-1453) NuTone Inc., 4820 Red Bank Road, Cincinnati, OH 45227 (1-800-543-8687) Broan-NuTone Canada Inc., 1140 Tristar Drive, Mississauga, ON L5T 1H9 (1-888-882-7626) V03515 rev. G...
- Page 34 All manuals and user guides at all-guides.com ADVERTENCIA ADVERTENCIA PARA REDUCIR EL RIESGO DE INCENDIO, PARA EVITAR RIESGO DE LESIONES PERSONALES DESCARGA ELÉCTRICA, O LESIONES A PER- EN CASO DE INCENDIO DE GRASA EN LA SUPERFICIE SONAS, CUMPLA LOS SIGUIENTES PUNTOS : DE LA ESTUFA, OBSERVE LO SIGUIENTE*: Solamente use esta unidad de la manera propuesta Cubra y sofoque las llamas con una tapa ajustada,...
- Page 35 All manuals and user guides at all-guides.com SERIE 64000 SISTEMA DE LA CAMPANA DE COCINA Ventilador exterior modelo 335 Ventilador exterior modelo Modelo 647 Modelo 634 ó 644 Modelo 643 Modelo 634 ó 644 (1200 pcm) 331H (600 pcm) (remate de pared) (remate de techo) (remate de pared 8”) (remate de techo)
- Page 36 All manuals and user guides at all-guides.com 1. INSTALE LOS CONDUCTOS 2. MIDA LA INSTALACIÓN Planifique dónde y como se van a colocar los Las dimensiones para las instalaciones mas corrientes. conductos. Le recommendamos que instale la campana a Instale los conductos de dimensión adecuada, un mínimo de 20”...
- Page 37 All manuals and user guides at all-guides.com 3. PREPARE LA INSTALACIÓN Asegúrese que los artículos siguientes están incluidos : - Campana - Accesorios: • Filtros • Bolsa de piezas incluye: (4) tuercas dentellado, (1) alambre eléctrico, (8) 1/2” tornillos a doble hilillo (2) conectador de cable, (2) 1/2”...
- Page 38 All manuals and user guides at all-guides.com 6. ELIJA LA ABERTURA (VENTILADOR INTERIOR) Rompa la abertura elegida (horizontal detrás de la campana o vertical en la placa del ventilador) de salida de aire. Ver las fotos de abajo. PRECAUCIÓN Si un ventilador P5 es instalado, quite la abertura de 10’’ de anchura (la mas pequeña). Si un ventilador P8 es instalado, quite la abertura de dimensión correspondiente a los conductos (10’’...
- Page 39 All manuals and user guides at all-guides.com 9. INSTALE EL ADAPTADOR (VENTILADOR INTERIOR) Utilizando los dos (2) tornillos estandar 1/2’’, instale el adaptador encima o detrás de la campana. Luego selle el adaptador con la ayuda de una cinta adhesiva a conducto. HD0005 HD0006 10.
- Page 40 All manuals and user guides at all-guides.com 11. CONEXIÓN ELÉCTRICA ADVERTENCIA Peligro de choque eléctrico. La instalación eléctrica debe ser hecha por personal calificado de acuerdo con todos los códigos aplicables y normas. Antes de efectuar el empalme, cortar la alimentación eléctrica del interruptor y cerrar con securidad para prevenir una alimentación accidental.
- Page 41 All manuals and user guides at all-guides.com 12. INSTALACIÓN DEL VENTILADOR (INTERNA) (CONTINUACIÓN) Instale los tornillos en el lugar que indica la foto de abajo (ventilador simple o doble) dejando un espacio de mas o menos 1/8’’. Enganche en seguida el ventilador a la placa del ventilador (pase las cabezas de los tornillos a través de la parte grandedel hoyo).
- Page 42 All manuals and user guides at all-guides.com 13. LUCES HALÓGENAS Esta campana utiliza bombillas halógenas de 50W (120V, 50W, PAR 20). Instale la bombilla girando en el sentido de las agujas del reloj. 14. LAMPÁRA TERMÓGENA Las bombillas termógenas necesarias son bombillas infrarrojas de 175W max. (120V, IR175W, PAR 38). Usted puede utilizar las bombillas halógenas blancas, si las tablas termogénas no son utilizadas.
- Page 43 All manuals and user guides at all-guides.com 16. MANTENIMIENTO (CONTINUACIÓN) Limpieza de la campana Acero inoxidable: como mantener una apariencia brillante. Lo que debe hacer: - Lavar regularmente la superficie con un trapo o un paño empapado de agua tibia y de jabón suave o detergente a vajilla.
- Page 44 INCLUYENDO, PERO NO LIMITADAS A, GARANTÍAS IMPLÍCITAS DE COMERCIALIZACIÓN O ACTITUD PARA UN PROPOSITO PARTICULAR. Durante el período de un año, y a su propio criterio, Broan-NuTone LLC reparará o reemplazará, sin costo todo producto o pieza que se encuentre defectuosa bajo condiciones normales de servicio y uso.
- Page 45 All manuals and user guides at all-guides.com ESQUEMAS ELÉCTRICOS LUZ HALÓGEN (50W PAR20) LUZ HALÓGEN (50W PAR20) Rangemaster LÁMPARA SPST INTERRUPTOR TERMOGÉNA 175W DOBLE A BÁSCULA 30” y 36” O HALÓGEN 90W SPST INTERRUPTOR LÁMPARA A BÁSCULA TERMOGÉNA 175W O HALÓGEN 90W TERMINAL DE CONEXIÓN SPST INTERRUPTOR 8 POSISIONES...
- Page 46 All manuals and user guides at all-guides.com REPUESTOS Serie 64000 10 11 HL0002 REF. CTD (largo de la campana) DESCRIPCIÓN PIEZA 30” 36” 42” 48” LOGOTIPO "RANGEMASTER" V03493 CASQUETE V02264 CONNECTADOR MACHO V02773 CONNECTADOR HEMBRA V02772 TERMOSTATO V03435 SOPORTE POR TERMOSTATO V03436 CONTROL DE VELOCIDAD V03501...
- Page 47 All manuals and user guides at all-guides.com REPUESTOS PLACA Y VENTILADOR SIMPLE (Modelo P5) HL0021 REF. DESCRIPCIÓN PIEZA V13296 ADAPTADOR & COMPUERTA 3 1/4 ‘’ x 10’’ V03500 DEFLECTOR DE AIRE V12997 MONTAJE DE PLACA DE VENTILADOR SIMPLE V03577 ESPUMA 1/2” X 1/2” X 12” V02160 CONDENSADOR 15MFD V01869...
- Page 48 All manuals and user guides at all-guides.com REPUESTOS PLACA Y VENTILADOR DOBLE (Modelo P8) HL0022 REF. DESCRIPCIÓN CTD. PIEZA V14971 ADAPTADOR & COMPUERTA 3 1/4’’ x 14’’ V13296 ADAPTADOR & COMPUERTA 3 1/4’’ x 10’’ V03500 DEFLECTOR DE AIRE V14975 MONTAJE DE PLACA DE VENTILADOR DOBLE V03577 ESPUMA 1/2”...