Sommaire des Matières pour HOMCOM A90-263
- Page 1 INapc002V02_FR A90-263 IMPORTANT, RETAIN FOR FUTURE REFERENCE: READ CAREFULLY ASSEMBLY & INSTRUCTION MANUAL...
-
Page 2: Consignes De Sécurité
Consignes de sécurité ATTENTION LIRE ATTENTIVEMENT LES INSTRUCTIONS AVANT TOUTE UTILISATION Suivez attentivement les instructions d'assemblage. 1.Assurez-vous que toutes les vis et tous les capuchons sont bien fixés une fois que le produit est complètement assemblé. 2.Assurez-vous que toutes les pièces de rechange sont fournies par le fabricant, le remplacement non autorisé... -
Page 3: Pièces Du Produit
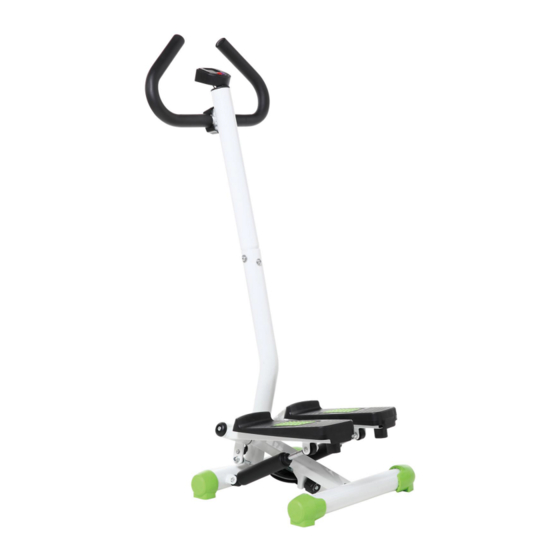
Pièces du produit Sortez toutes les pièces de l'emballage et vérifiez si elles sont conformes à la liste des pièces. Liste des pièces PIÈCE N° DESCRIPTION QTÉ PIÈCE N° DESCRIPTION QTÉ Machine de base Porte-compteur Tube inférieur Couvercle poignée Tubercule Boulon pour le tube supérieur Poignée... - Page 4 Instructions de montage Suivez attentivement toutes les étapes de montage expliquées dans ce manuel. Veuillez vous référer aux illustrations afin d'assembler correctement toutes les pièces. Étape 1: Placez la machine de base sur une surface plane. Insérez le câble B dans le tube inférieur, et connectez les câbles A et B ensemble, puis insérez le tube inférieur dans la machine de...
- Page 5 Étape 4: Connectez le connecteur C et la fiche D du compteur, puis fixez le compteur sur le support du compteur. Compteur BATTERIE : 1 pile AAA est nécessaire. Retirez le couvercle des piles à l'arrière du Compteur ; insérez 1 nouvelle pile "AAA". Assurez-vous que les piles sont correctement positionnées et que le contact avec les bornes est correct.
-
Page 6: Spécifications
SPÉCIFICATIONS: DURÉE........00:00-99:59 CALORIES(CAL).... .0.0-9999KCAL COMPTAGE......0-9999 FOULÉES/MIN....0-2000 FONCTIONS DES TOUCHES : MODE : Cette touche vous permet de sélectionner la fonction que vous souhaitez afficher à l'écran. RÉINITIALISER : Cette touche vous permet de réinitialiser les valeurs à zéro. PROCÉDURES DE FONCTIONNEMENT : MARCHE/ARRET AUTO : Le Compteur s'allume lorsqu'une touche est pressée ou lorsqu'il reçoit une entrée du capteur. -
Page 7: Conseils D'utilisation
Conseils d'utilisation Avant d'utiliser le stepper, veuillez placer la position de la pédale à la main au maximum, puis régler le bouton au bas du stepper pour que la poulie soit bien serrée, voir les illustrations ci-dessous. Choisissez un sol plat, mettez le stepper devant vous. Posez un pied sur la pédale, gardez les jambes bien verticales. - Page 8 Twist stepper with handlebar User manual ASSEMBLY & INSTRUCTIO...
-
Page 9: Safety Instructions
Safety Instructions Follow the assembly instructions carefully. 1.Ensure all screws and caps are fastened tightly upon the product is assembled completely. 2.Ensure all the spare parts are provided by the manufacturer, unauthorized replacement of spare parts are strictly prohibited. 3.Ensure the health condition before starting to exercise. To ensure sufficient physical strength, exercise should be done properly, regularly, and gradually. -
Page 10: Product Parts
Product Parts Take out all parts from the package and check whether the parts conform to the parts list. Parts List PARTNO. DESCRIPTION PARTNO. PARTNO. Base machine Meter holder Lower tube Handle cover Upper tuber Bolt for tube Handle Washer Meter Bolt for handle... - Page 11 Assembly Instructions Carefully follow all the assembly steps as explained on this manual. Please refer to the illustrations in order to assemble all parts correctly. Step 1: Place the base machine on a fl at surface. Insert Cable B into the lower tube, and connect Cable A and B together, and then insert the lower tube into the base machine and fasten with a bolt, as...
- Page 12 Step 4: Connect Connector C and meter plug D,and then fix the meter on the meter holder. Computer BATTERY: 1 AAA batteries are required. Remove the battery cover on the back of the computer; insert 1 new “AAA” batteries. Ensure that the batteries are correctly positioned and that proper contact is made with terminals.
-
Page 13: Key Functions
SPECIFICATIONS: TIME........00:00-99:59 CALORIES(CAL).... .0.0-9999KCAL COUNT......0-9999 STRIDES/MIN....0-2000 KEY FUNCTIONS: MODE: This key allows you to select the function you want displayed on the screen. RESET: This key allows you to reset values to zero. OPERATION PROCEDURES: AUTO ON/OFF: The computer turns on when any key is pressed or when it receives an input from the sensor. - Page 14 Method of use guidance Before using stepper , please put the pedal position by hand carried to the highest, then adjusting knob at the bottom of stepper to keep the pulley on the condition of tight ,see below pictures . Choose the flat ground, put on the stepper ahead of yourself .


