Publicité
Les langues disponibles
Les langues disponibles
Liens rapides
Wheelie Bar Installation Instructions
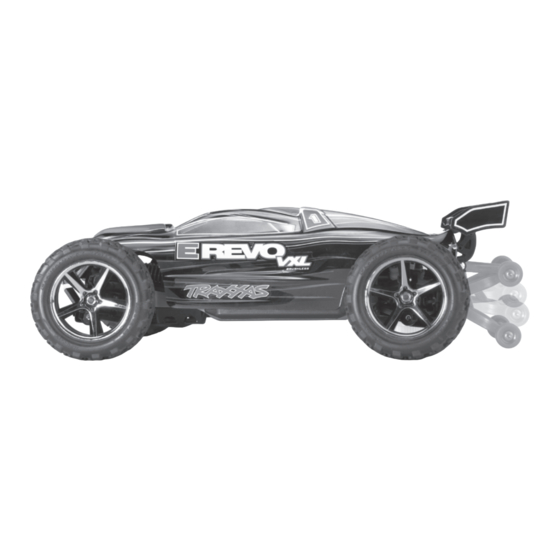
The 1/16 E-Revo wheelie bar is intended for hard, high-traction
surfaces where controlling wheelies can be difficult. The wheelie bar
can be removed easily for off-road racing or jumping.
1. Using a 2mm hex wrench,
remove the 2x8mm cap-head
screws that secure the rear
bumper (A), then remove the
bumper itself.
2. Remove the 2x12mm cap-head
screws from the rear body
mount (B). The rear toe links
will slide out from behind the
bulkhead tie bar. This is normal.
The toe links will be reinstalled
in step 4.
3. Install the upper wheelie bar
bracket onto the bosses that
held the rear bumper and secure
the upper bracket using two
2x8mm cap-head screws . Note
that the bracket is labeled "REAR"
with an arrow pointing up, to
indicate the direction in which
the part should be installed. See
the photo (C) for the correct
orientation of the bracket. Do
not overtighten the screws.
4. Install the lower wheelie bar
bracket over the rear skid plate.
The arrow molded into the lower
bracket should face out and up.
Align the holes in the bracket
with the holes in the body
mount and the rear toe links'
hollow balls. Secure the bracket
using two 2x14mm cap-head screws (D).
Make certain the screws pass through the hollow balls.
Setup Instructions
The wheelie bar can be set to
four different heights. To set
the wheelie bar height, snap
the upper arms off the wheelie
position cross bars. Move the
upper arms to the desired wheelie
position cross bar and then snap
them in place. Each setting can
offer different results based on
the individual ride height and droop settings for a particular truck.
Avoid riding on the wheelie bar wheels during normal driving (this
can happen in the lowest setting with lower than stock ride heights).
Remove the wheelie bar when the truck will be driven in harsh off-
road conditions.
Traxxas, 1100 Klein Road, Plano, TX 75074, Phone: 972-265-8000, Fax: 972-265-8011, e-mail: support@Traxxas.com
7184-KC1711-R00-Mini Wheelie Bar INST-120809-ML.indd 1
A
B
C
D
Upper Arms
Position
Cross Bars
T R A XX A S . com
Position 1 (Big Wheelies)
Bottom position on cross bars. Allows the truck to tip back the farthest
during a wheelie for longer, high-speed wheelies.
Position 4 (No Wheelies)
Top position on the cross bars. Offers the flattest launches with little
or no wheelie.
Removing the wheelie bar
Once installed, the wheelie bar can be
quickly removed by simply removing
the 3x40mm screw pins using a 2.5mm
hex driver. The mounting brackets will
remain installed on the chassis.
7184 Exploded Diagram
7184
3x40mm
3965
19.0 SS
2.5x8 CS
7184
2.5x14 CS
7184
If you have questions or need technical assistance, call Traxxas at
1-888-TRAXXAS
(1-888-872-9927) (U.S. residents only)
Covers Parts #7184
Position 1
Position 4
7184
5186 opt.
5186A opt.
7184
19.0 SS
3x40mm
KC1711-R00
120809
8/9/12 5:51 PM
Publicité

Sommaire des Matières pour Traxxas 7184
- Page 1 Remove the wheelie bar when the truck will be driven in harsh off- road conditions. T R A XX A S . com Traxxas, 1100 Klein Road, Plano, TX 75074, Phone: 972-265-8000, Fax: 972-265-8011, e-mail: support@Traxxas.com KC1711-R00 120809 7184-KC1711-R00-Mini Wheelie Bar INST-120809-ML.indd 1...
- Page 2 à la hauteur établie en usine). Enlevez la barre de wheeling lorsque le camion roule dans des conditions tout-terrain. T R A XX A S . com Traxxas, 1100 Klein Road, Plano, TX 75074, Phone: 972-265-8000, Fax: 972-265-8011, e-mail: support@Traxxas.com KC1711-R00 120809 7184-KC1711-R00-Mini Wheelie Bar INST-120809-ML.indd 2...


