
Manuels Connexes pour Cuisinart GRIDDLER PRO GR50E


Sommaire des Matières pour Cuisinart GRIDDLER PRO GR50E
- Page 1 GRIDDLER® PRO Instructions - Hinweise - Instructies - Istruzioni - Instrucciones GR50E 17_GR50E_IB_RC.indd 1 29/05/17 08:29...
- Page 2 17_GR50E_IB_RC.indd 2 29/05/17 08:29...
-
Page 3: Table Des Matières
SOMMAIRE Consignes de sécurité . . . . . . . . . . . . . . . . . . . . . . . . . . . . . . . . . . . . . . . . . . . . . . . . . . . . . . . . . . . . . . . . . . . . . . . . . . . . . . . . . . . . . . . . . . . . . . . . . . . 6 1. - Page 4 INHALTSVERZEICHNIS Sicherheitshinweise . . . . . . . . . . . . . . . . . . . . . . . . . . . . . . . . . . . . . . . . . . . . . . . . . . . . . . . . . . . . . . . . . . . . . . . . . . . . . . . . . . . . . . . . . . . . . . . . . . . . 28 1.
- Page 5 CONTENUTO Istruzioni di sicurezza . . . . . . . . . . . . . . . . . . . . . . . . . . . . . . . . . . . . . . . . . . . . . . . . . . . . . . . . . . . . . . . . . . . . . . . . . . . . . . . . . . . . . . . . . . . . . . . . . . 50 1.
-
Page 6: Consignes De Sécurité
. • Aucune réparation ne peut être effectuée par l’utilisateur . • Toute utilisation d’accessoires non recommandés ou non vendus par Cuisinart® peut provoquer incendie, électrocution et risque de blessure . - Page 7 ne doivent pas jouer avec l’appareil . Le nettoyage et l’entretien de l’appareil ne peuvent être effectués par des enfants sans surveillance . • Utiliser cet appareil exclusivement pour cuisiner, en suivant les instructions de ce manuel . • Ne pas utiliser à l’extérieur . •...
-
Page 8: Introduction
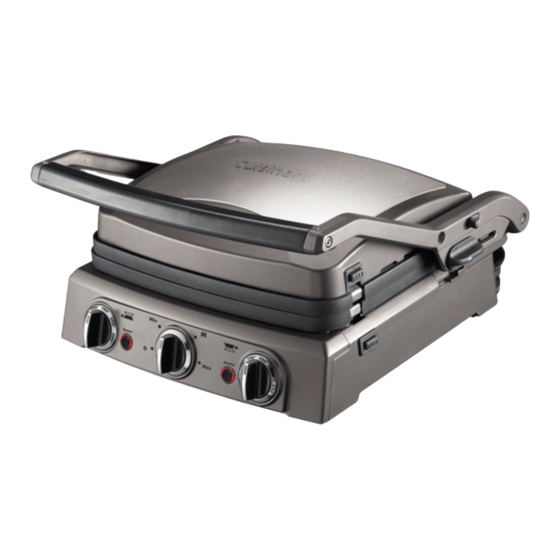
2 . CARACTÉRISTIQUES PRODUIT Félicitations pour votre achat ! 1 . Base Depuis plus de 30 ans, Cuisinart® développe une gamme complète 2 . Poignée presse thermo-isolante d’appareils culinaires qui permettent aux passionnés de cuisine et 3 . Plaques de cuisson anti-adhésives : aux grands chefs d’exprimer pleinement leur créativité... -
Page 9: Utilisation
C. Conseils d’utilisation A. Avant la première utilisation Grâce à sa charnière exclusive, le Griddler Pro Cuisinart cuit les ali- ments en position fermée ou ouverte à 180°, doublant ainsi la surface Avant la première utilisation, nettoyer le corps de l’appareil, le de cuisson disponible . -
Page 10: Fonction Barbecue
• FONCTION BARBECUE • Les jus de cuisson vont s’écouler sur les plaques jusque dans le bac récupérateur de jus . Installer les plaques de cuisson Grill puis ouvrir le plan de cuisson • Attendre que le Griddler Pro ait refroidi pour vider le bac récupérateur à... -
Page 11: Fonction « Booster
Note : Lorsque l’appareil est utilisé pour la première fois, il peut Note : Durant le cycle « Booster », les deux thermostats deviennent dégager une légère odeur et un peu de fumée . inactifs . MODE « MIN » •... -
Page 12: Tableau Des Modes Et Temps De Cuisson
H. Tableau des modes et temps de cuisson Les temps de cuisson sont donnés à titre indicatif, ils peuvent varier selon la quantité utilisée ainsi que la grosseur ou l’épaisseur des aliments . *pour les viandes rouges, la cuisson indiquée est « saignante » POSITION VIANDES PLAQUE... -
Page 13: Temps De Cuisson
Côte d’agneau Ouvert Grill 6 à 8 minutes Fermé 5 minutes Tranche de gigot Grill Ouvert 15 minutes Grill ou Merguez Ouvert 10 minutes Plancha Brochette d’agneau Ouvert Grill 5 minutes Magret de canard Ouvert Grill 10 minutes Râble de lapin Fermé... - Page 14 Grill Blanc d’encornet Ouvert 6 minutes Plancha Grill Grosses gambas Ouvert 6 minutes Plancha Poisson entier (450g) Fermé Grill 15 à 20 minutes Filet de poisson blanc Ouvert Plancha 6 minutes (bar/sandre/cabillaud) Fermé Grill 8 minutes POSITION LÉGUMES PLAQUE TEMPÉRATURE TEMPS DE CUISSON Ouvert Grill ou Plancha...
-
Page 15: L'avis Des Chefs
4 . L’AVIS DES CHEFS 5 . NETTOYAGE ET RANGEMENT • Après utilisation, tourner le bouton central sur la positon « O » et débrancher le Griddler Pro et le laisser refroidir complètement (minimum 1/2 heure) avant de le nettoyer . •... -
Page 16: Question/Réponses
6 . QUESTIONS/RÉPONSES QUE FAIRE SI: RÉPONSES L’appareil fume lors de la première Il est normal que l’appareil dégage de la fumée lors de sa première utilisation . utilisation ? Pensez à le nettoyer avec un linge humide avant de le mettre en fonction . L’appareil s’éteint tout seul ? Vérifiez que le bouton central n’est pas tourné... -
Page 17: Safety Cautions
. • Do not try to repair the appliance yourself . • Using any accessories not recommended or sold by Cuisinart® may cause a fire, electrocution and risk of injury . • This appliance can be used by children aged from 8 years and above and persons with reduced... - Page 18 • Use this appliance for cooking only and follow the instructions in this manual . • Do not use outdoors . • This appliance is intended to be used in household and similar applications such as: - staff kitchen areas in shops, offices and other working environments; - farm houses;...
-
Page 19: Introduction
Congratulations on your purchase! 1 . Base 2 . Heat-insulated press handle For over 30 years, Cuisinart® has been developing a full range of 3 . Non-stick cooking plates: kitchen appliances that lets both passionate amateurs and great 3a . 2 Grill plates chefs express their creativity to the fullest . -
Page 20: Use
C. Advice for use A. Before the first use Thanks to its exclusive floating hinge, the Griddler Pro Cuisinart lets you cook your food in the closed or in the open, flat position, this way Before using for the first time, wipe the body of the appliance, the lid doubling the available heating surface . -
Page 21: Installing The Drip Tray
• BARBECUE POSITION • The fats and juices from cooking the foods flow over the plates and are collected in the drip tray . Insert the Grill cooking plates then open the cooking surface to • Empty the drip tray after the Griddler Pro has cooled completely . the flat position by pulling on the button located on the right •... -
Page 22: Booster Feature
Note: There might be a slight odour or a little smoke when you start to flash . use the appliance for the first time . Note: During the Booster cycle, the two temperature controls for the “ ” MODE plates are deactivated . This mode deactivates the 2 temperature controls and automatically •... -
Page 23: Table Of Cooking Modes And Times
H. Table of cooking modes and times The cooking times are for reference only and will vary depending on the amount of food being cooked or the size or thickness of the food . *for red meats, the indicated cooking is rare . POSITION MEATS PLATE... - Page 24 Close 12 minutes Pork brochette Grill Open 16 to 18 minutes Lamb chop Open Grill 6 to 8 minutes Close 5 minutes Lamb leg slice Grill Open 15 minutes Grill or Merguez Open 10 minutes Griddle Lamb brochette Open Grill 5 minutes Duck filet Open...
- Page 25 Open Grill or 7 minutes Filet of monkfish Close Griddle 5 minutes Open 4 minutes Scallops Grill Close 2 minutes Grill White calamari Open 6 minutes Griddle Grill Large prawns Open 6 minutes Griddle Whole fish (450g) Close Grill 15 to 20 minutes White fish fillet Open Griddle...
-
Page 26: Advice From The Chefs
4 . ADVICE FROM THE CHEFS 5 . CLEANING AND STORAGE • When you have finished cooking, turn the button to the “O” position and unplug the appliance . Allow the grill to cool completely (at least 30 minutes) before cleaning . •... -
Page 27: Questions/Answers
6 . QUESTIONS/ANSWERS WHAT DO I DO IF: ANSWERS The appliance smokes the first time I use it? It's normal for the appliance to smoke a little during the first use . Clean with a damp cloth before turning it on . The appliance turns itself off? Check that the middle control is not in the “O”... -
Page 28: Sicherheitshinweise
Person ersetzt werden, um jede Gefahr zu vermeiden . • Der Benutzer darf keinerlei Reparaturen selbst durchführen . • Jeder Gebrauch von Zubehör, das nicht durch Cuisinart® empfohlen oder vertrieben wird, kann zu Feuer, Stromschlag und Verletzungsrisiko führen . - Page 29 Personen mit eingeschränkten physischen, sensoriellen oder mentalen Fähigkeiten oder von Personen ohne jede Erfahrungs- oder Kenntnisgrundlage, wenn es unter Aufsicht verwendet wird oder wenn sie vorher über den sicheren Gebrauch des Geräts unterrichtet wurden und die mit der Verwendung im Zusammenhang stehenden Risiken begreifen . Kinder dürfen nicht mit dem Gerät spielen .
-
Page 30: Einleitung
1 . EINLEITUNG 2 . MERKMALE Herzlichen Glückwunsch zu Ihrem Kauf! 1 . Sockel Seit über 30 Jahren entwickelt Cuisinart® ein komplettes Sortiment 2 . Wärmeisolierter Druckgriff von Küchengeräten, die es sowohl passionierten Liebhabern einer 3 . Antihaftbeschichtete Kochplatten: guten Küche als auch großen Küchenchefs ermöglichen, ihrer 3 a . -
Page 31: Gebrauch
3 . GEBRAUCH C. Gebrauchshinweise Dank des exklusiven Scharniers können Sie mit Ihrem Cuisinart- A. Vor dem ersten Gebrauch Griddler Pro die Nahrungsmittel in geschlossener Position oder in auf 180° geöffneter Position zubereiten, wobei die verfügbare Heizfläche Vor dem ersten Gebrauch den Geräterumpf, die Abdeckung und die verdoppelt wird . -
Page 32: Die Zubereitungsarten
• POSITION BARBECUE • Fett und Garfeuchtigkeit aus den Nahrungsmitteln fließen über die Platten ab und werden dann in der Auffangschale gesammelt . Installieren Sie die Garplatten so, dass die geriffelte Seite sichtbar • Entleeren Sie die Auffangschale, nachdem der Griddler Pro ist und öffnen Sie dann Garfläche auf 180°, indem Sie an dem Knopf vollständig abgekühlt ist . -
Page 33: Funktion « Booster
• Danach können Sie gegebenenfalls während des Garens die ideal, um Nahrungsmittel zu Beginn des Garens scharf anzubraten . Temperatur jeder einzelnen Platte anpassen . • Schließen Sie das Gerät nach dem Einsetzen der Platten an den Anmerkung: Bei der ersten Verwendung kann das Gerät einen Netzstrom an und drehen Sie den mittleren Reglerknopf auf die leichten Geruch oder etwas Rauch abgeben . -
Page 34: Tabelle Der Zubereitungsarten Und Garzeiten
H. Tabelle der Zubereitungsarten und Garzeiten Die Garzeiten stellen nur einen Anhaltspunkt dar und können je nach der verwendeten Menge und der Dicke des gewählten Garguts variie- ren! *für rotes Fleisch wird als Garmethode „blutig“ empfohlen FLEISCH POSITION PLATTE TEMPERATUR GARZEIT 7 Minuten Rippenstück (1kg) - Page 35 Geschlossen Grill 14 Minuten Andouillette Geöffnet Grill 18 Minuten Geschlossen 12 Minuten Schweinspieß Grill Geöffnet 16 bis 18 Minuten Lammkotelett Geöffnet Grill 6 bis 8 Minuten Geschlossen 5 Minuten Lammkeule, Scheibe Grill Geöffnet 15 Minuten Grill oder Merguez Geöffnet 10 Minuten Plancha Lammspieß...
- Page 36 Peterfisch, Filet Geöffnet Grill 6 Minuten Geöffnet Grill oder 7 Minuten Seeteufel, Filet Geschlossen Plancha 5 Minuten Geöffnet 4 Minuten Jakobsmuschel Grill Geschlossen 2 Minuten Grill Kalmar, weiß Geöffnet 6 Minuten Plancha Grill Gambas, dick Geöffnet 6 Minuten Plancha Ganzer Fisch (450g) Geschlossen Grill 15 bis 20 Minuten...
-
Page 37: Ratschläge Der Chefs
4 . RATSCHLÄGE DER CHEFS 5 . REINIGEN UND VERSTAUEN • Nach Beendigung des Garvorgangs den mittleren Knopf auf « O » drehen und den Netzstecker ziehen . Den Grill vor dem Reinigen vollständig abkühlen lassen (mindestens 1/2 Stunde) . •... -
Page 38: Fragen/Antworten
6 . FRAGEN/ANTWORTEN WAS TUN WENN: ANTWORTEN: Das Gerät während des ersten Gebrauchs Es ist normal, dass das Gerät bei der Inbetriebnahme Rauch abgibt . Denken Rauch abgibt? Sie daran, es mit einem feuchten Tuch zu reinigen, bevor Sie es zum ersten Mal einschalten . -
Page 39: Veiligheidsinstructies
. • Reparaties mogen niet worden uitgevoerd door de gebruiker zelf . • Het gebruik van accessoires die niet door Cuisinart® worden aangeboden of verkocht, kan brand, elektrocutie of verwondingen veroorzaken . - Page 40 apparaat, mits de werking en het veilige gebruik ervan van te voren aan hen is uitgelegd, of het apparaat onder toezicht wordt gebruikt, en de gebruiker zich bewust is van de mogelijk risico’s van het apparaat . Het apparaat dient niet als speelgoed gebruikt te worden door kinderen . Kinderen mogen het apparaat niet zonder toezicht reinigen of te onderhouden .
-
Page 41: Inleiding
1 . INLEIDING 2 . PRODUCTKENMERKEN Gefeliciteerd met uw aankoop! 1 . Machinebasis Al meer dan 30 jaar maakt Cuisinart® keukenapparatuur waarmee 2 . Thermisch geïsoleerde handgreep zowel hobbykoks als topkoks al hun creativiteit kunnen laten zien . 3 . Anti-aanbakplaten: 3a . -
Page 42: Gebruik
3 . GEBRUIK C. Gebruikstips A. Vóór het eerste gebruik Dankzij de speciale scharnier kunt u met de Cuisinart Griddler Pro bakken in gesloten stand of volledig geopend, waardoor het Voor u het apparaat in gebruik neemt dienen de behuizing, het deksel bakoppervlak wordt verdubbeld . -
Page 43: Het Installeren Van Het Opvangbakje
• BARBECUE-FUNCTIE • Vet en braadvocht uit de etenswaren zullen over de bakplaten naar het opvangbakje stromen . Plaats de bakplaten zodanig dat de groevenkanten zichtbaar zijn . • Leeg het opvangbakje nadat de grill volledig is afgekoeld . Klap vervolgens de platen 180° open door aan de knop rechts van •... -
Page 44: Booster" Functie
Opmerking: Wanneer het apparaat voor het eerst gebruikt wordt, • Sluit het deksel van de grill om hem te laten voorverwarmen . kan er een lichte geur en wat damp vanaf komen . • Druk op de « Booster » knop(pen) van de bijbehorende boven en/ of onderplaat . -
Page 45: Tabel Met Standen En Baktijden
H. Tabel met standen en baktijden De baktijden worden louter ter informatie opgegeven . Ze kunnen variëren naargelang van de gebruikte hoeveelheid en de dikte van de gekozen voedingsmiddelen! *voor rood vlees wordt uitgegaan van een rosé garing VLEES STAND PLAAT TEMPERATUUR BAKTIJD... - Page 46 Gesloten Grill 14 minuten Pens Geopend Grill 18 minuten Gesloten 12 minuten Varkensbrochette Grill Geopend 16 tot 18 minuten Lamskotelet Geopend Grill 6 tot 8 minuten Gesloten 5 minuten Lamsboutsnede Grill Geopend 15 minuten Grill of Merguezworst Geopend 10 minuten Plancha Lamsbrochette Geopend...
- Page 47 Zonnevisfilet Geopend Grill 6 minuten Geopend Grill of 7 minuten Zeeduivelfilet Gesloten Plancha 5 minuten Geopend 4 minuten Jakobsschelpen Grill Gesloten 2 minuten Grill Inktvis Geopend 6 minuten Plancha Grill Grote gambas Geopend 6 minuten Plancha Hele vis (450g) Gesloten Grill 15 tot 20 minuten Witvisfilet...
-
Page 48: Tips Van Chef-Koks
4 . TIPS VAN CHEF-KOKS 5 . REINIGEN EN OPBERGEN • Als u klaar bent met bakken, draait u de middelste knop in de « O » stand en haalt u de stekker uit het stopcontact . Laat de grill volledig afkoelen (minimaal een half uur) alvorens hem schoon te maken . -
Page 49: Vragen/Antwoorden
6 . VRAGEN/ANTWOORDEN WAT TE DOEN ALS: ANTWOORDEN Er komt rookt uit het apparaat tijdens het Het is normaal dat het apparaat rook afgeeft tijdens het eerste gebruik . Vergeet eerste gebruik niet hem te reinigen met een vochtig doekje, voordat u hem aanzet . Het apparaat gaat uit zichzelf uit Controleer of de middelste knop niet in de «... -
Page 50: Istruzioni Di Sicurezza
. • Nessuna riparazione può essere eseguita dall’utente . • L’uso di accessori non raccomandati o venduti da Cuisinart® può provocare incendi, folgorazione e rischio di infortuni . • Questo apparecchio può essere utilizzato da bambini, a partire dagli 8 anni, e da persone con capacità... - Page 51 conoscenze, qualora possano beneficiare di una sorveglianza o di istruzioni preliminari riguardanti l’utilizzo dell’apparecchio in tutta sicurezza e qualora ne comprendano i rischi . I bambini non devono giocare con l’apparecchio . La pulizia e la manutenzione dell’apparecchio non possono essere eseguite da bambini senza sorveglianza .
-
Page 52: Introduzione
2 . CARATTERISTICHE PRODOTTO Complimenti per l’acquisto! 1 . Base Da oltre 30 anni, Cuisinart® sviluppa una gamma completa di 2 . Impugnatura a pressione termoisolante apparecchi che consentono agli appassionati di cucina e ai grandi 3 . Piastre di cottura antiaderenti: chef di esprimere al meglio la loro creatività... -
Page 53: Utilizzo
3 . UTILIZZO C. Consigli per l’utilizzo Grazie alla cerniera esclusiva, il grill Cuisinart permette di cuocere A. Prima del primo utilizzo gli alimenti in posizione chiusa o aperta a 180°, raddoppiando così la superficie di calore disponibile . Anche il coperchio può essere... -
Page 54: Inserimento Del Contenitore Di Raccolta Del Liquido
• POSIZIONE BARBECUE • Il grasso e il liquido di cottura degli alimenti scorrono sulle piastre e vengono raccolti nell’apposito contenitore . Installare le piastre di cottura con i lati striati visibili, quindi aprire • Svuotare il contenitore di raccolta del liquido dopo che il grill si è il piano di cottura a 180°... -
Page 55: Funzione "Booster
• È quindi possibile modificare, se necessario, la temperatura di ogni • Dopo aver installato le piastre, attaccate l’apparecchio a una piastra durante la cottura . presa di corrente elettrica, quindi girate il pulsante centrale sulla posizione prescelta (Manuale o “Max”), come illustrato nella sezione Nota: Quando viene utilizzato per la prima volta, l’apparecchio può... -
Page 56: Tabella Tempi E Modalità Di Cottura
H. Tabella tempi e modalità di cottura I tempi di cottura riportati di seguito sono a scopo esclusivamente indicativo, e variano in base alla quantità e allo spessore del cibo! *per le carni rosse, la cottura indicata è «al sangue» CARNI POSIZIONE PIASTRA... - Page 57 Chiusa 12 minuti Spiedino di maiale Grill Aperta 16 - 18 minuti Braciola di arrosto Aperta Grill 6 - 8 minuti Chiusa 5 minuti Trancio di arrosto Grill Aperta 15 minuti Grill o Salsiccia Merguez Aperta 10 minuti Plancha Spiedino di agnello Aperta Grill 5 minuti...
- Page 58 Aperta 4 minuti Cappesante Grill Chiusa 2 minuti Grill Calamari Aperta 6 minuti Plancha Grill Gamberoni Aperta 6 minuti Plancha Pesce intero (450g) Chiusa Grill 15 - 20 minuti Filetto di pesce bianco Aperta Plancha 6 minuti (branzino/luccioperca/merluzzo) Chiusa Grill 8 minuti VEDURE POSIZIONE...
-
Page 59: Il Parere Degli Chef
4 . IL PARERE DEGLI CHEF 5 . PULIZIA E MANUTENZIONE • Una volta terminata la cottura, girare il pulsante centrale su «O» e staccare l’apparecchio dalla presa elettrica . Lasciare raffreddare completamente il grill (almeno mezz’ora) prima di pulirlo . •... -
Page 60: Domande/Risposte
6 . DOMANDE/RISPOSTE COSA FARE SE: RISPOSTE L’apparecchio fa fumo durante il primo È normale che l’apparecchio sprigioni del fumo durante il primo utilizzo . Pulirlo utilizzo? con un panno umido prima di metterlo in funzione . L’apparecchio si spegne da solo? Controllare che il pulsante centrale non sia girato in posizione “O”... -
Page 61: Consignas De Seguridad
. • El usuario no puede realizar reparación alguna en el electrodoméstico . • La utilización de accesorios no recomendados o vendidos por Cuisinart® puede provocar incendio, electrocución y lesiones . - Page 62 a la utilización del mismo con total seguridad y siempre que sean capaces de comprender los riesgos potenciales que supone . Los niños no deben jugar con este electrodoméstico . No se puede dejar la limpieza y el mantenimiento del mismo en manos de niños sin vigilancia . •...
-
Page 63: Introducción
2 . CARACTERÍSTICAS DEL PRODUCTO ¡Felicidades por su compra! 1 . Base Desde hace más de 30 años, Cuisinart® desarrolla una gama completa 2 . Empuñadura de presión termoaislante de electrodomésticos culinarios que permiten a los amantes de la 3 . Placas de cocción antiadherentes: cocina y a los grandes chefs expresar plenamente su creatividad . -
Page 64: Uso
3 . USO C. Consejos de uso Gracias a su bisagra exclusiva, el grill Cuisinart le permitirá cocinar A. Antes del primer uso los alimentos en posición cerrada o abierta a 180°, duplicando así la superficie de cocción disponible . La tapa también se puede ajustar Antes de la primera utilización, limpie el cuerpo del aparato, la tapa... -
Page 65: Instalacion Del Recipiente Para Jugos De Cocción
• POSICIÓN BARBACOA • La grasa y los jugos de cocción contenidos en los alimentos escurrirán por las placas hasta llegar al recipiente . Instale las placas de cocción con las caras estriadas hacia fuera, • Vacíe el recipiente para jugos de cocción una vez que el grill se haya luego abra el plano de cocción a 180°... -
Page 66: Funcion "Booster
• Después podrá modificar la temperatura de cada placa durante la • Después de haber instalado las placas, enchufe el aparato a la red cocción, si así lo desea . eléctrica y coloque el botón central en posición de su elección (Manual o «Max»), tal y como se indica en la sección anterior . -
Page 67: Tabla De Sistemas Y Tiempos De Cocción
H. Tabla de sistemas y tiempos de cocción Los tiempos de cocción son a título indicativo, pueden variar en función de la cantidad utilizada y del grosor de los alimentos elegidos . * Para la carne roja, la cocción indicada es «poco hecha» . CARNE POSICIÓN TIEMPO DE COCCIÓN... - Page 68 Cerrado 12 minutos Brocheta de cerdo Parrilla Abierto 16 a 18 minutos Chuletas de cordero Abierto Parrilla 6 a 8 minutos Cerrado 5 minutos Rosbif Parrilla Abierto 15 minutos Parrilla o Chorizo Abierto 10 minutos Plancha Brocheta de cordero Abierto Parrilla 5 minutos Magret de pato...
- Page 69 Abierto 4 minutos Vieiras Parrilla Cerrado 2 minutos Grill Calamar Abierto 6 minutos Plancha Parrilla Langostinos Abierto 6 minutos Plancha Pescado entero (450g) Cerrado Parrilla 15 a 20 minutos Filete de pescado blanco Abierto Plancha 6 minutos (lubina/merluza, perca/bacalao) Cerrado Parrilla 8 minutos VEDURA...
-
Page 70: Sugerencias De Los Chefs
4 . SUGERENCIAS DE LOS CHEFS 5 . LIMPIAR Y GUARDAR • Cuando haya terminado de cocinar, coloque el interruptor central en posición «0» y desenchufe el aparato . Deje que el grill se enfríe completamente (mínimo ½ hora) antes de limpiarlo . •... -
Page 71: Preguntas Y Respuestas
6 . PREGUNTAS Y RESPUESTAS QUÉ HACER SI: RESPUESTAS Sale humo durante el primer uso . Es normal que salga humo en la primera utilización . Puede limpiar el grill con un trapo húmedo antes de ponerlo en marcha . El aparato se apaga solo . - Page 72 BABYLISS SARL 99 Avenue Aristide Briand 92120 Montrouge – France IB-13/282A 17_GR50E_IB_RC.indd 72 29/05/17 08:29...