Table des Matières
Publicité
Les langues disponibles
Les langues disponibles
Liens rapides
Publicité
Chapitres
Table des Matières

Manuels Connexes pour FUAVE ACS09K01


Sommaire des Matières pour FUAVE ACS09K01
- Page 2 FUAVE ACS09K01 Bedieningshandleiding Manual Manuel d’instructions Mobiele Airconditioner/Luchtontvochtiger Mobile Airconditioner/Dehumidifier Climatiseur/Deshumidificateur Mobile...
-
Page 3: Table Des Matières
INHOUD Technische gegevens Veiligheidswaarschuwingen Algemene Veiligheidswaarschuwingen Elektrische veiligheid Veiligheid rond het koelmiddel R290 Maximaal effect gebruik Beschrijving Installatie Werking Werking met afstandsbediening Waterafvoer Veiligheid Schoonmaak en onderhoud Probleemoplossing Recycling Dit apparaat gebruikt een brandbaar koelmiddel. Als het koelmiddel lekt en blootgesteld wordt aan een externe ontstekingsbron bestaat er brandgevaar! Lees voor gebruik deze handleiding zorgvuldig en geheel door. -
Page 4: Technische Gegevens
TECHNISCHE GEGEVENS Type Fuave ACS09K01 AI0653 Batch Cooling capacity 9000Btu/h Heating capacity ---- Refrigerant R290/170g Permissible excessive Discharge 2.6MPa operating pressure Suction 1.0MPa Max allowable pressure 2.6MPa Weight 25,3kg Rated voltage 220-240V~ Rated Frequency 50Hz Standard Current Cooling 4.35A rating... -
Page 5: Veiligheidswaarschuwingen
VEILIGHEIDSWAARSCHUWINGEN Lees alle veiligheidsinstructies en andere instructies. Het niet naleven van alle instructies kan letsel of materiele schade veroorzaken. Algemene veiligheidswaarschuwingen • Dit apparaat is uitsluitend geschikt voor huishoudelijk gebruik. • Installeer het apparaat volgens de installatie-instructies. Onjuiste installatie kan waterlekkage, elektrische schokken, brand of schade aan eigendommen veroorzaken. - Page 6 • Zorg ervoor dat stekker en stopcontact te allen tijde goed zichtbaar en bereikbaar zijn. • Plaats geen voorwerpen op het apparaat. • Laat een werkend apparaat niet zonder toezicht achter, ook niet even! • Gebruik het apparaat niet in de nabijheid (minimaal 1 meter afstand) van licht ontvlambare of explosiegevoelige stoffen of brandstoffen.
-
Page 7: Elektrische Veiligheid
• Dit apparaat kan door kinderen van 8 jaar en ouder en personen met verminderde fysieke, zintuiglijke of geestelijke vaardigheden of gebrek aan ervaring en kennis worden gebruikt wanneer er toezicht op hen wordt gehouden of wanneer zij instructies hebben ontvangen aangaande het op veilige wijze gebruiken van het apparaat en begrijpen welke gevaren eraan verbonden zijn. - Page 8 • Het apparaat dient volgens de landelijke bedradingsvoorschriften te worden aangesloten. Controleer voor gebruik of het stopcontact dat u wilt gebruiken geaard • is, geen defecten vertoont en of de spanning op het stopcontact, overeenkomt met die op het typeplaatje van het apparaat. Schade, veroorzaakt door een foutieve spanning valt buiten de garantie! •...
-
Page 9: Veiligheid Rond Het Koelmiddel R290
• Verplaats het apparaat niet door aan de elektrokabel te trekken en neem de stekker in de hand als u die uit het stopcontact wilt nemen. • Trek niet aan, vervorm of wijzig de elektrokabel of dompel het onder in water. Trekken of verkeerd gebruik van de elektrokabel leiden tot schade aan het apparaat en een elektrische schok veroorzaken. -
Page 10: Maximaal Effect Gebruik
• Het apparaat moet zodanig worden opgeslagen dat mechanische defecten worden voorkomen. • Installeer, gebruik of bewaar het apparaat niet in een ruimte met een vloeroppervlakte kleiner dan 9 m². • R290 is geurloos, u zult lekkage dus niet ruiken! •... -
Page 11: Beschrijving
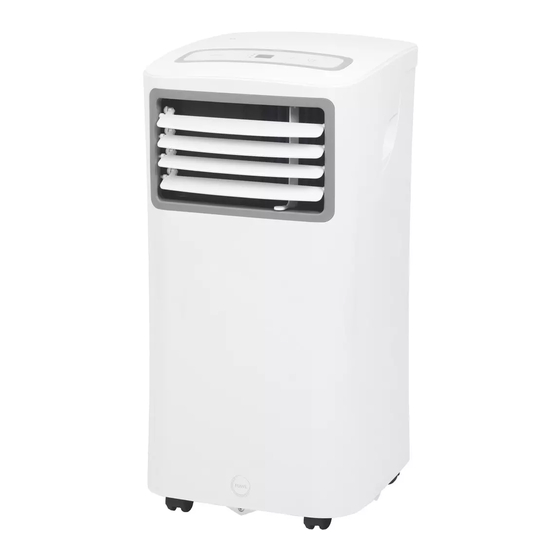
Beschrijving Controle paneel Signaallampje afstandsbediening Horizontale jaloeziehendel (handmatig instellen) Verticale jaloeziehendel (handmatig instellen) Paneel Wieltjes Handvat (beide zijden) Luchtfilter Bovenste luchtinlaat Aansluiting waterafvoerslang ontvochtigen Luchtuitlaat Lagere luchtinlaat Aansluiting waterafvoerslang koelen... -
Page 12: Installatie
Installatie De Fuave ACS09K01 is een mobiele airco/luchtontvochtiger die van kamer naar kamer verplaatst kan worden. • Verwijder al het verpakkingsmateriaal, houd het buiten bereik van kinderen en zorg er daarbij voor dat het apparaat steeds rechtop blijft staan. •... - Page 13 • Waarschuwing! De lengte van de afvoerpijp is speciaal aangepast aan de techniek van deze airco. Vervang hem dus niet door-, en verleng hem niet met een eigen slang, want dat kan het functioneren van de airco negatief beïnvloeden. De slang kan worden uitgerekt, maar om een optimaal effect te bereiken dient u de lengte zo kort mogelijk te houden.
- Page 14 Aan / Uit knop. Hiermee schakelt u de airco aan of uit. Hiermee kiest u voor een bepaalde functie: koelen, ventileren of drogen. Elke keer wanneer u de knop indrukt wisselt de functie; het lampje op het controlepaneel toont welke functie actief is. De ventilator wordt automatisch ingesteld.
-
Page 15: Werking Met Afstandsbediening
Opmerking: wanneer een van de bovenstaande storingen optreedt, schakel de airco uit en controleer eventuele obstakels. Start de airco opnieuw als de storing nog steeds aanwezig is, schakel de airco uit en neem de stekker uit het stopcontact. Neem contact op met uw leverancier. - Page 16 • Algemeen Gebruik de afstandsbediening binnen 8 meter verwijderd van de airco. Richt op de ontvanger. Ontvangst wordt bevestigd door een pieptoon. Zorg ervoor dat er geen obstakels, zoals gordijnen, deuren of dergelijke zich tussen de airco en de afstandsbediening bevinden. Plaats 2 stuks AAA batterijen in de afstandsbediening.
- Page 17 Temperatuur lager toets Temperatuur hoger toets Mode (Functie) toets Swing toets (niet beschikbaar) Reset knopje Aan/Uit toets Ventilatorsnelheid toets Timer On toets Sleep button Timer Off toets Lock knopje LED display toets...
- Page 18 LED display afstandsbediening Mode weergave Afstandsbediening is ingeschakeld weergave Temperatuur / Timer weergave Aan / uit weergave Ventilator weergave Ventilatorsnelheid weergave Timer weergave Lock (slot) weergave • Gebruik toetsen Auto werking Druk op de MODE toets om auto te selecteren. Druk op TEMP of om de gewenste temperatuur in te stellen.
- Page 19 Auto werking Druk op de MODE toets om auto te selecteren. Druk op TEMP of om de gewenste temperatuur in te stellen. Druk op de ON/OFF toets om te starten. Opmerking: In de Auto modus kan de airco logisch kiezen tussen koelen, ventileren en ontvochtigen door het verschil tussen de werkelijke...
- Page 20 Koelen en ventileren werking Druk op de MODE toets om voor de COOL of FAN functie te kiezen. Druk op TEMP of om de gewenste temperatuur in te stellen. Druk op de FAN SPEED om de ventilatiesnelheid AUTO-HIGH- LOW te kiezen. Druk op de ON/OFF toets om te starten.
- Page 21 Ontvochtig werking Druk op de MODE toets om de DRY functie te kiezen. Druk op TEMP of om de gewenste temperatuur in te stellen. Druk op de ON/OFF toets om te starten. Opmerking: In de ontvochtigingsfunctie kan geen ventilatiesnelheid worden gekozen, dit gebeurt automatisch.
- Page 22 Telkens wanneer u op de knop drukt, neemt de tijd toe in stappen van 30 minuten, tot 10 uur en daarna in stappen van 1 uur tot 24 uur. Nadat de TIMER AAN is gezet, duurt het een halve seconde voordat de afstandsbediening het signaal naar de airconditioner verzendt.
-
Page 23: Timer Off
Voorbeelden: De airco moet over 6 uur beginnen met werken. TIMER ON 1. Druk op de TIMER ON-knop, het 6.0h signaal ‘h’ verschijnt op het display. TIMER ON 2. Druk op de TIMER ON-knop om ‘6.0h’ weer te geven op het display 3. -
Page 24: Timer On Off
De airco 2 uur na het instellen stoppen en 10 uur na het instellen opnieuw starten TIMER OFF-TIMER ON (aan-uit-starten) 1. Druk op de TIMER OFF knop. 2. Druk nogmaals op de TIMER OFF knop om 2.0h weer te geven op het display. TIMER ON OFF 3. - Page 25 Sleep (Economy) werking De SLEEP-functie wordt gebruikt om het energiegebruik te beperken wanneer u slaapt: dan hebt u immers niet dezelfde temperaturen nodig om u comfortabel te voelen). De SLEEP-functie kan alleen met de afstandsbediening worden geactiveerd. Deze functie is alleen te gebruiken in de COOL en AUTO modus.
- Page 26 > Power Management Wanneer bij koelen de omgevingstemperatuur lager is de ingestelde temperatuur zal na bepaalde tijd de airco automatisch in de energiebesparende functie werken. De compressor slaat af en de ventilator gaat op LOW (laag) werken. Wanneer de omgevingstemperatuur weer hoger is dan de ingestelde temperatuur gaan de compressor en ventilator weer normaal werken, de energiebesparende functie wordt dan weer uitgeschakeld.
- Page 27 Tijdens het koelen Bij deze werking wordt water onttrokken aan de lucht, dit verdampt grotendeels weer, maar eventueel overtollig water hoopt zich op in het onderste waterreservoir. Als het waterreservoir vol is, piept de airco 8 keer en het display toont P1. De motor en compressor stoppen met werken, behalve de ventilator, deze blijft werken.
-
Page 28: Veiligheid
Veiligheid De Fuave mobiele airco is voorzien van een oververhittingsbeveiliging die het apparaat uitschakelt wanneer het oververhit raakt. Wanneer dit optreedt dient u de stekker uit het stopcontact te nemen en het apparaat minstens 30 minuten tijd te geven om af te koelen. Neem tevens de oorzaak van... - Page 29 Einde-seizoen-reiniging Wanneer het apparaat voor langere tijd wordt opgeslagen dient u de volgende maatregelen te nemen! • Verwijder het gecondenseerde water volledig. Laat het apparaat 12 uur draaien op de ventilatorfunctie, zodat de airco vanbinnen kurkdroog is. • Schakel de airco uit en neem de stekker uit het stopcontact. •...
-
Page 30: Probleemoplossing
Probleemoplossing Het apparaat start niet als ik op de AAN/UIT-knop druk • Zit de stekker in het stopcontact? • Is de aardlekschakelaar ingeschakeld? Geen stroomstoring? • Is de watertank wellicht vol (P1)? Leeg deze dan. • De kamertemperatuur is lager dan de ingestelde temperatuur; pas de ingestelde temperatuur aan. -
Page 31: Recycling
RECYCLING Binnen de EU betekent dit symbool dat dit pro- duct niet met het normale huishoudelijke afval mag worden afgevoerd. Afgedankte apparaten bevatten waardevolle materialen die hergebruikt kunnen en moeten worden, om het milieu en de gezondheid niet te schaden door ongereguleerde afvalinzame- ling. - Page 33 INDEX Technical Specifications Safety Warnings General Safety Warnings Electical Safety Safety in relation to coolant R290 Maximum effect Description Installation Operation Operation with remote control Water drainage Safety Cleaning and maintenance Troubleshooting Removal This appliance uses a flammable refrigerant. If the refrigerant leaks or is exposed, it becomes an external source of ignition and is can cause fire! Before use, read this user manual completely and very...
-
Page 34: Technical Specifications
TECHNICAL SPECIFICATIONS Type Fuave ACS09K01 Batch AI0653 9000Btu/h Cooling capacity Heating capacity ---- Refrigerant R290/170g Permissible excessive Discharge 2.6MPa operating pressure Suction 1.0MPa Max allowable pressure 2.6MPa Weight 25,3kg Rated voltage 220-240V~ Standard Current Cooling 4.35A rating Heating ---- contitions... -
Page 35: General Safety Warnings
SAFETY WARNINGS Read all safety instructions and other instructions. Non-compliance with all the instructions can result in injuries or material damage. General safety warnings • This appliance is suitable only for household use. • Install the appliance according to the installation instructions. Incorrect installation can cause water leakage, electric shocks, fire or damage to your possessions. - Page 36 • Make sure that the plug and socket are visible and accessible at all times. • Do not place any objects on the appliance. • Do not leave an operating appliance unsupervised, also not for a few seconds! • Do not use the appliance near fuels, lightly flammable materials or materials that could easily explode (keep a distance of minimum 1 metre).
-
Page 37: Electrical Safety
• The appliance can be operated by children over the age of 8 and by people with physical, sensory or mental disabilities or who lack knowledge and experience, only if they are supervised or are given instructions on how to use it safely and if they understand the risks involved. - Page 38 • If the appliance is not being used or if you are cleaning it or carrying out maintenance or if you want to move it, first switch it off and then take out the plug from the socket. Always move and/or transport the appliance gently! •...
- Page 39 • Do not use the appliance or switch it off immediately and remove the plug from the socket, if the electric cable, plug or the appliance itself is damaged, broken or malfunctions. The appliance, plug and/or cable must be repaired/replaced by an electrician or a similarly qualified person.
- Page 40 • The repairs must be carried out based on the recommendations of the appliance’s manufacturer. Maintenance and repairs that require the assistance of other qualified personnel must be carried out under the supervision of someone who specialises in the use of inflammable cooling agents.
- Page 41 Description Control panel Indication light for remote control Horizontal shutters (manual setting) Vertical shutters (manual setting) Panel Wheels Handles (both sides) Air filter Top air inlet Connection point for water drainage hose for dehumidifying Air outlet Lower air inlet Connection point for water drain hose for cooling Front side Back side...
- Page 42 Installation The Fuave ACS09K01 is a portable air conditioner/humidifier that can be moved from room to room. • Remove the packaging material, keep it out of children’s reach and make sure that the appliance remains standing upright. • Before use, check whether all the accessories are present and whether the appliance and the accessories do not show any damage.
- Page 43 Werking Before using your airco, check: • Whether it is installed according to the regulations and safety instructions. • Whether it shows no damage or faults. • Whether the socket that you want to use has the same voltage as shown on the type plate of the appliance (220-240V / 50Hz).
- Page 44 ON /OFF button. This switches the airco on or off. With this you select a particular function: cooling, fanning or dehumidifying. Every time you press the button, you change the function; the light on the control panel shows which function is active. The fan is set automatically.
-
Page 45: Operating With The Remote Control
Remark: When one of the aforementioned faults occurs, switch off the airco and check for possible obstacles. Restart the airco. If the fault persists, switch off the airco and take the plug out of the socket. Contact your supplier. Cooling: Press the Mode button until the function light ‘ Cool’... - Page 46 • General Use the remote control within a distance of 8 metres from the airco. Direct it to the receiver. Reception will be confirmed by means of a beep. Make sure that there are on obstacles, such as curtains, doors or alike, are standing in the way of the remote control.
- Page 47 Lower temperatures button Temperatuur hoger toets Mode (Function) button Swing button (not available) Reset button ON/OFF button Fan speed button Timer On button Sleep button Timer Off button Lock button LED display button...
- Page 48 LED display remote control Mode indication Indicates remote control is switched on Temperature / Timer indication ON /OFF indication Fan indication Fan speed indication Time indication Lock indication...
- Page 49 • Using the buttons Auto operation Press on the MODE button to select auto. Press on TEMP or to set the desired temperature. Press on the ON/OFF button to start. Remark: In the Auto mode, the airco can logically select between cooling, fanning and dehumidifying by detecting the difference between the actual room temperature and the temperature set in the remote control.
- Page 50 Cool and Fan operations Press on the MODE button to select the COOL or FAN function. Press on TEMP or to set the desired temperature. Press on the FAN SPEED to select the fan speed AUTO-HIGH-LOW. Press on the ON/OFF button to start.
- Page 51 Dehumidifying operation Press on the MODE button to select the DRY function. Press on TEMP or to set the desired temperature. Press on the ON/OFF button to start. Remark: In the DRY function, you cannot select the fan speed; this occurs automatically. Timer operation Press the Timer ON button to set the automatic switch ON time;...
- Page 52 After the TIMER ON is set, it takes half a second before the remote control transmits the signal to the air conditioner. After approximately 2 seconds, the ‘h’ signal disappears and the set temperature appears again on the LCD display. The timer function control light on the airco goes on.
-
Page 53: Timer Off
Examples: The airco must start operating in 6 hours. TIMER ON 1. Press the TIMER ON button, the 6.0h signal ‘h’ appears on the display. TIMER ON 2. Press on the TIMER ON button to show ‘6.0h’ on the display. 3. -
Page 54: Timer On Off
Stopping the airco 2 hours after setting and restarting it 10 hours after setting. TIMER OFF-TIMER ON (on-off-start) 1. Press the TIMER OFF button. 2. Press on the TIMER OFF button again to show ‘2.0h’ on the display. TIMER ON OFF 3. - Page 55 Sleep (Economy) operation The SLEEP function is used to reduce energy consumption while you sleep. After all, you don’t need the same temperature to feel comfortable. The SLEEP function can only be activated by the remote control. This function can only be used in the COOL and AUTO modes.
-
Page 56: Water Drainage
> Power Management If during COOL, the room temperature is lower than the set temperature, the airco will automatically operate in energy-saving function after an interval. The compressor shuts down and the fan starts working on LOW. When the room temperature rises again above the set temperature, then the compressor and fan will start working normally and the energy-saving function will switch off. - Page 57 During the COOL process continous drain hose remove the drain plug During this process, water is extracted from the air. This largely evaporates, but any excess water accumulates at the bottom water reservoir. When the water reservoir is full, the airco will beep 8 times and the display will show P1.
-
Page 58: Cleaning And Maintenance
Safety The Fuave portable airco is equipped with overheating protection, which switches off the airco when it overheats. When this happens, you must remove the plug from the socket and let the appliance cool down for at least 30 minutes. Eliminate the cause of the overheating: Was the appliance... - Page 59 air filter remove the air filter End-of-season cleaning If the appliance is stored for a long period, you must take the following measures! • Completely remove the condense water. Let the airco fan run for 12 hours so that the airco is totally dry on the inside. •...
- Page 60 Troubleshooting The appliance does not start when I press the ON/OFF button • Is the plug inserted into the socket? • Is the residual-current circuit breaker switched on? No power cut? • Is the water reservoir full (P1)? Then empty it out. •...
- Page 61 REMOVAL Within the EU, this symbol means that this product cannot be disposed of together with the usual house- hold refuse. Disused appliances contain valuable materials that can and must be reused in order not to harm health and the environment by unregulated refuse collection.
- Page 63 TABLE DES MATIÈRES Caractéristiques techniques Avertissement de sécurité Avertissement généraux de sécurité Sécurité électrique Sécurité relative au réfrigérant R290 Effet maximal Description Installation Fonctionnement Fonctionnement avec la télécommande Évacuation d’eau Sécurité Nettoyage et entretien Résolution des problèmes Élimination Cet appareil fait usage d’un produit frigorigène inflammable.
-
Page 64: Caractéristiques Techniques
CARACTÉRISTIQUES TECHNIQUES Type Fuave ACS09K01 Batch AI0653 9000Btu/h Cooling capacity Heating capacity ---- Refrigerant R290/170g Permissible excessive Discharge 2.6MPa operating pressure Suction 1.0MPa Max allowable pressure 2.6MPa Weight 25,3kg Rated voltage 220-240V~ Standard Current Cooling 4.35A rating Heating ---- contitions... -
Page 65: Consignes De Sécurité Générales
CONSIGNES DE SÉCURITÉ Veuillez lire toutes les consignes de sécurité et autres instructions. Le non-respect de toutes les instructions peut provoquer des lésions ou des dommages matériels. Consignes de sécurité générales • Cet appareil est exclusivement destiné à une utilisation domestique. •... - Page 66 • Assurez-vous que la fiche et la prise de courant soient visibles et accessibles à tout moment. • Ne posez pas d’objet sur l’appareil. • Ne laissez jamais un appareil fonctionner sans surveillance, même pour un instant ! • N’utilisez pas l’appareil à proximité (à moins d’1 mètre de distance) de substances ou combustibles légèrement inflammables ou explosifs.
- Page 67 • Cet appareil peut être utilisé sous surveillance par des enfants à partir de 8 ans et des personnes ayant des capacités physiques, sensorielles ou mentales réduites ou un manque d’expérience et de connaissances, ou après que ces personnes ont reçu des instructions pour utiliser l’appareil en toute sécurité...
- Page 68 • Avant utilisation, vérifiez si la prise de courant que vous souhaitez utiliser est reliée à la terre, ne présente aucun défaut et si le voltage correspond à celui indiqué sur la plaquette fixée sur l’appareil. Les dommages provoqués par un voltage inadéquat ne sont pas couverts par la garantie ! •...
-
Page 69: Sécurité Concernant Le Produit Frigorigène R290
• Ne déplacez pas l’appareil en tirant sur le câble électrique et prenez la fiche dans votre main lorsque vous la retirez de la prise de courant. • Ne tirez pas, ne déformez pas et ne modifiez pas le câble électrique et ne le plongez pas dans l’eau. -
Page 70: Utilisation Avec Effet Maximum
• Les personnes qui travaillent avec ou interviennent sur un circuit de refroidissement doivent être en possession de l’agrémentation adéquate qui a été délivré par une instance agréée, attestant que la personne en question est compétente pour manipuler les moyens de refroidissement conformément à... -
Page 71: Description
Description L’écran de contrôle Voyant signalétique télécommande Levier des ailettes horizontales (réglage manuel) Levier des ailettes verticales (réglage manuel) Écran Roulettes Poignée (des deux côtés) Filtre à air Entrée d’air supérieure Raccordement tuyau d’évacuation d’eau déshumidification Évacuation de l’air Évacuation de l’air inférieure Raccordement tuyau d’évacuation d’eau refroidissement avant arrière... -
Page 72: Installation
Installation Le Fuave ACS09K01 est un climatiseur / déshumidificateur mobile qui peut être déplacé d’une pièce à l’autre. • Enlevez l’emballage, tenez celui-ci hors de portée des enfants et assurez-vous que l’appareil soit toujours en position verticale • Avant utilisation, vérifiez si tous les accessoires sont présents et si l’appareil ou les accessoires ne présente(nt) pas de dommages. -
Page 73: Fonctionnement Avec L'écran De Contrôle
Fonctionnement Avant de faire fonctionner votre climatiseur, veuillez contrôler : • s’il a bien été installé conformément aux prescriptions et consignes de sécurité ; • s’il ne présente pas de dommages ou de défauts ; • si la prise de courant que vous souhaitez utiliser fournit la tension indiquée sur la plaquette du type de l’appareil (220-240V / 50Hz) ;... - Page 74 Touche Ouvert / Fermé. Vous l’utilisez pour mettre en marche ou pour éteindre le climatiseur. Cette touche vous permet de choisir une fonction donnée : refroidissement, ventilation ou déshumidification. Chaque fois que vous appuyez sur la touche, la fonction change ; le voyant sur l’écran de contrôle indique la fonction qui est active.
- Page 75 Safety codes: Le réservoir d’eau est plein : Raccordez le tuyau d’évacuation au point d’évacuation inférieur et vidangez l’eau collectée, voir chapitre évacuation d’eau. Si ce code de sécurité réapparait fréquemment, contactez votre fournisseur. Remarque : lorsque l’une des pannes ci-dessus se produit, éteignez le climatiseur et vérifiez les obstacles éventuels.
-
Page 76: Fonctionnement Avec La Télécommande
Fonctionnement avec la télécommande • Spécification Type de télécommande RG51B30/CE Type de piles 2x AAA 1.5 V Distance de transmission 8 mètres • Généralités Utilisez la télécommande dans un rayon de 8 mètres à partir du climatiseur. Dirigez-la vers le récepteur. La réception est confirmée par un bip. - Page 77 Touche de température plus basse Touche de température plus élevée Touche Mode (Fonction) Touche Swing (oscillement - non disponible) Touche de réinitialisation Touche Allumé / Éteint Touche de vitesse du ventilateur Touche Minuterie activée Touche Veille Touche Minuterie désactivée Touche Verrouillage Touche affichage LED...
- Page 78 Télécommande d’affichage LED Affichage du Mode Affichage La télécommande est en fonction Affichage de la température / Minuterie Affichage Allumé / Éteint Affichage Ventilateur Affichage de la vitesse du ventilateur Affichage de la minuterie Affichage Lock (Verrouillage)
- Page 79 • Utilisation des touches Fonctionnement automatique Appuyez sur la touche MODE sélectionner le mode automatique. Appuyez sur TEMP ou pour régler la température souhaitable. Appuyez sur la touche ON/OFF pour démarrer. Remarque : En mode Automatique, le climatiseur peut logiquement choisir entre refroidir, ventiler ou déshumidifier en détectant la différence entre la température ambiante réelle et la température réglée sur la télécommande.
- Page 80 Fonctionnement refroidissement et ventilation Appuyez sur la touche MODE pour choisir la fonction COOL ou FAN. Appuyez sur TEMP ou pour régler la température souhaitable. Appuyez sur la touche FAN SPEED pour choisir la vitesse de ventilation : AUTO-HIGH- LOW. Appuyez sur la touche ON/OFF pour démarrer.
- Page 81 Fonctionnement déshumidification Appuyez sur la touche MODE pour choisir la fonction DRY. Appuyez sur TEMP ou pour régler la température souhaitable. Appuyez sur la touche ON/OFF pour démarrer. Remarque : En mode déshumidification, la vitesse de ventilation ne peut pas être sélectionnée car elle est réglée automatiquement.
- Page 82 Après avoir mis en fonction la minuterie (TIMER ON), la télécommande envoie le signal vers le climatiseur après 1/2 seconde. Puis, après environ 2 secondes, le signal « h » disparaît et la température réglée réapparaît sur l’écran LCD. La fonction de minuterie va s’allumer sur le climatiseur. Réglage de l’heure d’arrêt automatique Appuyez sur la touche TIMER OFF.
- Page 83 Exemples : Le climatiseur doit commencer à fonctionner dans 6 heures. TIMER ON 1. Appuyez sur la touche TIMER ON, le signal 6.0h « h » apparaît sur l’écran. TIMER ON 2. Appuyez sur la touche TIMER ON pour afficher « 6.0h » sur l’écran 3.
- Page 84 Le climatiseur doit s’arrêter 2 heures après le réglage et redémarrer 10 heures après le réglage. TIMER OFF-TIMER ON (allumé- arrêt- démarrer) 1. Appuyez sur la touche TIMER OFF. 2. Appuyez une nouvelle fois sur la touche TIMER ON OFF TIMER OFF pour afficher «...
- Page 85 Fonctionnement Sleep (Veille) La fonction SLEEP est utilisée pour économiser l’énergie pendant votre sommeil : en effet, nous n’avez pas besoin d’avoir la même température pour pouvoir bien dormir). La fonction SLEEP ne peut être activée que depuis la télécommande. Cette fonction ne peut être utilisée que dans le mode COOL et AUTO.
-
Page 86: Évacuation D'eau
> Gestion de la puissance Lorsque la température ambiante est plus basse que la température réglée, le climatiseur se remettra automatiquement après un certain temps dans sa fonction d’économie d’énergie. Le compresseur s’éteint et le ventilateur va fonctionner en position LOW (basse). Lorsque la température ambiante est à... - Page 87 Pendant le refroidissement tuyau d’évacuation continue enlevez le bouchon de vidange Pendant cette fonction, l’eau est retirée de l’air et s’évapore en partie, mais l’eau excédentaire s’accumule dans le réservoir d’eau inférieur le cas échéant. Lorsque le réservoir d’eau est plein, le climatiseur fait bip 8 fois et l’écran indique P1.
-
Page 88: Sécurité
Sécurité Le climatiseur mobile Fuave est équipé d’une protection anti-surchauffe qui éteint l’appareil en cas de surchauffe. Si cela se produit, vous devez retirer la fiche de la prise de courant et laisser refroidir l’appareil au moins pendant 30 minutes. Éliminez également la cause de la surchauffe : l’appareil est-il (partiellement) recouvert ? Se trouve-t-il près d’un mur ou d’un obstacle... -
Page 89: Résolution Des Problèmes
filtre à air comment enlever le filtre à air Nettoyage de fin de saison En cas de stockage prolongé si l’appareil est inutilisé pendant une longue période, veuillez prendre les mesures suivantes ! • Éliminez entièrement l’eau de condensation. Faites fonctionner l’appareil en fonction de ventilation pendant 12 heures, pour vous assurer que le climatiseur soit entièrement sec à... -
Page 90: Élimination
On dirait que l’appareil ne rafraîchit pas beaucoup • Mesurez la température de soufflerie ; elle doit être ± 10° inférieure à la température ambiante. • L’appareil est-il directement exposé à la lumière du soleil ? Fermez les rideaux. • Les fenêtres ou les portes sont-elles ouvertes ? Fermez-les.