
Manuels Connexes pour FUAVE ACB07K01


Sommaire des Matières pour FUAVE ACB07K01
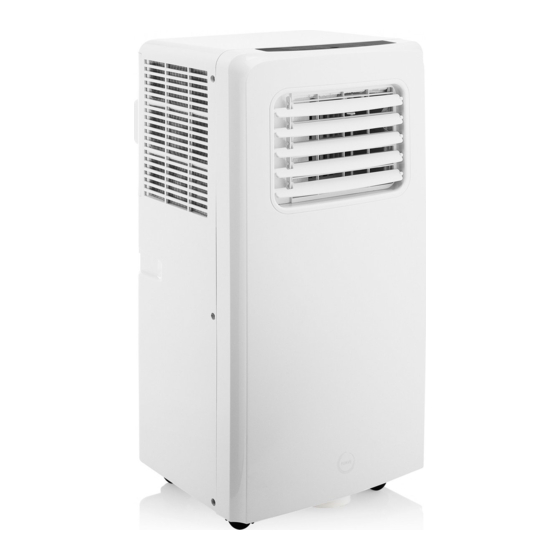
- Page 1 FUAVE ACB07K01 ACB09K01 Bedieningshandleiding Instruction manual Mode d’emploi Mobiele airconditioner / Mobile air conditioning / Climatiseur mobile...
-
Page 2: Table Des Matières
Inhoud Technische gegevens Veiligheid Beschrijving van de onderdelen Werking van het bedieningspaneel Afstandsbediening Vóór het eerste gebruik Gebruik Installatie Schoonmaakonderhoud Problemen oplossen Milieu Technical data Safety Parts description Function of control panel Remote control Before the first use Installation Cleaning maintenance Troubleshooting Environment Données techniques... -
Page 3: Technische Gegevens
4m²(Fuave ACB07K01) or 7.7m² (Fuave ACB09K01). Avant utilisation, lisez attentivement et entièrement le présent manuel d’utilisation. N’installez, n’utilisez ou ne stockez pas l’appareil dans un espace de moins de 4 m² (Fuave ACB07K01) ou 7.7 m² (Fuave ACB09K01). -
Page 4: Veiligheid
VEILIGHEID • Lees deze gebruiksaanwijzing zorgvuldig door voor een correct(e) gebruik, onderhoud en installatie. • Als u de veiligheidsinstructies negeert, kan de fabrikant niet verantwoordelijk worden gehouden voor de mogelijke schade. • Het apparaat is alleen geschikt voor gebruik binnenshuis. •... - Page 5 • Als het netsnoer is beschadigd, moet het om gevaarlijke situaties te voorkomen worden vervangen door de fabrikant, diens servicevertegenwoordiger of een bevoegde persoon. • Dit apparaat mag door kinderen jonger dan 8 jaar, personen met verminderde lichamelijke, zintuiglijke of verstandelijke capaciteiten of gebrek aan kennis worden gebruikt, mits dit gebeurt onder goed toezicht of zij juiste instructies hebben gekregen over het gebruik van het apparaat en de gevaren...
- Page 6 • Neem uitsluitend contact op met een bevoegde onderhoudsmonteur voor reparatie- of onderhoudswerkzaamheden aan dit apparaat. • Trek niet aan het netsnoer en vervorm of wijzig het niet. • Dompel het ook niet onder in water. Door aan het netsnoer te trekken of het verkeerd te gebruiken, kunt u het apparaat beschadigen en een elektrische schok veroorzaken.
- Page 7 • Het apparaat mag niet worden opgeslagen in een ruimte met voortdurend werkende ontstekingsbronnen (bijvoorbeeld: open vuur, een werkend gasapparaat of een werkende elektrische verwarming). • Doorboren of verbranden is niet toegestaan. • Het apparaat moet worden geïnstalleerd, gebruikt en opgeslagen in een ruimte met een vloeroppervlak van meer dan X m2.
-
Page 8: Beschrijving Van De Onderdelen
• Houd batterijen uit de buurt van kinderen. Batterijen zijn geen speelgoed! • Open de batterijen niet met kracht. • Vermijd contact met metalen voorwerpen (ringen, spijkers, schroeven, etc.) om gevaar van kortsluiting te voorkomen! • Door kortsluiting kunnen batterijen heet worden of zelfs ontbranden. -
Page 9: Werking Van Het Bedieningspaneel
10. Slangaansluiting (airconditioner-uiteinde) 11. Raamafdichting + klittenband 12. Afstandsbediening 13. Batterijen WERKING VAN HET BEDIENINGSPANEEL Aan/uit-knop Temperatuurknoppen Modusknop Regelknop voor ventilatorsnelheid Timerknop (aan/uit) -
Page 10: Afstandsbediening
AFSTANDSBEDIENING Knop voor hogere temperatuur Modusknop Regelknop voor ventilatorsnelheid Timerknop (aan/uit) Knop voor lagere temperatuur Aan/uit-knop VÓÓR HET EERSTE GEBRUIK Voordat u de handelingen in dit gedeelte uitvoert: • Kies een geschikte locatie in de buurt van een stroomvoorziening. • Installeer de afvoerslang. -
Page 11: Gebruik
GEBRUIK Koelen • Druk op de modusknop tot het koelingspictogram verschijnt. • Druk op de knop om de gewenste temperatuur voor de ruimte te selecteren. • Het duurt ongeveer 5 minuten voordat het koelen wordt gestart. • Druk op de knop voor de ventilatorsnelheid om de luchtstroom aan te passen. -
Page 12: Installatie
Alarmfunctie voor vol intern waterreservoir • Het waterreservoir in de airconditioner is uitgerust met een veiligheidsschakelaar om het waterpeil te controleren. Wanneer het waterpeil een verwachte hoogte bereikt, gaat er een lampje branden om aan te geven dat het waterreservoir vol is. Voer de bovenstaande stappen uit om het water af te voeren. -
Page 13: Gebruik Raamafdichting
Gebruik raamafdichting Let op: zet de airco pas aan als u de raamafdichting heeft bevestigd. Hiermee voorkomt u dat de warme uitblaaslucht van de airco juist in huis rond gaat waaien. Deze raamafdichting is niet geschikt voor kiepramen. 1. Klittenband raamkozijn Reinig het raam en het raamkozijn met schoonmaak- of afwasmiddel, zodat deze stof- en vetvrij zijn. -
Page 14: Schoonmaakonderhoud
6. Luchtafvoerslang bevestigen Steek de luchtafvoerslang van de airco door het gat in de raamafdichting. Sluit hierna de rits tot de luchtafvoerslang vastzit. De raamafdichting is nu klaar voor gebruik. U kunt de airco aanzetten. SCHOONMAAKONDERHOUD • Koppel het apparaat los van het stopcontact voordat u het reinigt. •... -
Page 15: Problemen Oplossen
PROBLEMEN OPLOSSEN Probleem Mogelijke oorzaken Voorgestelde oplossingen Het apparaat • Het lampje voor het • Laat het water uit het wordt niet waterreservoir knippert waterreservoir lopen. ingeschakeld en het reservoir is vol. • Wijzig de temperatuur. wanneer u • De kamertemperatuur op de aan/ is hoger dan de uitknop drukt. -
Page 16: Milieu
Het apparaat • Warmtebescherming: • Laat de temperatuur wordt wanneer de in de ruimte afkoelen automatisch temperatuur bij voordat u het apparaat uitgeschakeld de luchtuitlaat opnieuw start. in de stijgt tot meer dan verwarmings- 70°C, wordt het modus. apparaat automatisch uitgeschakeld. -
Page 17: Safety
SAFETY • Please read this user’s manual carefully to ensure proper use, maintenance and installation. • By ignoring the safety instructions the manufacturer cannot be held responsible for the damage. • The appliance is for indoor use only. • Do not use the unit on a socket that is damaged or that has not been installed correctly. - Page 18 • This appliance can be used by children aged 8 years and above, persons with reduced physical, sensory, and mental capabilities or persons with a lack of experience and knowledge if they have been given correct supervision or instruction concerning the use of the appliance in a safe way and understand the hazards involved.
- Page 19 • Keep ventilation openings clear of obstructions. • Any person who is involved with working on or opening a refrigerant circuit should hold a current valid certificate from an industry accredited assessment authority which authorizes their competence to handle refrigerants safely in accordance with an industry recognized assessment specification.
- Page 20 • If the appliance is installed, operated or stored in a non- ventilated area, the room must be designed to prevent to the accumulation of refrigerant leaks that could result in a fire risk or explosion due to ignition of the refrigerant caused by electric heaters, stoves, or other sources of ignition.
-
Page 21: Parts Description
Refrigerant (CE) N 842/2006: This unit contains the refrigerant R290. The amount of refrigerant is less than 1kg, and is in a closed cooling circuit. The coolant does have zero ozone depletion potential, but is a so-called greenhouse gases under the Kyoto Protocol and may thus contribute to global warming, if it is released to the atmosphere. -
Page 22: Function Of Control Panel
FUNCTION OF CONTROL PANEL Power (on/off) button Temperature buttons Mode button Fan speed adjustment button Timer (on/off) button REMOTE CONTROL Temperature up button Mode button Fan speed adjustment button Timer (on/off) button Temperature down button Power (on/off) button... -
Page 23: Before The First Use
BEFORE THE FIRST USE Before starting operations in this section: • Find a place where there is power supply nearby. • Install the exhaust hose and adjust the window position well. • The supplied small white clips must be mounted on the window kit. •... -
Page 24: Installation
Internal Tank Water Full Alarm Function • The inner water tank in the air-conditioner has one water level safety switch that controls the water level. When the water level reaches an anticipated height, the water full indicator lamp lights up. Follow above steps to drain the water. - Page 25 • Fix the hose connector window end(8) to the nearest windowsill. Use window seal Don’t turn on the air conditioner until after you’ve attached the window seal. This will prevent the air conditioner’s warm exhaust air from circulating around the house. This window seal isn’t suitable for tilt windows.
-
Page 26: Cleaning Maintenance
CLEANING MAINTENANCE • Before cleaning, disconnect the unit from any electric supply outlet. • First clean the surface with a neutral detergent and wet cloth, and then wipe it with a dry cloth. • Do not use gasoline or other chemicals to clean the unit. •... -
Page 27: Troubleshooting
TROUBLESHOOTING Troubles Possible Causes Suggested Remedies The unit • Water full indicator lamp • Drain the water out of does not blinks and water tank is the water tank. start when full. • Adjust the temperature. pressing • Room temperature is power higher than the setting button. -
Page 28: Environment
E0 Code. • Room temperature • Replace room sensor failed. temperature sensor. E2 Code. • Water tank full • Please empty the water tank. ENVIRONMENT This appliance should not be put into the domestic garbage at the end of its durability, but must be offered at a central point for the recycling of electric and electronic domestic appliances. -
Page 29: Sécurité
SÉCURITÉ • Veuillez lire attentivement ce mode d’emploi pour veiller à une utilisation, un entretien et une installation appropriées. • Si vous ignorez les consignes de sécurité, le fabricant ne peut être tenu pour responsable des dommages. • L’appareil est uniquement conçu pour un usage intérieur. •... - Page 30 • Cet appareil peut être utilisé par des enfants à partir de 8 ans et par des personnes ayant des capacités physiques, sensorielles ou mentales réduites ou un manque d’expérience et de connaissances si elles bénéficient d’une supervision ou d’instructions concernant l’utilisation de l’appareil en toute sécurité...
- Page 31 • Ne tirez pas sur le cordon d’alimentation, ne le déformez ou ne le modifiez pas, et ne l’immergez pas dans de l’eau. Tirer ou mal utiliser le cordon d’alimentation peut endommager l’appareil et provoquer une électrocution. • Attention à respecter la réglementation nationale relative au gaz.
- Page 32 • Ne pas percer, ni brûler. • L’appareil doit être installé, actionné et entreposé dans un local d’une superficie supérieure à X m2. (X=4 pour 7000 Btu/u, ; X=7,7 pour 9000 Btu/u) • Cet appareil contient Y g (voir la plaque signalétique au dos de l’appareil) de gaz réfrigérant R290.
-
Page 33: Description Des Pièces
• Suite à un court-circuit, les batteries et piles peuvent chauffer excessivement, voire s’enflammer, ce qui peut entraîner des brûlures. • Pour votre sécurité, les pôles de batteries devraient être recouverts par des languettes adhésives pendant le transport. • Ne touchez pas les batteries et piles percées ou présentant une fuite. -
Page 34: Fonction Du Panneau De Commande
FONCTION DU PANNEAU DE COMMANDE Bouton marche/arrêt Boutons de température Bouton de mode Bouton de réglage de vitesse du ventilateur Bouton marche/arrêt du minuteur... -
Page 35: Télécommande
TÉLÉCOMMANDE Bouton d’augmentation de la température Bouton de mode Bouton de réglage de vitesse du ventilateur Bouton marche/arrêt du minuteur Bouton de diminution de la température Bouton marche/arrêt AVANT LA PREMIÈRE UTILISATION Avant de commencer les opérations dans cette section : •... -
Page 36: Utilisation
UTILISATION Refroidissement • Appuyez sur le bouton mode jusqu’à ce que l’icône « Cool » apparaisse. • Appuyez sur le bouton pour sélectionner la température de la pièce souhaitée. • Attendre environ 5 minutes que le refroidissement démarre. • Appuyez sur le bouton de vitesse du ventilateur (« fan speed ») pour régler le débit d’air. -
Page 37: Fonction D'alarme De Niveau D'eau Maximum Dans Le Réservoir Interne
Drainage • Après une utilisation prolongée et avant le stockage, vous devrez vidanger l’eau recueillie. Préparez un emplacement ou un plateau approprié pour recueillir l’eau et retirez le bouchon en caoutchouc du trou de drainage situé au fond de l’appareil. Le drainage se mettra alors en route. -
Page 38: Utilisation Du Kit De Calfeutrage
• Fixez (8) le raccord de tuyau côté fenêtre sur le rebord de fenêtre le plus proche. Utilisation du kit de calfeutrage Installez le kit de calfeutrage avant d’allumer le climatiseur mobile. Vous éviterez ainsi que l’air chaud qui sort du climatiseur se répande dans la maison. -
Page 39: Ouvrir Le Kit De Calfeutrage
5. Ouvrir le kit de calfeutrage Ouvrez la tirette du kit de calfeutrage d’environ 50 centimètres. 6. Fixer le tuyau d’évacuation d’air Faites passer le tuyau d’évacuation d’air à travers l’ouverture du kit de calfeutrage. Fermez la tirette afin que le tuyau d’évacuation d’air reste en place. -
Page 40: Dépannage
DÉPANNAGE Résolution Causes possibles Solutions suggérées pannes L’unité ne • Le témoin de réservoir • Vidangez le réservoir démarre pas d’eau plein clignote, et d’eau. lorsqu’on le réservoir d’eau est • Réglez la température. appuie sur plein. le bouton • La température marche/arrêt. -
Page 41: Environnement
Appareil • Le sol n’est pas • Placez l’appareil sur un bruyant. horizontal ou pas assez sol horizontal et plat si plat. possible. • Le son provient de l’écoulement du réfrigérant à l’intérieur du climatiseur. E0 Code. • La sonde de •...