Publicité
Les langues disponibles
Les langues disponibles
Liens rapides
Publicité

Manuels Connexes pour Antari X-310PRO


Sommaire des Matières pour Antari X-310PRO
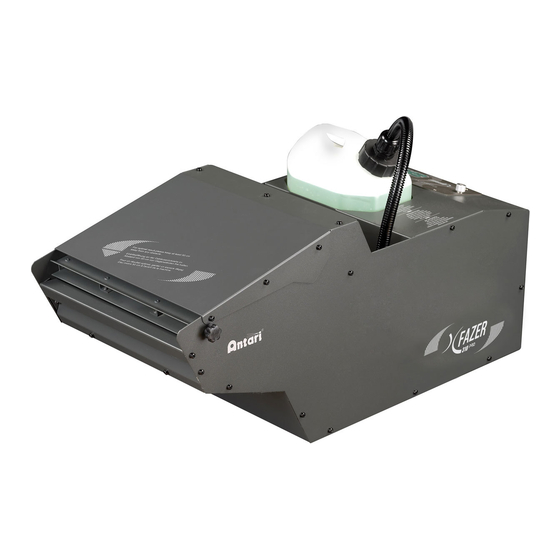
- Page 1 X-310PRO USER MANUAL English Français Deutsch • • • 2010 Antari Lighting and Effects Ltd.
- Page 3 ANTARI X-310PRO Fazer -Introduction Thank you for choosing an ANTARI X-310PRO Fazer. You now own a rugged and powerful state-of-the-art machine. Besides its ability to operate silently, this new model is user-friendly in terms of controlling and operating. In addition, for Antari X-310PRO it is W-DMX compatible. Prior to use, we suggest that you carefully read all of the instructions.
-
Page 4: Important
Before beginning initial setup of your ANTARI Fazer Machine, make sure that there is no evident damage caused by transportation. In the event that the unit's housing or cable is damaged, do not plug it in and do not attempt to use it until after contacting your ANTARI dealer for assistance. -Packaging The shipping carton should include the following items: 1. - Page 5 Place fog machine on a flat surface and remove fog liquid tank cap. Fill with only Antari Fog Fluid. Antari X-310PRO Fazer only works with uncontaminated Antari FLG Fog Fluid. Other fluids may cause spitting and serious clogging problem and could result in the production of an unhealthful fog.
- Page 6 30 seconds, check the hose attached to the tank to make sure there is fluid going through the hose. If you are unable to determine the cause of the problem, do not simply continue pushing the control module button, as this may damage the unit. Return the machine to your ANTARI dealer immediately.
- Page 7 Setting the fog output volume for timer operation - Press the button FUNCTION until the display indicates » Timer Out «. Use the buttons DOWN to adjust the fog output volume in timer mode within the range of 1 % and 100 Setting the fog output volume for continuous operation - Press the button FUNCTION until the display indicates »...
- Page 8 03 Function Keypad 04 Cable For Remote Control (2m/5-pin) -Antari X-30PRO Control Module Operation X-30PRO Wireless Control Module Operation All the X-10PRO features plus wireless capability. The wireless control module X-30PRO consists of a transmitter equipped with two buttons for fog on and off, and a receiver pre-attached to the panel of each X-30PRO.
- Page 9 Press the button “A”, to emit fog. The button “A” has the same function as the button VOLUME on the control panel, i.e. the fog output depends on the setting of menu item »Volume Out«. The display indicates »Volume« followed by the defined value or »NON STOP BURST« when continuous fog output was selected.
- Page 10 In order to use 1 transmitter to control 2 or more machines, turn on the machines respectively. When the displays indicate »Wireless Setup«, press the button “A” 1 second on the transmitter within 15 seconds to establish the signal transmission. -Battery change on the transmitter If the range of the transmitter decreases, the battery is probably exhausted and must be replaced.
- Page 11 There are 3-pin and 5-pin male/female DMX control sockets for connecting your selection located at the rear panel of the X-310PRO fazer. The X-310PRO Fazer has on-board DMX control. This model uses two channels to control Volume output and Fan speed. Whatever channel you select on the unit, the channel next to it will automatically be selected for fan volume control.
- Page 12 Whenever enormous effect is required, press Manual key to emit faze at 100% output MANUAL instantly. -Specifications MODEL X-310PRO Power 100/120 VAC, 230/240 V AC 50-60 Hz Heater 1,000W Fog Output 10,000 c u.ft./min...
- Page 14 0-85 (SLOW) 0-5 (OFF) The X-310PRO Fazer has on-board DMX control. This model uses 2 channels to control Volume output operation and Fan operation. Whatever channel you select on the unit, the channel next to it will be automatically selected for fan volume control. Each channel has a value range of 0 to 255.
- Page 15 ANTARI LIMITED WARRANTY Thank you for purchasing an Antari product from an authorized Antari dealer. We take great pride in the highest quality and reliability of our products. Please follow proper operation and storage procedures outlined in your accompanying user manual.Shall you require any further assistance, please kindly contact sales@antari.com...
- Page 16 ANTARI X-310PRO. -Introduction Nous vous remercions d'avoir choisi une machine à fumée d'ANTARI X-310PRO. Vous êtes en possession d'un produit robuste et puissant. En vue d'utiliser correctement votre nouvel appareil, veuillez lire attentivement ce mode d'emploi. Si vous respectez les instructions suivantes, vous profiterez d'une performance solide et convaincante de votre machine à...
- Page 17 Avant de faire fonctionner votre machine à fumée, vérifier bien qu'il n'y ait eu aucun dommage dû au transport. Si l'appareil ou un câble était endommagé, ne branchez pas la machine et n'essayez pas de l'utiliser sans avoir au préalable contacter votre revendeur d'ANTARI après-vente du magasin.
- Page 18 Placez la machine à fumée sur une surface plane et dévissez le couvercle du réservoir du liquide à fumée. Remplissez le réservor de liquide à fumée ANTARI ou d'un autre liquide à fumée de haute qualité à base d'eau. Refermez le réservoir.
-
Page 19: Important
X-10PRO: La module de contrôle multifonction X-10PRO est reliée à un cordon de 2 m, et est composée de 5 broches XLR, et peut être connectée aux la machine à fumée X-310PRO. Cette commande a pour fonction d'ajuster le temps, les intervalles, et le volume de débit. L'écran LCD des paramètres d'utilisation sont automatiquement munis d'une mémoire constante qui permet à... - Page 20 - Réglage de la durée pour fonctionnement timer Appuyez sur le bouton FUNCTION jusqu'à l'écran indique » Duration Set « [réglage de la durée]. Utilisez les boutons UP et DOWN pour ajuster la durée de chaque dégagement de fumée entre 1 à 200 secondes. - Réglage de la volume de fumée pour le fonctionnement timer Appuyez sur le bouton FUNCTION jusqu'à...
- Page 21 dégagement de fumée est arrêté. Le fonctionnement manuel est prioritaire sur le mode continu et le mode timer. Lorsque un des modes de maniement est activé, la machine à fumée dégage tout le temps de la fumée avec volume de débit maximal quand vous presser le bouton MANUAL MANUAL.
- Page 22 Avec le transmetteur, il est possible de débiter de fumée dedans un rayon d'action de 50 mètres. Le transmetteur est compatible avec chaque récepteur de X-30PRO et peut contrôler des machines illimitée en mémé temps. Pour dégager la fumée, appuyez sur la bouton “A”. Le volume de fumée dépend de l'ajustement sous l'entrée de menu »Volume Out«...
- Page 23 était codée sur l'addresse initial DMX 124, pour exemple, le canal A correspond à l'addresse DMX 124 et le canal B reçoit automatiquement l'addresse initial 125. Attention: La machine à fumée X-310PRO ainsi que le réservoir à liquides et le tuyau à liquides ont...
-
Page 24: Contrôle Du Volume (5 % - 100 %)
été testés et nettoyés. Quand vous mettez-la en service pour la première fois, appuyez sur la touche MANUAL de 3 à 5 secondes. N'essayez pas encore à activer le fonction Timer. En outre, c'est normal si l'appareil fait les bruits de pompe pour environs 5 secondes. Si la machine fonctionne correctement, vous pouvez utiliser toutes les fonctions. - Page 25 -Note d'Exécution Il est recommandé, de reguler le débit du ventilatuer à 100% et le débit de brouillard entre 15 à 20%. Ce réglage garanti un débit constant de brouillard fin. Pour les effets extrêmes, appuyez sur la touche MANUAL pour un débit immédiat de ...
- Page 27 0-5 ( arrêt Le machine à fumée X-310PRO possède un contrôle DMX. Le modèle peut être réglé par deux canaux DMX en ce qui concerne le débit de fumée et le performance du ventilateur. Chaque canal varie entre les valeurs DMX 0 à 255. Des fonctions Timer comme la durée de fumée et intervalle peuvent être programmés par le contrôleur DMX ou par le logiciel DMX via la fenêtre d'effets...
- Page 28 Für die 110V Modelle verwenden Sie bitte ausschließlich 3-adrige, geerdete Steckdosen. Vor Inbetriebnahme darauf achten, dass das Gerät an die richtige Spannung angeschlossen wird. Vor Befüllen des Tanks ist Ihr ANTARI Nebelgerät immer vom Netz zu trennen. Achten Sie darauf, dass das Nebelgerät stets aufrecht installiert ist.
- Page 29 -Auspacken & auf Transportschäden untersuchen Öffnen Sie den Außenkarton und stellen Sie sicher, dass alle Teile, die für den Betrieb des Systems notwendig sind, in einem einwandfreien Zustand eingetroffen sind. Bitte vergewissern Sie sich vor der ersten Inbetriebnahme Ihres ANTARI Nebelgerätes, dass kein...
- Page 30 Transportschaden vorliegt. Sollte das Gehäuse oder das Netzkabel beschädigt sein, Gerät nicht an das Netz anschließen und einschalten, sondern Ihren ANTARI-Händler um Rat fragen. Der Versandkarton sollte die folgenden Artikel enthalten: 1. X-310PRO Fazer mit Netzkabel 2. X-10PRO Steuermodul 3.
- Page 31 Während des Nebelns immer auf die Fluidtankanzeige achten um eine Unterbrechung des Nebeausstoßes zu vermeiden. Weitere Informationen zum Betrieb Ihres ANTARI Nebelgerätes X-310PRO finden Sie unter "Bedienung des Steuermoduls". -Achtung Während des Nebelns immer auf die Fluidtankanzeige achten. Der Betrieb eines Nebelgerätes ohne Fluid kann zu irreparablen Schäden Ihres Gerätes führen.
- Page 32 automatisch in einem nichtflüchtigen Speicher gespeichert. Dadurch bleiben alle Einstellungen erhalten, auch wenn die Maschine ausgeschaltet wird. -Menüeinstellungen mit der Taste FUNCTION - Zeitintervalle für den Timer-Betrieb einstellen Drücken Sie die Taste FUNCTION, bis auf der Anzeige » Interval Set « [Intervall einstellen] erscheint.
- Page 33 Lüfter und Heizelement ein- und ausschalten Drücken Sie die Taste FUNCTION , bis auf der Anzeige » Heater&Fan Open « erscheint. Verwenden Sie die Taste MANUAL, um den Lüfter und das Heizelement ein- [Anzeige MANUAL »Open«] und auszuschalten [Anzeige »Closed«]. - Dauerbetrieb Drücken Sie die Taste VOLUME , um einen dauerhaften Nebelausstoß...
- Page 34 * Sendeeinheit: Mit der Sendeeinheit lässt sich der Nebelausstoß per Funkübertragung über eine Distanz von bis zu 50 Metern auslösen. Die Sendeeinheit ist kompatibel zu allen Empfängern der X-30PRO und kann eine unbegrenzte Anzahl von Maschinen parallel steuern. Drücken Sie die Taste “A”, um den Nebelausstoß auszulösen. Die Taste “A” hat die gleiche Funktion wie die Taste VOLUME am Bedienfeld, d.
- Page 35 zuvor adressiert werden. Schalten Sie dazu die Maschine ein. Drücken Sie die Taste “A” 1 Sekunde auf jeder Sendeeinheit, wenn auf der Anzeige »Wireless Setup« erscheint. Dadurch werden alle zuvor adressierten Sendeeinheiten aus dem Speicher des Empfängers gelöscht. Die Adressierung muss innerhalb von 15 Sekunden nach dem Einschalten der Maschine erfolgen.
- Page 36 -DMX-gesteuerter Betrieb Auf der Geräterückseite befinden sich 3-polige und 5-polige Buchsen zum Anschluss Ihrer Geräte. Das Dunst-Nebel-gerät X-310PRO verfügt über DMX-Ansteuerung. Das Gerät benötigt 2 Kanäle für Ausstoß und Lüfterleistung. Jeder Kanal bewegt sich innerhalb der DMX-Werte 0 bis 255.
- Page 37 100 % zu erreichen. Für einen leisen Betrieb, senken Sie die Lüfterleistung auf das gewünschte Niveau. Das Dunst-Nebelgerät X-310PRO benötigt nach langen Nebelintervallen (ca. 35 - 40 Sekunden) eine Aufheizphase. Das Gerät schaltet dazu selbstständing für ca. 80 Sekunden ab.
- Page 38 -Technische Daten Modell X - 3 1 0 P RO 100/120 V AC, 230/240 V AC, Spannungsversorgung 50/60 Hz Gesamtanschlusswert 1 .0 0 0 W Ausstoßvolumen 1 2 5 m³ /mi n 0 ,6 8 6 p a Ausstoßdruck Aufwärmzeit 1 0 mi n.
- Page 40 86-170 (mittel) 0-85 (langsam) 0-5 ( Das Dunst-Nebelgerät X-310PRO verfügt über DMX- Ansteuerung.Das Gerät benötigt 2 Kanäle für Ausstoß und Lüfterleistung. Jeder Kanal bewegt sich innerhalb der DMX-Werte 0 bis 255. Timer-Funktionen wie Nebeldauer und Intervall können über den DMX-Controller oder die DMX-Steuerungssoftware programmiert werden.
- Page 41 歡迎您成為 ANTARI X-310PRO 專業特效煙霧機的使用者 感謝您選用 Antari X310PRO Fazer 專業煙霧機,此系列煙霧機除了在使用時完全靜音以外,更 增加了人性化及易控性的優點, 能選擇搭配無線 DMX 控制器,增添無限便利。使用煙霧機 之前,我們建議您先仔細閱讀此說明書,依照使用說明書中的說明,讓您在使用 Antari 專業 煙霧機時非常安全,輕易的達到最滿意的煙霧效果,也使的機器的使用壽命更為延長。 注意! 小心觸電,為避免觸電,在需要打開機殼前,請先移 除電源。本包裝中未附有服務零件,如有服務需求 敬請聯繫 Antari 代理商或洽詢合格技術人員。 請依照這份操作說明,以確保機器 再長期使用及保養上的安全性。 -重要安全準則 -避免觸電的安全使用方式: 請保持機器乾燥,僅於室內使用,本產品非為室外使用設計。 使用前請注意電壓及伏特數/赫茲數,所有機種應配合接地型插座使用。 填充煙霧油前,請先拔掉電源插頭。 不使用時請關閉電源,長時間不使用時請拔掉電源插頭。 本產品之設計為不防水,遇潮濕浸水或煙霧油滲出時請即刻拔掉插頭並擦乾機體。 -避免燃燒的安全使用方式 機器內部並無一般使用者可變動之結構,請勿任意打開上蓋及作任何更改的動作,否則...
- Page 42 說明書一份 -選配配件 X-30PRO 液晶顯示無線控制器 FX-310 X-310PRO 飛行箱 -安裝機器 拆開包裝,小心的移除所有的 PE 墊片,特別是機器噴嘴的部分。 將煙霧機平放,取下裝置煙霧油容器的蓋子,並仔細移除輸油管及油量偵測器上的包膜 (此煙霧油管及油量偵測器是設定好的一個組件,請勿任意將兩者分離或拆除) 注入 Antari 的高品質 FLG 水性特效煙霧油至八分滿,並仔細蓋上油蓋。非 Antari 原廠 煙霧油可能會導致煙霧機堵管或油量偵測器腐蝕的問題,甚至其輸出的煙霧可能會造成 人體健康的危害。因使用其他煙霧油所造成的損壞不在保固範圍之內。 -操作機器 將電源線插在有接地的插座上,再將機身後方之電源開關打開至“ON”,暖機約八分鐘 直至控制器上顯示螢幕正確的顯示“ Ready to Faze ” ( 噴煙準備就緒) 為止。 設定 X-10PRO 遙控器上適當的按鍵以調整需要的噴煙時間、輸出量大小及噴煙間距。 控制器上的顯示螢幕會依機器運轉溫度循環顯示 “Warming up” (加溫準備) 以及...
- Page 43 “Ready to Fazer” (準備就緒) 。 當油桶中的煙霧油量過低時,機器內建的藍色 LED 會開始持續閃爍兩分鐘,接著停下動 作來保護幫浦。因此請隨時檢視油桶中的煙油量以避免煙霧輸出中斷。 機器的噴嘴部分,為長條型扇葉設計,可藉由噴嘴兩邊的梅花型螺絲調整並固定所需求 的輸出角度。ㄧ般而言,X- 310PRO 輸出的煙霧經過風扇攪拌,已經呈現較薄的半透明狀, 將機器置放於低處,讓煙霧依自然特性遍佈,會是較佳的使用方式。 關於 Antari X-310PRO 的控制器操作,請參考此說明書後面的”控制器的操作”內容 注意: 煙霧機動作時會造成能見度的降低, 請依場所需求適當使用。 -重要說明 使用煙霧機時,請隨時檢視油桶中的煙油量。在沒有煙油的情況下繼續讓煙霧機動作可能會 造成機器幫浦的永久性損壞。 如果您發現煙霧機的輸出低於您的設定值、幫浦發出雜音或是完全無法輸出動作,請立即將 電源插頭拔出並停止操作。檢查油桶中的油量、外部保險絲、控制器的連接以及外部的電源 供應,若以上部分均無問題,請重新插上電源插頭,等待加熱完成並按下控制器上的 按 MANUAL 鍵 30 秒,若煙霧機仍然不能正常動作,請檢查連接油桶的油管中是否有抽到煙霧油。如您無 法確認問題的所在,請勿繼續使用,以避免造成更嚴重的損壞與危險,並即刻聯絡 Antari 經 銷商。 - X-10PRO 液晶顯示控制器 X-10PRO:控制器:為一配有 10 公尺長連接線和 5 芯的 XLR 連接器的多功能搖控器,適用於...
- Page 44 所欲創造各種所需的效果。而其液晶顯示螢幕和內鍵記憶體可以自動記憶您上次的設定,而 不會因為因關機而遺失。 -操作說明如下: 1. 透過 FUNCTION 功能鍵,您可以藉由次選項頁來設定需要的功能。按一下功能鍵,液晶螢 幕會顯示 INTERVAL SET (噴煙間隔時間),在此功能下,可以調整每次噴煙動作的間隔時間(利 上/下調整鍵,可以將間隔時間設定於 1 至 200 秒之間)。按功能鍵兩次,液晶 用 螢幕會顯示 DURATION SET (持續噴煙時間),在此功能下,可以調整每次噴煙動作的持續時間 (利用 上/下調整鍵,可以將持續噴煙時間設定於 1 至 200 秒之間)。按功能鍵三次, 液晶螢幕會顯示 TIMER OUT (計時器模式下煙量輸出)在此功能下,您可以利用 上/ 下調整鍵,來設定煙霧機處於計時器模式下的煙量輸出。再按功能鍵一下,您會進入 VOLUME OUT (煙量輸出設定模式),在此模式下,您可以利用 上/下調整鍵,來對煙霧機的輸 出做 1%至 100%的線性調整。另外,在 100% 和 1% 的輸出之間,您可以找到 NON STOP BURST 此功能鍵,在此模式下,煙霧機會持續噴煙不停。再按功能鍵一下,選單會顯示...
- Page 45 接收器: - 接收器在經過測試之後會固定在每組 X-30PRO 上,請勿嘗試將它拔除。 * 設定功能: 1. 所有的接收器都能接收任何已完成對頻的發射器。 2. 每個接收器都能記憶五組發射器的訊號。 3. 每個發射器在出廠前都已經完成設定,使用者可以不用重新設定即可使用。最初的設定 為按 A 按鈕可以啓動機器,按 B 按鈕則可以停止機器運作。 4. 若使用者希望透過其他發射器來控制機器(除了原來配備的發射器之外) ,需要在機器開 啓的 15 秒內完成設定,否則機器會在 15 秒之後自動離開設定模式。 設定範例 (1): 若使用者希望設定三組發射器對一台機器 , 當機器啓動且 LCD 螢幕顯示 「Wireless Setup」 (無 線設定),請在 15 秒內分別按下這三組發射器的 A 鈕,即可完成設定配對。 請注意若...
- Page 46 5. 機器具有記憶功能,若在機器啓動也完成設定之後,沒有再設定其他組控制器時,機器可 自動記憶最後設定的控制器組,在機器下次使用開機時,請勿按壓任何控制器的按鈕,經 過 15 秒的設定時間之後,即可以上次所記憶的控制器組來控制機器。 6. 請注意當有新的發射器要與機器對頻時,無論先前有幾組完成設定的控制器都會被洗掉。 註 1: 若希望關閉或重啟無線控制功能,可將 LCD 液晶螢幕選擇至「Wireless On-Off」此頁面, 然後利用 Up(上)或 Down(下)鍵來關閉或重啟無線控制功能。 當煙霧機加熱完成,處於待機狀態時, 無線功能的狀態在 LCD 液晶螢幕表示如下: 無線功能開啟時,LCD 液晶螢幕會顯示「Ready To Faze W」 (W 意指 Wireless) 而當無線功能關閉時, LCD 液晶螢幕則只顯示「Ready To Faze」 。 註 2: 當無線控制距離變短時,有可能是電池沒電了,此時,請將發射器外殼打開,更換一個全新 的 DC 12V 電池,換好後,再將外殼鎖回。 X-10PRO / 5Pin) X-30PRO...
- Page 47 MANUAL 內循環,約 3 ~ 5 秒即可,不要急於設定輸出量及時間。第一次的輸出,機器會發生非常短 暫約 3~ 5 秒空管抽油的聲響,這是正常的情況,在機器順暢的噴出煙霧之後再進行設定所 希望的運轉模式。往後機器在進行搬運或大幅度移動之前,都建議清空油桶,再重新啟用機 器時依照上述的方式讓機器的煙霧油跑一次內循環。 DMX 設定 X-310PRO 機器後背板,內建有 3 Pin 及 5 Pin 的 DMX 公母雙插座,提供 3 Pin 及 5 Pin 連 接線的多樣選擇。 ANTARI 內建 DMX 控制設定模式 頻道 A 風扇轉速控制 0-85 86-170 171-255 一般而言,風速的快慢與煙霧的濃淡成反比,以...
- Page 48 -維護保養您的煙霧機 請定期的清潔您的煙霧機,將可有效的協助您降低零件更換率或維修的費用。 請勿污染煙霧油,隨時蓋上油桶的瓶蓋,及煙霧機上所裝置煙霧油桶的蓋子。 無論何時,請勿在空油桶的情況下,啟動煙霧機。 注意: 由於煙霧油黏稠的特性和高溫的汽化過程,很難完全避免機器堵管的情況發生,然而,因此 強烈建議請於 2,000 個小時運轉工作後做定期的適當保養,如此一來可以確保機器更穩定的 工作及更長的壽命。 -儲放注意事項 為了使煙霧機保持在最佳使用狀況,若長期不使用,至少也應該一個月將煙霧機做一次測試 噴煙的動作,將煙霧機暖機後並持續噴煙幾分鐘後,冷卻後再儲放。 -最佳效果表現注意事項 建議您使用時將風扇設定至 100%轉速的風力,而煙霧量則調整至 15-20%的輸出量,在這樣 的設定值下,可以達成持續最佳效果的表現,而當您需要更大或更小量煙霧輸出的表現時, 可以按上下鍵(Up/ Down)來調整您所需求的煙霧輸出量。 -規格說明 -310 P RO A C1 0 0 V/ 1 2 0 V/ 2 3 0 V/ 2 4 0 V, 5 0 - 6 0 Hz 1,000 3,500...
- Page 50 隔時間,燈光特效設計師可以利用 DMX 控制器或 DMX 控制軟體來完成想要的設定。 如果 DMX 位置被設定在 0 至 5 則煙霧機停止動作。 DMX 位置在 6 至 255 中可以線性的控制煙霧的輸出量。在 6 的時候,煙量輸出是最小的, 而在 255 的時候,煙霧機則提供 100% 的輸出。 注意:在以上的範例中,如果機器被設定在 DMX 124 的位置,則頻道會在一致的 124 而 DMX125 頻道則被用來控制風扇的速度。 X-310PRO 的 Nopstop Burst (不間斷連續噴煙動作)功能無法直接由從 DMX 系統來做控制與設 定。...
- Page 51 ________________________________________________________________________________ ________________________________________________________________________________ ________________________________________________________________________________ ________________________________________________________________________________ ________________________________________________________________________________ ________________________________________________________________________________ ________________________________________________________________________________ ________________________________________________________________________________ ________________________________________________________________________________ ________________________________________________________________________________ ________________________________________________________________________________ ________________________________________________________________________________ ________________________________________________________________________________ ________________________________________________________________________________ ________________________________________________________________________________ ________________________________________________________________________________ ________________________________________________________________________________ ________________________________________________________________________________ ________________________________________________________________________________ ________________________________________________________________________________...
- Page 52 C08XPRO00...