Table des Matières
Publicité
Les langues disponibles
Les langues disponibles
Liens rapides
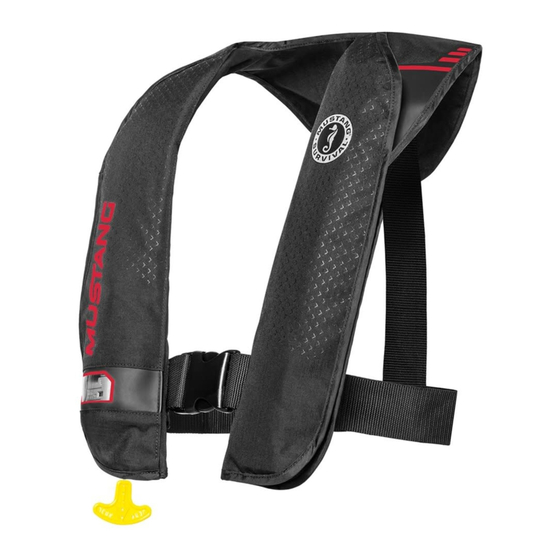
FOR MODEL NUMBERS MD2015 AND MD2017
OWNER'S MANUAL
MD2015
INFLATABLE PFD
MANUAL INFLATION MODEL
APPROVED BY TRANSPORT CANADA
WARNING:
THE MD2015 WILL NOT
INFLATE AUTOMATICALLY UPON
IMMERSION. TAB MUST BE PULLED TO
ACTIVATE INFLATION MECHANISM.
DO NOT REMOVE PRIOR TO SALE
HT3160 REV 29MAY2020
MD2017
INFLATABLE PFD
MANUAL WITH AUTOMATIC BACKUP
INFLATION MODEL
APPROVED BY TRANSPORT CANADA
I
Publicité
Chapitres
Table des Matières

Manuels Connexes pour Mustang Survival MD2015


Sommaire des Matières pour Mustang Survival MD2015
- Page 1 FOR MODEL NUMBERS MD2015 AND MD2017 OWNER'S MANUAL MD2015 INFLATABLE PFD MD2017 INFLATABLE PFD MANUAL INFLATION MODEL MANUAL WITH AUTOMATIC BACKUP INFLATION MODEL APPROVED BY TRANSPORT CANADA APPROVED BY TRANSPORT CANADA WARNING: THE MD2015 WILL NOT INFLATE AUTOMATICALLY UPON IMMERSION. TAB MUST BE PULLED TO ACTIVATE INFLATION MECHANISM.
-
Page 2: Table Des Matières
INFLATING YOUR INFLATABLE PFD .............. 4 SPECIAL CONSIDERATIONS FOR AUTOMATIC DEVICES (MD2017) ... 6 DEFLATING THE INFLATABLE PFD ..............6 RE-ARMING YOUR PFD (MD2015) ..............7 RE-ARMING YOUR PFD (MD2017) ..............9 REPACKING ......................12 IS YOUR PFD IN GOOD AND SERVICEABLE CONDITION? ....12 USAGE BELOW FREEZING ................ - Page 3 HOW AND WHY TO TEST YOUR PFD ............15 HOW DO YOU TEST YOUR PFD USING THE AUTOMATIC INFLATOR? (MD2017) ..........16 HOW DO YOU TEST YOUR PFD USING THE MANUAL INFLATOR? ................16 HOW DO YOU TEST YOUR PFD USING THE ORAL INFLATOR? ................. 17 WEAR YOUR PFD ....................18 HYPOTHERMIA......................18 HOW HYPOTHERMIA AFFECTS MOST ADULTS .......18...
-
Page 4: Inflatable Pfds
INFLATABLE PFDS Inflatable personal flotation devices (PFDs) are special devices in that the flotation of the wearer is not derived from inherently buoyant materials. In order for them to do their job, you, the wearer, must do yours! This means you have the responsibility to ensure you are familiar with the operation and maintenance requirements of your inflatable PFD! You must also be aware of the limitations of the device and know that it is not approved under the Small Vessel... -
Page 5: Instructions For Use
(Fig. 1). Ensure the service indicator is green. If the service indicator is red, the mechanism has been fired or is incorrectly fitted (see “Re-arming Your PFD (MD2015)” on page 7 or see “Re-arming Your PFD (MD2017)” on page 9). -
Page 6: Readiness Checklist
READINESS CHECKLIST Check your Inflatable PFD and ensure all of the checkpoints listed below are true before use. Service indicator is green. No rips, tears or holes; all seams are securely sewn; and the fabric, straps and hardware are still strong. ... -
Page 7: Inflating Your Inflatable Pfd
Activate the inflation system by jerking firmly downward on the pull-tab (Fig. 3). The Inflatable PFD should fully inflate within 5 seconds. Manual Inflator Automatic Inflator MD2015 MD2017 PULL-TAB FIGURE 3 2. Automatic Backup Inflation (MD2017 only) Inflation will occur automatically within 10 seconds after the inflator is immersed in water. - Page 8 When inflated, the carbon dioxide (CO ) used to inflate the PFD will slowly escape through the fabric over time. A slight reduction of pressure will be observed after several hours of inflation. Topping up by oral inflation may be required in the event of very prolonged immersion.
-
Page 9: Special Considerations For Automatic Devices (Md2017)
SPECIAL CONSIDERATIONS FOR AUTOMATIC DEVICES (MD2017) The Inflatable PFD might not be armed when needed, either knowingly or unknowingly. Premature automatic inflation causes several risks that you must address to avoid drowning. Much less common but also important are: Inflation when stored in a tight space could damage the PFD 2. -
Page 10: Re-Arming Your Pfd (Md2015)
THE SERVICE INDICATOR MUST BE GREEN BEFORE PROCEEDING. 6. Refold the Inflatable PFD in accordance with the Repacking section (see “Repacking” on page 12). YOUR INFLATABLE PFD (MD2015) IS NOW READY FOR MANUAL USE... -
Page 11: Cylinder Installation
MD2015 Manual Inflator Cylinder Step 2 Sensor Ring Step 3 Bayonet Step 4 O-Ring Step 3 Service Indicator Lever Step 5 Step 4 Service Indicator: If GREEN unit is operable If RED stop and service unit FIGURE 7 MD2015 MANUAL INFLATOR MD2015 Manual Inflator... -
Page 12: Re-Arming Your Pfd (Md2017)
RE-ARMING YOUR PFD (MD2017) A RE-ARM KIT (MA2014) WITH A VALID BOBBIN INSTALL-BY-DATE (CHECK RE-ARM KIT PACKAGING) IS REQUIRED FOR THIS PROCEDURE. FOLLOW INSTRUCTIONS IN THE EXACT SEQUENCE BELOW. Open the inflator cover flap so that the manual/automatic inflator is exposed (Fig. 9). 2. -
Page 13: Service Indicator
MD2017 Automatic Inflator Step 3 Cylinder Step 2 Sensor Ring Yellow Bobbin Step 9 (white side up) Bayonet Step 3 HOUSING*** Step 10 Step 4 O-Ring Step 9 Housing Shoulder Step 8 Pins Service Indicator Step 11 Lever Step 10 Pull Tab Service Indicator: If GREEN, unit is operable... - Page 14 Figure 11 MD2017 Automatic Inflator Cylinder Piercing Service Indicator 1/8 Turn Groove Pull-cord CYLINDER INSTALLATION FIGURE 11 10. Push, and hold, the lever into the inflator housing. The pull-cord should be situated in the groove (Fig. 11). Install a new cylinder/ bayonet assembly by engaging bayonet tabs in housing, pushing in then turning clockwise 1/8 turn to a full stop (Fig.
-
Page 15: Repacking
REPACKING Repacking should only be done after deflating and re-arming the PFD. View Status Indicator CORRECT FOLD SIDES FIGURE 13 FIGURE 12 Fold sides (A) and (B) outward along dotted lines. Secure with Velcro™. 2. Make sure inflator status indicator is viewable through window. 3. -
Page 16: Usage Below Freezing
• Examine the single point status indicator ensuring it is green. If the indicator is red, your PFD needs to be re-armed (see “Re-arming Your PFD (MD2015)” on page 7 or see “Re-arming Your PFD (MD2017)” on page 9). • Ensure the manual pull-tab is accessible. -
Page 17: Cleaning And Storing Your Inflatable Pfd
If any item shows signs of damage, perform inspections listed in “Every Six (6) Months” inspection details. If in doubt, contact Mustang Survival customer service. • For MD2017 only. Ensure the current date is not three (3) years past the date on the bobbin. -
Page 18: How And Why To Test Your Pfd
To properly test your flotation device and to ensure you have a replacement re-arming kit, you should purchase two re-arming kits: one to be used immediately in testing the manual (for MD2015) or automatic (for MD2017) inflation system and the other to carry on board as a spare. -
Page 19: How Do You Test Your Pfd Using The Automatic Inflator? (Md2017)
HOW DO YOU TEST YOUR PFD USING THE AUTOMATIC INFLATOR? (MD2017) A1. To test your Inflatable PFD, you will need: • your fully armed Inflatable PFD • the re-arming kit approved for your device (MA2014) A2. Put on the Inflatable PFD. A3. -
Page 20: How Do You Test Your Pfd Using The Oral Inflator
M7. Let the Inflatable PFD dry thoroughly. Re-arm and Repack the PFD (see “Re-arming Your PFD (MD2015)” on page 7 or see “Re-arming Your PFD (MD2017)” on page 9 and see “Repacking” on page 12). HOW DO YOU TEST YOUR PFD USING THE ORAL INFLATOR? -
Page 21: Wear Your Pfd
WEAR YOUR PFD In approximately 80 percent of all boating fatalities, the victims were not wearing a PFD. Most fatal accidents happen on calm sunny days. This Inflatable PFD is much more comfortable to wear than other PFD types. Get into the habit of wearing this Inflatable PFD. Non-swimmers and children especially should wear a hybrid or non- Inflatable PFD at all times when on or near the water. -
Page 22: Each Of These Devices Is Intended To Help You Save Your Own Life
2. Do not attempt to swim unless it is to reach a nearby craft, fellow survivor, or a floating object on which you can lean or climb. Swimming increases the rate of body heat loss. In cold water, drown-proofing methods that require putting your head in the water are not recommended. -
Page 23: Inflatable Pfd Safety Accessories
INFLATABLE PFD SAFETY ACCESSORIES MA2014 Re-arm Kit — Contains 24-gram replacement CO cylinder/ bayonet assembly and bobbin. MD2015 will not use the bobbin. ADDITIONAL INFORMATION If you need more information about PFDs and safe recreational boating, contact your provincial boating authority, Transport Canada –... - Page 24 MUSTANG ENGINEERED For 50 years Mustang Survival has been engineering high-performance marine gear for military, coast guard, and rescue personnel. With a focus on applied research and field-testing, we’re committed to the protection and enhancement of those who push themselves to extremes.
- Page 25 POUR LES NUMÉROS DE MODÈLES MD2015 ET MD2017 MANUEL D’UTILISATION MD2015 V.F.I. GONFLABLE MD2017 V.F.I. GONFLABLE V.F.I. À GONFLAGE MANUEL V.F.I. À GONFLAGE MANUEL AVEC SYSTÈME DE GONFLAGE APPROUVÉ PAR AUTOMATIQUE DE RÉSERVE TRANSPORTS CANADA APPROUVÉ PAR AVERTISSEMENT: LE MD2015 NE SE...
- Page 26 COMMENT GONFLER VOTRE V.F.I. GONFLABLE ........5 CONSIDÉRATIONS PARTICULIÈRES POUR DISPOSITIFS AUTOMATIQUES (MD2017) ................6 COMMENT DÉGONFLER VOTRE V.F.I. GONFLABLE .........7 COMMENT RÉARMER VOTRE V.F.I. (MD2015) ..........8 COMMENT RÉARMER VOTRE V.F.I. (MD2017) ...........10 REMBALLAGE ......................13 VOTRE V.F.I. EST-IL EN BON ÉTAT?............13 UTILISATION LORS DE TEMPÉRATURES SOUS ZÉRO ......14...
- Page 27 COMMENT ET POURQUOI FAIRE L’ESSAI DE VOTRE V.F.I....17 COMMENT FAIRE L’ESSAI DE VOTRE V.F.I. À L’AIDE D’UN GONFLEUR AUTOMATIQUE (MD2017) ........18 COMMENT FAIRE L’ESSAI DE VOTRE V.F.I. À L’AIDE DU GONFLEUR MANUEL? ................18 COMMENT FAIRE L’ESSAI DE VOTRE V.F.I. À L’AIDE DU GONFLEUR BUCCAL? ................19 PORTEZ VOTRE V.F.I.
-
Page 28: V.f.i. Gonflables
V.F.I. GONFLABLES Le vêtement de flottaison individuel (VFI) gonflable est un dispositif spécial en ce sens qu’il ne dépend pas de matériaux insubmersibles pour assurer la flottabilité de l’utilisateur. Afin que ce dernier puisse faire son boulot, vous, l’utilisateur, devez faire le vôtre! Ceci veut dire que vous devez vous assurer de bien connaître le fonctionnement et l’entretien de votre V.F.I. -
Page 29: Qu'est-Ce Qu'un V.f.i. Gonflable
(Fig. 1). S’assurer que l’indicateur de service est vert. S’il est rouge, le mécanisme a été utilisé ou n’est pas correctement en place (voir “Comment réarmer votre V.F.I. (MD2015)” à la page 8 ou voir “Comment réarmer votre V.F.I. (MD2017)” à la page 10). -
Page 30: Liste De Contrôle Sur L'état De Préparation
2. Détacher les bandes de VelcroMD qui se trouvent sur les deux côtés du V.F.I. 3. S’assurer que le capuchon anti-poussière du gonfleur buccal est en position fermée (ill 6). 4. Pour le MD2017 - Vérifier la bobine. Si la bobine a été utilisée ou est endommagée, il faut la remplacer! S’assurer que la nouvelle bobine est valide;... -
Page 31: Tailles Et Ajustement
COMMUNIQUER AVEC VOTRE DÉTAILLANT DE PRODUITS MUSTANG SI VOUS AVEZ DES QUESTIONS OU DES COMMENTAIRES AU SUJET DE L’ÉTAT DE PRÉPARATION DE VOTRE V.F.I. GONFLABLE. TAILLES ET AJUSTEMENT Une fois gonflée, ce V.F.I. vous offre au moins 100 newton (22.5 livres) de flottabilité;... -
Page 32: Comment Gonfler Votre V.f.i. Gonflable
Activer le système de gonflage en tirant sur la languette énergiquement, par saccades et vers le bas (Fig. 3). Le V.F.I. gonflable devrait se gonfler entièrement en 5 secondes. Gonfleur manuel Gonfleur automatique MD2015 MD2017 FIGURE 3 POIGNÉE DE GONFLAGE 2. Gonflage automatique de réserve (modèles MD2017 seulement) Le gonflage se produira automatiquement dans les 10 secondes suivant l’immersion du gonfleur dans l’eau. -
Page 33: Gonflage Buccal
3. Gonflage buccal Un V.F.I. gonflable qui a été bien armé et vérifié correctement se gonfle lorsqu’il est activé manuellement ou automatiquement. Cependant, si le V.F.I. gonflable ne se gonfle pas ou s’il ne s’agit pas d’une urgence, vous êtes quand même en mesure de le gonfler complètement par la bouche (Fig. -
Page 34: Comment Dégonfler Votre V.f.i. Gonflable
3. Vérifier l’indicateur de service (Fig. 1) et s’il est rouge, c’est que le mécanisme a été utilisé ou qu’il est mal ajusté; le gonfleur doit alors être réparé (voir "Comment réarmer votre V.F.I. (MD2015)" à la page 8 ou voir "Comment réarmer votre V.F.I. (MD2017)" à la page 10). -
Page 35: Comment Réarmer Votre V.f.i. (Md2015)
été utilisé ou qu’il est mal ajusté; le gonfleur doit donc être réparé. L’INDICATEUR DE SERVICE DOIT ÊTRE VERT AVANT DE CONTINUER. 6. Replier le V.F.I. gonflable selon les instructions à la section Réemballage (voir “Remballage” à la page 13). VOTRE V.F.I. GONFLABLE (MD2015) EST MAINTENANT PRÊT À UTILISER MANUELLEMENT. - Page 36 MD2015 Gonfleur Manuel Cartouche Étape 2 Anneau de détection Étape 3 Baïonnette Languette Étape 4 Anneau en O Étape 3 Indicateur de service Levier Étape 5 Étape 4 Indicateur de service: Si VERT, l’appareil est utilisable Si ROUGE, arrêter et faire réparer l’appareil...
-
Page 37: Comment Réarmer Votre V.f.i. (Md2017)
COMMENT RÉARMER VOTRE V.F.I. (MD2017) UN ENSEMBLE DE RÉARMEMENT (MA2014) AVEC UNE BOBINE DONT LA DATE D’INSTALLATION EST VALIDE (VÉRIFIER L’EMBALLAGE DE L’ENSEMBLE DE RÉARMEMENT) EST NÉCESSAIRE POUR CETTE PROCÉDURE. SUIVRE LES INSTRUCTIONS DANS L’ORDRE EXACT TEL QU’INDIQUÉ CI-DESSOUS. Déballer ou ouvrir le V.F.I. de manière à ce que le gonfleur manuel/ automatique soit exposé... -
Page 38: Md2017 Gonfleur Automatique
MD2017 Gonfleur automatique Cartouche Capuchon Étape 2 Étape 3 Anneau de détection Étape 9 Bobine jaune (côté blanc sur le dessus) Baïonnette Étape 3 Languette LOGEMENT*** Étape 10 Étape 4 Anneau en O Étape 9 Épaulement du logement Étape 8 Aiguilles Indicateur de service Étape 11... - Page 39 10. Pousser et tenir le levier dans le logement du gonfleur. La tirette doit se trouver dans la rainure (Fig. 11). Installer un nouvel assemblage cartouche/baïonnette en enclenchant les languettes dans le logement, en poussant et puis en faisant une rotation de 1/8 tour dans le sens des aiguilles d’une montre jusqu’à...
-
Page 40: Remballage
REMBALLAGE Le repliage ne devrait être fait qu’après avoir dégonflé et réarmé le dispositif de flottaison. Voir l’indicateur de l’état REPLIEZ LES CÔTÉS CORRECT FIGURE 12 FIGURE 13 Plier les côtés (A) et (B) vers l’extérieur le long des lignes pointillées. -
Page 41: Instructions D'entretien Et Maintenance
V.F.I. gonflable conformément à ces instructions, communiquez avec le service à la clientèle de Mustang Survival. Vous devez vérifier ce dispositif de flottaison: • Avant chaque utilisation (inspection des composantes) •... -
Page 42: Inspection De Votre V.f.i. Gonflable
• Examinez l’indicateur de gonflage unique pour vous assurer qu’il est vert. Si l’indicateur est rouge, votre V.F.I. doit être réarmé (voir “Comment réarmer votre V.F.I. (MD2015)” à la page 8 ou voir “Comment réarmer votre V.F.I. (MD2017)” à la page 10). -
Page 43: Comment Nettoyer Et Remiser Votre V.f.i
• À l’encre permanente, indiquer comme étant la date d’inspection « annuelle » sur l’étiquette d’entretien et de remisage, dans la colonne de la date d’entretien. Réemballer le VFI tel qu’indiqué à la section Réemballage, à la page 13. COMMENT NETTOYER ET REMISER VOTRE V.F.I. Pour nettoyer votre V.F.I., lavez-le à... -
Page 44: Comment Et Pourquoi Faire L'essai De Votre V.f.i
: utilisez la première sans tarder pour l’essai du système de gonflage automatique (MD2017) ou manuel (MD2015), et apportez la seconde à bord comme trousse de rechange. N’oubliez pas d’enclencher à nouveau votre équipement gonflable lorsque la cartouche de CO est vide. -
Page 45: Comment Faire L'essai De Votre V.f.i. À L'aide D'un Gonfleur Automatique (Md2017)
COMMENT FAIRE L’ESSAI DE VOTRE V.F.I. À L’AIDE D’UN GONFLEUR AUTOMATIQUE (MD2017) A1. Pour faire l’essai de votre V.F.I., il vous faudra : • un V.F.I. correctement armé • un ensemble de réarmement (MA2014) approuvé pour votre V.F.I. A2. Enfiler le V.F.I. gonflable. A3. -
Page 46: Comment Faire L'essai De Votre V.f.i. À L'aide Du Gonfleur Buccal
CO /baïonnette du gonfleur. M7. Laisser sécher complètement le V.F.I. gonflable (voir “Comment réarmer votre V.F.I. (MD2015)” à la page 8 ou voir “Comment réarmer votre V.F.I. (MD2017)” à la page 10 et voir “Remballage” à la page 13). -
Page 47: L'hypothermie
V.F.I. gonflable à l’aide du gonfleur buccal. O8. Laisser sécher complètement le V.F.I. gonflable (voir “Comment réarmer votre V.F.I. (MD2015)” à la page 8 ou voir “Comment réarmer votre V.F.I. (MD2017)” à la page 10 et voir “Remballage”... -
Page 48: Voici Certains Points À Ne Pas Oublier Au Sujet De La Protection Contre L'hypothermie
Un V.F.I. peut augmenter la durée de survie car il vous permet de flotter sans utiliser l’énergie nécessaire pour vous garder à flot et aussi en raison de ses propriétés isolantes. Bien sûr, plus l’eau est chaude, moins vous avez besoin d’isolant. Lorsque vous pratiquez des activités en eau froide [moins de 15,6 °C (60 °F)], il est recommandé... -
Page 49: Chacun De Ces Dispositifs Peut Vous Aiderà Vous Sauver La Vie
8. Ne pas sécher le V.F.I. gonflable devant un radiateur ou toute autre source de chaleur directe. ACCESSOIRES DE SÉCURITÉ POUR LE V.F.I. GONFLABLE Ensemble de réarmement MA2014 - Contient un assemblage cartouche CO /baïonnette de 24g et une bobine. MD2015 n’utilisera pas la bobine. -
Page 50: Renseignements Supplémentaires
RENSEIGNEMENTS SUPPLÉMENTAIRES Si vous désirez plus d’information sur les V.F.I.s et la sécurité nautique, contactez l’autorité provinciale en matière de sécurité nautique, le beareau de la sécurité nautique de Transports Canada, la garde côtière canadienne (GCC), GCC auxiliaire ou la Croiz Rouge canadienne. - Page 52 Nous fabriquons des outils pour sauver des vies et soutenir l’exploration. www.mustangsurvival.com NE PAS RETIRER AVANT LA VENTE LE LOGO DE MUSTANG SURVIVAL ARBORANT LE DESSIN DE L’HIPPOCAMPE EST UNE MARQUE DE COMMERCE DÉPOSÉE DE MUSTANG SURVIVAL CORP.