Table des Matières
Publicité
Les langues disponibles
Les langues disponibles
Liens rapides
Návod k použití
®
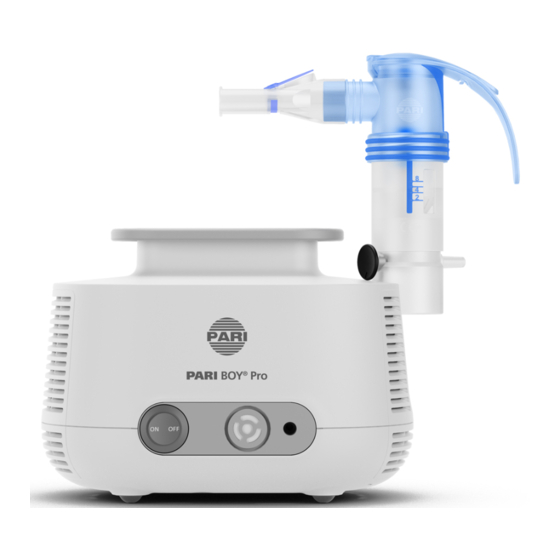
Inhalační systém PARI BOY
Pro
®
Kompresor PARI BOY
Pro (Typ 130)
®
Nebulizátor PARI LC SPRINT
(Typ 023)
Měkká maska pro děti PARI (Typ 041)
Důležité: Před použitím si důkladně přečtěte návod
k použití. Dodržujte všechny pokyny a bezpečnostní
informace!
Návod k použití bezpečně uložte.
cs
Publicité
Chapitres
Table des Matières
Dépannage

Manuels Connexes pour Pari BOY Pro


Sommaire des Matières pour Pari BOY Pro
- Page 1 Návod k použití ® Inhalační systém PARI BOY ® Kompresor PARI BOY Pro (Typ 130) ® Nebulizátor PARI LC SPRINT (Typ 023) Měkká maska pro děti PARI (Typ 041) Důležité: Před použitím si důkladně přečtěte návod k použití. Dodržujte všechny pokyny a bezpečnostní informace! Návod k použití bezpečně uložte.
- Page 3 ©2019 PARI GmbH Spezialisten für effektive Inhalation Moosstraße 3, 82319 Starnberg, Germany Žádnou část této dokumentace není povoleno v jakékoli formě reprodukovat ani elektronicky zpracovávat, kopírovat, překládat ani rozšiřovat bez písemného svolení společnosti PARI GmbH. Všechna práva vyhrazena. Technické a optické změny a tiskové chyby vyhrazeny. Zařízení jsou ilustracím podobná. Výrobce PARI GmbH Spezialisten für effektive Inhalation...
- Page 4 Kontakt Veškeré informace o výrobcích a rady při závadách a dotazech na manipulaci vám poskytnou pracovníci našeho střediska služeb zákazníkům: Tel.: +49 (0)8151-279 220 (mezinárodní) +49 (0)8151-279 279 (německy) E-Mail: info@pari.de Příslušné úřady pro hlášení závažných incidentů Stát Úřad CZ – Česká republika Ministerstvo zdravotnictví Šrobárova 48 CZ – 100 41 Prague 10 urgent@sukl.cz;...
-
Page 5: Table Des Matières
– 5 – OBSAH DŮLEŽITÉ INFORMACE ..........Určení účelu ..............Indikace ................Kontraindikace..............Bezpečnostní informace ........... POPIS VÝROBKU ............Obsah balení ..............Funkční prvky ..............Popis funkce ..............Informace o materiálech ........... Údržba ................Životnost ................POUŽÍVÁNÍ ..............Umístění kompresoru ............Příprava léčby .............. - Page 6 – 6 – DALŠÍ INFORMACE ............Likvidace ................Odkazy ................Označování ..............DODATEK: Hygienické ošetření pro další použití v odborném prostředí s více pacienty......Kompresor ................ Nebulizátor a příslušenství ..........Připojovací trubice ............
-
Page 7: Důležité Informace
Pokud pacient není schopen bezpečně obsluhovat inhalační systém, musí léčbu zajišťovat zodpovědná osoba. Kompresor Kompresor PARI slouží k přípravě stlačeného vzduchu pro provoz nebulizátorů PARI. Kompresor PARI je určen pro používání více pacienty. Je možné ho používat pouze s nebulizátory PARI. Kompresor mohou obsluhovat pacienti a je určen výhradně pro provoz v místnostech. Nebulizátor Nebulizátor vyvíjí... -
Page 8: Indikace
– 8 – Maska Maska je příslušenství pro inhalační léčbu pomocí nebulizátoru PARI. Měkká maska pro děti PARI je určena pro léčbu dětí od 4 let Masku je možné používat pouze s nebulizátory PARI. Tento výrobek PARI smí v domácím prostředí z hygienických důvodů používat pouze jeden pacient. - Page 9 – 9 – V těchto případech požádejte o další informace svého lékaře. Pokud léčba nevede ke zlepšení zdravotního stavu nebo dokonce způsobí jeho zhoršení, obraťte se na odborné zdravotnické pracovníky. Nebezpečí ohrožení života elektrickým proudem Kompresor je elektrický přístroj napájený ze sítě. Je konstruován tak, aby nebyly přístupné...
- Page 10 (jako je varná deska, radiátor, otevřený oheň). Mohlo by dojít k poškození krytu kompresoru nebo izolace kabelu. Ovlivnění léčby elektromagnetickým rušením Používejte výhradně originální náhradní díly a originální příslušenství PARI. Použití jiných výrobků může vést ke zvýšení elektromagnetického vyzařování nebo snížení odolnosti kompresoru PARI proti elektromagnetickému rušení.
- Page 11 Hlášení závažných incidentů Závažné incidenty, ke kterým dojde v souvislosti s tímto výrobkem PARI, je nutné neprodleně ohlásit výrobci nebo prodejci a příslušným úřadům (kontaktní údaje najdete na straně 4). Incident je považován za závažný, pokud přímo nebo nepřímo vede nebo by mohl vést k úmrtí...
- Page 12 – 12 – Označování a klasifikace varování Bezpečnostní upozornění jsou v tomto návodu k použití rozdělena podle stupně ohrožení: NEBEZPEČÍ Pojem NEBEZPEČÍ označuje nebezpečné situace, které – pokud se jim nevyhnete – vedou k nejtěžším zraněním nebo úmrtí. VAROVÁNÍ Pojem VAROVÁNÍ označuje nebezpečné situace, které – pokud se jim nevyhnete –...
-
Page 13: Popis Výrobku
(2d) Dolní díl nebulizátoru (2e) Přerušovač LC (2f) Náustek (2g) Připojovací trubice (3) Měkká maska pro děti PARI (3a) Gumová páska 4) Se systémem PARI PIF-Control System. PIF = Peak Inspiratory Flow (špičkový inspirační průtok)[viz část Průběh léčby na straně 24]. Není součástí všech výrobků. -
Page 14: Funkční Prvky
– 14 – 2.2 Funkční prvky Kompresor má následující funkční prvky: (1) Držadlo (2) Síťový kabel (pevně spojeno s kompresorem) (2a) Držák na kabely (3) Větrací štěrbiny (4) Držák pro nebulizátor (5) Typový štítek (na spodní straně přístroje) (6) Otvor pro stlačený vzduch (7) Vzduchový... -
Page 15: Popis Funkce
– 15 – 2.3 Popis funkce Kompresor s nebulizátorem Aerosol Stlačený vzduch Kompresor zásobuje nebulizátor stlačeným vzduchem. Nebulizátor při přívodu Okolní vzduch stlačeného vzduchu vyvíjí z kapalné náplně, například Aerosol léčiva, aerosol. Tento aerosol pacient přes náustek nebo masku vdechuje do plic. Kapalina Stlačený... -
Page 16: Informace O Materiálech
Polypropylen Dolní díl nebulizátoru Polypropylen, termoplastický elastomer Přerušovač LC Polypropylen Náustek (s vydechovacím Polypropylen, termoplastický ventilem) elastomer Připojovací trubice Polyvinylchlorid Koncovka trubice Termoplastický elastomer Měkká maska pro děti PARI Polypropylen, termoplastický elastomer Gumová páska Syntetický kaučuk 2.5 Údržba Kompresor nevyžaduje údržbu. -
Page 17: Životnost
Přibližně 1000 provozních hodin (odpovídá max. 5 letem) Pokud budete kompresor používat i po této době, nechejte ho zkontrolovat. Kontaktujte výrobce nebo prodejce. Nebulizátor (všechny součásti 300 dezinfekcí, max. 1 rok kromě připojovací trubice) Připojovací trubice Maximálně 1 rok Měkká maska pro děti PARI 300 dezinfekcí, max. 1 rok... -
Page 18: Používání
• Dodržujte minimální odstup 30 cm od přenosných nebo bezdrátových komunikačních prostředků (včetně jejich příslušenství, například kabelů k anténám nebo externích antén). • Pokud musí být přístroj PARI umístěn bezprostředně vedle jiného přístroje, pod ním nebo nad ním, je nutné během provozu sledovat jeho řádné fungování. - Page 19 – 19 – POZOR Nebezpečí zranění při pádu kompresoru Nevhodné umístění kompresoru představuje riziko zranění. • Kompresor nikdy neumisťujte výše než hlavu. • Dbejte na to, aby kompresor nešlo stáhnout za síťový kabel nebo připojovací trubici. • Kompresor neumisťujte na měkké podložky, například gauč, postel nebo ubrus.
-
Page 20: Příprava Léčby
– 20 – 3.2 Příprava léčby Sestavení nebulizátoru POZOR Nebezpečí ovlivnění léčby Poškozené součásti nebo nesprávně sestavený nebulizátor mohou ovlivnit funkci nebulizátoru i léčbu. • Před každým použitím zkontrolujte všechny díly nebulizátoru i veškeré příslušenství. • Poškozené, zdeformované nebo silně zabarvené součásti vyměňte. - Page 21 – 21 – Alternativní varianta: • Nasaďte na nebulizátor přerušovač LC. • Na postranní vstup přerušovače LC nasaďte připojovací trubici. Inhalace s náustkem • Nasaďte na nebulizátor náustek. Inhalace s maskou • Provlékněte maskou gumovou pásku (podle obrázku). • Stáhněte případně z nebulizátor náustek. • Nasaďte na nebulizátor masku.
- Page 22 – 22 – Naplnění nebulizátoru UPOZORNĚNÍ Možnost poškození víčka nebulizátoru Pokud víčkem nebulizátoru pohnete v nesprávném směru, může dojít k jeho odlomení. Nebulizátor je pak nepoužitelný a neopravitelný. • Víčkem pohybujte pouze ve směru vyznačeném na závěsu. • Zastrčte nebulizátor do příslušného držáku na kompresoru. •...
-
Page 23: Průběh Léčby
– 23 – 3.3 Průběh léčby Před zahájením léčby je nutné přečíst a pochopit všechny bezpečnostní informace uvedené v tomto návod k použití. Nebulizátor držte při léčbě vždy ve svislé poloze. Při léčbě postupujte takto: • Zasuňte připojovací trubici nebulizátoru za současného mírného otáčení... - Page 24 Důsledkem je nebezpečí úrazu elektrickým proudem. • Než začnete s léčbou, ujistěte se, že nebulizátor vyvíjí aerosol. Informace o systému PIF-Control System: Systém PARI PIF-Control System v horní části nebulizátoru slouží k nácviku pomalé a kontrolované inhalace. Ta vylepšuje distribuci účinné látky do dolních cest dýchacích.
- Page 25 – 25 – Inhalace s náustkem • Uvolněně a vzpřímeně se posaďte. • Uchopte náustek mezi zuby a obemkněte ho rty. • Co nejpomaleji a zhluboka se nadechujte a uvolněně vydechujte přes náustek. • Inhalujte tak dlouho, dokud se nezmění zvuk nebulizátoru. Po dokončení léčby zůstává v nebulizátoru zbytek kapaliny. Inhalace s maskou POZOR Ovlivnění...
- Page 26 – 26 – • Lehkým tlakem nasaďte masku těsně kolem úst a nosu. Dbejte na to, aby byl nebulizátor ve svislé poloze. • Masku můžete na obličeji případně upevnit gumovými páskami. Gumová páska by měla obepínat zadní část hlavy. Veďte dítě k následujícímu inhalačnímu manévru: •...
-
Page 27: Ukončení Léčby
– 27 – Pokud máte namontovaný přerušovač LC, ale chcete využívat trvalou nebulizaci: • Otočte přerušovacím tlačítkem po směru hodinových ručiček až na doraz. Æ Aerosol bude vyvíjen bez přerušení (Trvalá nebulizace). 3.4 Ukončení léčby Při ukončení léčby postupujte takto: •... -
Page 28: Hygienické Ošetření Pro Další Použití
– 28 – HYGIENICKÉ OŠETŘENÍ PRO DALŠÍ POUŽITÍ NEBEZPEČÍ Nebezpečí ohrožení života elektrickým proudem Kapaliny vedou proud, proto hrozí nebezpečí úrazu elektrickým proudem. • Před každým čištěním vypněte kompresor a vytáhněte vidlici ze zásuvky. Pokud inhalační systém používá pouze jeden pacient, postupujte podle pokynů... - Page 29 – 29 – Nebulizátor a maska Masku lze čistit, dezinfikovat a sušit současně s nebulizátorem. Příprava MASKA • Stáhněte masku z nebulizátoru. • Sejměte z masky gumovou pásku. NEBULIZÁTOR • Stáhněte z nebulizátoru trubici. • Stáhněte z nebulizátoru náustek. • Odstraňte z nebulizátoru veškeré zbytky kapaliny. • Rozeberte nebulizátor na součásti. •...
- Page 30 – 30 – • Součásti důkladně opláchněte tekoucí vodou. • Oklepáním odstraňte ze všech součástí zbytky vody. Dezinfekce Všechny součásti dezinfikujte až po vyčištění (účinně lze dezinfikovat pouze vyčištěné díly). V následujícím textu jsou uvedeny doporučené dezinfekční postupy. Výrobce nebo prodejce vám na vyžádání sdělí popisy dalších ověřených dezinfekčních postupů.
- Page 31 – 31 – BĚŽNĚ PRODÁVANÝ TEPELNÝ DEZINFEKČNÍ PŘÍSTROJ NA DĚTSKÉ LAHVE (NIKOLI MIKROVLNNÝ) POZOR Nedostatečná dezinfekce zvyšuje nebezpečí infekce Nedostatečná dezinfekce podporuje růst bakterií a zvyšuje tak nebezpečí infekce. • Před každou dezinfekcí zkontrolujte, zda je dezinfekční přístroj čistý a funkční. • Dezinfekci provádějte do okamžiku, kdy se dezinfekční přístroj automaticky vypne nebo do dosažení...
-
Page 32: S Výměnou Pacienta
– 32 – Těleso kompresoru čistěte takto: • Měkkým, vlhkým hadříkem utřete vnější plochu krytu. 4.2 S výměnou pacienta Cykly čištění a dezinfekce Nebulizátor s připojovací Výměna při každé výměně pacienta trubicí a maskou Těleso kompresoru Dezinfekce při každé výměně pacienta Vzduchový filtr Výměna po 200 hodinách provozu (přibližně 1 rok) Nebulizátor a maska Nebulizátor a maska nejsou určeny pro používání... -
Page 33: Péče O Připojovací Trubici
– 33 – • Navlhčete hadřík dezinfekčním prostředkem. UPOZORNĚNÍ! Nebezpečí poruchy při proniknutí kapalin. Na kompresor ani na síťový kabel nestříkejte žádné kapaliny. Pokud do kompresoru zateče kapalina, nesmíte kompresor v žádném případě dále používat. Před opětovným uvedením kompresoru do provozu se spojte s výrobcem nebo prodejcem. -
Page 34: Kontrola
– 34 – • Vytáhněte z držáku starý vzduchový filtr a nasaďte nový filtr. UPOZORNĚNÍ! Používejte výhradně vzduchové filtry, které jsou výrobcem určeny k provozu s tímto kompresorem. Při použití vzduchového filtru neschváleného pro tento kompresor může dojít k poškození kompresoru. • Nasaďte držák filtru zpět do kompresoru. 4.5 Kontrola Po každém čištění... -
Page 35: Řešení Potíží
– 35 – ŘEŠENÍ POTÍŽÍ Kompresor smí opravovat pouze oddělení technické podpory společnosti PARI GmbH nebo servis výslovně zmocněný společností PARI GmbH. Pokud kompresor otevře nebo s ním manipuluje jiná osoba, ztrácíte veškerá práva ze záruky. V takovém případě společnost PARI GmbH nepřebírá žádné záruky. -
Page 36: Technické Údaje
– 36 – TECHNICKÉ ÚDAJE 6.1 Kompresor Obecné údaje o kompresoru Síťové napětí 220 – 240 V Frekvence v síti 50 Hz Příkon 0,95 A Rozměry přístroje (Š × V × H) 18,5 cm × 13,0 cm × 15,0 cm Hmotnost 1,7 kg Tlak 1,6 bar Průtok kompresorem 5,0 l/min Hladina akustického tlaku 54 dB(A) Klasifikace podle normy IEC 60601-1 / EN 60601-1 Druh ochrany proti úrazu elektrickým Třída ochrany II... -
Page 37: Elektromagnetická Kompatibilita
řádný provoz podle požadavků. Technické údaje o elektromagnetické kompatibilitě (pokyny EMC) jsou v podobě tabulky k dispozici na vyžádání u výrobce nebo prodejce nebo na Internetu na následujícím odkazu: https://www.pari.com/fileadmin/Electromagnetic-compatibility-5.pdf Podmínky okolního prostředí Provozní Teplota +10 až +40 °C Relativní... -
Page 38: Nebulizátor
– 38 – Doprava a skladování Minimální teplota okolního prostředí (bez -25 °C ohledu na relativní vlhkost) Maximální teplota okolního prostředí (při +70 °C relativní vlhkosti do 93 %, nekondenzující) Vlhkost vzduchu max. 93 % Tlak vzduchu 500 hPa – 1060 hPa 6.2 Nebulizátor Obecné údaje o nebulizátoru Velikost 10 cm × 10 cm × 4 cm Hmotnost... - Page 39 39,8 31,2 < 5 µm] Podíl aerosolu 47,7 38,1 39,5 [% > 5 µm] Dávkování aerosolu [ml] 0,35 0,41 0,38 Rychlost dávkování 0,07 0,16 0,18 aerosolu [ml/min] 8) Provoz s kompresorem PARI BOY Pro (Typ 130). 9) MMAD = Aerodynamický průměru inhalovaných částic 10) GSD = Geometrická směrodatná odchylka...
- Page 40 – 40 – Minimální Nominální Maximální průtok průtok průtok Nástavec trysky kompresorem kompresorem kompresorem (modrý) (3 l/min – (5 l/min – (6 l/min – 0,6 bar) 1,6 bar) 1,9 bar) Zbytkový objem [ml] 1,16 1,16 1,10 (stanoveno gravimetricky) Rychlost dávkování vzhledem k objemu náplně [%/min] Minimální Nominální Maximální...
-
Page 41: Další Informace
(např. likvidace prostřednictvím obce nebo prodejce). Recyklování materiálu pomáhá při snižování spotřeby surovin a chrání životní prostředí. Všechny ostatní součásti Všechny součásti inhalačního systému PARI můžete likvidovat s domovním odpadem (pokud neplatí jiná pravidla likvidace odpadu specifická pro danou zemi). 7.2 Odkazy Záruční... -
Page 42: Označování
– 42 – 7.3 Označování Na součástech výrobku a balení najdete následující značky: Výrobek splňuje požadavky směrnice 93/42/EHS (zdravotnické výrobky) a 2011/65/EU (RoHS). Dodržujte návod k použití Dodržujte návod k použití Katalogové číslo Číslo série, šarže Výrobní číslo ON OFF ZAP / VYP Střídavý... - Page 43 – 43 – Zdravotnický prostředek byl uveden na trh po 13. srpnu 2005. Výrobek nesmí být likvidován spolu s normálním domovním odpadem. Symbol přeškrtnuté nádoby na odpad upozorňuje na nutnost použití tříděného odpadu. Výrobce...
- Page 44 – 44 –...
-
Page 45: Dodatek: Hygienické Ošetření Pro Další Použití V Odborném Prostředí S Více Pacienty
Nebulizátor a příslušenství Následující přehled kroků ošetření v odborném prostředí platí pro následující výrobky: – Nebulizátor – Přerušovač LC – Měkká maska pro děti PARI (bez gumové pásky) 1. Příprava Demontujte výrobek [viz část Příprava na straně 29]. Zkontrolujte: – Datum použitelnosti čisticího/dezinfekčního prostředku – Dosažení limitů ošetřování... - Page 46 – 46 – 2. Čištění a dezinfekce Ruční čištění: Enzymatický čisticí prostředek s neutrálním pH, ® například Korsolex Endo Cleaner (Bode) nebo ® Bodedex forte (Bode) Použití: podle pokynů výrobce, při viditelném znečištění lze použít kartáček. Ruční Přípravkem pro dezinfekci přístrojů obsahujícím ®...
- Page 47 – 47 – 3. Parní sterilizátor Vybavení: – Parní sterilizátor (nejlépe s frakcionovaným předvakuem) podle normy DIN EN 285 nebo DIN EN 13060 (typ B) – Sterilní obal podle normy DIN EN 11607 – Stabilizátor masek Teplota / doba trvání: 134 °C na nejméně 3 min. Poznámka: Masky vždy sterilizujte se stabilizátorem, aby se vlivem vysoké...
-
Page 48: Připojovací Trubice
– 48 – Připojovací trubice 1. Příprava Zkontrolujte výrobek: – Datum použitelnosti čisticího/dezinfekčního prostředku – Dosažení limitů ošetřování 2. Čištění a dezinfekce Ruční čištění: nelze použít Ruční dezinfekce: nelze použít Strojové čištění a Alkalický čisticí prostředek, například ® dezinfekce: neodisher MediClean forte (Dr. Weigert), a neutralizační... - Page 49 – 49 – Limity ošetřování max. 50 cyklů ošetřování...
- Page 50 – 50 –...
-
Page 51: Záruční List
® Inhalační systém PARI BOY ZÁRUČNÍ LIST Na kompresor poskytujeme 4 roky záruky. Záruční doba začíná datem prodeje. - Page 52 Stvrzenka o nákupu: výrobek s výše uvedeným číslem jsme prodali v originálním obalu. Datum zakoupení Razítko a podpis specializovaného prodejce ©2019 PARI GmbH Spezialisten für effektive Inhalation, 130D2103_cs-F 2019-12-19 PARI GmbH Spezialisten für effektive Inhalation Moosstraße 3 82319 Starnberg • GERMANY info@pari.de • www.pari.com...
- Page 53 Gebrauchsanweisung ® PARI BOY Pro Inhalationssystem ® PARI BOY Pro Kompressor (Type 130) ® PARI LC SPRINT Vernebler (Type 023) PARI Kindermaske soft (Type 041) Wichtig: Lesen Sie diese Gebrauchsanweisung vor der An- wendung sorgfältig durch. Befolgen Sie alle Anweisungen und Sicherheitshinweise! Bewahren Sie die Gebrauchsanweisung sorgfältig auf.
- Page 55 Format kann vergrößert ausgedruckt werden. CE-Konformität Das Produkt erfüllt die Anforderungen gemäß: – 93/42/EWG (Medizinprodukte) – 2011/65/EU (RoHS) Markenzeichen Die folgenden Markenzeichen sind eingetragene Warenzei- chen der PARI GmbH Spezialisten für effektive Inhalation in Deutschland und/oder anderen Ländern: ® ® ® , LC SPRINT , PARI Copyright ©2019 PARI GmbH Spezialisten für effektive Inhalation...
- Page 56 Kontakt Für Produktinformationen jeder Art, im Fehlerfall oder bei Fra- gen zur Handhabung wenden Sie sich bitte an unser Service Center: Tel.: +49 (0)8151-279 220 (international) +49 (0)8151-279 279 (deutschsprachig) E-Mail: info@pari.de Zuständige Behörde für die Meldung schwerwiegender Vorkommnisse Land Behörde CH – Schweiz Swissmedic Schweizerisches Heilmittelinstitut Institut suisse des produits thérapeutiques...
- Page 57 – 5 – INHALTSVERZEICHNIS WICHTIGE HINWEISE............. Zweckbestimmung ............Indikation ................Gegenanzeigen ..............Sicherheitshinweise............PRODUKTBESCHREIBUNG........... Lieferumfang ..............Funktionselemente ............Funktionsbeschreibung ............ Materialinformation ............Wartung ................Lebensdauer ..............ANWENDUNG ..............Kompressor aufstellen............Therapie vorbereiten ............Therapie durchführen ............Therapie beenden ............WIEDERAUFBEREITUNG..........Ohne Patientenwechsel ...........
- Page 58 – 6 – SONSTIGES ..............Entsorgen ................. Links ................. Kennzeichnung..............ANHANG: Wiederaufbereitung in professionellen Umgebungen mit Patientenwechsel ......Kompressor ..............Vernebler und Zubehör ............ Anschlusschlauch.............
-
Page 59: Wichtige Hinweise
Therapie von der verant- wortlichen Person durchgeführt werden. Kompressor Der PARI Kompressor dient dazu, Druckluft für den Betrieb ei- nes PARI Verneblers zu erzeugen. Der PARI Kompressor ist für einen Patientenwechsel vorgese- hen. Er darf nur für PARI Vernebler verwendet werden. Der Kompressor kann vom Patienten selbst bedient werden und darf ausschließlich in Räumen verwendet werden. -
Page 60: Indikation
Die Maske ist ein Zubehör für die Inhalationstherapie mit einem PARI Vernebler. Die PARI Kindermaske soft ist geeignet für die Behandlung von Kindern ab 4 Jahren Die Maske darf nur mit PARI Verneblern verwendet werden. Dieses PARI Produkt darf in häuslicher Umgebung aus hygie- nischen Gründen nur von einem einzigen Patienten verwendet werden. -
Page 61: Lebensgefahr Durch Stromschlag
– 9 – Allgemein Werden nicht zugelassene Lösungen oder Suspensionen für die Vernebelung verwendet, können die Aerosoldaten des Ver- neblers von den Angaben des Herstellers abweichen. Dieses Produkt ist nicht für eine Verwendung in einem Anäs- thesie-Atemsystem oder einem Atemsystem eines Beatmungs- geräts geeignet. - Page 62 – 10 – – Schließen Sie den Kompressor an eine leicht zugängliche Steckdose an. Der Netzstecker sollte jederzeit schnell gezo- gen werden können. – Schalten Sie den Kompressor sofort aus und ziehen Sie den Netzstecker aus der Steckdose: – wenn der Verdacht besteht, dass der Kompressor oder die Netzleitung beschädigt sein könnte (z. B.
- Page 63 Das Gehäuse des Kompressors oder die Isolierung der Netzleitung könnten beschädigt werden. Beeinträchtigung der Therapie durch elektromagnetische Störungen Verwenden Sie ausschließlich Original-Ersatzteile und Origi- nal-Zubehör von PARI. Die Verwendung von Fremd-Produkten kann zu einer erhöhten elektromagnetischen Störaussendung oder zu einer verminderten Störfestigkeit des PARI Kompres- sors führen. Hygiene Beachten Sie folgende Hygienehinweise: –...
- Page 64 Meldung von schwerwiegenden Vorkommnissen Schwerwiegende Vorkommnisse, die in Verbindung mit diesem PARI Produkt auftreten, müssen unverzüglich dem Hersteller bzw. Händler und der zuständigen Behörde gemeldet werden (Kontaktinformationen siehe Seite 4). Vorkommnisse sind schwerwiegend, wenn sie direkt oder indi- rekt zum Tod oder einer unvorhergesehenen schwerwiegen- den Verschlechterung des Gesundheitszustands einer Person geführt haben oder führen könnten.
- Page 65 – 13 – VORSICHT VORSICHT bezeichnet eine gefährliche Situation, die zu leichten oder mittelschweren Verletzungen führen kann, wenn sie nicht vermieden wird. HINWEIS HINWEIS bezeichnet Situation, die zu Sachschäden führen kann, wenn sie nicht vermieden wird.
-
Page 66: Produktbeschreibung
(1) Kompressor (2) PARI LC SPRINT Vernebler (2a) Vernebleroberteil (2b) Düsenaufsatz (blau) (2c) Düsenaufsatz (rot) (2d) Verneblerunterteil (2e) LC Unterbrecher (2f) Mundstück (2g) Anschlussschlauch (3) PARI Kindermaske soft (3a) Gummiband 4) Mit PARI PIF-Control System. PIF = Peak Inspiratory Flow (Einatemspitzenflusskontrolle) [siehe: Therapie durchführen, Seite 26]. Nicht in allen Produktvarianten enthalten. -
Page 67: Funktionselemente
– 15 – 2.2 Funktionselemente Der Kompressor verfügt über folgende Funktionselemente: (1) Tragegriff (2) Netzleitung (untrennbar mit dem Kompressor verbunden) (2a) Kabelhalterung (3) Lüftungsschlitze (4) Halterung für Vernebler (5) Typenschild (Geräteunterseite) (6) Druckluftanschluss (7) Luftfilter (8) Ein-/Aus-Schalter 5) Der Netzsteckertyp ist länderspezifisch. Die Abbildung zeigt den Eurostecker (Typ „C“). -
Page 68: Funktionsbeschreibung
– 16 – 2.3 Funktionsbeschreibung Kompressor mit Vernebler Aerosol Druckluft Der Kompressor versorgt den Vernebler mit Druckluft. Der Vernebler erzeugt bei Zufuhr Umgebungsluft von Druckluft Aerosol aus der ein- gefüllten Flüssigkeit, z. B. dem Aerosol Medikament. Dieses Aerosol wird über das Mundstück oder ggf. über eine Maske in die Lunge ein- geatmet. -
Page 69: Materialinformation
Materialien: Produktbestandteil Material Vernebleroberteil Polypropylen, Thermoplastisches Elastomer Düsenaufsatz Polypropylen Verneblerunterteil Polypropylen, Thermoplastisches Elastomer LC Unterbrecher Polypropylen Mundstück (mit Polypropylen, Thermoplastisches Elastomer Ausatemventil) Anschlussschlauch Polyvinylchlorid Schlauchendstück Thermoplastisches Elastomer PARI Kindermaske Polypropylen, Thermoplastisches Elastomer soft Gummiband Synthetischer Kautschuk 2.5 Wartung Der Kompressor ist wartungsfrei. -
Page 70: Lebensdauer
Sollte der Kompressor nach dieser Zeit immer noch in Verwendung sein, lassen Sie den Kompressor überprüfen. Nehmen Sie dafür mit dem Hersteller bzw. Händler Kontakt auf. Vernebler (alle Bestandteile 300 Desinfektionen, max. 1 Jahr außer Anschlussschlauch) Anschlussschlauch Max. 1 Jahr PARI Kindermaske soft 300 Desinfektionen, max. 1 Jahr... -
Page 71: Anwendung
Personen, die Andere bei der Therapie unterstützen, müssen darauf achten, dass alle nachfolgend beschriebenen Schritte ordnungsgemäß durchgeführt werden. Soll der Vernebler über einen PARI CENTRAL an einer zentra- len Gasversorgung (ZV) betrieben werden, ist die Gebrauchs- anweisung des PARI CENTRAL zu beachten. 3.1 Kompressor aufstellen Der Raum, in dem der Kompressor betrieben wird, muss be- stimmte Voraussetzungen erfüllen [siehe: Im Betrieb, Sei-... - Page 72 Elektrische Geräte können elektromagnetische Störungen verursachen. Diese können die Funktion der Geräte und so- mit die Therapie beeinträchtigen. • Stellen Sie das PARI Gerät nicht unmittelbar neben einem anderen Gerät oder mit anderen Geräten gestapelt auf. • Halten Sie einen Mindestabstand von 30 cm zu tragbaren drahtlosen Kommunikationsgeräten ein (inklusive deren...
-
Page 73: Therapie Vorbereiten
– 21 – Stellen Sie den Kompressor folgendermaßen auf: • Stellen Sie den Kompressor auf einen festen, flachen, staubfreien und trockenen Untergrund. • Stecken Sie den Netzstecker in eine geeignete Steckdose. VORSICHT! Verlegen Sie die Netzleitung so, dass sie keine Stolperfalle darstellt und sich niemand darin verfan- gen kann. - Page 74 – 22 – • Stecken Sie den Anschluss- schlauch an den Vernebler. Alternativ: • Stecken Sie den LC Unterbre- cher an den Vernebler. • Stecken Sie den Anschluss- schlauch auf den seitlichen Lufteinlass am LC Unterbre- cher. Mundstück verwenden • Stecken Sie das Mundstück an den Vernebler.
- Page 75 – 23 – • Ziehen Sie ggf. das Mundstück vom Vernebler ab. • Stecken Sie die Maske an den Vernebler. Vernebler befüllen HINWEIS Verneblerdeckel könnte abbrechen Wird der Deckel in die falsche Richtung bewegt, kann er ab- brechen. Der Vernebler ist dann unbrauchbar und irrepara- bel.
-
Page 76: Therapie Durchführen
– 24 – Wenn mehrere Inhalationslösungen nacheinander verwendet werden sollen: • Spülen Sie den Vernebler zwischen den einzelnen Anwen- dungen mit Trinkwasser aus. • Schütteln Sie überschüssiges Wasser aus dem Vernebler. • Befüllen Sie den Vernebler mit der nächsten Inhalationslö- sung wie beschrieben. - Page 77 – 25 – • Nehmen Sie den Vernebler aus der Halterung heraus und halten Sie ihn senkrecht. • Vergewissern Sie sich, dass alle Teile fest miteinander ver- bunden sind. • Schalten Sie den Kompressor ein. GEFAHR! Lebensgefahr durch Stromschlag bei Gerä- tedefekt! Schalten Sie sofort den Kompressor aus und zie- hen Sie den Netzstecker aus...
- Page 78 – 26 – Information zum PIF-Control System: Das PARI PIF-Control System im oberen Teil des Verneblers dient dazu, eine langsame und kontrol- lierte Inhalation zu erlernen. Da- durch wird die Aufnahme des Wirkstoffs in den unteren Atem- wegen verbessert. Wird zu schnell eingeatmet, wird die Luftzufuhr verringert und da- durch ein erhöhter Widerstand...
- Page 79 – 27 – Mit Maske inhalieren VORSICHT Therapiebeeinträchtigung durch entweichendes Aerosol Wenn die Maske nicht dicht auf dem Gesicht aufliegt, kann Aerosol entweichen. Eine Unterdosierung des Medikaments kann die Folge sein. • Achten Sie darauf, dass die Maske beide Mundwinkel und die Nase vollständig umschließt.
- Page 80 – 28 – • Möglichst langsam und tief durch die Maske ein- und ent- spannt wieder ausatmen. • So lange inhalieren, bis sich das Geräusch im Vernebler verändert. Es bleibt nach Therapieende Restflüssigkeit im Vernebler. LC Unterbrecher verwenden Ist der LC Unterbrecher montiert, wird erst Aerosol erzeugt, wenn die Unterbrechertaste gedrückt wird.
-
Page 81: Therapie Beenden
– 29 – 3.4 Therapie beenden Zum Beenden der Therapie gehen Sie wie folgt vor: • Schalten Sie den Kompressor aus. • Stecken Sie den Vernebler wieder zurück in die Halterung am Kompressor. • Ziehen Sie den Netzstecker aus der Steckdose. Die vollständige Trennung vom Netz ist nur gewährleistet, wenn der Netzstecker aus der Steckdose gezogen ist. -
Page 82: Wiederaufbereitung
– 30 – WIEDERAUFBEREITUNG GEFAHR Lebensgefahr durch Stromschlag Flüssigkeiten können Strom leiten, wodurch die Gefahr eines Stromschlags entsteht. • Schalten Sie vor jeder Reinigung den Kompressor aus und ziehen Sie den Netzstecker aus der Steckdose. Wird das Inhalationssystem nur von einem Patienten verwen- det, beachten Sie die Reinigungs- und Desinfektionshinweise im Abschnitt "Ohne Patientenwechsel"... - Page 83 – 31 – Vernebler und Maske Die Maske kann zusammen mit dem Vernebler gereinigt, des- infiziert und getrocknet werden. Vorbereiten MASKE • Ziehen Sie die Maske vom Vernebler ab. • Entfernen Sie das Gummiband von der Maske. VERNEBLER • Ziehen Sie den Schlauch vom Vernebler ab. •...
- Page 84 – 32 – VERNEBLER UND MASKE • Spülen Sie alle verwendeten Einzelteile unter fließendem Trinkwasser kurz vor. • Legen Sie alle Einzelteile ca. 5 Minuten lang in warmes Trinkwasser mit etwas Spülmit- tel. • Spülen Sie alle Einzelteile gründlich unter fließendem Trink- wasser ab.
- Page 85 – 33 – IN KOCHENDEM WASSER • Legen Sie alle Einzelteile mind. 5 Minuten in kochendes Wasser. Verwenden Sie einen sauberen Kochtopf und Trinkwasser. HINWEIS! Gefahr einer Beschädigung der Kunststofftei- le! Kunststoff schmilzt bei Berührung mit dem heißen Topf- boden. Achten Sie auf ausreichenden Wasserstand im Topf, so dass die Einzelteile nicht den Topfboden berühren.
- Page 86 – 34 – Kompressorgehäuse reinigen HINWEIS Gefahr eines Gerätedefekts durch eindringende Flüssig- keiten Wenn Flüssigkeiten in das Innere des Kompressors gelan- gen, kann dies einen Gerätedefekt verursachen. • Tauchen Sie den Kompressor nicht unter Wasser. • Reinigen Sie den Kompressor nicht unter fließendem Wasser.
-
Page 87: Mit Patientenwechsel
– 35 – 4.2 Mit Patientenwechsel Reinigungs- und Desinfektionszyklen Vernebler mit Anschluss- Austausch vor jedem Patientenwechsel schlauch und Maske Kompressorgehäuse Desinfektion vor jedem Patientenwechsel Luftfilter Austausch nach 200 Betriebsstunden (ca. 1 Jahr) Vernebler und Maske Der Vernebler und die Maske sind nicht für einen Patienten- wechsel geeignet. -
Page 88: Anschlussschlauch Pflegen
– 36 – 4.3 Anschlussschlauch pflegen Trocknen Sie den Anschlussschlauch nach jeder Inhalation: • Schließen Sie den Anschlussschlauch an den Kompressor • Schalten Sie Ihren Kompressor ein. • Lassen Sie den Kompressor so lange arbeiten, bis die durch den Schlauch strömende Luft einen eventuellen Feuchtig- keitsniederschlag im Schlauch beseitigt hat. -
Page 89: Kontrollieren
– 37 – 4.5 Kontrollieren Überprüfen Sie alle Produktbestandteile nach jeder Reinigung und Desinfektion. Ersetzen Sie gebrochene, verformte oder stark verfärbte Teile. 4.6 Aufbewahren Bewahren Sie dieses Produkt wie nachfolgend beschrieben auf: • Wickeln Sie die Netzleitung lo- cker auf. HINWEIS! Wickeln Sie die Netzleitung nicht um den Kom- pressor. -
Page 90: Fehlerbehebung
– 38 – FEHLERBEHEBUNG Nur der Technische Service der PARI GmbH oder eine von der PARI GmbH ausdrücklich dazu ermächtigte Service-Stelle darf den Kompressor reparieren. Wird der Kompressor von anderen Personen geöffnet oder manipuliert, verfallen sämtliche Ge- währleistungsansprüche. In diesen Fällen übernimmt die PARI GmbH keine Haftung. -
Page 91: Technische Daten
– 39 – TECHNISCHE DATEN 6.1 Kompressor Allgemeine Kompressordaten Netzspannung 220 – 240 V Netzfrequenz 50 Hz Stromaufnahme 0,95 A Gehäuseabmessungen 18,5 cm × 13,0 cm × 15,0 cm (B × H × T) Gewicht 1,7 kg Druck 1,6 bar Kompressorfluss 5,0 l/min Schalldruckpegel 54 dB(A) Klassifikation nach IEC 60601-1 / EN 60601-1 Art des Schutzes gegen elektrischen Schlag Schutzklasse II Grad des Schutzes gegen elektrischen Typ BF Schlag des Anwendungsteils (Vernebler) -
Page 92: Elektromagnetische Verträglichkeit
Betrieb in der benutzten Anordnung sicherzu- stellen. Technische Daten zur elektromagnetischen Verträglichkeit (EMV-Hinweise) in tabellarischer Form sind auf Anfrage beim Hersteller bzw. Händler oder im Internet unter folgendem Link erhältlich: https://www.pari.com/fileadmin/Electromagnetic-compatibility-5.pdf Umgebungsbedingungen Im Betrieb Umgebungstemperatur +10 °C bis +40 °C Relative Luftfeuchtigkeit 30 % bis 75 % (nicht... -
Page 93: Vernebler
– 41 – Der Betrieb des Kompressors in professionellen Einrichtungen zur Gesundheitsvorsorge ist auf den stationären Bettenbereich und die Intensivpflegestation beschränkt. Der Betrieb des Kom- pressors in Bereichen erhöhter magnetischer oder elektrischer Strahlung (z. B. in der Nähe eines Kernspintomographen) ist nicht zulässig. - Page 94 Aerosolanteil 39,8 31,2 [% > 2 µm < 5 µm] Aerosolanteil 47,7 38,1 39,5 [% > 5 µm] Aerosol Output [ml] 0,35 0,41 0,38 Aerosol Outputrate 0,07 0,16 0,18 [ml/min] 8) Betrieb mit PARI BOY Pro Kompressor (Type 130). 9) MMAD = Medianer massenbezogener aerodynamischer Durchmesser 10) GSD = Geometrische Standardabweichung...
- Page 95 – 43 – Minimaler Kom- Nominaler Kom- Maximaler Kom- Düsenaufsatz pressorfluss pressorfluss pressorfluss (3 l/min – (5 l/min – (6 l/min – (blau) 0,6 bar) 1,6 bar) 1,9 bar) Restvolumen [ml] 1,16 1,16 1,10 (gravimetrisch bestimmt) Outputrate bezo- gen auf das Füllvo- lumen [%/min] Minimaler Kom- Nominaler Kom- Maximaler Kom- pressorfluss...
-
Page 96: Sonstiges
Händler). Materialrecycling hilft, den Verbrauch von Rohstoffen zu verringern und die Umwelt zu schützen. Alle weiteren Produktbestandteile Alle weiteren in Ihrem PARI Inhalationssystem enthaltenen Komponenten können über den Hausmüll entsorgt werden, so- fern es keine anderen landesspezifischen Entsorgungsregeln gibt. -
Page 97: Kennzeichnung
– 45 – 7.3 Kennzeichnung Auf den Produktbestandteilen bzw. auf der Verpackung befin- den sich folgende Zeichen: Das Produkt erfüllt die Anforderungen gemäß 93/42/EWG (Medizinprodukte) und 2011/65/EU (RoHS). Gebrauchsanweisung beachten Gebrauchsanweisung beachten Artikelnummer Fertigungslosnummer, Charge Seriennummer ON OFF Ein / Aus Wechselstrom Schutzgrad des Anwendungsteils: Typ BF Gerät der Schutzklasse II... - Page 98 – 46 – Das Medizinprodukt wurde nach dem 13. August 2005 in Verkehr gebracht. Das Produkt darf nicht über den normalen Hausmüll entsorgt werden. Das Symbol der durchgestrichenen Mülltonne weist auf die Notwendigkeit der getrennten Sammlung hin. Hersteller...
-
Page 99: Anhang: Wiederaufbereitung In Professionellen Umgebungen Mit Patientenwechsel
Vernebler und Zubehör Die nachfolgende Übersicht über die Aufbereitungsschritte in professionellen Umgebungen gilt für folgende Produkte: – Vernebler – LC Unterbrecher – PARI Kindermaske soft (ohne Gummiband) 1. Vorbereitung Produkt zerlegen [siehe: Vorbereiten, Seite 31]. Prüfen: – Verfallsdatum des Reinigungs-/ Desinfektionsmittels – Grenzen der Aufbereitung erreicht? - Page 100 – 48 – 2. Reinigung und Desinfektion Manuelle pH-neutrales, enzymatisches Reinigungsmittel, ® Reinigung: z. B. Korsolex Endo Cleaner (Bode) oder ® Bodedex forte (Bode) Anwendung: gemäß Herstellerangaben, bei sichtbarer Verunreinigung ggf. Bürste verwenden. Manuelle Mit aldehydhaltigem Instrumenten- ® Desinfektion: Desinfektionsmittel, z. B. Korsolex Basic (Bode) Anwendung: gemäß...
- Page 101 – 49 – 3. Dampfsterilisation Ausstattung: – Dampfsterilisator (bevorzugt mit fraktioniertem Vorvakuum) gem. DIN EN 285 bzw. DIN EN 13060 (Typ B) – Sterilbarrieresystem gem. DIN EN 11607 – Maskenstabilisator Temperatur / Dauer: 134 °C für mind. 3 Min. Info: Verwenden Sie für die Steri- lisation stets den Maskenstabili- sator, da sich durch die hohen Temperaturen die Passform der Maske verändern kann.
-
Page 102: Anschlusschlauch
– 50 – Anschlusschlauch 1. Vorbereitung Produkt prüfen: – Verfallsdatum des Reinigungs-/ Desinfektionsmittels – Grenzen der Aufbereitung erreicht? 2. Reinigung und Desinfektion Manuelle nicht anwendbar Reinigung: Manuelle nicht anwendbar Desinfektion: ® Maschinelle Alkalisches Reinigungsmittel, z. B. neodisher Reinigung mit MediClean forte (Dr. Weigert) in Verbindung mit ®... - Page 103 – 51 – 4. Visuelle Kontrolle & Aufbewahrung Alle Einzelteile überprüfen. Gebrochene, verformte oder stark verfärbte Teile ersetzen. Aufbewahrungsort: – trocken – staubfrei – kontaminationsgeschützt optional: Sterilverpackung verwenden Grenzen der Aufbereitung max. 50 Aufbereitungszyklen...
- Page 104 – 52 –...
- Page 105 – 53 –...
- Page 106 – 54 –...
- Page 107 ® PARI BOY Pro Inhalationssystem GARANTIESCHEIN Auf den Kompressor gewähren wir 4 Jahre Garantie. Die Garantiezeit läuft ab Kaufdatum. PARI GmbH Technischer Service Holzhofstr. 10b 82362 Weilheim, Germany...
- Page 108 Kaufbestätigung: Das Produkt mit der obigen Seriennummer wurde von uns originalverpackt verkauft. Kaufdatum Stempel und Unterschrift des Fachhändlers ©2019 PARI GmbH Spezialisten für effektive Inhalation, 130D2103_de-F 2019-12-19 PARI GmbH Spezialisten für effektive Inhalation Moosstraße 3 82319 Starnberg • GERMANY info@pari.de • www.pari.com...
- Page 109 Pro inhalation system ® PARI BOY Pro compressor (Type 130) ® PARI LC SPRINT nebuliser (Type 023) PARI child mask soft (Type 041) Important: Read these instructions carefully before using the product for the first time. Follow all instructions and safety instructions! Keep the instructions in a safe place.
- Page 111 – 3 – Identification, validity, version These instructions for use are valid for PARI BOY Pro inhala- tion systems in the following countries: Countries outside the EU Version of these instructions for use: Version F – 2019-12, Approved version dated 2019-11-15 Information as of: 2019-11...
- Page 112 – 4 – Contact For all product information and in the event of defects or ques- tions about usage, please contact our Service Center: Tel.: +49 (0)8151-279 220 (international) +49 (0)8151-279 279 (German-speaking) E-Mail: info@pari.de...
- Page 113 – 5 – TABLE OF CONTENTS IMPORTANT INFORMATION.......... Intended purpose ............. Indication ................Contraindications.............. Safety instructions ............PRODUCT DESCRIPTION ..........Components ..............Working parts ..............Description of function ............Material information ............Maintenance ..............Operating life ..............APPLICATION ..............Setting up the compressor ..........Preparing for treatment ............
- Page 114 – 6 – MISCELLANEOUS ............Disposal................Links ................. Labelling ................APPENDIX: Reprocessing in professional environ- ments for use with several patients ......Compressor ..............Nebuliser and accessories ..........Connection tubing ............
-
Page 115: Important Information
Compressor The purpose of the PARI compressor is to generate com- pressed air for operating a PARI nebuliser. The PARI compressor is intended for use with multiple pa- tients. It must only be used for PARI nebulisers. The com- pressor can be operated by the patient himself and must only be used indoors. -
Page 116: Indication
The user must follow these in order to guarantee safe op- eration of this PARI product. This PARI product must only be used as described in these in- structions for use. The instructions for use of the inhalation solution used must also be followed. -
Page 117: Danger Of Electrocution
– 9 – General Nebuliser aerosol characteristics differ from the information provided by the manufacturer if non-approved solutions or sus- pensions are used for nebulisation. This product is not suitable for use in an anaesthetic breathing system or a ventilator breathing system. Tracheotomised patients cannot inhale with a mouthpiece. - Page 118 – 10 – – if it is suspected that the compressor or the power cord might have been damaged (e.g., after the compressor has fallen or if there is a smell of burning plastic) – if a malfunction occurs during operation –...
- Page 119 – 11 – Impairment of treatment due to electromagnetic interference Use only original spare parts and original accessories from PARI. The use of third party products can result in increased emissions of electromagnetic interference or reduced resis- tance of the PARI compressor. Hygiene Observe the following hygiene instructions: –...
- Page 120 – 12 – Identifying and classifying warning instructions Safety-critical warnings are categorised according to the follow- ing hazard levels in these instructions for use: DANGER DANGER indicates a hazardous situation which will lead to severe injuries or death if it is not avoided. WARNING WARNING indicates a hazardous situation which can lead to severe injuries or death if it is not avoided.
-
Page 121: Product Description
(2c) Nozzle insert (red) (2d) Nebuliser lower part (2e) LC interrupter (2f) Mouthpiece (2g) Connection tubing (3) PARI child mask soft (3a) Elastic band 4) With PARI PIF-Control System. PIF = Peak Inspiratory Flow (inhalation peak flow control) [see: Performing treatment, page 25]. Not included with all product variants. -
Page 122: Working Parts
– 14 – 2.2 Working parts The compressor includes the following working parts: (1) Carrying handle (2) Power cord (connected inseparably to the compressor) (2a) Cable holder (3) Ventilation slits (4) Holder for nebuliser (5) Identification label (bottom of device) (6) Air connection (7) Air filter (8) On/off switch... -
Page 123: Description Of Function
– 15 – 2.3 Description of function Compressor with nebuliser Aerosol Compressed air The compressor supplies the nebuliser with compressed air. When compressed air is supplied, Ambient air the nebuliser generates an aero- Aerosol sol from the liquid, for example the medication with which it is filled. -
Page 124: Material Information
Nozzle insert Polypropylene Nebuliser lower part Polypropylene, thermoplastic elastomer LC interrupter Polypropylene Mouthpiece (with Polypropylene, thermoplastic elastomer exhalation valve) Connection tubing Polyvinyl chloride Tubing endpiece Thermoplastic elastomer PARI child mask soft Polypropylene, thermoplastic elastomer Elastic band Synthetic rubber 2.5 Maintenance The compressor is maintenance free. -
Page 125: Operating Life
If the compressor is still in use after this time, have the compressor tested. To do this, contact the manufacturer or distributor. Nebuliser (all components 300 disinfections, max. 1 year except the connection tubing) Connection tubing max. 1 year PARI child mask soft 300 disinfections, max. 1 year... -
Page 126: Application
People who assist others in carrying out the therapy must ensure that all of the steps described below are carried out correctly. If the nebuliser is to be operated via a PARI CENTRAL on a central medical gas supply, the instructions for use of the PARI CENTRAL must be followed. - Page 127 (including accessories there- for, such as antenna cables or external antennas). • If the PARI device has to be placed immediately beside or on top of other devices for operation, all devices must be monitored to ensure that they are working properly.
-
Page 128: Preparing For Treatment
– 20 – Set the compressor up as follows: • Place the compressor on a firm, flat, dust-free, dry surface. • Plug the power plug into a suitable socket. CAUTION! Route the power cord in such a way that it is not a tripping hazard and no one can become entangled in it. - Page 129 – 21 – • Attach the connection tubing to the nebuliser. • Attach the LC interrupter to the nebuliser. • Insert the connection tubing in the air inlet on the side of the LC interrupter. Using the mouthpiece • Fit the mouthpiece onto the nebuliser.
- Page 130 – 22 – Using the mask • If desired, attach the elastic band to the mask (as shown in the figure). • If applicable, detach the mouthpiece from the nebuliser. • Attach the mask to the nebuliser. Filling the nebuliser NOTE Nebuliser lid might break off If the lid is twisted in the wrong direction, it may break off.
- Page 131 – 23 – • Pour the required quantity of inhalation solution into the top of the nebuliser. Note the minimum and max- imum fill volumes [see: Gen- eral nebuliser data, page 40]. If the nebuliser contains too little or too much liquid, the nebulisation and consequently the therapy will be less effect- ive.
-
Page 132: Performing Treatment
– 24 – 3.3 Performing treatment All of the safety instructions in these instructions for use must have been read and understood before any treatment is carried out. Always hold the nebuliser upright during treatment. Proceed as follows in order to carry out the treatment: •... - Page 133 This in turn may lead to an electric shock. • Check that an aerosol is being generated before you begin the treatment. Information about the PIF-Control System: The PARI PIF-Control System in the nebuliser upper section is de- signed to help the patient learn a slow, controlled inhalation tech- nique.
- Page 134 – 26 – Inhaling with the mouthpiece • Sit in an upright position and relax. • Hold the mouthpiece between your teeth and enclose it with your lips. • Breathe in as slowly and deeply as possible through the mouthpiece, and out again calmly. •...
- Page 135 – 27 – • Gently press the mask against the face so that it fits snugly over the mouth and nose. Make sure that the nebuliser is upright. • If desired, use the elastic band to hold the mask in place against the face.
-
Page 136: Ending The Treatment
– 28 – If you want to use the permanent nebulising function even with the LC interrupter fitted: • Turn the interrupter button clockwise as far as it will go. Æ The aerosol is generated per- manently (permanent nebulising). 3.4 Ending the treatment To end the treatment, proceed as follows: •... -
Page 137: Reprocessing
– 29 – REPROCESSING DANGER Danger of electrocution Liquids can conduct electricity, thereby posing a risk of elec- tric shock. • Always switch the compressor off and disconnect the power plug from the mains socket before starting to clean If the inhalation system is used by only one patient, follow the instructions for cleaning and disinfecting in the section "Single patient use"... - Page 138 – 30 – Nebuliser and mask The mask can be cleaned, disinfected and dried together with the nebuliser. Preparation MASK • Detach the mask from the nebuliser. • Detach the elastic band from the mask. NEBULISER • Detach the tube from the nebuliser. •...
- Page 139 – 31 – NEBULISER AND MASK • Briefly rinse all parts used in running drinking water beforehand. • Place all disassembled com- ponents in warm drinking water with a little dishwashing liquid for about 5 min. • Rinse off all parts thoroughly in drinking water. •...
- Page 140 – 32 – IN BOILING WATER • Place all the individual parts in boiling water for at least 5 minutes. Use a clean pot and drinking water. NOTE! Risk of damage to plastic parts! Plastic will melt if it comes into contact with the hot base of the pot. Make sure there is enough water in the pot to prevent the individual parts from touching the pot base.
-
Page 141: Multiple Patient Use
– 33 – Cleaning the compressor housing NOTE Danger of device fault due to liquid penetration If liquids get into the interior of the compressor, this may cause a fault in the device. • Never immerse the compressor in water. •... -
Page 142: Care Of The Connection Tube
– 34 – Nebuliser and mask The nebuliser and mask are not suitable for use by multiple pa- tients. Use a separate nebuliser (including connection tubing) and a separate mask for each patient. Disinfecting the compressor housing For disinfection, use a standard, alcohol-based disinfectant (e.g., isopropanol). -
Page 143: Replacing The Air Filter
– 35 – 4.4 Replacing the air filter The air filter must be checked at regular intervals (after every 10th application). If it is discoloured brown or grey, or if it is damp or clogged, it must be replaced. In all cases, it must be replaced after 200 operating hours (ap- prox. 1 year). -
Page 144: Storage
– 36 – 4.6 Storage Store this product as described below: • Wind the power cord up loosely. NOTE! Do not wind the power cord around the compressor. If the power cord is wound or bent very tightly, the wires in- side the cord may break. -
Page 145: Troubleshooting
The compressor must not be repaired except by the Technical Service of PARI GmbH or a service center expressly authorised to do so by PARI GmbH. If the compressor is opened or manipulated by anyone else, all claims under the warranty shall be void. In these cases, PARI GmbH will accept no liability. -
Page 146: Technical Data
– 38 – TECHNICAL DATA 6.1 Compressor General compressor data Supply voltage [V] see label on confirmation of Mains frequency [Hz] purchase Power consumption [A] Housing dimensions 18.5 cm × 13.0 cm × 15.0 cm (W × H × D) Weight 1.7 kg Pressure 1.6 bar Compressor flow 5.0 l/min. Sound pressure level 54 dB(A) Classification according to IEC 60601-1 / EN 60601-1 Type of electric shock protection Protection class II... -
Page 147: Electromagnetic Compatibility
Technical data on electromagnetic compatibility (EMC informa- tion) is available in table format upon request from the manu- facturer or dealer or on the internet at the following linked page: https://www.pari.com/fileadmin/Electromagnetic-compatibility-5.pdf Ambient conditions During operation Ambient temperature +10 °C to +40 °C... -
Page 148: Nebuliser
– 40 – Use of the compressor in professional healthcare facilities is limited to the inpatient wards and the intensive care unit. Use of the compressor in areas with elevated magnetic or electrical radiation (e.g., close to an MRI scanner) is not permitted. During transportation and storage Minimum ambient temperature (without -25 °C... - Page 149 Aerosol output [ml] 0.35 0.41 0.38 Aerosol output rate 0.07 0.16 0.18 [ml/min] Residual volume 1.16 1.16 1.10 [ml] (gravimetric) 8) Operation with PARI BOY Pro compressor (Type 130). 9) MMAD = Mass Median Aerodynamic Diameter 10) GSD = Geometric Standard Deviation...
- Page 150 – 42 – Minimum com- Nominal com- Maximum com- Nozzle insert pressor flow pressor flow pressor flow (3 l/min – (5 l/min – (6 l/min – (blue) 0.6 bar) 1.6 bar) 1.9 bar) Percentage of fill volume emitted per minute [%/min] Minimum com- Nominal com- Maximum com- pressor flow pressor flow pressor flow...
-
Page 151: Miscellaneous
All other product components All other product components included in your PARI inhalation system can be disposed of with domestic waste unless other regulations apply in the country where you are located. - Page 152 – 44 – This product satisfies the requirements of 93/42/EEC (Medical devices) and 2011/65/EU (RoHS). Follow the instructions for use Consult instructions for use Item number Production batch number, lot Serial number ON OFF On / Off Alternating current Protection class of the applied part: Type BF Protection class II device The device is protected against drip water (degree of protection according to IEC 60529 / EN 60529).
-
Page 153: Appendix: Reprocessing In Professional Environments For Use With Several Patients
The following overview of the processing steps in professional environments applies to the following products: – Nebuliser – LC interrupter – PARI child mask soft (without elastic band) 1. Preparation Disassemble the product [see: Preparation, page 30]. Check: – Expiry date of the cleaning agent/disinfectant... - Page 154 – 46 – 2. Cleaning and disinfection ® Manual pH-neutral, enzymatic cleaner, e.g., Korsolex ® cleaning: Endo Cleaner (Bode) or Bodedex forte (Bode) Use: In accordance with manufacturer information, if dirt is visible use a brush if necessary. Manual With aldehyde-containing instrument ®...
- Page 155 – 47 – 3. Steam sterilisation Equipment: – Steam steriliser (preferably with fractionated pre-vacuum) in accordance with DIN EN 285 or DIN EN 13060 (Type B) – Sterile barrier system in accordance with DIN EN 11607 – Mask stabiliser Temperature / Duration: 134 °C for at least 3 min. Info: Always use the mask stabil- iser when sterilising because oth- erwise it may lose its shape under...
-
Page 156: Connection Tubing
– 48 – Connection tubing 1. Preparation Check the product: – Expiry date of the cleaning agent/disinfectant – Processing limits reached? 2. Cleaning and disinfection Manual not applicable cleaning: Manual not applicable disinfection: ® Mechanical Alkaline cleaning agent, e.g., neodisher cleaning with MediClean forte (Dr. Weigert) in conjunction with ®... - Page 157 – 49 – 4. Visual inspection & storage Inspect all individual parts. Replace any broken, misshapen or seriously discoloured parts. Storage location: – dry – dust-free – protected from sources of contamination optional: Use sterile packaging Processing limits max. 50 processing cycles...
- Page 158 – 50 –...
-
Page 159: Certificate Of Guarantee
® PARI BOY Pro inhalation system CERTIFICATE OF GUARANTEE We guarantee the compressor for 4 years. The warranty period commences on the date of purchase. - Page 160 The product with the serial number stated above was sold in its original packaging by us. Date of purchase Stamp and signature of the dealer ©2019 PARI GmbH Spezialisten für effektive Inhalation, 130D2103_en-F 2019-12-19 PARI GmbH Spezialisten für effektive Inhalation Moosstraße 3 82319 Starnberg •...
- Page 161 Pro (Tipo 130) ® Nebulizador PARI LC SPRINT (Tipo 023) Mascarilla pediátrica soft PARI (Tipo 041) Importante: Antes de utilizar el producto lea detenidamente estas instrucciones de uso. Atención: respete todas las ins- trucciones y la información sobre seguridad. Conserve las instrucciones de uso en buen estado.
- Page 163 Última actualización: 2019-11 La versión actual de las instrucciones de uso se puede descar- gar como archivo PDF de la página: www.pari.com (en la página de producto que corresponda). Formatos disponibles para personas con discapacidad visual Las instrucciones de uso disponibles online en formato PDF se pueden imprimir ampliadas.
- Page 164 – 4 – Fabricante PARI GmbH Spezialisten für effektive Inhalation Moosstraße 3, 82319 Starnberg, Germany Contacto Si desea obtener cualquier tipo de información sobre nuestros productos y en caso de fallos o consultas sobre el uso diríjase a nuestro Centro de atención: Tel.: +49 (0)8151-279 220 (internacional) +49 (0)8151-279 279 (atención en alemán)
- Page 165 – 5 – ÍNDICE ADVERTENCIAS IMPORTANTES ........Finalidad de uso ............... Indicaciones ..............Contraindicaciones ............Información sobre seguridad ..........DESCRIPCIÓN DEL PRODUCTO........Componentes ..............Elementos funcionales ............. Descripción del funcionamiento ........Información sobre el material ........... Mantenimiento ..............Vida útil................MODO DE USO..............
- Page 166 – 6 – INFORMACIÓN ADICIONAL........... Eliminación ............... Enlaces................Identificación ..............ANEXO: Higiene en entornos profesionales con cambio de paciente ............Compresor................ Nebulizador y accesorios ..........Tubo flexible ..............
-
Page 167: Advertencias Importantes
1.1 Finalidad de uso El sistema de inhalación PARI está compuesto por un compre- sor PARI, un nebulizador PARI y accesorios PARI. Este siste- ma se utiliza para el tratamiento de las vías respiratorias bajas. Este sistema de inhalación solo puede ser utilizado por perso- nas que entienden el contenido de las instrucciones de uso y que pueden utilizar el sistema de inhalación de forma segura. -
Page 168: Indicaciones
Solo si el usuario las cumple y las respeta se podrá utilizar este producto PARI de forma segura. Utilice este producto PARI únicamente tal y como se indica en estas instrucciones de uso. También se debe respetar la información de uso de la solución para inhalación utilizada. - Page 169 – 9 – Generalidades Si se utilizan soluciones o suspensiones no permitidas para la nebulización, los datos del aerosol del nebulizador podrían di- ferir de la información facilitada por el fabricante. Este producto no se puede utilizar en un sistema de anestesia por inhalación ni en el circuito de respiradores.
- Page 170 – 10 – – No deje nunca el compresor sin vigilancia mientras está en funcionamiento. – Enchufe el compresor a una toma de corriente fácilmente accesible. El enchufe debe poder extraerse rápidamente en cualquier momento. – Apague el compresor inmediatamente y extraiga la clavija de la toma de corriente: –...
- Page 171 Pérdida de eficacia del tratamiento por perturbaciones electromagnéticas Utilice solo recambios originales y accesorios originales de PARI. El uso de productos de otros fabricantes puede incre- mentar las emisiones electromagnéticas perturbadoras o redu- cir la inmunidad del compresor PARI. Higiene Siga estas instrucciones de higiene: –...
-
Page 172: Tratamiento De Lactantes, Niños Y Personas Que Necesitan Ayuda
Notificación de sucesos graves Si sucede algo grave con este producto PARI debe informarse inmediatamente al fabricante o distribuidor y a las autoridades competentes (información de contacto: 4). - Page 173 – 13 – ATENCIÓN La palabra ATENCIÓN advierte sobre una situación peligro- sa que, de no evitarse, puede provocar lesiones leves o de gravedad media. AVISO La palabra AVISO advierte sobre una situación que puede provocar daños materiales si no se evita.
-
Page 174: Descripción Del Producto
(2f) Boquilla (2g) Tubo flexible (3) Mascarilla pediátrica soft PARI (3a) Cinta de goma 4) Con PIF-Control System de PARI. PIF = Peak Inspiratory Flow (control de flujo inspiratorio máximo) [véase: Realización del tratamiento, página 26]. No incluido en todas las variantes del producto. -
Page 175: Elementos Funcionales
– 15 – 2.2 Elementos funcionales El compresor dispone de los siguientes elementos funcionales: (1) Asidero (2) Cable de alimentación (está unido al compresor y no se puede desmontar) (2a) Soporte de cable (3) Ranuras de ventilación (4) Soporte para el nebulizador (5) Placa identificativa (en la parte inferior del aparato) (6) Salida de aire (7) Filtro de aire... -
Page 176: Descripción Del Funcionamiento
– 16 – 2.3 Descripción del funcionamiento Compresor con nebulizador Aerosol Aire comprimido El compresor suministra aire comprimido al nebulizador. Con la entrada de aire comprimi- Aire ambiente do, el nebulizador genera aerosol Aerosol a partir del líquido introducido (fármaco). Este aerosol se inspira a través de la boquilla o en su ca- so de una mascarilla para que lle- gue a los pulmones. -
Page 177: Información Sobre El Material
Parte inferior del nebulizador Polipropileno, elastómero termoplástico Dispositivo interruptor LC Polipropileno Boquilla (con válvula de Polipropileno, elastómero espiración) termoplástico Tubo flexible Cloruro de polivinilo Extremo del tubo Elastómero termoplástico Mascarilla pediátrica soft PARI Polipropileno, elastómero termoplástico Cinta de goma Caucho sintético... -
Page 178: Mantenimiento
Póngase en contacto con el fabricante o el distribuidor. Nebulizador (todos los 300 desinfecciones, máximo componentes excepto el tubo 1 año flexible) Tubo flexible Máximo 1 año Mascarilla pediátrica soft PARI 300 desinfecciones, máximo 1 año... -
Page 179: Modo De Uso
Si el nebulizador debe utilizarse con un sistema de suministro de gas centralizado mediante PARI CENTRAL, deberán con- sultarse las instrucciones de uso del sistema PARI CENTRAL. 3.1 Colocación del compresor La estancia en la que se utilice el compresor debe cumplir cier- tos requisitos en relación con las condiciones ambientales de... - Page 180 Éstas pueden afectar negativamente al funcionamiento de los aparatos y por consiguiente al trata- miento. • No coloque el aparato PARI junto a otro aparato ni lo api- le con otros dispositivos. • Asegúrese de mantener una distancia mínima de 30 cm con respecto a los dispositivos de comunicación inalám-...
-
Page 181: Preparación Del Tratamiento
– 21 – Coloque el compresor del siguiente modo: • Disponga el compresor sobre una base firme, llana, seca y libre de polvo. • Enchufe la clavija en una toma de corriente adecuada. ¡ATENCIÓN! Coloque el cable de alimentación adecua- damente para que nadie tropiece o se enrede con él. Las conexiones de cable realizadas incorrectamente suponen riesgo de lesiones. - Page 182 – 22 – • Conecte el tubo flexible al ne- bulizador. Alternativa: • Conecte el dispositivo interrup- tor LC al nebulizador. • Conecte el tubo flexible a la entrada de aire lateral del dis- positivo interruptor LC. Uso de la boquilla •...
- Page 183 – 23 – Uso de la mascarilla • Si es necesario, fije la cinta de goma a la mascarilla (como muestra la figura). • Retire si es necesario la boqui- lla del nebulizador. • Conecte la mascarilla al nebu- lizador. Llenado del nebulizador AVISO Riesgo de rotura de la tapa del nebulizador...
- Page 184 – 24 – • Introduzca en el nebulizador la cantidad necesaria de solución para inhalación desde la parte superior. Preste atención al volumen de llenado mínimo y máximo [véa- se: Datos generales sobre el nebulizador, página 41]. Una cantidad excesiva o insuficien- te de líquido en el nebulizador afecta gravemente a la nebuli- zación y por consiguiente al tratamiento.
-
Page 185: Realización Del Tratamiento
– 25 – 3.3 Realización del tratamiento Antes de llevar a cabo el tratamiento debe leerse y enten- derse toda la información sobre seguridad que incluyen estas instrucciones de uso. Durante la terapia mantenga siempre el nebulizador en po- sición vertical. Siga estos pasos para realizar el tratamiento: •... - Page 186 • Asegúrese de que se genera el aerosol antes de empezar con el tratamiento. Información sobre el PIF-Control System de PARI: El PIF-Control System de PARI de la parte superior del nebuliza- dor sirve para aprender a hacer una inhalación lenta y controlada.
- Page 187 – 27 – Inhalación con boquilla • Colóquese sentado, en postura relajada y con la espalda er- guida. • Coloque la boquilla entre los dientes y cierre los labios alre- dedor de ésta. • Inspire y espire por la boquilla lo más profunda, lenta y rela- jadamente posible.
- Page 188 – 28 – • Coloque la mascarilla sobre la nariz y la boca ejerciendo una ligera presión. Asegúrese de que el nebuliza- dor se encuentra en posición vertical. • Si es necesario, ayúdese de la cinta de goma para sujetar la mascarilla en la cara.
-
Page 189: Finalización Del Tratamiento
– 29 – • Desbloquee la tecla para interrumpir la generación de aero- sol. Si desea una nebulización ininterrumpida a pesar de tener el dispositivo interruptor LC montado: • Gire la tecla de interrupción a derechas hasta el tope. Æ El aerosol se generará de for- ma ininterrumpida (nebuliza- ción continua). -
Page 190: Higiene
– 30 – HIGIENE PELIGRO Peligro de muerte por descarga eléctrica Los líquidos son conductores de electricidad, lo que va aso- ciado al riesgo de descarga eléctrica. • Antes de limpiar el compresor apáguelo y extraiga el en- chufe de la toma de corriente. Si el sistema de inhalación va a ser utilizado por un solo pa- ciente consulte y respete las instrucciones de limpieza y des- infección del apartado "Sin cambio de paciente"... - Page 191 – 31 – Nebulizador y mascarilla La mascarilla se puede limpiar, desinfectar y secar junto con el nebulizador. Preparación MASCARILLA • Separe la mascarilla del nebulizador. • Retire la cinta de goma de la mascarilla. NEBULIZADOR • Desconecte el tubo flexible del nebulizador. •...
- Page 192 – 32 – NEBULIZADOR Y MASCARILLA • Aclare brevemente todos los componentes sueltos con agua corriente potable. • Sumerja todos los componen- tes durante unos 5 minutos en agua potable caliente y un po- co de detergente. • Aclare bien todos los componentes con agua corriente pota- ble.
- Page 193 – 33 – EN AGUA HIRVIENDO • Sumerja todos los componentes sueltos en agua hirvien- do durante al menos 5 minutos. Utilice una olla limpia y agua corriente potable. ¡AVISO! Peligro de dañar los componentes de plástico Los plásticos se funden al entrar en contacto con el fondo caliente de la olla.
- Page 194 – 34 – Limpieza de la carcasa del compresor AVISO Riesgo de avería del aparato por la penetración de líqui- Si penetran líquidos en el compresor éste se puede averiar. • No sumerja el compresor en agua. • No lave el compresor con agua corriente. •...
-
Page 195: Con Cambio De Paciente
– 35 – 4.2 Con cambio de paciente Ciclos de limpieza y desinfección Nebulizador con tubo Sustituir antes de cada cambio de flexible y mascarilla paciente Carcasa del compresor Desinfectar antes de cada cambio de paciente Filtro de aire Cambiar al cabo de 200 horas de servicio (aproximadamente 1 año) Nebulizador y mascarilla Ni el nebulizador ni la mascarilla son adecuados para un cam-... -
Page 196: Cambio Del Filtro De Aire
– 36 – • Conecte el tubo flexible al compresor. • Encienda el compresor. • Mantenga el compresor en marcha hasta que el aire que pasa por el tubo flexible haya eliminado por completo la po- sible condensación en el tubo flexible. 4.4 Cambio del filtro de aire El filtro de aire se debe comprobar con regularidad (cada 10 aplicaciones). -
Page 197: Almacenamiento
– 37 – 4.6 Almacenamiento Almacene este producto del siguiente modo: • Enrolle el cable de alimentación sin tensión. ¡AVISO! No enrolle el cable de alimentación alrededor del compresor. Si el cable de ali- mentación queda plegado o do- blado en un radio muy pequeño los hilos del interior del cable se podrían romper. -
Page 198: Resolución De Problemas
– 38 – RESOLUCIÓN DE PROBLEMAS Solo el servicio técnico de PARI GmbH o un centro de servicio autorizado expresamente por PARI GmbH pueden hacer repa- raciones en el compresor. La apertura o manipulación del com- presor por otras personas invalidará de inmediato todos los de- rechos de garantía. -
Page 199: Datos Técnicos
– 39 – DATOS TÉCNICOS 6.1 Compresor Información general sobre el compresor Tensión de alimentación 220 – 240 V Frecuencia de red 50 Hz Consumo de potencia 0,95 A Dimensiones de la carcasa 18,5 cm × 13,0 cm × 15,0 cm (Ancho x Alto x Largo) Peso 1,7 kg Presión 1,6 bar Caudal del compresor 5,0 l/min Nivel de presión acústica 54 dB(A) Clasificación según IEC 60601-1 / EN 60601-1... -
Page 200: Compatibilidad Electromagnética
Las tablas con los datos de compatibilidad electromagnética (requisitos sobre CEM) se pueden solicitar al fabricante o dis- tribuidor y están disponibles en internet en el siguiente enlace: https://www.pari.com/fileadmin/Electromagnetic-compatibility-5.pdf Condiciones ambientales Funcionamiento Temperatura ambiente de +10 °C a +40 °C... -
Page 201: Datos Generales Sobre El Nebulizador
– 41 – En centros hospitalarios profesionales el compresor solo se puede utilizar en salas de hospitalización y en unidades de cui- dados intensivos. El compresor no se puede utilizar nunca en zonas expuestas a altos niveles de radiación magnética o eléc- trica (p. - Page 202 Volumen de salida 0,35 0,41 0,38 de aerosol [ml] Velocidad de salida 0,07 0,16 0,18 de aerosol [ml/min] 8) Uso con el compresor PARI BOY Pro (Tipo 130). 9) MMAD = Mediana del diámetro aerodinámico de la masa 10) GSD = Desviación estándar geométrica...
- Page 203 – 43 – Caudal mínimo Caudal nominal Caudal máximo Adaptador de del compresor del compresor del compresor (3 l/min – (5 l/min – (6 l/min – tobera (azul) 0,6 bar) 1,6 bar) 1,9 bar) Volumen residual 1,16 1,16 1,10 [ml] (método gravimétrico) Velocidad de salida asociada al volumen de llenado [%/min] Caudal mínimo Caudal nominal...
-
Page 204: Información Adicional
Resto de componentes del producto El resto de componentes del sistema de inhalación PARI se pueden desechar con la basura doméstica siempre que no existan otras normas sobre eliminación de residuos específi- cas del país. -
Page 205: Identificación
– 45 – 7.3 Identificación Los componentes del producto y el envase presentan los si- guientes símbolos: Este producto cumple los requisitos de las directivas 93/42/CEE (productos sanitarios) y 2011/65/UE (RoHS). Siga las instrucciones de uso Siga las instrucciones de uso Número de catálogo Código de lote Número de serie... - Page 206 – 46 – Este producto sanitario se ha comercializado después del 13 de agosto de 2005. Este producto no se puede desechar con la basura doméstica. El símbolo del contenedor de basura tachado indica la necesidad de una recogida selectiva. Fabricante...
-
Page 207: Anexo: Higiene En Entornos Profesionales Con Cambio De Paciente
Los pasos de higiene descritos a continuación para entornos profesionales se refieren a los productos siguientes: – Nebulizador – Dispositivo interruptor LC – Mascarilla pediátrica soft PARI (sin cinta de goma) 1 Preparación Desmontaje del producto [véase: Preparación, página 31]. Comprobar lo siguiente: –... - Page 208 – 48 – 2 Limpieza y desinfección Limpieza Detergente enzimático con pH neutro como ® ® manual: Korsolex Endo Cleaner (Bode) o Bodedex forte (Bode) Aplicación: según las instrucciones del fabricante, en caso de suciedad visible utilizar un cepillo si es necesario. Desinfección Con desinfectante de instrumentos con ®...
- Page 209 – 49 – 3 Esterilización a vapor Equipo: – Esterilizador a vapor (preferentemente con prevacío fraccio- nado) según DIN EN 285 o DIN EN 13060 (tipo B) – Sistema de barrera estéril según DIN EN 11607 – Estabilizador para mascarillas Temperatura / Duración: 134°C durante un mínimo de 3 minutos Nota: Para la esterilización utilice siempre el estabilizador para mascarillas a fin de evitar que la...
-
Page 210: Tubo Flexible
– 50 – Tubo flexible 1 Preparación Comprobar el producto: – La fecha de caducidad del desinfectante o del limpiador – ¿Se han alcanzado los límites de la higiene? 2 Limpieza y desinfección Limpieza No aplicable manual: Desinfección No aplicable manual: ®... - Page 211 – 51 – 4 Control visual y conservación El estado de todos los componentes. Sustituya los componen- tes rotos, deformados o muy decolorados. Lugar de almacenamiento: – seco – sin polvo – protegido de la contaminación alternativa: utilizar envases estériles Límites de la higiene máximo 50 ciclos de higiene...
- Page 212 – 52 –...
- Page 213 – 53 –...
- Page 214 – 54 –...
-
Page 215: Certificado De Garantía
® Sistema de inhalación PARI BOY CERTIFICADO DE GARANTÍA El compresor tiene una garantía de 4 años. El periodo de garantía se inicia a partir de la fecha de compra. - Page 216 El producto con el número de serie indicado ha sido vendido por nosotros en su envase original. Fecha de compra Sello y firma del distribuidor autorizado ©2019 PARI GmbH Spezialisten für effektive Inhalation, 130D2103_es-F 2019-12-19 PARI GmbH Spezialisten für effektive Inhalation Moosstraße 3 82319 Starnberg •...
- Page 217 Notice d'utilisation ® Système de nébulisation PARI BOY Pro ® Compresseur PARI BOY Pro (type 130) ® Nébuliseur PARI LC SPRINT (type 023) PARI masque enfant (type 041) Important : lisez attentivement cette notice d'utilisation avant toute utilisation. Suivez toutes les instructions et les consignes de sécurité ! Conservez cette notice d'utilisation dans un endroit sûr.
- Page 219 Le produit est conforme des exigences aux directives sui- vantes : – 93/42/CEE (sur les dispositifs médicaux) – 2011/65/UE (RoHS) Marques Les marques suivantes sont des marques déposées en Alle- magne et/ou dans d'autres pays par PARI GmbH Spezialisten für effektive Inhalation : ® ® ® , LC SPRINT , PARI...
- Page 220 – 4 – Fabricant PARI GmbH Spezialisten für effektive Inhalation Moosstraße 3, 82319 Starnberg, Germany Contact Pour toute information sur nos produits, en cas de panne ou de questions sur leur manipulation, veuillez-vous adresser à notre S.A.V. : Tél. : +49 (0)8151-279 220 (international) +49 (0)8151-279 279 (pays germanophones) E-mail : info@pari.de Autorité...
- Page 221 – 5 – TABLE DES MATIÈRES REMARQUES IMPORTANTES ........Utilisation prévue .............. Indications ................ Contre-indications ............Consignes de sécurité ............DESCRIPTION DU PRODUIT.......... Étendue de livraison ............Éléments fonctionnels ............Description du fonctionnement ......... Informations matériaux ............. Maintenance ..............Durée de vie ..............UTILISATION ..............
- Page 222 – 6 – DIVERS ................Élimination ................ Liens ................. Étiquetage ................ ANNEXE : Retraitement dans un environnement pro- fessionnel avec changement de patient ...... Compresseur ..............Nébuliseur et accessoires ..........Tubulure de raccordement ..........
-
Page 223: Remarques Importantes
être effectuée par la personne responsable. Compresseur Le compresseur PARI sert à générer de l'air comprimé pour le fonctionnement d'un nébuliseur PARI. Le compresseur PARI permet un changement de patient. Il ne peut être utilisé que pour le nébuliseur PARI. Le compresseur peut être utilisé... -
Page 224: Indications
Masque Le masque est un accessoire destiné à l'aérosolthérapie avec un nébuliseur PARI. Le PARI masque enfant est adapté pour la thérapie des en- fants à partir de 4 ans Le masque ne peut être utilisé qu'avec des nébuliseurs PARI. Pour des raisons d'hygiène, ce produit PARI ne doit être utilisé... -
Page 225: Généralités
– 9 – Généralités Si des solutions ou suspensions non autorisées sont utilisées pour la nébulisation, les caractéristiques de l'aérosol du nébuli- seur peuvent différer des indications du fabricant. Ce produit n'est pas conçu pour être utilisé dans des systèmes respiratoires d'anesthésie ou dans le système respiratoire d'ap- pareils de ventilation. -
Page 226: Danger Dû À La Présence De Petites Pièces Susceptibles D'être Avalées
– 10 – – Ne laissez jamais le compresseur sans surveillance pendant le fonctionnement. – Raccordez le compresseur à une prise de courant facile d'accès. Il doit être possible de débrancher rapidement la fiche électrique à tout moment. – Éteignez immédiatement le compresseur et débranchez la fiche électrique de la prise : –... -
Page 227: Altération De L'efficacité De La Thérapie En Raison De Perturbations Électromagnétiques
Altération de l'efficacité de la thérapie en raison de perturbations électromagnétiques Utilisez exclusivement des pièces de rechange et des acces- soires d'origine PARI. L'utilisation de produits d'autres fabri- cants peut entraîner l'augmentation d'émissions de perturba- tions électromagnétiques ou la réduction de l'immunité du com- presseur PARI. -
Page 228: Déclaration D'incidents Graves
Déclaration d'incidents graves Les incidents graves qui surviennent en lien avec ce pro- duit PARI doivent être immédiatement signalés au fabricant ou au distributeur et aux autorités compétentes (pour obtenir leurs coordonnées, voir la page 4). - Page 229 – 13 – ATTENTION Le terme ATTENTION désigne une situation dangereuse qui, si elle n'est pas évitée, peut entraîner des blessures légères ou modérées. REMARQUE Le terme REMARQUE désigne une situation qui, si elle n'est pas évitée, peut entraîner des dommages matériels.
-
Page 230: Description Du Produit
(2d) Cuve du nébuliseur (2e) Interrupteur LC (2f) Embout buccal (2g) Tubulure de raccordement (3) PARI masque enfant (3a) Élastique 4) Avec le contrôle du débit inspiratoire maximum. PIF = Peak Inspiratory Flow (contrôle du flux des pics inspiratoires) [voir : Administration de la thérapie, page 25]. -
Page 231: Éléments Fonctionnels
– 15 – 2.2 Éléments fonctionnels Le compresseur dispose des éléments fonctionnels suivants : (1) Poignée (2) Cordon d'alimentation (raccordement au compresseur de manière inséparable) (2a) Support pour câbles (3) Fentes de ventilation (4) Support du nébuliseur (5) Plaque signalétique (dessous de l'appareil) (6) Raccord pour tubulure du nébuliseur (7) Filtre d'entrée d'air (8) Interrupteur Marche/Arrêt... -
Page 232: Description Du Fonctionnement
– 16 – 2.3 Description du fonctionnement Compresseur avec nébuliseur Aérosol Air comprimé Le compresseur alimente le nébuliseur en air comprimé. Lors de l'alimentation en air com- Air ambiant primé, le nébuliseur génère des aérosols à partir du liquide char- Aérosol gé, par exemple le médicament. -
Page 233: Informations Matériaux
Polypropylène Cuve du nébuliseur Polypropylène, élastomère thermosensible Interrupteur LC Polypropylène Embout buccal (avec valve Polypropylène, élastomère expiratoire) thermosensible Tubulure de raccordement Polychlorure de vinyle Raccord de connexion de la Élastomère thermosensible tubulure PARI masque enfant Polypropylène, élastomère thermosensible Élastique Caoutchouc synthétique... -
Page 234: Maintenance
étapes décrites ci-des- sous sont exécutées correctement. Si le nébuliseur doit être utilisé avec un PARI CENTRAL rac- cordé à une alimentation centrale en gaz (ZV), il convient de respecter la notice d’utilisation du PARI CENTRAL. -
Page 235: Installation Du Compresseur
(y com- pris leurs accessoires comme les câbles d'antenne ou les antennes externes). • Si l'appareil PARI doit être utilisé directement à côté d'un autre appareil ou empilé sur d'autres appareils, le bon fonctionnement des appareils doit être surveillé pendant... - Page 236 – 20 – ATTENTION Risque de blessures causées par la chute du compresseur Un compresseur mal placé entraîne un risque de blessures. • Ne placez pas le compresseur au-dessus de la hauteur de tête. • Veillez à ce qu'il ne puisse pas être entraîné vers le bas en tirant sur le cordon d'alimentation ou sur la tubulure de raccordement.
-
Page 237: Préparation De La Thérapie
– 21 – 3.2 Préparation de la thérapie Assemblage du nébuliseur ATTENTION Risque d’altération de l'efficacité de la thérapie Les pièces endommagées et un nébuliseur mal monté peuvent altérer le fonctionnement du nébuliseur et en consé- quence la thérapie. • Contrôlez tous les éléments du nébuliseur et les acces- soires avant utilisation. - Page 238 – 22 – Autre possibilité : • Fixez l'interrupteur LC au né- buliseur. • Insérez la tubulure de raccor- dement dans l'entrée d'air laté- rale de l'interrupteur LC. Utilisation de l'embout buccal • Placez l'embout buccal sur le nébuliseur. Utilisation du masque • Si nécessaire, fixez l'élastique au masque (comme indiqué...
-
Page 239: Remplissage Du Nébuliseur
– 23 – Remplissage du nébuliseur REMARQUE Le couvercle du nébuliseur pourrait se casser Si le couvercle est déplacé dans la mauvaise direction, il peut se casser. Le nébuliseur est alors inutilisable et irréparable. • Déplacez le couvercle uniquement dans la direction indi- quée par la charnière. -
Page 240: Administration De La Thérapie
– 24 – 3.3 Administration de la thérapie Avant l'administration de la thérapie, toutes les consignes de sécurité figurant dans cette notice d'utilisation doivent avoir été lues et comprises. Tenez toujours le nébuliseur à la verticale lors de la thérapie. Afin d’effectuer une thérapie, procédez de la manière sui- vante : •... - Page 241 • Assurez-vous que l'aérosol est généré avant de débuter la thérapie. Informations sur le système de contrôle du débit inspiratoire maximum (PIF) : Le système PARI de contrôle du débit inspiratoire maximum situé dans la partie supérieure du né- buliseur est utilisé pour apprendre à...
-
Page 242: Inhalation Avec Embout Buccal
– 26 – Inhalation avec embout buccal • Prenez une position détendue. Tenez-vous bien droit. • Maintenez l'embout buccal entre les dents et serrez les lèvres autour de celui-ci. • Inspirez si possible lentement et profondément par l'embout buccal, puis expirez en étant détendu. •... -
Page 243: Utilisation De L'interrupteur Lc
– 27 – • Mettez le masque en place sur le nez et la bouche en exer- çant une légère pression. Veillez à ce que le nébuliseur se trouve en position verticale. • Si nécessaire, mettez le masque en place sur le visage à... -
Page 244: Arrêt De La Thérapie
– 28 – Si vous souhaitez une nébulisation permanente malgré l'inter- rupteur LC monté : • Tournez la touche de l'interrup- teur dans le sens des aiguilles d'une montre jusqu'à la butée. Æ L'aérosol est généré en per- manence (nébulisation per- manente). 3.4 Arrêt de la thérapie Pour terminer la thérapie, procédez de la manière suivante : •... -
Page 245: Sans Changement De Patient
– 29 – Si le système d'inhalation est utilisé dans un environnement professionnel, respectez les informations figurant en annexe à la fin de cette notice d'utilisation pour le retraitement. 4.1 Sans changement de patient Cycles de nettoyage et de désinfection Boîtier du compresseur Nettoyage en cas de contamination visible... -
Page 246: Élastique
– 30 – Nettoyage La tubulure de raccordement ne peut être ni nettoyée ni désinfectée. Pour l'entretien de la tubulure de raccordement, reportez-vous au paragraphe correspondant [voir : Entretien de la tubulure de raccordement, page 34]. ÉLASTIQUE • En cas de besoin, nettoyez l'élastique avec de l'eau cou- rante chaude et du produit de vaisselle. -
Page 247: Dans L'eau Bouillante
– 31 – ATTENTION Risque d'infection dû à l'humidité L'humidité favorise la croissance de germes. • Retirez toutes les pièces du récipient de cuisson ou du désinfecteur immédiatement après le processus de désinfection. • Séchez toutes les pièces. DANS L'EAU BOUILLANTE •... -
Page 248: Nettoyage Du Boîtier Du Compresseur
– 32 – dure de désinfection ainsi que la quantité d'eau nécessaire, consultez la notice d'utilisation du désinfecteur utilisé. Séchage Après chaque nettoyage et désinfection, placez toutes les pièces sur un support sec, propre et absorbant et laissez-les entièrement sécher. Nettoyage du boîtier du compresseur REMARQUE Risque de défaut de l'appareil si des liquides pénètrent à... -
Page 249: Avec Changement De Patient
– 33 – 4.2 Avec changement de patient Cycles de nettoyage et de désinfection Nébuliseur avec tubulure Remplacement avant chaque change- de raccordement et ment de patient masque Boîtier du compresseur Désinfection avant chaque change- ment de patient Filtre d'entrée d'air Remplacement après 200 heures de fonctionnement (env. 1 an) Nébuliseur et masque... -
Page 250: Entretien De La Tubulure De Raccordement
– 34 – 4.3 Entretien de la tubulure de raccordement Séchez la tubulure de raccordement après chaque inhalation. • Branchez la tubulure de raccordement au compresseur. • Allumez votre compresseur. • Laissez le compresseur fonctionner jusqu'à ce que l'air qui circule dans la tubulure ait éliminé... -
Page 251: Contrôles
– 35 – 4.5 Contrôles Contrôlez tous les éléments du produit après chaque net- toyage et désinfection. Remplacez les pièces cassées, défor- mées ou ayant fortement déteint. 4.6 Rangement Rangez ce produit comme décrit ci-dessous : • Enroulez le cordon d'alimenta- tion sans le serrer. -
Page 252: Recherche Des Pannes
– 36 – RECHERCHE DES PANNES Seul le service technique de PARI GmbH ou un S.A.V. expres- sément autorisé par PARI GmbH peut réparer le compresseur. L'ouverture ou la manipulation du compresseur par d'autres personnes annule tous droits de garantie. La société... -
Page 253: Caractéristiques Techniques
– 37 – CARACTÉRISTIQUES TECHNIQUES 6.1 Compresseur Caractéristiques générales du compresseur Tension secteur 220 – 240 V Fréquence du réseau 50 Hz Tension du secteur 0,95 A Dimensions du boîtier (L x H x P) 18,5 cm × 13,0 cm × 15,0 cm Poids 1,7 kg Pression 1,6 bar Débit du compresseur 5,0 l/min Niveau de pression acoustique 54 dB(A) -
Page 254: Compatibilité Électromagnétique
Un tableau des caractéristiques techniques relatives à la com- patibilité électromagnétique (remarques CEM) est disponible sur demande auprès du fabricant ou du distributeur ou sur In- ternet, via le lien suivant : https://www.pari.com/fileadmin/Electromagnetic-compatibility-5.pdf Conditions ambiantes En fonctionnement Température ambiante +10 °C à +40 °C Humidité... -
Page 255: Caractéristiques Générales Du Nébuliseur
– 39 – Dans les établissements de soins de santé professionnels, le fonctionnement de l’appareil est réservé au service des hospi- talisations et au service de réanimation. Il est interdit de faire fonctionner le compresseur dans des zones à fort rayonnement électrique ou magnétique (p. ex. - Page 256 29,4 [% < 2 µm] Fraction alvéolaire 39,8 31,2 [% > 2 µm < 5 µm] Fraction alvéolaire 47,7 38,1 39,5 [% > 5 µm] Émission d'aérosol 0,35 0,41 0,38 [ml] 8) Utilisation avec le compresseur PARI BOY Pro (type 130). 9) MMAD = diamètre aérodynamique massique médian 10) GSD = écart type géométrique...
- Page 257 – 41 – Débit minimal Débit nominal Débit maximal Insert pour gicleur du compresseur du compresseur du compresseur (3 l/min - (5 l/min – (6 l/min - (bleu) 0,6 bar) 1,6 bar) 1,9 bar) Taux d'émission 0,07 0,16 0,18 d'aérosol [ml/min] Volume résiduel 1,16 1,16 1,10 [ml] (déterminé...
-
Page 258: Divers
Le recyclage des matériaux permet de réduire la consomma- tion de matières brutes et de protéger l'environnement. Tous les autres composants du produit Tous les composants du système de nébulisation PARI peuvent être éliminés avec les déchets ménagers, à moins qu'il n'existe d'autres règles d'élimination propres aux pays. -
Page 259: Liens
– 43 – 7.2 Liens Conditions de garantie : Caractéristiques techniques sur la www.pari.com/ compatibilité électromagnétique : warranty-conditions https://www.pari.com/fileadmin/ Electromagnetic-compatibility-5.pdf 7.3 Étiquetage Les symboles suivants se trouvent sur les composants du pro- duit ou l’emballage : Le produit satisfait aux exigences des directives 93/42/ CEE (produits médicaux) et 2011/65/EU (RoHS). - Page 260 – 44 – Appareil de la catégorie de protection II L'appareil est protégé contre les chutes de gouttes d'eau (indice de protection selon la norme CEI 60529 / EN 60529). Limitation de température Humidité, limitation Pression atmosphérique, limitation Le dispositif médical a été mis sur le marché après le 13 août 2005.
-
Page 261: Annexe : Retraitement Dans Un Environnement Professionnel Avec Changement De Patient
Le tableau suivant des étapes de retraitement dans les envi- ronnements professionnels s'applique aux produits suivants : – Nébuliseur – Interrupteur LC – PARI masque enfant (sans élastique) 1. Préparation Démonter le produit [voir : Préparation, page 29]. Vérifications : – Date de péremption du nettoyant/désinfectant... - Page 262 – 46 – 2. Nettoyage et désinfection Nettoyage Nettoyant enzymatique au ph-neutre, p. ex. ® ® manuel : Korsolex Endo Cleaner (Bode) ou Bodedex forte (Bode) Utilisation : conformément aux instructions du fabricant. En cas de contamination visible, utiliser une brosse si nécessaire. Désinfection Avec un désinfectant pour instruments sans ®...
- Page 263 – 47 – ® Nettoyage Nettoyant neutre, p. ex. neodisher Medizym ® mécanique (Dr Weigert) ou alcalin, p. ex. neodisher avec MediClean forte 0,5 % (Dr Weigert) en désinfection : association avec un neutralisant, p. ex. ® neodisher Z (Dr Weigert) Équipement : laveur-désinfecteur conforme à la norme DIN EN ISO 15883, p. ex. RDG G7836 CD (Miele) Programme Vario TD ou programmes valides...
- Page 264 – 48 – 4. Contrôle visuel et conservation Vérifications : Vérifier toutes les pièces. Remplacer les pièces cassées, dé- formées ou fortement décolorées. Lieu d'entreposage : – endroit sec – non poussiéreux – à l'abri de toute contamination En option : utiliser un emballage stérile Limites du retraitement max.
-
Page 265: Tubulure De Raccordement
– 49 – Tubulure de raccordement 1. Préparation Vérification du produit : – Date de péremption du nettoyant/désinfectant – Limites du retraitement atteintes ? 2. Nettoyage et désinfection Nettoyage non applicable manuel : Désinfection non applicable manuelle : ® Nettoyage Nettoyant alcalin, p. ex. neodisher MediClean mécanique forte (Dr Weigert) en association avec un... - Page 266 – 50 – 4. Contrôle visuel et conservation Vérifier toutes les pièces. Remplacer les pièces cassées, dé- formées ou fortement décolorées. Lieu d'entreposage : – endroit sec – non poussiéreux – à l'abri de toute contamination En option : utiliser un emballage stérile Limites du retraitement 50 cycles de retraitement max.
-
Page 267: Certificat De Garantie
Système de nébulisation ® PARI BOY Pro CERTIFICAT DE GARANTIE Nous accordons une garantie de 4 ans pour le compresseur. La période de garantie prend effet à partir de la date d'achat. - Page 268 Nous avons vendu le produit portant le numéro de série ci-dessus dans son emballage d'origine. Date d'achat Tampon et signature du détaillant ©2019 PARI GmbH Spezialisten für effektive Inhalation, 130D2103_fr-F 2019-12-19 PARI GmbH Spezialisten für effektive Inhalation Moosstraße 3 82319 Starnberg • GERMANY...
- Page 269 Istruzioni per l'uso ® Sistema di inalazione PARI BOY ® Compressore PARI BOY Pro (Tipo 130) ® Nebulizzatore PARI LC SPRINT (Tipo 023) Maschera soft per bambini PARI (Tipo 041) Importante: si prega di leggere attentamente queste istru- zioni per l'uso prima dell'utilizzo. Osservare tutte le avver- tenze e le indicazioni per la sicurezza!
- Page 271 Conformità CE Il prodotto soddisfa i requisiti delle seguenti direttive: – 93/42/CEE (dispositivi medici) – 2011/65/UE (RoHS) Marchi I seguenti nomi sono marchi registrati di PARI GmbH Speziali- sten für effektive Inhalation in Germania e/o in altri Paesi: ® ® ®...
- Page 272 Per informazioni di qualunque tipo sul prodotto, in caso di gua- sti o per dubbi sull'utilizzo, rivolgersi al nostro centro di assi- stenza: Tel.: +49 (0)8151-279 220 (internazionale) +49 (0)8151-279 279 (in lingua tedesca) Email: info@pari.de Autorità competenti per la comunicazione di eventi gravi Paese Autorità CH – Svizzera Swissmedic Schweizerisches Heilmittelinstitut Institut suisse des produits thérapeutiques...
- Page 273 – 5 – INDICE INDICAZIONI IMPORTANTI ..........Finalità del prodotto ............Indicazioni ................ Controindicazioni .............. Indicazioni per la sicurezza ..........DESCRIZIONE DEL PRODOTTO ........Confezione ............... Elementi operativi ............. Descrizione del funzionamento ........Informazioni sui materiali..........Manutenzione ..............Durata................UTILIZZO ................. Posizionamento del compressore ........
- Page 274 – 6 – ALTRO ................Smaltimento ..............Collegamenti ..............Contrassegno ..............ALLEGATO: Preparazione igienica in ambiente pro- fessionale con cambio di paziente ....... Compressore ..............Nebulizzatore e accessori ..........Tubo di collegamento ............
-
Page 275: Indicazioni Importanti
– 7 – INDICAZIONI IMPORTANTI 1.1 Finalità del prodotto Il sistema di inalazione PARI si compone di un compresso- re PARI, un nebulizzatore PARI e alcuni accessori PARI. Il si- stema consente di eseguire la terapia delle vie respiratorie in- feriori. Il sistema di inalazione deve essere usato esclusivamente da persone che comprendono i contenuti delle istruzioni per l'uso e possono usare in sicurezza il sistema di inalazione. -
Page 276: Indicazioni
Le presenti istruzioni per l'uso contengono importanti in- formazioni, indicazioni per la sicurezza e misure precau- zionali. Un utilizzo sicuro di questo prodotto PARI è possi- bile solo se l'utente rispetta tali avvertenze. Utilizzare questo prodotto PARI solo come descritto nelle pre- senti istruzioni per l'uso. -
Page 277: Informazioni Generali
– 9 – È necessario osservare anche le istruzioni per l'uso della solu- zione per inalazione utilizzata. Informazioni generali Se vengono utilizzate soluzioni o sospensioni non approvate per la nebulizzazione, i dati relativi all'aerosol del nebulizzatore possono differire dalle indicazioni del produttore. Questo prodotto non è... - Page 278 – 10 – – se l'alloggiamento, il cavo di alimentazione o la spina so- no danneggiati; – se si sospetta la presenza di un difetto in seguito a una caduta o evento simile. – Non lasciare mai il compressore incustodito durante l'utilizzo. –...
- Page 279 Terapia compromessa da disturbi elettromagnetici Utilizzare esclusivamente parti di ricambio e accessori originali di PARI. L'utilizzo di prodotti di altri produttori può determinare una maggiore emissione di disturbi elettromagnetici oppure una riduzione della resistenza ai disturbi elettromagnetici del compressore PARI.
-
Page 280: Terapia Di Neonati, Bambini E Persone Con Particolari Difficoltà
Comunicazione di eventi gravi Eventi gravi che si verificano in relazione a questo prodot- to PARI devono essere immediatamente comunicati al produt- tore oppure al rivenditore e all'autorità competente (per le infor- mazioni di contatto, vedere a pagina 4). Un evento è considerato grave se causa o può causare, diret- tamente o indirettamente, la morte o un imprevisto e grave peggioramento dello stato di salute di una persona. - Page 281 – 13 – ATTENZIONE ATTENZIONE indica una situazione pericolosa che può cau- sare lesioni di gravità medio-bassa, qualora non venga pre- stata la dovuta attenzione. NOTA NOTA indica una situazione che può causare danni materia- li, qualora non venga prestata la dovuta attenzione.
-
Page 282: Descrizione Del Prodotto
(2d) Parte inferiore del nebulizzatore (2e) Interruttore LC (2f) Boccaglio (2g) Tubo di collegamento (3) Maschera soft per bambini PARI (3a) Elastico 4) Con PIF-Control System di PARI. PIF= Peak Inspriatory Flow (controllo del flusso inspiratorio di picco) [vedere: Esecuzione della terapia, a pagina 26]. Non presente in tutte le varianti di prodotto. -
Page 283: Elementi Operativi
– 15 – 2.2 Elementi operativi Il compressore dispone dei seguenti elementi operativi: (1) Impugnatura per il trasporto (2) Cavo di alimentazione (collegato al compressore senza possibilità di separarlo) (2a) Supporto del cavo (3) Fori di ventilazione (4) Sostegno del nebulizzatore (5) Contrassegno di fabbrica (sul lato inferiore dell'apparecchio) (6) Collegamento dell'aria (7) Filtro dell'aria... -
Page 284: Descrizione Del Funzionamento
– 16 – 2.3 Descrizione del funzionamento Compressore con nebulizzatore Aerosol Aria compressa Il compressore alimenta aria compressa al nebulizzatore. Mediante l'alimentazione di aria Aria dell'ambiente compressa il nebulizzatore gene- Aerosol ra un aerosol dal liquido inserito al suo interno come, ad esempio, un medicinale. -
Page 285: Informazioni Sui Materiali
Polipropilene, elastomero nebulizzatore termoplastico Supporto dell'ugello Polipropilene Parte inferiore del nebulizzatore Polipropilene, elastomero termoplastico Interruttore LC Polipropilene Boccaglio (con valvola di Polipropilene, elastomero espirazione) termoplastico Tubo di collegamento Polivinilcloruro Estremità del tubo Elastomero termoplastico Maschera soft per bambini PARI Polipropilene, elastomero termoplastico Elastico Caucciù sintetico... -
Page 286: Manutenzione
2.6 Durata I singoli componenti del prodotto hanno le seguenti durate pre- viste: Componente del prodotto Durata Compressore Ca. 1.000 ore di utilizzo (pari a max. 5 anni) Se dopo questo periodo il compressore dovesse essere sempre utilizzato, far eseguire una revisione dell'apparecchio. -
Page 287: Utilizzo
Se il nebulizzatore deve essere utilizzato tramite un PARI CENTRAL in un'alimentazione di gas centrale (ZV), de- vono essere osservate le istruzioni per l'uso di PARI CENTRAL. 3.1 Posizionamento del compressore L'ambiente in cui verrà... - Page 288 (inclusi i relativi ac- cessori come, ad esempio, cavi dell'antenna o antenne esterne). • Se l'apparecchio PARI deve essere utilizzato nelle imme- diate vicinanze di un altro apparecchio oppure impilato con altri apparecchi, è necessario controllare che il funzio- namento dell'apparecchio durante l'esercizio sia corretto.
-
Page 289: Preparazione Della Terapia
– 21 – NOTA Pericolo di un guasto dell'apparecchio causato da polvere Se il compressore viene messo in funzione in un ambiente con forte presenza di polvere, all'interno dell'alloggiamento si può depositare una maggiore quantità di polvere. In tal caso si potrebbe verificare un guasto dell'apparecchio. - Page 290 – 22 – • Esercitando una leggera pres- sione, inserire il supporto dell'ugello sull'ugello nella par- te inferiore del nebulizzatore. La freccia sul supporto dell'ugello deve essere rivolta verso l'alto. • Posizionare la parte superiore del nebulizzatore sulla parte in- feriore del nebulizzatore e chiudere il nebulizzatore ruo- tando i componenti in senso orario.
- Page 291 – 23 – Utilizzo del boccaglio • Inserire il boccaglio nel nebu- lizzatore. Utilizzo della maschera • Fissare eventualmente l'elasti- co alla maschera (come mo- strato in figura). • Rimuovere eventualmente il boccaglio dal nebulizzatore. • Inserire la maschera nel nebu- lizzatore.
- Page 292 – 24 – Riempimento del nebulizzatore NOTA Il coperchio del nebulizzatore potrebbe rompersi Se il coperchio viene aperto nella direzione errata, si può rompere. In tal caso il nebulizzatore sarà irreparabilmente inutilizzabile. • Aprire e chiudere il coperchio solo nella direzione imposta dalla cerniera.
-
Page 293: Esecuzione Della Terapia
– 25 – 3.3 Esecuzione della terapia Prima di eseguire una terapia, è necessario aver letto e compreso tutte le indicazioni per la sicurezza incluse nelle presenti istruzioni per l'uso. Durante la terapia, tenere il nebulizzatore sempre in posizio- ne verticale. Per eseguire la terapia, procedere come descritto di seguito: •... - Page 294 • Prima di iniziare la terapia, assicurarsi che venga generato l'aerosol. Informazioni su PIF-Control System: La tecnologia PIF-Control System di PARI nella parte superiore del nebulizzatore consente di impara- re a eseguire un'inalazione lenta e controllata. In tal modo viene migliorato l'afflusso di principio at- tivo nelle vie respiratorie inferiori.
- Page 295 – 27 – Inalazione con il boccaglio • Sedersi in posizione eretta e rilassata. • Afferrare il boccaglio con i denti e stringerlo tra le labbra. • Inspirare il più lentamente e profondamente possibile attra- verso il boccaglio ed espirare in modo rilassato. •...
-
Page 296: Utilizzo Dell'interruttore Lc
– 28 – • Posizionare la maschera sulla bocca e sul naso applicando una leggera pressione. Assicurarsi che durante l'ope- razione il nebulizzatore sia in posizione verticale. • Usare eventualmente l'elastico per fissare la maschera al viso. L'elastico deve essere fatto passare dietro la testa. -
Page 297: Conclusione Della Terapia
– 29 – • Rilasciare il pulsante di interruzione per interrompere la ge- nerazione di aerosol. Se si desidera una nebulizzazione continua anche se è pre- sente l'interruttore LC: • Ruotare il pulsante di interru- zione in senso orario fino alla posizione di arresto. -
Page 298: Preparazione Igienica
– 30 – PREPARAZIONE IGIENICA PERICOLO Rischio per la vita causato da folgorazione I liquidi possono essere conduttori di corrente, quindi rappre- sentano un rischio di folgorazione. • Spegnere il compressore ed estrarre la spina dalla presa di corrente prima di ogni pulizia. Se il sistema di inalazione viene usato da un solo paziente, osservare le indicazioni per la pulizia e la disinfezione nella se- zione "Il dispositivo viene utilizzato sempre dallo stesso pa-... - Page 299 – 31 – Nebulizzatore e maschera È possibile pulire, disinfettare e asciugare la maschera insieme al nebulizzatore. Preparazione MASCHERA • Estrarre la maschera dal nebulizzatore. • Rimuovere l'elastico dalla maschera. NEBULIZZATORE • Estrarre il tubo dal nebulizzatore. • Estrarre il boccaglio dal nebulizzatore. •...
- Page 300 – 32 – NEBULIZZATORE E MASCHERA • Eseguire un breve lavaggio con acqua potabile di tutti i com- ponenti utilizzati. • Immergere tutti i componenti per circa 5 minuti in acqua po- tabile calda con un po' di de- tersivo. • Risciacquare a fondo tutti i componenti con acqua potabile corrente.
- Page 301 – 33 – IN ACQUA BOLLENTE • Immergere tutti i componenti in acqua bollente per almeno 5 minuti. Utilizzare una pentola pulita e acqua potabile. NOTA! Pericolo di danneggiare le parti in plastica! La plastica si fonde a contatto con il fondo bollente della pento- la.
- Page 302 – 34 – Asciugatura Dopo ogni operazione di pulizia e disinfezione, posizionare tutti i componenti del prodotto su una superficie asciutta, pulita e assorbente, quindi lasciarli asciugare completamente. Pulizia dell'alloggiamento del compressore NOTA Pericolo di guasto dell'apparecchio in seguito a infiltra- zione di liquidi Se penetrano dei liquidi all'interno del compressore, si pos- sono verificare malfunzionamenti.
-
Page 303: Il Dispositivo Viene Utilizzato Da Più Pazienti
– 35 – 4.2 Il dispositivo viene utilizzato da più pazienti Cicli di pulizia e disinfezione Nebulizzatore con tubo di Sostituzione prima di ogni cambio di collegamento e maschera paziente Alloggiamento del Disinfezione prima di ogni cambio di compressore paziente Filtro dell'aria Sostituzione dopo 200 ore di utilizzo (ca. 1 anno) -
Page 304: Cura Del Tubo Di Collegamento
– 36 – • Strofinare a fondo le superfici esterne dell'alloggiamento con il panno. 4.3 Cura del tubo di collegamento Asciugare il tubo di collegamento dopo ogni inalazione: • Collegare il tubo di collegamento al compressore. • Accendere il compressore. •... -
Page 305: Controllo
– 37 – 4.5 Controllo Esaminare tutti i componenti del prodotto dopo ogni pulizia e disinfezione. Sostituire i componenti rotti, deformati o molto scoloriti. 4.6 Conservazione Conservare il prodotto come descritto di seguito: • Avvolgere il cavo di alimenta- zione senza stringerlo. NOTA! Non avvolgere il cavo di alimentazione attorno al com- pressore. -
Page 306: Risoluzione Degli Errori
– 38 – RISOLUZIONE DEGLI ERRORI Solo il servizio tecnico di PARI GmbH o un servizio di assisten- za espressamente autorizzato da PARI GmbH può riparare il compressore. Se il compressore viene aperto o manipolato da altre persone, decadono tutte le garanzie. In questo caso PARI GmbH non si assume alcuna responsabilità. -
Page 307: Dati Tecnici
– 39 – DATI TECNICI 6.1 Compressore Dati generali del compressore Tensione dell'alimentazione 220 V – 240 V Frequenza di rete 50 Hz Assorbimento di corrente 0,95 A Dimensioni dell'alloggiamento 18,5 cm × 13,0 cm × 15,0 cm (L × A × P) Peso 1,7 kg Pressione d'esercizio 1,6 bar Flusso del compressore 5,0 l/min Rumorosità 54 dB(A) Classificazione secondo le norme IEC 60601-1 / EN 60601-1 Tipo di protezione da scossa elettrica Classe di... -
Page 308: Compatibilità Elettromagnetica
I dati tecnici in forma tabellare relativi alla compatibilità elettro- magnetica sono disponibili su richiesta presso il produttore o il rivenditore, oppure in Internet all'indirizzo seguente: https://www.pari.com/fileadmin/Electromagnetic-compatibility-5.pdf Condizioni ambientali Esercizio Temperatura dell'ambiente Tra +10°C e +40°C Umidità... -
Page 309: Dati Generali Sul Nebulizzatore
– 41 – ambienti con elevate emissioni elettromagnetiche (ad esempio, nelle vicinanze di un apparecchio per tomografia a risonanza magnetica). Trasporto e conservazione Temperatura ambiente minima (senza -25°C controllo dell'umidità relativa dell'aria) Temperatura ambiente massima (con +70°C un'umidità relativa dell'aria fino al 93%, senza condensa) Umidità... - Page 310 Percentuale di aerosol 13,3 22,1 29,4 [% < 2 µm] Percentuale di aerosol 39,8 31,2 [% > 2 µm < 5 µm] Percentuale di aerosol 47,7 38,1 39,5 [% > 5 µm] 8) Utilizzo con compressore PARI BOY Pro (Tipo 130). 9) MMAD = Diametro aerodinamico mediano di massa 10) GSD = Deviazione standard geometrica...
- Page 311 – 43 – Flusso minimo Flusso Flusso nominale del massimo del Supporto dell'ugello compressore compressore compressore (blu) (3 l/min – (5 l/min – (6 l/min – 0,6 bar) 1,6 bar) 1,9 bar) Generazione di aerosol 0,35 0,41 0,38 [ml] Velocità di erogazione 0,07 0,16 0,18 dell'aerosol [ml/min] Volume del residuo [ml] 1,16 1,16...
- Page 312 – 44 – Flusso minimo Flusso Flusso nominale del massimo del Supporto dell'ugello compressore compressore compressore (rosso) (3 l/min – (5 l/min – (6 l/min – 0,6 bar) 1,6 bar) 1,9 bar) Velocità di erogazione 0,05 0,10 0,13 dell'aerosol [ml/min] Volume del residuo [ml] 0,95 1,11 0,83 (definito mediante analisi gravimetrica)
-
Page 313: Altro
Tutti gli altri componenti del prodotto Tutti gli altri componenti del sistema di inalazione PARI posso- no essere smaltiti con i rifiuti domestici, qualora non siano in vi- gore norme di smaltimento specifiche per il Paese. -
Page 314: Contrassegno
– 46 – 7.3 Contrassegno Sui componenti del prodotto o sulla confezione si trovano i se- guenti simboli: Il prodotto soddisfa i requisiti delle direttive 93/42/CEE (dispositivi medici) e 2011/65/UE (RoHS). Osservare le istruzioni per l'uso Osservare le istruzioni per l'uso Numero articolo Numero di lotto, partita Numero di serie... - Page 315 – 47 – Il dispositivo medico è reperibile sul mercato dal 13 agosto 2005. Non è consentito lo smaltimento del prodotto con i normali rifiuti domestici. Il simbolo della pattumiera sbarrata da una croce indica la necessità di effettuare la raccolta differenziata per lo smaltimento del prodotto.
- Page 316 – 48 –...
-
Page 317: Allegato: Preparazione Igienica In Ambiente Professionale Con Cambio Di Paziente
La panoramica seguente sulle procedure di preparazione in ambiente professionale si applica ai seguenti prodotti: – Nebulizzatore – Interruttore LC – Maschera soft per bambini PARI (senza elastico) 1. Preparazione Smontare il prodotto [vedere: Preparazione, a pagina 31]. Verificare: – Data di scadenza del detergente/prodotto di disinfezione... - Page 318 – 50 – 2. Pulizia e disinfezione Pulizia manuale: Detergente enzimatico a pH neutro, ® ad esempio Korsolex Endo Cleaner (Bode) ® oppure Bodedex forte (Bode) Utilizzo: in base alle indicazioni del produttore, in caso di sporcizia visibile, utilizzare eventualmente una spazzola. Disinfezione Con prodotto di disinfezione per strumenti ®...
- Page 319 – 51 – ® Pulizia e Detergente neutro, ad esempio neodisher disinfezione con Medizym (Dr. Weigert) o detergente alcalino, ® procedimento ad esempio neodisher MediClean forte 0,5% meccanico: (Dr. Weigert) insieme a un neutralizzatore, ad ® esempio neodisher Z (Dr. Weigert) Strumenti: apparecchio per pulizia e disinfezione (RDG) conforme alla norma DIN EN ISO 15883, ad esempio RDG G7836 CD (Miele)
- Page 320 – 52 – 4. Controllo visivo e conservazione Verificare: Verificare tutti i singoli componenti. Sostituire i componenti rot- ti, deformati o molto scoloriti. Luogo di conservazione: – asciutto – al riparo da polvere – al riparo da contaminazioni opzionale: utilizzo di una confezione sterile Limiti della preparazione max.
-
Page 321: Tubo Di Collegamento
– 53 – Tubo di collegamento 1. Preparazione Verifica del prodotto: – Data di scadenza del detergente/prodotto di disinfezione – Raggiunti i limiti di trattamento? 2. Pulizia e disinfezione Pulizia manuale: non applicabile Disinfezione non applicabile manuale: ® Pulizia e Detergente alcalino, ad esempio neodisher disinfezione con MediClean forte (Dr. Weigert) insieme a un... - Page 322 – 54 – 4. Controllo visivo e conservazione Verificare tutti i singoli componenti. Sostituire i componenti rot- ti, deformati o molto scoloriti. Luogo di conservazione: – asciutto – al riparo da polvere – al riparo da contaminazioni opzionale: utilizzo di una confezione sterile Limiti della preparazione max.
-
Page 323: Certificato Di Garanzia
® Sistema di inalazione PARI BOY CERTIFICATO DI GARANZIA Questo compressore dispone di una garanzia di 4 anni. Il periodo di garanzia decorre dalla data di acquisto. - Page 324 Il prodotto con il numero di serie sopraindicato è stato confezionato e venduto da noi. Data di acquisto Timbro e firma del rivenditore ©2019 PARI GmbH Spezialisten für effektive Inhalation, 130D2103_it-F 2019-12-19 PARI GmbH Spezialisten für effektive Inhalation Moosstraße 3 82319 Starnberg •...
- Page 325 Gebruiksaanwijzing ® PARI BOY Pro inhalatiesysteem ® PARI BOY Pro compressor (type 130) ® PARI LC SPRINT vernevelaar (type 023) PARI kindermasker soft (type 041) Belangrijk: lees deze gebruiksaanwijzing vóór het gebruik aandachtig door. Volg alle aanwijzingen en veiligheidsin- structies op! Bewaar de gebruiksaanwijzing zorgvuldig.
- Page 327 Stand van de informatie: 2019-11 De actuele versie van de gebruiksaanwijzing kan als PDF- bestand op het internet worden gedownload: www.pari.com (op de pagina van het betreffende product) Beschikbare formaten voor visueel gehandicapten De op het internet beschikbare gebruiksaanwijzing in PDF-for- maat kan vergroot worden afgedrukt.
- Page 328 – 4 – Fabrikant PARI GmbH Spezialisten für effektive Inhalation Moosstraße 3, 82319 Starnberg, Germany Contact Voor alle productinformatie, in geval van storing of bij vragen over het gebruik dient u contact op te nemen met ons Service Center: Tel.: +49 (0)8151-279 220 (internationaal) +49 (0)8151-279 279 (Duitstalig) E-mail: info@pari.de...
- Page 329 – 5 – INHOUDSOPGAVE BELANGRIJKE AANWIJZINGEN ........Gebruiksdoel ..............Indicatie ................Contra-indicaties .............. Veiligheidsinstructies ............PRODUCTBESCHRIJVING..........Levering................Functie-elementen............Beschrijving van de werking ..........Materiaalinformatie ............Onderhoud ............... Levensduur............... GEBRUIK ................. Compressor opstellen ............Therapie voorbereiden ............. Therapie uitvoeren ............Therapie afsluiten ............. HYGIËNISCHE MAATREGELEN VOOR HERGEBRUIK Zonder wisseling van patiënten ........
- Page 330 – 6 – DIVERSEN ............... Verwijderen ..............Links ................. Markering ................. BIJLAGE: hygiënische maatregelen voor hergebruik in professionele omgeving met wisseling van patiën- ten ..................Compressor ..............Vernevelaar en toebehoren ..........Aansluitslang ..............
-
Page 331: Belangrijke Aanwijzingen
Compressor De PARI compressor wordt gebruikt om perslucht voor de wer- king van een PARI vernevelaar te genereren. De PARI compressor is bedoeld voor gebruik bij meerdere pa- tiënten. Hij mag alleen worden gebruikt voor PARI verneve- laars. -
Page 332: Indicatie
Het PARI kindermasker soft is geschikt voor de behandeling van kinderen vanaf 4 jaar Het masker mag alleen samen met PARI vernevelaars worden gebruikt. Dit PARI product mag uitsluitend in de thuisomgeving en om hygiënische redenen maar door één patiënt worden gebruikt. 1.2 Indicatie Aandoeningen aan de onderste luchtwegen. - Page 333 – 9 – Algemeen Als niet-toegestane oplossingen of suspensies voor de verne- veling worden gebruikt, kunnen de aerosolgegevens van de vernevelaar afwijken van de gegevens van de fabrikant. Dit product is niet geschikt voor gebruik in een anesthesie- ademsysteem of in een ademsysteem van een beademingsap- paraat.
- Page 334 – 10 – – Sluit de compressor aan op een gemakkelijk toegankelijk stopcontact. De netstekker moet er te allen tijde snel uit kunnen worden getrokken. – Schakel de compressor onmiddellijk uit en trek de net- stekker uit het stopcontact: – als u vermoedt dat de compressor of het netsnoer beschadigd kan zijn (bijv.
-
Page 335: Behandeling Van Baby's, Kinderen En Hulpbehoevende Personen
Benadeling van de therapie door elektromagnetische storingen Gebruik uitsluitend originele reserveonderdelen en origineel toebehoren van PARI. Het gebruik van producten van derden kan leiden tot een verhoogde elektromagnetische sto- ringsemissie of een verminderde immuniteit van de PARI com- pressor. - Page 336 Melding van ernstige voorvallen Ernstige voorvallen die in combinatie met dit PARI product op- treden, moeten onmiddellijk worden gemeld aan de fabrikant of leverancier en de bevoegde autoriteit (zie voor contactinformatie pagina 4).
-
Page 337: Productbeschrijving
(2b) Sproeieropzetstuk (blauw) (2c) Sproeieropzetstuk (rood) (2d) Onderste deel van de vernevelaar (2e) LC onderbreker (2f) Mondstuk (2g) Aansluitslang (3) PARI kindermasker soft (3a) Elastieken band 4) Met PARI PIF Control System. PIF = Peak Inspiratory Flow (piekinademcontrole) [zie: Therapie uitvoeren, pagina 25]. Niet in alle productvarianten opgenomen. -
Page 338: Functie-Elementen
– 14 – 2.2 Functie-elementen De compressor beschikt over de volgende functie-elementen: (1) Draaggreep (2) Netsnoer (onlosmakelijk verbonden met de compressor) (2a) Snoerhouder (3) Ventilatieopeningen (4) Houder voor de vernevelaar (5) Typeplaatje (onderzijde van het apparaat) (6) Persluchtaansluiting (7) Luchtfilter (8) Aan/Uit-schakelaar 5) Het netstekkertype is landspecifiek. -
Page 339: Beschrijving Van De Werking
– 15 – 2.3 Beschrijving van de werking Compressor met vernevelaar Aerosol Perslucht De compressor voorziet de vernevelaar van perslucht. De vernevelaar produceert bij Omgevingslucht toevoer van perslucht aerosol uit de erin gedane vloeistof, bijv. het Aerosol medicament. Deze aerosol wordt via het mondstuk of indien nodig via een masker ingeademd in de long. -
Page 340: Materiaalinformatie
Bovenste deel van de Polypropyleen, thermoplastisch vernevelaar elastomeer Sproeieropzetstuk Polypropyleen Onderste deel van de Polypropyleen, thermoplastisch vernevelaar elastomeer LC onderbreker Polypropyleen Mondstuk (met uitademventiel) Polypropyleen, thermoplastisch elastomeer Aansluitslang Polyvinylchloride Eindstuk slang Thermoplastisch elastomeer PARI kindermasker soft Polypropyleen, thermoplastisch elastomeer Elastieken band Synthetisch rubber... -
Page 341: Onderhoud
Als de compressor na deze tijd nog altijd in gebruik is, laat de compressor dan controleren. Neem daarvoor contact op met de fabrikant of de leverancier. Vernevelaar (alle onderdelen 300 desinfecties, max. 1 jaar behalve de aansluitslang) Aansluitslang Max. 1 jaar PARI kindermasker soft 300 desinfecties, max. 1 jaar... -
Page 342: Gebruik
Personen die anderen helpen bij de therapie, moeten erop let- ten dat alle hierna beschreven stappen correct worden uitge- voerd. Als de vernevelaar via een PARI CENTRAL op een centrale gasvoorziening (ZV) moet werken, moet de gebruiksaanwijzing van de PARI CENTRAL in acht worden genomen. - Page 343 Deze kunnen afbreuk doen aan de werking van de apparaten en daarmee aan de therapie. • Plaats het PARI apparaat niet vlak naast een ander appa- raat of gestapeld tussen andere apparaten. • Houd een minimumafstand van 30 cm tot draagbare...
-
Page 344: Therapie Voorbereiden
– 20 – Stel de compressor als volgt op: • Plaats de compressor op een vaste, vlakke, stofvrije en droge ondergrond. • Steek de netstekker in een geschikt stopcontact. VOORZICHTIG! Leg het netsnoer zo dat niemand erover kan struikelen of erin verstrikt kan raken. Ongustig gelegde kabelverbindingen vormen een gevaar voor letsel. - Page 345 – 21 – • Bevestig de aansluitslang aan de vernevelaar. Alternatief: • Steek de LC onderbreker op de vernevelaar. • Steek de aansluitslang op de luchtinlaat aan de zijkant van de LC onderbreker. Mondstuk gebruiken • Steek het mondstuk op de ver- nevelaar.
- Page 346 – 22 – Masker gebruiken • Bevestig indien nodig de elas- tieken band aan het masker (zoals aangegeven in de af- beelding). • Trek indien nodig het mond- stuk van de vernevelaar af. • Steek het masker op de verne- velaar.
-
Page 347: Therapie Uitvoeren
– 23 – • Doe de vereiste hoeveelheid inhalatieoplossing van boven in de vernevelaar. Neem het minimale en maxi- male vulvolume in acht [zie: Al- gemene vernevelaargegevens, pagina 40]. Wanneer de ver- nevelaar te weinig of te veel vloeistof bevat, wordt afbreuk gedaan aan de verneveling en daarmee aan de therapie. - Page 348 – 24 – gen! Als er slangsystemen van andere apparaten in de buurt zijn (bijv. voor infusen), controleer dan zorgvuldig of de op de compressor aangesloten aansluitslang aan het an- dere uiteinde is verbonden met de vernevelaar. Anders be- staat het gevaar dat verschillende aansluitmogelijkheden met elkaar worden verwisseld.
- Page 349 – 25 – Informatie over het PARI PIF Control System: Het PARI PIF Control System in het bovenste deel van de verne- velaar heeft als doel een langza- me en gecontroleerde inhalatie te leren. Daarmee wordt de opname van de werkzame stof in de on- derste luchtwegen verbeterd.
- Page 350 – 26 – Met masker inhaleren VOORZICHTIG Benadeling van de therapie door ontsnappende aerosol Wanneer het masker niet nauwsluitend op het gezicht ligt, kan aerosol ontsnappen. Een onderdosering van het medica- ment kan het gevolg zijn. • Let erop dat het masker beide mondhoeken en de neus volledig omsluit.
- Page 351 – 27 – Leer het kind de volgende inhalatiemanoeuvre: • Zo langzaam en diep mogelijk door het masker inademen en ontspannen weer uitademen. • Net zo lang inhaleren tot het geluid in de vernevelaar verandert. Er blijft na het einde van de therapie een resthoeveelheid in de vernevelaar zitten.
-
Page 352: Therapie Afsluiten
– 28 – 3.4 Therapie afsluiten Ga als volgt te werk om de therapie af te sluiten: • Schakel de compressor uit. • Plaats de vernevelaar weer terug in de houder op de compressor. • Trek de netstekker uit het stopcontact. Alleen wanneer de netstekker uit het stopcontact is getrok- ken, is gegarandeerd dat het apparaat volledig is losgekoppeld van het stroomnet. -
Page 353: Hygiënische Maatregelen Voor Hergebruik
– 29 – HYGIËNISCHE MAATREGELEN VOOR HERGEBRUIK GEVAAR Levensgevaar door een elektrische schok Vloeistoffen kunnen stroom geleiden, waardoor gevaar voor een elektrische schok ontstaat. • Schakel vóór elke reiniging de compressor uit en trek de netstekker uit het stopcontact. Als het inhalatiesysteem maar door één patiënt wordt ge- bruikt, neem dan de aanwijzingen voor reiniging en desinfectie in de paragraaf "Zonder wisseling van patiënten"... - Page 354 – 30 – Vernevelaar en masker Het masker kan samen met de vernevelaar worden gereinigd, gedesinfecteerd en gedroogd. Voorbereiden MASKER • Haal het masker van de vernevelaar af. • Haal de elastieken band van het masker af. VERNEVELAAR • Trek de slang van de vernevelaar af. •...
- Page 355 – 31 – VERNEVELAAR EN MASKER • Spoel alle gebruikte onderdelen kort voor onder stromend drinkwater. • Leg alle onderdelen ca. 5 minuten lang in warm drinkwater met wat afwasmiddel. • Spoel alle onderdelen grondig af onder stromend drinkwa- ter. • Schud het water uit de onderdelen. Desinfecteren Desinfecteer alle onderdelen direct na de reiniging (alleen ge- reinigde onderdelen kunnen effectief worden gedesinfecteerd).
- Page 356 – 32 – IN KOKEND WATER • Leg alle onderdelen minstens 5 minuten in kokend water. Gebruik een schone kookpan en drinkwater. AANWIJZING! Gevaar voor beschadiging van de kunst- stofonderdelen! Kunststof smelt bij aanraking met de hete bodem van de pan. Zorg voor een voldoende hoeveelheid water in de pan, zodat de onderdelen niet de bodem van de pan raken.
- Page 357 – 33 – Compressorbehuizing reinigen AANWIJZING Gevaar voor een defect aan het apparaat door binnendringende vloeistoffen Wanneer vloeistoffen in het inwendige van de compressor komen, kan dit een defect aan het apparaat veroorzaken. • Dompel de compressor niet onder in water. •...
-
Page 358: Met Wisseling Van Patiënten
– 34 – 4.2 Met wisseling van patiënten Reinigings- en desinfectiecycli Vernevelaar met Vervanging vóór elke wisseling van aansluitslang en masker patiënten Compressorbehuizing Desinfectie vóór elke wisseling van patiënten Luchtfilter Vervanging na 200 bedrijfsuren (ca. 1 jaar) Vernevelaar en masker De vernevelaar en het masker zijn niet geschikt voor een wisseling van patiënten. -
Page 359: Aansluitslang Verzorgen
– 35 – 4.3 Aansluitslang verzorgen Droog de aansluitslang na elke inhalatie: • Sluit de aansluitslang aan op de compressor. • Schakel uw compressor in. • Laat de compressor net zolang werken tot de door de slang stromende lucht de eventuele condens in de slang heeft verwijderd. -
Page 360: Controleren
Op het stroomnet aangesloten elektrische apparaten vormen een potentiële gevarenbron. VERHELPEN VAN FOUTEN Alleen de technische dienst van PARI GmbH of een door PARI GmbH uitdrukkelijk hiervoor gemachtigde servicedienst mag de compressor repareren. Als de compressor door andere personen wordt geopend of gemanipuleerd, vervalt elk recht op garantie. -
Page 361: Technische Gegevens
– 37 – Fout Mogelijke oorzaak Oplossing De com- De netstekker zit niet Controleer of de netstekker pressor goed in het stopcontact. goed in het stopcontact zit. start niet. De beschikbare Controleer of de lokale netspanning is niet netspanning overeenkomt geschikt voor de met de spanning die op het compressor. -
Page 362: Vernevelaar
– 38 – Classificatie conform IEC 60601-1 / EN 60601-1 Beschermingstype tegen elektrische Beschermings- schokken klasse II Beschermingsgraad tegen elektrische Type BF schokken van het gebruiksgedeelte (vernevelaar) Beschermingsgraad conform IEC 60529 / IP 21 EN 60529 tegen binnendringen van water resp. vaste stoffen Beschermingsgraad bij gebruik in Geen bescherming aanwezigheid van brandbare mengsels van anesthetica met lucht, met zuurstof of met lachgas... - Page 363 – 39 – Technische gegevens over de elektromagnetische compatibili- teit (EMC-aanwijzingen) in tabelvorm zijn op aanvraag bij de fabrikant dan wel leverancier of op het internet via de volgende link te verkrijgen: https://www.pari.com/fileadmin/Electromagnetic-compatibility-5.pdf Omgevingsomstandigheden Tijdens de werking Omgevingstemperatuur +10 °C tot +40 °C...
-
Page 364: Algemene Vernevelaargegevens
– 40 – 6.2 Vernevelaar Algemene vernevelaargegevens Grootte 10 cm × 10 cm × 4 cm Gewicht 31 g tot 33 g Drijfgassen Lucht Minimale compressorstroom 3,0 l/min Minimale bedrijfsdruk 0,5 bar / 50 kPa Maximale compressorstroom 6,0 l/min Maximale bedrijfsdruk 2,0 bar / 200 kPa Minimaal vulvolume 2 ml Maximaal vulvolume 8 ml Aerosolkenmerken conform ISO 27427 De in deze gebruiksaanwijzing vermelde aerosolkenmerken zijn conform ISO 27427 vastgesteld met salbutamol. - Page 365 (3 l/min – (5 l/min – (6 l/min – (rood) 0,6 bar) 1,6 bar) 1,9 bar) MMAD [µm] 2,10 2,00 2,08 Respirabele (alveo- 74,0 79,6 80,6 len)fractie [% < 5 µm] 8) Gebruik met PARI BOY Pro compressor (type 130). 9) MMAD = mediane aërodynamische massadiameter 10) GSD = geometrische standaardafwijking...
-
Page 366: Diversen
– 42 – Minimale com- Nominale com- Maximale com- Sproeieropzetstuk pressorstroom pressorstroom pressorstroom (3 l/min – (5 l/min – (6 l/min – (rood) 0,6 bar) 1,6 bar) 1,9 bar) Aerosolgehalte 26,4 30,3 34,6 [% < 2 µm] Aerosolgehalte 47,6 49,3 46,0 [% < 2 µm < 5 µm] Aerosolgehalte 26,0 20,4 19,4 [% > 5 µm] Aerosol Output [ml] 0,45 0,35 0,47... -
Page 367: Links
– 43 – Alle verdere onderdelen van het product Alle verdere componenten in uw PARI inhalatiesysteem kunnen met het huishoudelijk afval worden afgevoerd, indien er geen andere nationale voorschriften voor afvalverwijdering gelden. 7.2 Links Garantievoorwaarden: Technische gegevens over de www.pari.com/ elektromagnetische compatibiliteit: warranty-conditions https://www.pari.com/fileadmin/... - Page 368 – 44 – ON OFF Aan/Uit Wisselstroom Beschermingsgraad van het gebruiksgedeelte: type BF Apparaat van beschermingsklasse II Het apparaat is druipwaterdicht (beschermingsgraad conform IEC 60529 / EN 60529). Temperatuurbegrenzing Luchtvochtigheid, begrenzing Luchtdruk, begrenzing Dit medische product werd na 13 augustus 2005 in het handelsverkeer gebracht. Het product mag niet samen met het gewone huishoudelijk afval worden verwijderd.
-
Page 369: Bijlage: Hygiënische Maatregelen Voor Hergebruik In Professionele Omgeving Met Wisseling Van Patiënten
Het volgende overzicht van de stappen van de hygiënische maatregelen voor hergebruik in professionele omgevingen geldt voor de volgende producten: – Vernevelaar – LC-onderbreker – PARI kindermasker soft (zonder elastieken band) 1. Voorbereiding Product demonteren [zie: Voorbereiden, pagina 30]. Controleren: – Vervaldatum van het reinigings-/desinfectiemiddel –... - Page 370 – 46 – 2. Reiniging en desinfectie Reiniging met ph-neutraal, enzymatisch reinigingsmiddel, bijv. ® ® de hand: Korsolex Endo Cleaner (Bode) of Bodedex forte (Bode) Gebruik: volgens voorschriften van de fabrikant, bij zichtbare verontreiniging indien nodig borstel gebruiken. Desinfectie Met aldehydehoudend instrumenten- ®...
- Page 371 – 47 – 3. Stoomsterilisatie Uitrusting: – Stoomsterilisator (bij voorkeur met gefractioneerd voorvacu- üm) conform DIN EN 285 resp. DIN EN 13060 (type B) – Steriel barrièresysteem conform DIN EN 11607 – Maskerstabilisator Temperatuur/duur: 134 °C gedurende minstens 3 min. Info: gebruik voor de sterilisatie steeds de maskerstabilisator, om- dat de pasvorm van het masker door de hoge temperaturen kan veranderen.
-
Page 372: Aansluitslang
– 48 – Aansluitslang 1. Voorbereiding Product controleren: – Vervaldatum van het reinigings-/desinfectiemiddel – Grenzen van de hygiënische maatregelen voor hergebruik bereikt? 2. Reiniging en desinfectie Reiniging met niet bruikbaar de hand: Desinfectie met niet bruikbaar de hand: ® Machinale Alkalisch reinigingsmiddel, bijv. - Page 373 – 49 – 4. Visuele controle & opbergen Alle onderdelen controleren. Gebroken, vervormde of sterk ver- kleurde onderdelen vervangen. Opbergplaats: – droog – stofvrij – beschermd tegen besmetting optioneel: steriele verpakking gebruiken Grenzen van de maatregelen voor hergebruik max. 50 voorbereidingscycli...
- Page 374 – 50 –...
-
Page 375: Garantiebewijs
® PARI BOY Pro inhalatiesysteem GARANTIEBEWIJS Op de compressor geven we 4 jaar garantie. De garantieperiode begint op de koopdatum. - Page 376 Het product met het bovenvermelde serienummer werd door ons in originele verpakking verkocht. Aankoopdatum Stempel en handtekening van de distributeur ©2019 PARI GmbH Spezialisten für effektive Inhalation, 130D2103_nl-F 2019-12-19 PARI GmbH Spezialisten für effektive Inhalation Moosstraße 3 82319 Starnberg • GERMANY...
-
Page 377: Instrukcja Obsługi
Kompresor PARI BOY Pro (typ 130) ® Nebulizator PARI LC SPRINT (typ 023) Miękka maska dla dzieci PARI (typ 041) Ważne: Przed użyciem urządzenia należy starannie prze- czytać niniejszą instrukcję obsługi. Należy postępować zgodnie ze wszystkimi instrukcjami i wskazówkami dotyczą- cymi bezpieczeństwa! Niniejszą instrukcję obsługi należy starannie przechowywać. - Page 379 , PARI Copyright ©2019 PARI GmbH Spezialisten für effektive Inhalation Moosstraße 3, 82319 Starnberg, Germany Bez uprzedniej pisemnej zgody PARI GmbH żadna część ni- niejszej dokumentacji nie może być reprodukowana w jakiejkol- wiek formie ani przetwarzana, powielana, tłumaczona lub roz- powszechniana za pomocą systemów elektronicznych. Wszelkie prawa zastrzeżone. Zmiany techniczne, zmiany wy- glądu oraz błędy w druku zastrzeżone.
- Page 380 – 4 – Producent PARI GmbH Spezialisten für effektive Inhalation Moosstraße 3, 82319 Starnberg, Niemcy Informacje kontaktowe W przypadku awarii urządzenia oraz jakichkolwiek pytań doty- czących produktów lub ich obsługi należy się skontaktować z naszym Centrum obsługi: Tel.: +49 (0)8151-279 220 (obsługa w różnych językach) +49 (0)8151-279 279 (obsługa w języku niemieckim) E-mail: info@pari.de...
- Page 381 – 5 – SPIS TREŚCI WAŻNE INFORMACJE............ Przeznaczenie ..............Wskazania ................ Przeciwwskazania ............Wskazówki dotyczące bezpieczeństwa......OPIS PRODUKTU............Zakres dostawy ..............Elementy funkcjonalne ............. Opis funkcji ............... Informacja o zastosowanych materiałach ......Konserwacja ..............Żywotność ................ ZASTOSOWANIE ............Przygotowanie kompresora ..........Przygotowanie zabiegu ............
- Page 382 – 6 – INFORMACJE DODATKOWE......... Utylizacja ................Łącza ................Oznaczenie ..............ZAŁĄCZNIK: Higieniczne przygotowanie do ponow- nego użycia w środowiskach profesjonalnych ze zmianą pacjenta.............. Kompresor ................ Nebulizator i akcesoria ............. Wężyk przyłączeniowy .............
-
Page 383: Ważne Informacje
– 7 – WAŻNE INFORMACJE 1.1 Przeznaczenie System do inhalacji PARI składa się z kompresora PARI, nebu- lizatora PARI i akcesoriów PARI. System służy do leczenia dol- nych dróg oddechowych. System do inhalacji może być obsługiwany wyłącznie przez osoby, które rozumieją treść instrukcji obsługi i mogą bezpiecz- nie obsługiwać... -
Page 384: Wskazania
Maska Maska należy do akcesoriów do leczenia wziewnego za pomo- cą nebulizatora PARI. Miękka maska dla dzieci PARI nadaje się do leczenia dzieci od 4. roku życia Maska może być stosowana tylko z nebulizatorami PARI. Ten produkt PARI może być użytkowany wyłącznie w środowi- sku domowym oraz — ze względów higienicznych — może... -
Page 385: Zagadnienia Ogólne
– 9 – Zagadnienia ogólne Jeśli do nebulizacji używane będą niedopuszczone roztwory lub zawiesiny, parametry aerozolu wytwarzanego przez nebuli- zator mogą różnić się od podanych przez producenta. Niniejszy produkt nie nadaje się do użytku w obwodzie odde- chowym urządzenia do anestezji ani w obwodzie oddechowym respiratora. -
Page 386: Niebezpieczeństwo Uszkodzenia Urządzenia
– 10 – – Nie wolno pozostawiać pracującego kompresora bez nadzo- – Podłączyć kompresor do łatwo dostępnego gniazda. Musi istnieć możliwość szybkiego wyciągnięcia wtyczki sieciowej w każdej chwili. – Należy natychmiast wyłączyć kompresor i wyjąć wtyczkę sieciową z gniazda: – przy podejrzeniu, że kompresor albo przewód zasilania mogły zostać... - Page 387 Stosować wyłącznie oryginalne części zamienne i oryginalne akcesoria PARI. Stosowanie produktów innych producentów może prowadzić do zwiększonej emisji zakłóceń elektromagne- tycznych lub do obniżenia odporności kompresora PARI na za- kłócenia. Zachowanie higieny Należy przestrzegać następujących zasad higieny: – Stosować wyłącznie elementy wyczyszczone i wysuszone.
- Page 388 Zgłaszanie poważnych incydentów Poważne incydenty, które wystąpią w związku z tym produk- tem PARI, należy niezwłocznie zgłaszać producentowi lub sprzedawcy i właściwemu organowi (informacje kontaktowe — patrz strona 4). Incydenty są poważne, jeśli doprowadziły lub mogły doprowa- dzić, bezpośrednio lub pośrednio, do śmierci lub nieprzewidzia-...
- Page 389 – 13 – UWAGA UWAGA określa niebezpieczną sytuację, która, jeśli się jej nie zapobiegnie, może spowodować obrażenia lekkie lub średniej ciężkości. WSKAZÓWKA WSKAZÓWKA określa sytuację, która, jeśli się jej nie zapo- biegnie, może prowadzić do uszkodzenia mienia.
-
Page 390: Opis Produktu
(2d) Dolna część nebulizatora (2e) Przerywacz LC (2f) Ustnik (2g) Wężyk przyłączeniowy (3) Miękka maska dla dzieci PARI (3a) Opaska gumowa 4) Z PARI PIF-Control System. PIF = Peak Inspiratory Flow (kontrola szczytowego przepływu wdechowego) [patrz: Sposób prowadzenia leczenia, strona 26]. Nie zawarto we wszystkich wersjach produktu. -
Page 391: Elementy Funkcjonalne
– 15 – 2.2 Elementy funkcjonalne Kompresor składa się z następujących elementów funkcjonalnych: (1) Uchwyt (2) Przewód zasilania (na stałe połączony z kompresorem) (2a) Mocowanie przewodu (3) Szczeliny wentylacyjne (4) Uchwyt do nebulizatora (5) Tabliczka znamionowa (spód urządzenia) (6) Przyłącze powietrza (7) Filtr powietrza (8) Wyłącznik 5) Typ wtyczki sieciowej jest zależny od kraju. -
Page 392: Opis Funkcji
– 16 – 2.3 Opis funkcji Kompresor z nebulizatorem Aerozol Sprężone powietrze Kompresor dostarcza sprężone powietrze do nebulizatora. Przy dopływie sprężonego powie- Powietrze otaczające trza nebulizator wytwarza aerozol z cieczy, którą go napełniono, Aerozol np. leku. Aerozol ten jest wdycha- ny przez ustnik lub w razie potrze- by przez maskę... -
Page 393: Informacja O Zastosowanych Materiałach
Nasadka dyszy polipropylen Dolna część nebulizatora polipropylen, elastomer termoplastyczny Przerywacz LC polipropylen Ustnik (z zaworem polipropylen, elastomer wydechowym) termoplastyczny Wężyk przyłączeniowy polichlorek winylu Końcówka węża elastomer termoplastyczny Miękka maska dla dzieci PARI polipropylen, elastomer termoplastyczny Opaska gumowa kauczuk syntetyczny... -
Page 394: Konserwacja
Gdyby po tym czasie kompresor był w dalszym ciągu użytkowany, należy go skontrolować. W tym celu należy się skontaktować z producentem lub sprzedawcą. Nebulizator (wszystkie elementy 300 dezynfekcji, maksymalnie poza wężykiem 1 rok przyłączeniowym) Wężyk przyłączeniowy Maksymalnie 1 rok Miękka maska dla dzieci PARI 300 dezynfekcji, maksymalnie 1 rok... -
Page 395: Zastosowanie
Osoby, które pomagają innym w terapii, muszą pilnować, aby wszystkie kroki opisane poniżej były wykonywane prawidłowo. Gdyby nebulizator miał być eksploatowany za pośrednictwem łącznika PARI CENTRAL na centralnej instalacji gazów me- dycznych konieczne jest przestrzeganie instrukcji obsługi łącz- nika PARI CENTRAL. 3.1 Przygotowanie kompresora Pomieszczenie, w którym użytkowany jest kompresor, musi... - Page 396 • Zachować minimalny odstęp 30 cm od przenośnych bez- przewodowych urządzeń komunikacyjnych (łącznie z ich osprzętem, jak np. kabel antenowy czy anteny zewnętrz- ne). • Jeśli urządzenie PARI musi stać bezpośrednio obok inne- go urządzenia albo na innych urządzeniach, należy moni- torować prawidłowe działanie urządzeń. UWAGA Niebezpieczeństwo obrażeń...
-
Page 397: Przygotowanie Zabiegu
– 21 – WSKAZÓWKA Niebezpieczeństwo uszkodzenia urządzenia z powodu pyłu Jeśli kompresor pracuje w silnie zapylonym otoczeniu, kurz może gromadzić się wewnątrz obudowy. Może to prowadzić do usterki urządzenia. • Kompresor nie powinien pracować ustawiony na podło- dze, pod łóżkiem ani w warsztatach. •... - Page 398 – 22 – • Nałożyć nasadkę dyszy na dy- szę w dolnej części nebulizato- ra, delikatnie ją dociskając. Strzałka na nasadce dyszy musi być zwrócona do góry. • Na dolną część nebulizatora nałożyć jego część górną i ob- rócić ją zgodnie z kierunkiem ruchu wskazówek zegara w celu złączenia obu części.
- Page 399 – 23 – Używanie ustnika • Założyć ustnik na nebulizator. Używanie maski • W razie potrzeby zamocować do maski gumową opaskę (jak pokazano na ilustracji). • W razie potrzeby zdjąć ustnik z nebulizatora. • Założyć maskę na nebulizator.
- Page 400 – 24 – Napełnianie nebulizatora WSKAZÓWKA Pokrywa nebulizatora może pęknąć W przypadku przekręcenia pokrywy w nieprawidłowym kie- runku może ona pęknąć. Nebulizator będzie wówczas bezu- żyteczny i nie będzie możliwości jego naprawy. • Przesuwać pokrywę w taki sposób, aby poruszała się tyl- ko w kierunku zgodnym z ustawieniem zawiasu.
-
Page 401: Sposób Prowadzenia Leczenia
– 25 – 3.3 Sposób prowadzenia leczenia Przed rozpoczęciem terapii należy przeczytać i zrozumieć wszystkie wskazówki dotyczące bezpieczeństwa zawarte w tej instrukcji obsługi. W trakcie leczenia nebulizator należy cały czas utrzymy- wać w pionie. Leczenie prowadzi się następująco: • Podłączyć wężyk przyłączenio- wy nebulizatora, wkręcając go delikatnie w przyłącze powie- trza kompresora. - Page 402 Skutkiem może być porażenie prądem. • Przed rozpoczęciem terapii upewnić się, że wytwarzany jest aerozol. Informacje o PIF-Control System: PARI PIF-Control System w gór- nej części nebulizatora służy do nauki powolnej i kontrolowanej in- halacji. Poprawia to wchłanianie substancji czynnej w dolnych dro- gach oddechowych.
- Page 403 – 27 – Inhalacja za pomocą ustnika • Usiąść wygodnie i prosto. • Zacisnąć ustnik zębami i objąć wargami. • Wciągać powietrze możliwie powoli i głęboko i wydychać je swobodnie przez ustnik. • Inhalować tak długo, aż zmieni się odgłos w nebulizatorze. Po zakończeniu terapii w nebulizatorze pozostanie resztka cieczy.
- Page 404 – 28 – • Przyłożyć szczelnie maskę do ust i nosa, lekko ją dociskając. Należy pilnować, aby nebuliza- tor znajdował się w położeniu pionowym. • W razie potrzeby zamocować maskę na twarzy za pomocą gumowej opaski. Gumowa opaska powinna przebiegać w poprzek potylicy. Poinstruować...
-
Page 405: Kończenie Zabiegu
– 29 – Jeżeli mimo zamontowania przerywacza LC potrzebna jest ne- bulizacja ciągła: • Przekręcić do oporu przycisk przerywacza zgodnie z kierun- kiem ruchu wskazówek zega- Æ Aerozol jest wytwarzany cały czas (nebulizacja ciągła). 3.4 Kończenie zabiegu Aby zakończyć terapię, należy wykonać następujące czynno- ści: •... -
Page 406: Higieniczne Przygotowanie Do Ponownego Użycia
– 30 – HIGIENICZNE PRZYGOTOWANIE DO PONOWNEGO UŻYCIA NIEBEZPIECZEŃSTWO Zagrożenie życia spowodowane porażeniem prądem Ciecze mogą przewodzić prąd, powodując niebezpieczeń- stwo porażenia prądem. • Przed przystąpieniem do czyszczenia należy za każdym razem wyłączyć kompresor i wyjąć wtyczkę sieciową z gniazda. Jeżeli system do inhalacji jest używany tylko przez jednego pacjenta, należy przestrzegać... - Page 407 – 31 – Nebulizator i maska Maskę można czyścić, dezynfekować i suszyć razem z nebulizatorem. Przygotowanie MASKA • Zdjąć maskę z nebulizatora. • Zdjąć gumową opaskę z maski. NEBULIZATOR • Wyjąć wężyk z nebulizatora. • Zdjąć ustnik z nebulizatora. • Usunąć z nebulizatora resztki cieczy. •...
- Page 408 – 32 – NEBULIZATOR I MASKA • Krótko przepłukać bieżącą wodą pitną wszystkie użyte elementy. • Wszystkie pojedyncze części włożyć na ok. 5 minut do cie- płej wody pitnej z dodatkiem płynu do mycia naczyń. • Dokładnie wypłukać wszystkie części pod bieżącą wodą pitną. • Wytrząsnąć wodę ze wszystkich części. Dezynfekcja Zdezynfekować...
- Page 409 – 33 – WE WRZĄCEJ WODZIE • Umieścić wszystkie części na co najmniej 5 minut we wrzą- cej wodzie. Do dezynfekcji należy używać czystego garnka i wody pitnej. WSKAZÓWKA! Niebezpieczeństwo uszkodzenia części z tworzyw sztucznych! Tworzywa sztuczne, z których wy- konano części zestawu, topią się w kontakcie z gorącym dnem garnka. Należy zapewnić wystarczający poziom wody w garnku, aby poszczególne części nie dotykały dna.
- Page 410 – 34 – Czyszczenie obudowy kompresora WSKAZÓWKA Niebezpieczeństwo uszkodzenia urządzenia spowodo- wane wnikającymi cieczami Jeśli do środka kompresora dostaną się ciecze, może to spo- wodować jego uszkodzenie. • Nie zanurzać kompresora w wodzie. • Nie czyścić kompresora pod bieżącą wodą. •...
-
Page 411: Przy Zmianie Pacjentów
– 35 – 4.2 Przy zmianie pacjentów Cykle czyszczenia i dezynfekcji Nebulizator z wężykiem Wymiana przed każdą zmianą przyłączeniowym i maską pacjenta Obudowa kompresora Dezynfekcja przed każdą zmianą pacjenta Filtr powietrza Wymiana po 200 godzinach pracy (około 1 roku) Nebulizator i maska Nebulizator i maska nie nadają się do użytku przez różnych pa- cjentów. -
Page 412: Pielęgnacja Wężyka Przyłączeniowego
– 36 – 4.3 Pielęgnacja wężyka przyłączeniowego Po każdej inhalacji należy wysuszyć wężyk przyłączeniowy: • Nasunąć wężyk przyłączeniowy na złącze w kompresorze. • Włączyć kompresor. • Pozostawić kompresor włączony do momentu, w którym po- wietrze przepływające przez wężyk usunie pozostałą w nim wilgoć. 4.4 Wymiana filtra powietrza Filtr powietrza należy kontrolować w regularnych odstępach czasu (co 10 zastosowań). -
Page 413: Kontrola
– 37 – 4.5 Kontrola Po każdym czyszczeniu i dezynfekcji należy sprawdzić wszyst- kie części produktu. Elementy pęknięte, zdeformowane lub znacznie przebarwione należy wymienić. 4.6 Przechowywanie Niniejszy produkt należy przechowywać w następujący sposób: • Zwinąć luźno przewód zasila- nia. WSKAZÓWKA! Nie należy owi- jać... -
Page 414: Usuwanie Usterek
USUWANIE USTEREK Naprawy kompresora może prowadzić wyłącznie serwis tech- niczny PARI GmbH lub wyraźnie upoważniony przez PARI GmbH punkt serwisowy. W przypadku otwarcia lub naru- szenia kompresora przez inne osoby przestają obowiązywać wszystkie warunki gwarancji. W takich sytuacjach firma PARI GmbH nie ponosi żadnej odpowiedzialności. -
Page 415: Dane Techniczne
– 39 – DANE TECHNICZNE 6.1 Kompresor Ogólne dane kompresora Napięcie sieciowe 220–240 V Częstotliwość sieci 50 Hz Natężenie prądu 0,95 A Wymiary obudowy 18,5 cm × 13,0 cm × 15,0 cm (szer. × wys. × głęb.) Masa 1,7 kg Ciśnienie 1,6 bara Przepływ kompresora 5,0 l/min Poziom ciśnienia akustycznego 54 dB(A) Klasyfikacja zgodnie z normami IEC 60601-1 / EN 60601-1 Rodzaj ochrony przed porażeniem prądem Urządzenie II klasy ochronności... -
Page 416: Zgodność Elektromagnetyczna
Dane techniczne dotyczące zgodności elektromagnetycznej (wskazówki EMC) w formie tabelarycznej są dostępne na żą- danie u producenta albo sprzedawcy lub w Internecie pod po- niższym adresem: https://www.pari.com/fileadmin/Electromagnetic-compatibility-5.pdf Warunki otoczenia Podczas pracy Temperatura otoczenia od +10°C do +40°C Wilgotność względna powietrza od 30% do 75% (bez skraplania) Ciśnienie powietrza... -
Page 417: Nebulizator
– 41 – Kompresor przewidziano do stosowania we wszystkich obsza- rach opieki zdrowotnej. Używanie go w pociągach, samocho- dach i samolotach jest niedozwolone. Używanie kompresora w profesjonalnych zakładach opieki zdrowotnej ogranicza się do łóżek stacjonarnych i oddziałów intensywnej opieki medycznej. Stosowanie kompresora w ob- szarach o zwiększonym promieniowaniu magnetycznym lub elektrycznym (np. - Page 418 29,4 [% < 2 μm] Zawartość aerozolu 39,8 31,2 [% > 2 µm < 5 µm] Zawartość aerozolu 47,7 38,1 39,5 [% > 5 μm] Wydajność produkcji 0,35 0,41 0,38 aerozolu [ml] 8) Praca z kompresorem PARI BOY Pro (typ 130). 9) MMAD = uśredniona wielkość cząsteczek aerozolu 10) GSD = geometryczne odchylenie standardowe...
- Page 419 – 43 – Minimalny Nominalny Maksymalny przepływ przepływ przepływ Nasadka dyszy (niebieska) kompresora kompresora kompresora (3 l/min – (5 l/min – (6 l/min – 0,6 bar) 1,6 bar) 1,9 bar) Wydajność produkcji 0,07 0,16 0,18 aerozolu na jednostkę czasu [ml/min] Objętość resztkowa [ml] 1,16 1,16 1,10 (określona grawimetrycznie) Wydajność...
- Page 420 – 44 – Minimalny Nominalny Maksymalny przepływ przepływ przepływ Nasadka dyszy (czerwona) kompresora kompresora kompresora (3 l/min – (5 l/min – (6 l/min – 0,6 bar) 1,6 bar) 1,9 bar) Objętość resztkowa [ml] 0,95 1,11 0,83 (określona grawimetrycznie) Wydajność na jednostkę czasu w odniesieniu do objętości napełnienia [%/min]...
-
Page 421: Informacje Dodatkowe
Recykling mate- riałów pomaga zmniejszyć zużycie surowców i chronić środowisko. Wszystkie inne elementy składowe produktu Wszystkie inne elementy składowe systemu do inhalacji PARI można usuwać wraz z odpadami komunalnymi, o ile lokalne przepisy dotyczące utylizacji odpadów nie stanowią inaczej. 7.2 Łącza Warunki gwarancji: Dane techniczne dotyczące zgod-... -
Page 422: Oznaczenie
– 46 – 7.3 Oznaczenie Na elementach produktu lub opakowaniu znajdują się następu- jące symbole: Produkt spełnia wymogi dyrektywy 93/42/EWG (dotyczącej wyrobów medycznych) oraz 2011/65/WE (w sprawie ograniczenia stosowania niektórych niebezpiecznych substancji w sprzęcie elektrycznym i elektronicznym, RoHS). Przestrzegać instrukcji obsługi. Przestrzegać instrukcji obsługi. Numer artykułu Numer partii produkcyjnej, partia Numer seryjny... - Page 423 – 47 – Ograniczenie ciśnienia Ten wyrób medyczny został wprowadzony do obrotu po 13 sierpnia 2005 r. Urządzenia tego nie wolno utylizować wraz z odpadami komunalnymi. Symbol przekreślonego pojemnika na śmieci wskazuje na konieczność selektywnej zbiórki. Producent...
- Page 424 – 48 –...
-
Page 425: Załącznik: Higieniczne Przygotowanie Do Ponownego Użycia W Środowiskach Profesjonalnych Ze Zmianą Pacjenta
Poniższe zestawienie dotyczące etapów przygotowania do użycia w środowiskach profesjonalnych obowiązuje dla nastę- pujących produktów: – Nebulizator – Przerywacz LC – Miękka maska dla dzieci PARI (bez opaski gumowej) 1. Czynności przygotowawcze Rozłożyć produkt [patrz: Przygotowanie, strona 31]. Sprawdzić: – termin ważności środka czyszczącego i dezynfekującego –... - Page 426 – 50 – 2. Czyszczenie i dezynfekcja Czyszczenie Enzymatyczny środek czyszczący o neutralnym ® ręczne: pH, np. Korsolex Endo Cleaner (Bode) lub ® Bodedex forte (Bode). Zastosowanie: zgodnie ze wskazówkami producenta, przy widocznych zabrudzeniach ewent. użyć szczotki. Dezynfekcja Zawierającym aldehydy środkiem do ® ręczna: dezynfekcji instrumentów, np. Korsolex Basic...
- Page 427 – 51 – ® Maszynowe Obojętny środek czyszczący, np. neodisher czyszczenie Medizym (Dr. Weigert) albo alkaliczny środek ® i dezynfekcja: czyszczący, np. neodisher MediClean forte 0,5% (Dr. Weigert) w połączeniu ® z neutralizatorem, np. neodisher Z (Dr. Weigert) Potrzebne środki i sprzęt: myjnio-dezynfektor zgodny z normą DIN EN ISO 15883, np. RDG G7836 CD (Miele). Program Vario TD albo porównywalne sprawdzone programy.
-
Page 428: Wężyk Przyłączeniowy
– 52 – 4. Kontrola wzrokowa i przechowywanie Sprawdzić: Sprawdzić wszystkie pojedyncze części. Elementy pęknięte, zniekształcone lub znacznie przebarwione należy wymienić. Miejsce przechowywania: – suche – wolne od pyłu – chronione przed kontaminacją opcjonalnie: używać sterylnych opakowań Granice dotyczące higienicznego przygotowania do po- nownego użycia maksymalnie 300 cykli przygotowania do ponownego użycia, maksymalnie 1 rok... - Page 429 – 53 – ® Maszynowe Alkaliczny środek czyszczący, np. neodisher czyszczenie MediClean forte (Dr. Weigert) w połączeniu z ® i dezynfekcja: neutralizatorem, np. neodisher Z (Dr. Weigert) Potrzebne środki i sprzęt: – Myjnio-dezynfektor zgodny z normą DIN EN ISO 15883, np. RDG G7836 CD (Mie- le). – Koszyki specjalne zmywarki do narzędzi me- dycznych Miele. –...
- Page 430 – 54 –...
-
Page 431: Karta Gwarancyjna
® System do inhalacji PARI BOY KARTA GWARANCYJNA Kompresor objęty jest czteroletnią gwarancją. Okres gwarancji rozpoczyna się w dniu zakupu. - Page 432 Urządzenie o powyższym numerze fabrycznym zostało przez nas sprzedane w oryginalnym opakowaniu. Data zakupu Pieczęć i podpis dystrybutora ©2019 PARI GmbH Spezialisten für effektive Inhalation, 130D2103_pl-F 2019-12-19 PARI GmbH Spezialisten für effektive Inhalation Moosstraße 3 82319 Starnberg • GERMANY info@pari.de • www.pari.com...
- Page 433 Sistema de inalação PARI BOY ® Compressor PARI BOY Pro (tipo 130) ® Nebulizador PARI LC SPRINT (tipo 023) Máscara para crianças soft PARI (tipo 041) Importante: Leia atentamente o manual de instruções antes da utilização. Respeite as instruções e informações de segurança! Guarde cuidadosamente o manual de instruções.
- Page 435 O produto cumpre os requisitos das normas: – 93/42/CEE (dispositivos médicos) – 2011/65/UE (RoHS) Marcas registadas As seguintes marcas registadas são marcas comerciais da PARI GmbH Spezialisten für effektive Inhalation na Alemanha e/ou em outros países: ® ® ® , LC SPRINT , PARI...
- Page 436 – 4 – Fabricante PARI GmbH Spezialisten für effektive Inhalation Moosstraße 3, 82319 Starnberg, Germany Contacto Para quaisquer informações sobre o produto, em caso de falhas ou de questões relacionadas com o manuseamento, contacte o nosso centro de atendimento: Tel.: +49 (0)8151-279 220 (internacional) +49 (0)8151-279 279 (alemão) E-mail: info@pari.de...
- Page 437 – 5 – ÍNDICE INDICAÇÕES IMPORTANTES........Indicações de uso ............Indicação ................Contraindicações.............. Informações de segurança ..........DESCRIÇÃO DO PRODUTO........... Material fornecido ............. Elementos funcionais ............Descrição do funcionamento ..........Informação sobre os materiais ......... Manutenção..............Durabilidade ..............UTILIZAÇÃO..............Instalar o compressor ............Preparar a terapia ............
- Page 438 – 6 – DIVERSOS ............... Eliminar ................Links ................. Marcação................ANEXO: Preparativos de higiene em ambientes profissionais com mudança de paciente ..... Compressor ..............Nebulizador e acessórios ..........Mangueira de ligação ............
-
Page 439: Indicações Importantes
O compressor PARI destina-se a produzir ar comprimido para utilização com um nebulizador PARI. O compressor PARI foi concebido para uma mudança de paciente. Este só pode ser utilizado para o nebulizador PARI. O compressor pode ser operado pelo próprio paciente e destina-se exclusivamente a uma utilização em espaços fechados. - Page 440 Máscara A máscara é um acessório para a terapia de inalação com o nebulizador PARI. A máscara para crianças soft PARI é adequada para o tratamento de crianças a partir dos 4 anos A máscara só pode ser utilizada com nebulizadores PARI. Por questões de higiene, este produto PARI só pode ser utilizado em ambiente doméstico por um único paciente.
-
Page 441: Perigo De Vida Devido A Choque Elétrico
– 9 – Generalidades Se para a nebulização forem utilizadas soluções ou suspensões não permitidas, os dados de aerossol do nebulizador podem divergir dos dados do fabricante. Este produto não é adequado para uma utilização num sistema respiratório anestésico ou num sistema respiratório de um ventilador. - Page 442 – 10 – – Nunca deixe o compressor sem vigilância durante o funcionamento. – Ligue o compressor a uma tomada de fácil acesso. Deve ser possível desligar a ficha em qualquer momento com facilidade. – Desligue imediatamente o compressor e tire o cabo de alimentação da tomada: –...
- Page 443 Perturbação da terapia devido a interferências eletromagnéticas Utilize exclusivamente peças de reposição e acessórios originais da PARI. A utilização de produtos de outras marcas pode causar uma maior emissão de interferências eletromagnéticas ou uma menor resistência a interferências do compressor PARI.
-
Page 444: Terapia Em Bebés, Crianças E Pessoas Fragilizadas
Notificação de ocorrências graves As ocorrências graves, que envolvam este produto PARI, têm de ser imediatamente comunicadas ao fabricante ou fornecedor e às autoridades competentes (informações de contacto ver 4). - Page 445 – 13 – CUIDADO CUIDADO identifica uma situação perigosa que, caso não seja evitada, pode resultar em ferimentos ligeiros a médios. NOTA NOTA identifica uma situação que, caso não seja evitada, pode resultar em danos materiais.
-
Page 446: Descrição Do Produto
(2g) Mangueira de ligação (3) Máscara para crianças soft PARI (3a) Tira de borracha 4) Com PARI PIF-Control System. PIF = Peak Inspiratory Flow (controlo do fluxo dos picos inspiratórios) [ver: Realizar a terapia, página 25]. Não incluído em todas as variantes do produto. -
Page 447: Elementos Funcionais
– 15 – 2.2 Elementos funcionais O compressor dispõe dos seguintes elementos funcionais: (1) Pega de transporte (2) Cabo de alimentação (fixamente ligado ao compressor) (2a) Suporte do cabo (3) Orifícios de ventilação (4) Suporte do nebulizador (5) Chapa de dados (parte inferior do aparelho) (6) Ligação do ar (7) Filtro de ar (8) Interruptor de ligar/desligar... -
Page 448: Descrição Do Funcionamento
– 16 – 2.3 Descrição do funcionamento Compressor com nebulizador Aerossol Ar comprimido O compressor alimenta o nebulizador com ar comprimido. Em caso de alimentação de ar Ar ambiente comprimido, o nebulizador gera Aerossol aerossol a partir do líquido colocado, p. ex. do medicamento. Este aerossol é... -
Page 449: Informação Sobre Os Materiais
Parte inferior do nebulizador Polipropileno, elastómero termoplástico Dispositivo interruptor LC Polipropileno Bocal (com válvula de Polipropileno, elastómero expiração) termoplástico Mangueira de ligação Policloreto de vinilo Extremidade da mangueira Elastómero termoplástico Máscara para crianças soft Polipropileno, elastómero PARI termoplástico Tira de borracha Borracha sintética... - Page 450 As pessoas que apoiam outros na terapia têm de certificar-se de que todos os passos descritos a seguir são corretamente efetuados. Se o nebulizador for utilizado através de uma alimentação de gás central (ZV) PARI CENTRAL, deve ser respeitado o manual de instruções do PARI CENTRAL.
-
Page 451: Instalar O Compressor
(incluindo os respetivos acessórios, como p. ex. o cabo da antena ou antenas externas). • Se o aparelho PARI tiver de ser utilizado na proximidade imediata de outro aparelho ou empilhado com outros aparelhos, é necessário supervisionar o funcionamento... - Page 452 – 20 – CUIDADO Perigo de ferimentos devido à queda do compressor Um compressor posicionado de forma inadequada representa um perigo de ferimentos. • Não instale o compressor acima do nível da cabeça. • Certifique-se de que o compressor não possa ser puxado para baixo através do cabo de alimentação ou da mangueira de ligação.
-
Page 453: Preparar A Terapia
– 21 – 3.2 Preparar a terapia Montar o nebulizador CUIDADO Perigo de perturbação da terapia Componentes danificados ou um nebulizador mal montado podem afetar o funcionamento do nebulizador e, consequentemente, a terapia. • Verifique todos os componentes do nebulizador e os acessórios antes de cada utilização. - Page 454 – 22 – Alternativamente: • Encaixe o dispositivo interruptor LC no nebulizador. • Encaixe a mangueira de ligação na entrada de ar lateral no dispositivo interruptor LC. Utilizar o bocal • Encaixe o bocal no nebulizador. Utilizar a máscara • Se necessário, fixe a tira de borracha à...
- Page 455 – 23 – Encher o nebulizador NOTA A tampa do nebulizador pode partir-se A tampa pode partir-se se for rodada na direção errada. O nebulizador fica então inutilizado e não pode ser reparado. • Rode a tampa apenas na direção indicada na dobradiça. •...
-
Page 456: Realizar A Terapia
– 24 – 3.3 Realizar a terapia Antes de realizar uma terapia, têm de ser lidas e compreendidas todas as informações de segurança contidas neste manual de instruções. Mantenha o nebulizador sempre na vertical durante a terapia. Para realizar uma terapia, proceda da seguinte forma: •... - Page 457 • Antes de iniciar a terapia, certifique-se de que é gerado aerossol. Informação sobre o PIF-Control System: O PARI PIF-Control System na parte superior do nebulizador serve para aprender a inalar de forma lenta e controlada. Dessa forma é melhorada a absorção da substância nas vias respiratórias...
- Page 458 – 26 – Inalar com bocal • Sente-se descontraidamente e com as costas direitas. • Prenda o bocal entre os dentes e cerre os lábios em volta do bocal. • Inspire tão lenta e profundamente quanto possível através do bocal e volte a expirar descontraidamente. •...
- Page 459 – 27 – • Coloque a máscara sobre a boca e nariz, pressionando ligeiramente. Certifique-se de que o nebulizador está posicionado na vertical. • Se necessário, fixe a máscara no rosto com a ajuda da tira de borracha. A tira de borracha deve passar pelo lado de trás da cabeça.
-
Page 460: Terminar A Terapia
– 28 – Se, mesmo com o dispositivo interruptor LC montado, não desejar uma nebulização contínua: • Rode o botão de interrupção no sentido dos ponteiros do relógio até ao fim. Æ O aerossol é gerado de forma contínua (nebulização contínua). 3.4 Terminar a terapia Para terminar a terapia, proceda do seguinte modo: •... -
Page 461: Sem Mudança De Paciente
– 29 – Se o sistema de inalação for utilizado em ambientes profissionais, respeite as informações em anexo no final deste manual de instruções para os preparativos de higiene. 4.1 Sem mudança de paciente Ciclos de limpeza e desinfeção Caixa do compressor Limpeza em caso de contaminação visível Nebulizador (sem... - Page 462 – 30 – Limpeza A mangueira de ligação não pode ser limpa ou desinfetada. Para tratar da mangueira de ligação, observe a respetiva secção [ver: Tratar a mangueira de ligação, página 34]. TIRA DE BORRACHA • Se necessário, limpe a tira de borracha com água potável quente e um pouco de detergente.
- Page 463 – 31 – CUIDADO Risco de infeção devido a humidade A humidade favorece a proliferação de germes. • Retire todos os componentes do tacho ou do aparelho de desinfeção logo após o processo de desinfeção. • Seque todos os componentes. EM ÁGUA FERVENTE •...
- Page 464 – 32 – como a quantidade de água necessária, consulte o manual de instruções do aparelho de desinfeção utilizado. Secar Depois de cada limpeza e desinfeção, deposite todos os componentes do produto sobre uma superfície seca, limpa e absorvente, e deixe-os secar completamente. Limpar a caixa do compressor NOTA Perigo de danos no aparelho devido à...
-
Page 465: Com Mudança De Paciente
– 33 – 4.2 Com mudança de paciente Ciclos de limpeza e desinfeção Nebulizador com Substituição antes de cada mudança mangueira de ligação e de paciente máscara Caixa do compressor Desinfeção após cada mudança de paciente Filtro de ar Substituição ao fim de 200 horas de serviço (aprox. 1 ano) Nebulizador e máscara O nebulizador e a máscara não são adequados para uma... -
Page 466: Tratar A Mangueira De Ligação
– 34 – 4.3 Tratar a mangueira de ligação Seque a mangueira de ligação após cada inalação: • Ligue a mangueira de ligação ao compressor. • Ligue o compressor. • Deixe o compressor trabalhar até que o ar que sai pela mangueira tenha eliminado quaisquer eventuais gotículas de condensação que se tenham formado na mangueira. - Page 467 – 35 – 4.5 Controlar Verifique todos os componentes do produto após cada limpeza e desinfeção. Substitua os componentes partidos, deformados ou muito descolorados. 4.6 Guardar Guarde este produto conforme descrito a seguir: • Enrole o cabo de alimentação de forma solta. NOTA! Não o enrole à...
-
Page 468: Eliminação De Erros
– 36 – ELIMINAÇÃO DE ERROS O compressor apenas pode ser reparado pelo departamento técnico da PARI GmbH ou por uma oficina de assistência oficialmente autorizada pela PARI GmbH. Se o compressor for aberto ou manipulado por outras pessoas, exclui-se qualquer direito de garantia. Nestes casos, a PARI GmbH não assume qualquer responsabilidade. -
Page 469: Dados Técnicos
– 37 – DADOS TÉCNICOS 6.1 Compressor Dados gerais do compressor Tensão de rede 220 – 240 V Frequência da rede 50 Hz Consumo de energia 0,95 A Dimensões do dispositivo 18,5 cm × 13,0 cm × 15,0 cm (L × A × P) Peso 1,7 kg Pressão 1,6 bar Fluxo do compressor 5,0 l/min Nível sonoro 54 dB(A) Classificação de acordo com a norma IEC 60601-1/EN 60601-1... -
Page 470: Compatibilidade Eletromagnética
Os dados técnicos relativos à compatibilidade eletromagnética (indicações CEM), sob a forma de tabela, podem ser solicitados ao fabricante ou fornecedor ou estão disponíveis na Internet no seguinte link: https://www.pari.com/fileadmin/Electromagnetic-compatibility-5.pdf Condições ambientais O funcionamento Temperatura ambiente +10 °C a +40 °C Humidade relativa do ar 30% até... - Page 471 – 39 – A operação do compressor em instalações profissionais de cuidados de saúde está limitada a uma utilização estacionária na área da cama e em unidades de cuidados intensivos. Não é permitido operar o compressor em zonas com elevada radiação magnética ou elétrica (p. ex.
- Page 472 [% > 2 µm < 5 µm] Teor de aerossol 47,7 38,1 39,5 [% > 5 µm] Aerosol Output [ml] 0,35 0,41 0,38 Aerosol Outputrate 0,07 0,16 0,18 [ml/min] 8) Funcionamento do compressor PARI BOY Pro (tipo 130). 9) MMAD = Diâmetro Aerodinâmico de Massa Médio 10) GSD = Desvio padrão geométrico...
- Page 473 – 41 – Fluxo mínimo Fluxo nominal Fluxo máximo Adaptador para o do compressor do compressor do compressor (3 l/min – (5 l/min – (6 l/min – bico (azul) 0,6 bar) 1,6 bar) 1,9 bar) Volume residual [ml] 1,16 1,16 1,10 (determinado por gravimetria) Outputrate em relação ao volume de enchimento [%/min] Fluxo mínimo...
- Page 474 Todos os outros componentes do produto Todos os restantes componentes do seu sistema de inalação PARI podem ser eliminados junto com o lixo doméstico, desde que não haja outra legislação aplicável em vigor no país de utilização. 7.2 Links Condições de garantia:...
- Page 475 – 43 – 7.3 Marcação Nos componentes do produto ou na embalagem encontram-se os seguintes símbolos: O produto está em conformidade com os requisitos das normas 93/42/CEE (dispositivos médicos) e 2011/65/UE (RoHS). Respeitar o manual de instruções Respeitar o manual de instruções Número de artigo Número do lote de produção, lote Número de série...
- Page 476 – 44 – Pressão atmosférica, limitação O dispositivo médico foi introduzido no mercado após o dia 13 de agosto de 2005. O dispositivo não pode ser eliminado junto com o lixo doméstico normal. O símbolo do caixote do lixo com um traço por cima remete para a necessidade de separar os lixos.
-
Page 477: Anexo: Preparativos De Higiene Em Ambientes Profissionais Com Mudança De Paciente
A visão geral das etapas de preparação em ambientes profissionais que se segue aplica-se aos seguintes produtos: – Nebulizador – Dispositivo interruptor LC – Máscara para crianças soft PARI (sem tira de borracha) 1. Preparação Desmontar o produto [ver: Preparar, página 29]. Verificar: – Prazo de validade do produto de limpeza/desinfetante... - Page 478 – 46 – 2. Limpeza e desinfeção Limpeza Produto de limpeza enzimático, com ph neutro, ® ® manual: p. ex. Korsolex Endo Cleaner (Bode) ou Bodedex forte (Bode) Utilização: De acordo com os dados do fabricante, em caso de contaminação visível utilizar uma escova, se necessário.
- Page 479 – 47 – 3. Esterilização por vapor Equipamento: – Esterilizador por vapor (preferencialmente com pré-vácuo fracionado) seg. norma DIN EN 285 ou DIN EN 13060 (tipo B) – Sistema de barreira estéril seg. DIN EN 11607 – Estabilizador de máscara Temperatura/duração: 134 °C por, no mínimo, 3 min Informação: Para a esterilização, utilize sempre o estabilizador de máscara, uma vez que as altas temperaturas podem alterar a...
-
Page 480: Mangueira De Ligação
– 48 – Mangueira de ligação 1. Preparação Verificar o produto: – Prazo de validade do produto de limpeza/desinfetante – Limites dos preparativos de higiene atingidos? 2. Limpeza e desinfeção Limpeza Não aplicável manual: Desinfeção Não aplicável manual: ® Limpeza Produto de limpeza alcalino, p. ex. - Page 481 – 49 – 4. Controlo visual e armazenamento Verificar todos os componentes. Substitua os componentes partidos, deformados ou muito descolorados. Local de armazenamento: – seco – sem pó – protegido contra agentes contaminantes opcional: Utilizar uma embalagem esterilizada Limites dos preparativos de higiene máx.
- Page 482 – 50 –...
- Page 483 ® Sistema de inalação PARI BOY CERTIFICADO DE GARANTIA O aparelho tem uma garantia de 4 anos. O prazo de garantia entra em vigor a partir da data de compra.
- Page 484 O produto com o número de série acima indicado foi vendido por nós na embalagem original. Data de compra Carimbo e assinatura do revendedor especializado ©2019 PARI GmbH Spezialisten für effektive Inhalation, 130D2103_pt-F 2019-12-19 PARI GmbH Spezialisten für effektive Inhalation Moosstraße 3 82319 Starnberg • GERMANY...