Publicité
Les langues disponibles
Les langues disponibles
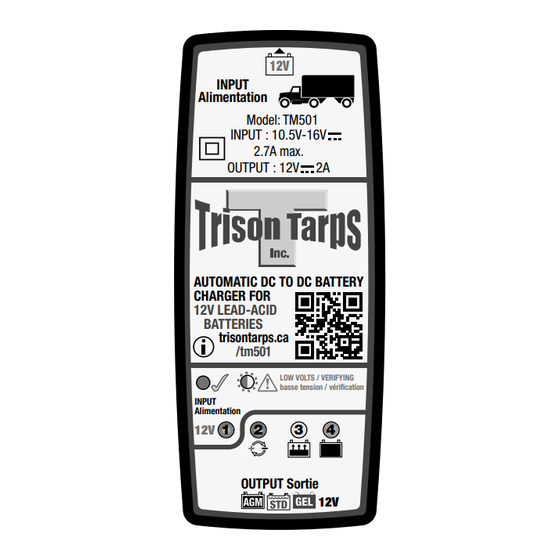
MODEL: TM501
INPUT
DC: 10.5V-16VDC 2.7A max.
OUTPUT
DC: 2A
DC IN / Courant d'entrée directe /
Gelijkstroom-ingang / entrada de corriente
directa / ingresso diretto di corrente /
entrada decorrente direta / Likström ingång /
Gleichstrom-Eingang
12V
+
-
STD / AGM-MF / GEL /
AGM CYCLIC CELL / LITHIUM
Automatic charger for 12V lead-acid batteries
• Chargeur automatique pour batteries 12V
plomb-acide • Cargador automático para
baterías 12V plomo-ácido
copyright © 2020 TecMate International – TM501-IN1-200731
12V
INSTRUCTIONS FOR USE
IMPORTANT: Read completely
before charging
MODE D'EMPLOI
IMPORTANT: à lire avant
d'utiliser l'appareil
MODO DE EMPLEO
IMPORTANTE: a leer antes de
utilizar el aparato
Publicité
Table des Matières

Manuels Connexes pour TecMate International Trison Tarps TM501


Sommaire des Matières pour TecMate International Trison Tarps TM501
- Page 1 / Likström ingång / Gleichstrom-Eingang STD / AGM-MF / GEL / AGM CYCLIC CELL / LITHIUM Automatic charger for 12V lead-acid batteries • Chargeur automatique pour batteries 12V plomb-acide • Cargador automático para baterías 12V plomo-ácido copyright © 2020 TecMate International – TM501-IN1-200731...
- Page 2 SOURCE: 12V BATTERY or VEHICLE SYTEM INPUT Alimentation Model: TM501 INPUT : 10.5V-16V 2.7A max. OUTPUT : 12V AUTOMATIC DC TO DC BATTERY CHARGER FOR 12V LEAD-ACID BATTERIES trisontarps.ca /tm501 LOW VOLTS / VERIFYING basse tension / vérification INPUT Alimentation LED #1 - Input: DC IN / SOURCE battery LED #2 - Reverse Polarity (Target battery) LED #3 - CHARGE...
- Page 3 A. IMPORTANT SAFETY INSTRUCTIONS FOR CANADA & USA SAVE THESE INSTRUCTIONS. THIS PORTION OF THE MANUAL CONTAINS IMPORTANT SAFETY INSTRUCTIONS FOR THE OPTIMATE DC-DC 12V 2A BATTERY CHARGER. IT IS OF THE UTMOST IMPORTANCE THAT EACH TIME, BEFORE USING THE CHARGER, YOU READ AND EXACTLY FOLLOW THESE INSTRUCTIONS. AUTOMATIC CHARGER FOR 12V LEAD-ACID OR 12.8V LIFEPO4 BATTERIES DO NOT USE FOR NiCd, NiMH, any other Li-Ion OR NON-RECHARGEABLE BATTERIES.
-
Page 4: Preparing To Charge
12. PREPARING TO CHARGE a) If necessary to remove battery from vehicle to charge,always remove grounded terminal from battery first. Make sure all accessories in the vehicle are off, so as not to cause an arc. b) Be sure area around battery is well ventilated while battery is being charged. Gas can be forcefully blown away by using a piece of cardboard or other non-metallic material as a fan. - Page 5 B. CONNECTING THE CHARGER TO THE 12V SOURCE AND 12V TARGET BATTERY. SOURCE - a 12V engine start battery system in a vehicle or a stand-alone 12V battery supplying DC power to the TM-501 battery charger. Input voltage range: 10.5V to 16VDC Input current: 2.7A max. TARGET - The battery receiving charge.
- Page 6 4. Additional / alternate connections / stationery use with battery clips: Battery clips are not supplied with the TM-501 battery charger. WARNING: DO NOT USE BATTERY CLIPS ON OR IN A VEHICLE IN MOTION, EITHER FOR CONNECTION TO THE SOURCE BATTERY OR THE TARGET BATTERY OR BOTH.
- Page 7 LED #1 - SOURCE battery / supply voltage verification - Minimum start up voltage: 10.5V. Minimum running voltage (after start up): 10V. Ideal running voltage: 12V or higher. Maximum start up / running voltage: 16V. NORMAL: LED #1 flashes for 5 seconds to verify SOURCE voltage, then turns full ON if confirmed stable and within range.
-
Page 8: Instructions Importantes Concernant La Sécurité
INSTRUCTIONS IMPORTANTES CONCERNANT LA SÉCURITÉ CONSERVER CES INSTRUCTIONS. CE MANUEL CONTIENT DES INSTRUCTIONS IMPORTANTES CONCERNANT LA SÉCURITÉ ET LE FONCTIONNEMENT DU CHARGEUR OPTIMATE DC-DC. CHARGEUR AUTOMATIQUE POUR BATTERIES 12V PLOMB-ACIDE & 12.8V LiFePO NE CONVIENT PAS POUR LES BATTERIES NiCd, NiMH, Li-Ion OU NON RECHARGEABLES. - Page 9 (iv) DÉTERMINER QUELLE BORNE EST MISE À LA MASSE (RACCORDÉE AU CHÂSSIS). SI LA BORNE NÉGATIVE EST RACCORDÉE AU CHÂSSIS (COMME DANS LA PLUPART DES CAS), VOIR LE POINT (v). SI LA BORNE POSITIVE EST RACCORDÉE AU CHÂSSIS, VOIR LE POINT (vi) ; (v) SI LA BORNE NÉGATIVE EST MISE À...
-
Page 10: Chargeur Automatique Pour Batteries 12V Plomb-Acide
CHARGEUR AUTOMATIQUE POUR BATTERIES 12V PLOMB-ACIDE : NE CONVIENT PAS POUR LES BATTERIES NiCd, NiMH, Li-Ion. IMPORTANT : LIRE ENTIÈREMENT LES INSTRUCTIONS SUIVANTES AVANT D’UTILISER LE CHARGEUR Cet appareil peut être utilisé par des enfants âgés de 8 ans et plus et par des personnes possédant des capacités physiques, sensorielles ou mentales réduites, ou manquant d’expérience et de connaissance si elles bénéficient d’une surveillance ou ont reçu des instructions concernant l’utilisation de l’appareil et comprennent les risques impliqués. - Page 11 remplissage et que les plaques des cellules sont visibles de l’extérieur, examinez soigneusement la batterie pour tenter de déterminer si certaines cellules semblent différentes des autres (par exemple, de la matière blanche entre les plaques, les plaques qui entrent en contact).
- Page 12 Inversion de la polarité de la batterie CIBLE - La LED no2 clignote. 4. Raccordements supplémentaires / alternatifs / utilisation à l'arrêt avec des pinces de batterie : les pinces de batterie ne sont pas fournies avec le chargeur de batterie TM-501. AVERTISSEMENT : NE PAS UTILISER DE PINCES DE BATTERIE SUR OU DANS UN VÉHICULE EN MARCHE, QUE CE SOIT POUR LE RACCORDEMENT À...
- Page 13 ERREUR (AUCUNE CHARGE N'EST FOURNIE / LE CHARGEMENT EST TROP LENT). 1. La LED no1 ne s'allume pas - La tension source est inférieure à 9 V ou la polarité des raccordements d'alimentation est inversée. 2. La LED no1 clignote mais ne s'allume jamais de façon fixe : l'alimentation est faible / supérieure à la plage de tensions minimale / maximale acceptée par le chargeur (voir ci-dessus).
- Page 14 CARGADOR AUTOMÁTICO PARA BATERÍAS 12V PLOMO-ÁCIDO NO UTILIZAR CON BATERÍAS DE NiCd, NiMH, Li-Ion. IMPORTANTE: LEA COMPLETAMENTE LAS SIGUIENTES INSTRUCCIONES ANTES DE UTILIZAR EL CARGADOR Este aparato pueden utilizarlo niños a partir de 8 años y personas con capacidades físicas, sensoriales o mentales disminuidas, o bien con falta de experiencia y conocimientos, si se las supervisa o instruye sobre el uso seguro del aparato y entienden los peligros que conlleva.
- Page 15 3. Cuando cargue una batería fuera del vehículo con las pinzas, colóquela en un lugar bien ventilado. Conecte el cargador a la batería: pinza ROJA con el terminal POSITIVO (POS, P o +) y pinza NEGRA con el terminal NEGATIVO (NEG, N o –).Asegúrese de que las conexiones son firmes y seguras.
- Page 16 desconexión siempre en el orden inverso. NOTA: El cargador de batería está protegido frente a conexiones de polaridad incorrecta o inversa. Conexión de polaridad inversa en la batería o el suministro eléctrico que actúan como FUENTE: el LED n.º 1 (12 V) NO se iluminará, lo que indica que el cargador no está...
- Page 17 Tensión máxima de arranque/funcionamiento: 16 V. NORMAL: El LED n.º 1 parpadea durante 5 segundos para verificar la tensión FUENTE; a continuación se mantiene encendido si se confirma que la tensión es estable y está dentro del rango. Los LED n.º 3 n.º 4 se iluminan para confirmar que la batería de DESTINO está...
- Page 20 Trisontarps.ca...