
Manuels Connexes pour Proline IH2350M


Sommaire des Matières pour Proline IH2350M
- Page 1 MANUEL Table de cuisson IHM2350M NOTICE D’UTILISATION Tous nos Tutos vidéo Darty.com Tous nos magasins Communauté SAV Darty...
- Page 2 IH2350M_OP 25oct 1.indd 1 IH2350M_OP 25oct 1.indd 1 26/10/2023 10:54 AM 26/10/2023 10:54 AM...
- Page 3 IH2350M_OP 25oct 1.indd 2 IH2350M_OP 25oct 1.indd 2 26/10/2023 10:54 AM 26/10/2023 10:54 AM...
- Page 4 TABLE DES MATIÈRES MISES EN GARDE IMPORTANTES..........p. 02 DESCRIPTION................p. 06 PRINCIPE DE FONCTIONNEMENT DE L’INDUCTION....p. 07 INSTALLATION................p. 08 CONNEXION ÉLECTRIQUE............p. 11 UTILISATION.................p. 13 CONSEILS DE CUISSON..............p. 20 NETTOYAGE ET ENTRETIEN............p. 22 DÉPANNAGE..................p. 24 DONNÉES TECHNIQUES..............p. 28 MISE AU REBUT................p. 30 IH2350M_OP 25oct 1.indd 1 IH2350M_OP 25oct 1.indd 1 26/10/2023 10:54 AM...
- Page 5 MISES EN GARDE IMPORTANTES MERCI DE BIEN VOULOIR LIRE LES CONSIGNES DE SÉCURITÉ ATTENTIVEMENT AVANT D’UTILISER L’APPAREIL ET DE LES CONSERVER POUR RÉFÉRENCE ULTÉRIEURE. AVERTISSEMENTS • Cet appareil est destiné à être utilisé dans des applications domestiques et analogues telles que: –...
- Page 6 éléments chauffants. Les enfants de moins de 8 ans doivent être tenus à l’écart à moins d’être surveillées en continu. • MISE EN GARDE : Les parties accessibles peuvent devenir chaudes au cours de l’utilisation. Il est recommandé d’éloigner les jeunes enfants. •...
- Page 7 • La température des surfaces accessibles peut être élevée lorsque l’appareil est en fonctionnement. • Un moyen de déconnexion du réseau d’alimentation ayant une distance d’ouverture des contacts de tous les pôles doit être prévu dans la canalisation fixe conformément aux règles d’installation.
- Page 8 • Ne touchez pas ses surfaces chaudes. • N’utilisez jamais la plaque de cuisson comme surface de rangement ou comme un plan de travail. • Ne laissez jamais un objet ou un ustensile autre qu’un ustensile de cuisson approprié sur l’appareil. •...
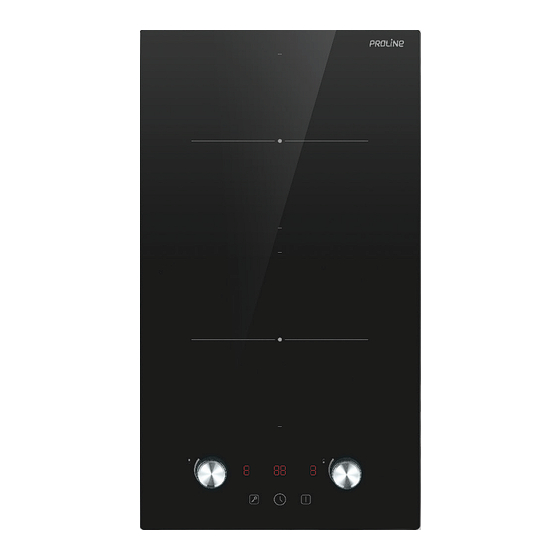
- Page 9 DESCRIPTION Vue supérieure Foyer à 1800/ 2000W (fonction d’amplication de puissance) max. Foyer à 1800/ 2000W (fonction d’amplication de Plaque en puissance) max. verre Panneau de contrôle Panneau de contrôle Contrôle du réglage Affichage du Contrôle du réglage Affichage de puissance et de la niveau de de puissance et de du minuteur...
- Page 10 PRINCIPE DE FONCTIONNEMENT DE L’INDUCTION Une bobine d’induction se trouve sous chaque zone de cuisson. Lorsqu’une zone de cuisson est allumée, cette bobine créé un champ magnétique qui impacte directement le fond de l’ustensile de cuisson approprié, ce qui provoque instantanément une accumulation de chaleur permettant de cuire les aliments.
- Page 11 INSTALLATION Découpez dans le plan de travail un trou dont les dimensions sont indiquées ci-dessous. Le trou doit être à au moins 5 cm de tous les bords. Le plan de travail doit avoir une épaisseur d’au moins 3 cm et être fabriqué...
- Page 12 A (mm) B (mm) C (mm) Min. 50 Min. 20 Entre d’air Sortie d’air 5mm AVERTISSEMENT : Assurez une ventilation appropriée. Veillez à ce que la plaque de cuisson soit bien ventilée et à ce que ses entrées et sorties d’air ne soient pas bouchées. Pour éviter que des objets ne touchent accidentellement la base de la plaque de cuisson, il est nécessaire de placer une plaque en bois, fixée par des vis, à...
- Page 13 Support Trou de vis La position des supports peut s’ajuster selon l’épaisseur du plan de travail. Table de cuisson Table de cuisson Plan de travail Plan de travail TABLE TABLE Support Support BRACKET BRACKET Attention : • La plaque de cuisson doit être installée par une personne agréée et qualifiée.
- Page 14 CONNEXION ÉLECTRIQUE Attention ! • La plaque de cuisson doit être installée par un électricien qualifié en respectant les normes et réglementations locales concernant les câbles électriques. • Avant tout travail sur une partie électrique de l’appareil, celui-ci doit être débranché du secteur. •...
- Page 15 • L’installateur doit s’assurer que le bon raccordement électrique a été effectué et qu’il est totalement conforme aux consignes de sécurité. 220-240V~ AVERTISSEMENTS : • Avant de brancher l’appareil au secteur, assurez-vous que : – L’appareil est relié à la terre et la prise est conforme à la loi. –...
- Page 16 UTILISATION Ustensiles de cuisine N’utilisez pas d’ustensiles avec des bords dentelés ou un fond bombé. Assurez-vous que la base de l’ustensile est lisse, qu’elle repose à plat contre le verre et qu’elle est de la même taille que la zone de cuisson. Utilisez des casseroles dont le diamètre est aussi grand que le graphique de la zone sélectionnée.
- Page 17 Les ustensiles de cuisson fabriqués dans les matériaux suivants ne conviennent pas à l’induction : acier inoxydable pur, aluminium ou cuivre sans base magnétique, verre, bois, porcelaine, céramique et faïence Dimensions de l’ustensile de cuisson Le foyer, jusqu’à une certaine limite, s’adapte automatiquement au diamètre de l’ustensile de cuisson.
- Page 18 Lancer la cuisson Mettez les aliments dans la poêle/casserole et positionnez celle ci au centre du cercle dessiné sur la plaque. REMARQUE : • Les ustensiles de cuisson doivent comporter un couvercle. • Ne mettez en aucun cas un ustensile vide sur l’appareil lorsqu’il est allumé. •...
- Page 19 Guide des niveaux de puissance Les réglages de niveau ci-dessous ne sont fournis qu’à titre indicatif. Les réglages exacts dépendront de plusieurs facteurs, dont votre ustensile de cuisson et la quantité d’aliments à cuire. Faites des tests avec la plaque de cuisson pour trouver les réglages les plus appropriés.
- Page 20 La lettre « H » apparaît sur l’afficheur de la zone de cuisson qui reste chaude au toucher. Elle disparaîtra lorsque la surface aura refroidi à une température sûre. Elle peut également être utilisée comme fonction d’économie d’énergie si vous souhaitez chauffer d’autres casseroles sur la zone de cuisson qui est encore chaude.
- Page 21 Utilisation de la fonction Boost (amplification) Pour activer la fonction boost, tournez le bouton correspondant en vous assurant que l’écran affiche « P ». La fonction turbo fonctionne seulement durant 5 minutes environ, puis le foyer retourne au réglage 9. Pour annuler cette fonction, tournez le bouton correspondant dans le sens inverse des aiguilles d’une montre pour régler le niveau de puissance souhaité.
- Page 22 REMARQUE : Vous pouvez toujours éteindre la table en cas d’urgence, mais les boutons seront verrouillés lorsque vous rallumerez la table. Vous devrez d’abord déverrouiller les boutons avant d’utiliser la table. Pour déverrouiller les boutons 1. Allumez la table. 2. Gardez la touche de verrouillage appuyée pendant 2 secondes. “Lo” disparaît de l’écran.
- Page 23 CONSEILS DE CUISSON • Lorsque les aliments arrivent à ébullition, baissez la température. • La cuisson avec couvercle permet de retenir la chaleur et donc de réduire le temps de cuisson et économiser l’énergie. • Minimisez les quantités de graisse et de liquide afin de réduire les temps de cuisson.
- Page 24 Faire sauter 1. Choisissez une grande poêle ou un wok plat compatible avec les tables en céramique. 2. Préparez tous les ingrédients et ustensiles dont vous aurez besoin. Ce mode de cuisson est rapide. Si vous voulez faire cuire de grandes quantités d’aliments de cette manière, procédez par petites fournées.
- Page 25 NETTOYAGE ET ENTRETIEN Quoi ? Comment ? Important ! • Lorsque la table est éteinte, le témoin ‘surface chaude’ disparaît mais la plaque peut être encore Éteignez table brûlante ! Soyez très vigilant. Souillure cuisson. • Les produits de nettoyage durs/ quotidienne Appliquez un produit pour abrasifs et les tampons à...
- Page 26 Éteignez table cuisson. Épongez. Essuyez le panneau de Résidus sur commande avec Faites attention aux éclaboussures les boutons de éponge (ou un chiffon) brûlantes. commande propre et mouillée. Séchez complètement le panneau avec du Sopalin. Rallumez la table. IH2350M_OP 25oct 1.indd 23 IH2350M_OP 25oct 1.indd 23 26/10/2023 10:54 AM 26/10/2023 10:54 AM...
- Page 27 DÉPANNAGE Problème Causes possibles Solution possible Vérifiez que la table est branchée et que la prise est bien sous tension. Il peut y avoir eu une coupure de La table ne s’allume courant chez vous ou dans votre Pas d’alimentation. pas.
- Page 28 Codes d’erreur Ces codes d’erreur sont uniquement indicatifs et tous les dysfonctionnements doivent être diagnostiqués et réparés par un technicien qualifié. Affichage Causes possibles Solution possible Panne du capteur de température de la plaque de verre – circuit ouvert Vérifiez la connexion ou remplacez le Défaillance capteur capteur de température de la plaque...
- Page 29 Panne spécifique et solution Défaillance Problème Solution Vérifiez si la fiche est bien fixée Il n’y a pas d’alimentation. dans la prise et que la prise fonctionne. La LED ne s’allume carte d’alimentation pas lorsque la accessoire tableau Vérifiez la connexion. table de cuisson d’affichage sont...
- Page 30 carte d’alimentation accessoire tableau Les zones de Vérifiez la connexion. d’affichage sont chauffage du connectés. même côté (telles que la première et La carte d’affichage de la la seconde zone) partie de communication est Remplacez la carte d’affichage. afficheraient le endommagée.
- Page 31 No 66/2014. Informations concernant les plaques de cuisson domestiques électriques Symbole Valeur Unité Identification du modèle IH2350M Type de plaque Four encastré Nombre de zones et/ou aires de cuisson Technologie de chauffage (zones et aires de cuisson par induction, zones...
- Page 32 Marque Proline Référence IH2350M Catégorie Plaque de cuisson à induction 2 zones 220-240V~ Tension / fréquence V / Hz 50Hz ou 60Hz Puissance nominale totale (W) 3500W Dimensions du produit (mm) 288 x 520 x 59,5 (Longueur x Largeur x Hauteur) Dimensions (intégrée)
- Page 33 MISE AU REBUT En tant que distributeur responsable, nous accordons une grande importance à la protection de l’environnement. Nous vous encourageons à respecter les procédures correctes de mise au rebut de votre appareil, des piles et des éléments d’emballage. Cela aidera à préserver les ressources naturelles et à...
- Page 34 En raison des mises au point et améliorations constamment apportées à nos produits, de petites incohérences peuvent apparaître dans ces instructions. Veuillez nous excuser pour la gêne occasionnée. Etablissements Darty & fils ©, 9 Rue des Bateaux-Lavoirs, 94200 Ivry-sur-Seine, France 18/10/2023 IH2350M_OP 25oct 1.indd 31 IH2350M_OP 25oct 1.indd 31 26/10/2023 10:54 AM...
- Page 35 INHOUDSOPGAVE BELANGRIJKE VEILIGHEIDSINSTRUCTIES.........p. 33 OVERZICHT...................p. 37 PRINCIPE VAN INDUCTIE............p. 38 INSTALLATIE.................p. 39 ELEKTRISCHE AANSLUITING............p. 42 WERKING..................p. 44 TIPS VOOR BEREIDINGEN............p. 51 SCHOONMAKEN EN ONDERHOUD..........p. 53 PROBLEEMOPLOSSING..............p. 55 TECHNISCH GEGEVENSBLAD............p. 59 VERWIJDERING................p. 61 IH2350M_OP 25oct 1.indd 32 IH2350M_OP 25oct 1.indd 32 26/10/2023 10:54 AM 26/10/2023 10:54 AM...
- Page 36 BELANGRIJKE VEILIGHEIDSINSTRUCTIES LEES DE VOLGENDE VEILIGHEIDSINSTRUCTIES AANDACHTIG DOOR VOORDAT U HET APPARAAT IN GEBRUIK NEEMT EN BEWAAR ZE VOOR TOEKOMSTIG GEBRUIK. WAARSCHUWINGEN • Dit apparaat is bestemd voor huishoudelijk gebruik of gelijksoortige toepassingen zoals: – personeelskeukens in winkels, kantoren en andere werkomgevingen;...
- Page 37 • Plaats geen metalen voorwerpen zoals messen, vorken, lepels of deksels op de kookplaat, deze kunnen warm worden. • Deze oppervlakken kunnen heet worden. • Gebruik geen stoomreiniger. • Na gebruik, schakel de kookveld uit via de bedieningsknop en vertrouw niet enkel op de pandetector. •...
- Page 38 • Voor de bevestigingsmethode en het aansluiten van de kabels, raadpleeg de sectie “ELEKTRISCHE AANSLUITING”. • Voor gedetailleerde instructies en waarschuwingen om het apparaat op een juiste manier te gebruiken en te onderhouden, raadpleeg de secties “WERKING” en “SCHOONMAKEN EN ONDERHOUD”.
- Page 39 luchtinlaat en dek ze niet af. • Personen met een pacemaker moeten eerst een dokter raadplegen. Gebruik het apparaat alleen als u zeker weet dat het apparaat geen invloed op de pacemaker heeft. IH2350M_OP 25oct 1.indd 36 IH2350M_OP 25oct 1.indd 36 26/10/2023 10:54 AM 26/10/2023 10:54 AM...
- Page 40 OVERZICHT Bovenaanzicht Max. 1800/ 2000W (Power-boostfunctie) kookzone Max. 1800/ 2000W (Power-boostfunctie) kookzone Glasplaat Bedieningspaneel Bedieningspaneel Controle voor de Controle voor de Vermogensniveau- warmte / timer - Weergave warmte / timer - weergave : 1 tot 9 van timer instelling instelling Vergrendeltoets Toets stroom AAN/UIT Toets voor de timer - instelling...
- Page 41 PRINCIPE VAN INDUCTIE Er bevindt zich een inductiespoel onder elk kookveld. Wanneer een kookveld wordt ingeschakeld, creëert deze spoel een magnetisch veld, wat voor een directe impact op de bodem van het gepaste kookgerei en een onmiddellijke warmteontwikkeling zorgt om de levensmiddelen te bereiden.
- Page 42 INSTALLATIE Zaag een gat met afmetingen als in het onderstaande diagram in het aanrecht. Laat minimaal 50 mm ruimte rondom de opening. Het werkblad moet minstens 30 mm dik en uit hittebestendig material vervaardigd zijn. Opmerking: De veiligheidsafstand tussen de zijkant van de kookplaat en de binnenkant van het aanrecht moet minstens 3 mm zijn.
- Page 43 A (mm) B (mm) C (mm) Min. 50 Min. 20 Luchtinlaat Luchtuitlaat 5mm WAARSCHUWING: Zorg voor voldoende ventilatie Zorg dat de kookplaat goed wordt geventileerd en dat de luchtinlaat en -uitlaat niet worden belemmerd. Om te vermijden dat er voorwerpen de onderkant van de kookplaat per ongeluk aanraken, is het nodig om een houten inzetstuk, dat met schroeven is vastgemaakt, op een afstand van minstens 50mm van de onderkant van de kookplaat aan...
- Page 44 Schroef Haak Schroefgat De stand van de haken kan worden aangepast aan de dikte van het aanrecht. KOOKPLAAT KOOKPLAAT AANRECHT AANRECHT TABLE TABLE HAAK HAAK BRACKET BRACKET Opgelet: • Laat de inductiekookplaat door een erkende en vakbekwame persoon installeren. Probeer dit apparaat niet zelf te installeren. •...
- Page 45 ELEKTRISCHE AANSLUITING Opgelet! • Laat de installatie van de kookplaat uitvoeren door een vakbekwame elektricien en overeenkomstig alle lokale richtlijnen en voorschriften inzake elektrische bedrading. • Voordat u elektrische werkzaamheden aan het apparaat uitvoert, moet u het ontkoppelen van de netvoeding. •...
- Page 46 correct tot stand is gebracht en dat deze volledig voldoet aan de veiligheidswetgeving. 220-240V~ WAARSCHUWINGEN: • Zorg er voordat u het apparaat op het stroomnet aansluit voor dat: – Het apparaat is geaard en de stekker in overeenstemming met de wetten is. –...
- Page 47 WERKING Kookgerei Gebruik geen kookgerei met scherpe randen of een ronde bodem. Zorg dat de bodem van de pan glad is, vlak tegen het glas zit en even groot als het kookveld is. Gebruik pannen met een diameter die even groot is als de grafische afbeelding van de gekozen zone.
- Page 48 Kookgerei dat uit de volgende materialen is gemaakt is niet geschikt voor inductie: zuiver roestvrij staal, aluminium of koper zonder een magnetische bodem, glas, hout, porselein, keramiek of aardewerk. Afmeting van de pan De kookzones worden, tot een bepaalde grens, automatisch aangepast aan de diameter van de pan.
- Page 49 Aan de slag met koken Doe het voedsel in een pan en zet deze neer op het midden van de cirkelvorm op de kookplaat OPMERKINGEN: • Gebruik altijd een deksel tijdens het koken. • Zet nooit leeg kookgerei op het apparaat terwijl het is ingeschakeld. •...
- Page 50 Gids voor vermogenniveau Onderstaande niveau-instellingen dienen slechts ter referentie. De exacte instelling is afhankelijk van verschillende factoren, zoals uw gebruikte kookgerei en de hoeveelheid te koken levensmiddelen. Experimenteer met de kookplaat om de meest gepaste instellingen te vinden. Vermogenniveau Geschikt voor •...
- Page 51 De letter “H” verschijnt op het display van de kookzone die te warm is om aan te raken. Dit verdwijnt zodra het oppervlak tot een veilige temperatuur is afgekoeld. Het kan tevens als een energiebesparingsfunctie worden gebruikt om pannen verder te laten opwarmen op de kookzone die nog warm is.
- Page 52 De boostfunctie gebruiken Om de boostfunctie te activeren, draai de overeenkomstige knop. Controleer of het scherm ‘P’ weergeeft. De boostfunctie wordt slechts gedurende circa 5 minuten ingeschakeld, waarna de kookzone opnieuw op 9. Om deze functie te annuleren, draai de overeenkomstige knop tegen de klok in om uw gewenst vermogenniveau in te stellen.
- Page 53 De toetsen vergrendelen Houd uw vinger 2 seconden lang op de toetsenvergrendeling . “Lo” verschijnt op de timerdisplay, aangevend dat de toetsen vergrendeld zijn. OPMERKING: u kunt de kookplaat in een noodgeval nog altijd uitschakelen, maar de toetsen blijven vergrendeld wanneer u de kookplaat opnieuw inschakelt. Ontgrendel de toetsen voordat u de kookplaat opnieuw gebruikt.
- Page 54 TIPS VOOR BEREIDINGEN • Verminder de warmte instelling zodra het voedsel begint te koken. • Het gebruik van een deksel zal de bereidingstijd verkorten en energie besparen door te voorkomen dat de warmte kan ontsnappen. • Beperk de hoeveelheid vloeistof of vet om de bereidingstijd te verkorten. •...
- Page 55 Roerbakken 1. Neem een wok met platte bodem die ge schikt is voor keramische kookplaten of een grote braadpan. 2. Zet alle ingrediënten en kookgerei vooraf klaar. Roerbakken moet snel gaan. Voor het bereiden van grote hoeveelheden verdeelt u het eten in verschillende kleinere porties.
- Page 56 SCHOONMAKEN EN ONDERHOUD Wat? Hoe? Belangrijk! • Er is geen waarschuwing “hete kookplaat” wanneer de kookplaat is uitgeschakeld, hoewel de kookzone nog steeds zeer warm kan zijn! Wees uiterst voorzichtig. Schakel de kookplaat uit. • Schuursponsjes voor Breng een reiniger voor Dagelijkse bevuiling zwaar gebruik,...
- Page 57 Schakel de kookplaat uit. Week de vlek op. Veeg tiptoetsen schoon met een schone, Gemorste vochtige spons of doek. Wees voorzichtig met gemorst levensmiddelen op Veeg het hele oppervlak voedsel dat heet is. de tiptoetsen volledig droog keukenpapier. Schakel kookplaat weer in.
- Page 58 PROBLEMEN OPLOSSEN Probleem Mogelijke oorzaak Mogelijke oplossing Controleer of de kookplaat op de netvoeding is aangesloten en of het stopcontact is ingeschakeld. Controleer of er bij u thuis of in De kookplaat Geen stroom. uw buurt geen stroomstoring is. schakelt niet in. Raadpleeg gekwalificeerd elektricien...
- Page 59 Foutcodes Deze foutcodes zijn louter indicatief. Alle fouten moeten door een vakbekwame technicus gecontroleerd en gerepareerd worden. Scherm Mogelijke oorzaak Mogelijke oplossing Temperatuursensor glasplaat is defect – open circuit Controleer de aansluiting of vervang de Temperatuursensor temperatuursensor van de glasplaat. glasplaat is defect –...
- Page 60 Storingen en oplossingen Storing Probleem Oplossing Controleer of de stekker stevig Er is geen voeding. in het stopcontact zit en of het stopcontact werkt. De led gaat niet Er is een storing in de branden wanneer verbinding tussen de kookplaat is Controleer de verbinding.
- Page 61 Storing in de verbinding tussen voedingsmodule en Controleer de verbinding. Verwarmingszones displaymodule. aan dezelfde kant (bijvoorbeeld eerste communicatiegedeelte en tweede zone) van de displaymodule is Vervang de displaymodule. geven het symbool defect. weer. De voedingsmodule is defect. Vervang de voedingsmodule. De ventilatormotor De ventilatormotor is defect.
- Page 62 TECHNISCH GEGEVENSBLAD De volgende productinformatie zijn volgens de verordening (EU) Nr. 66/2014. Informatie met betrekking tot huishoudelijke elektrische kookplaten Symbool Waarde Eenheid Identificatie van het model IH2350M Type kookplaat Ingebouwde kookplaat Aantal kookzones en/of -gebieden Verwarmingstechnologie (inductie- kookzones en -kookgebieden, inductie-kookzones...
- Page 63 Merk Proline Referentie IH2350M Category Inductiekookplaat met 2 kookzones 220-240V~ Spanning/frequentie V / Hz 50Hz of 60Hz Nominaal – Totaal vermogen (W) 3500W Afmetingen product (mm)(L*B*H) 288 x 520 x 59,5 Inbouwafmetingen L x B (mm) 268 x 500 Netto gewicht product (kg)
- Page 64 VERWIJDERING Als verantwoordelijke handelaar dragen we zorg voor het milieu. We moedigen u aan om de juiste verwijderingsprocedure voor uw apparaat en verpakkingsmateriaal te volgen. Dit draagt bij tot het behoud van de natuurlijke rijkdommen door deze te recyclen zodat zowel de menselijke gezondheid en het milieu worden beschermd.
- Page 65 TABLE OF CONTENTS IMPORTANT SAFETY INSTRUCTIONS........p. 63 OVERVIEW..................p. 66 THE INDUCTION PRINCIPLE............p. 67 INSTALLATION................p. 68 ELECTRICAL CONNECTION............p. 71 OPERATION..................p. 73 COOKING TIPS................p. 80 CLEANING AND MAINTENANCE..........p. 82 TROUBLESHOOTING..............p. 83 TECHNICAL DATA SHEET.............p. 87 DISPOSAL..................p. 89 IH2350M_OP 25oct 1.indd 62 IH2350M_OP 25oct 1.indd 62 26/10/2023 10:54 AM 26/10/2023 10:54 AM...
- Page 66 IMPORTANT SAFETY INSTRUCTIONS PLEASE READ THE FOLLOWING SAFETY WARNINGS AND THE INSTRUCTIONS CAREFULLY BEFORE USING THE APPLIANCE AND KEEP FOR FUTURE REFERENCE. WARNINGS • This appliance is intended to be used in household and similar applications such as: – staff kitchen areas in shops, offices and other working environments;...
- Page 67 children should be kept away. • Metallic objects such as knives, forks, spoons and lids should not be placed on the hob surface since they can get hot. • These surfaces can get hot. • A steam cleaner is not to be used. •...
- Page 68 appliance and the precautions during user maintenance, refer to the sections “OPERATION” and “CLEANING AND MAINTENANCE”. • CAUTION: The cooking process has to be supervised. A short term cooking process has to be supervised continuously. • The plug must be remained easily accessible after installation of the appliance.
- Page 69 OVERVIEW Top View Max. 1800/ 2000W (boost) zone Max. 1800/ 2000W (boost) zone Glass plate Control panel Control Panel Power level Power/Time Power/Time Timer display : 1 to 9 setting control setting control display Lock key Power ON/OFF key Timer setting key IH2350M_OP 25oct 1.indd 66 IH2350M_OP 25oct 1.indd 66 26/10/2023 10:54 AM...
- Page 70 THE INDUCTION PRINCIPLE An induction coil is located under each cooking zone. When a cooking zone is switched on, this coil creates a magnetic field which impacts directly on the base of the suitable cookware, which causes an instant build-up of heat to cook the food. Magnetic circuit Plate Induction coil...
- Page 71 INSTALLATION Cut a hole in the worktop of the dimension shown in the diagram below. A minimum of 50 mm space should be left around the hole. The worktop should be at least 30 mm thick and made of heat- resistant material.
- Page 72 A (mm) B (mm) C (mm) Min. 50 Min. 20 Air intake Air exit 5mm WARNING: Ensuring Adequate Ventilation Make sure the hob is well ventilated and the air inlet and outlet are not blocked. To prevent items accidently touching the base of the hob, it is necessary to put a wooden insert, fixed by screws, at a minimum distance of 50mm from the bottom of the hob.
- Page 73 Screw Bracket Screw hole The position of the brackets can be adjusted according to the thickness of the top. TABLE TABLE BRACKET BRACKET Cautions: • The induction hob must be installed by a qualified authorised person. Never try to install the appliance by yourself. •...
- Page 74 ELECTRICAL CONNECTION Attention! • The hob must be installed by a qualified electrician in line with all local standards and regulations for electrical wiring. • Before any work on the electrical section of the appliance, it must be disconnected from the mains. •...
- Page 75 connection has been made and that it is fully compliant with safety regulations. 220-240V~ WARNINGS: • Before connecting the appliance to the power supply, make sure that: – The appliance is earthed and the plug is compliant with the law. –...
- Page 76 OPERATION Cookware Do not use cookware with jagged edges or a curved base. Make sure the base of the pan is smooth, sits flat against the glass and is the same size as the cooking zone. Use pans with a diameter as large as the graphic of the zone selected.
- Page 77 Only use cookware with a base suitable for induction cooking. Look for the induction symbol on the packaging or on the bottom of the pan. Suitable pans : stainless steel pans with a magnetic base, enamelled steel pans, cast iron pans Cookware made from the following materials are not suitable for induction: pure stainless steel, aluminium or copper without a magnetic base, glass, wood,...
- Page 78 Using the Control Panel • The buttons are touch-sensitive, so you do not need to apply any pressure. • Use the ball of your finger, not its tip. • You will hear a beep each time a touch is registered. •...
- Page 79 – The pan is not placed on the selected cooking zone. – The pan used is not suitable for induction cooking. – The pan used is too small or not properly centered on the cooking zone. The display ” ” will automatically go out after about 2 minutes. Power level guideline The level settings below are for reference only.
- Page 80 The letter ”H” will appear on the display of the cooking zone which is hot to touch. It will disappear when the surface has cooled down to a safe temperature. It can also be used as an energy saving function if you want to heat further pans on the cooking zone that is still hot.
- Page 81 Using the Boost function To activate the boost function, rotate the corresponding knob, making sure the display shows “P”. The boost function will only operate for about 5 minutes and then the cooking zone will return to 9. To cancel this function, rotate the corresponding knob anticlockwise to set the power level you want.
- Page 82 still be locked when you turn the hob on again. Unlock the controls first before operating the hob. To unlock the controls 1. Make sure the hob is turned on. 2. Touch and hold the key lock control for 2 seconds. “Lo” will disappear. 3.
- Page 83 COOKING TIPS • When food comes to the boil, reduce the temperature setting. • Using a lid will reduce cooking times and save energy by retaining the heat. • Minimize the amount of liquid or fat to reduce cooking times. •...
- Page 84 4. Cook any meat first and then put it aside and keep warm. 5. Stir-fry the vegetables. When they are hot but still crisp, turn the cooking zone to a lower power level, return the meat to the pan and add your sauce. 6.
- Page 85 CLEANING AND MAINTENANCE What? How? Important! • When the hob is switched off, there will be no ‘hot surface’ warning but the cooking zone may still be Switch the hob off. hot! Take extreme care. Everyday soiling on Apply a hob cleaner while •...
- Page 86 TROUBLESHOOTING Problem Possible Cause Possible Solution Make sure the hob is connected to the power supply and that it is switched on at the mains socket. The hob cannot be Check whether there is a power No power. turned on. outage in your home or area.
- Page 87 Error codes These error codes are for guidance only and all faults should be diagnosed and repaired by a qualified technician. Display Possible Cause Possible Solution Glass plate temperature sensor failure – open circuit. Check the connection or replace the Glass plate temperature sensor glass plate temperature sensor.
- Page 88 Specific failure and solution Failure Problem Solution Check to see if plug is secured No power supplied. tightly in outlet and that outlet is working. The LED does not accessorial power come on when the board and the display board Check the connection.
- Page 89 The power board and the display board connection Check the connection. Heating zones of fails. the same side (such as the first and display board the second zones ) communicate part Replace the display board. would display the damaged. symbol The Main board is damaged.
- Page 90 Below is the sheet of household induction hob according to EU regulation No. 66 / 2014. Information for domestic electric hobs Symbol Value Unit Model identification IH2350M Type of hob Built-in hob Number of cooking zones and/or areas Heating technology (induction cooking zones and cooking areas, Induction cooking zones...
- Page 91 Brand Proline Reference IH2350M Category 2-zone induction hob 220-240V~ Voltage/frequency V / Hz 50Hz or 60Hz Rated – Total power (W) 3500W Product Size L×W×H (mm) 288 x 520 x 59,5 Built-in Size L x W (mm) 268 x 500...
- Page 92 DISPOSAL As a responsible retailer we care about the environment. As such we urge you to follow the correct disposal procedure for the appliance and packaging materials. This will help conserve natural resources and ensure that it is recycled in a manner that protects health and the environment. You must dispose of this appliance and its packaging according to local laws and regulations.
- Page 93 IH2350M_OP 25oct 1.indd 90 IH2350M_OP 25oct 1.indd 90 26/10/2023 10:54 AM 26/10/2023 10:54 AM...
- Page 94 IH2350M_OP 25oct 1.indd 91 IH2350M_OP 25oct 1.indd 91 26/10/2023 10:54 AM 26/10/2023 10:54 AM...
- Page 95 IH2350M_OP 25oct 1.indd 92 IH2350M_OP 25oct 1.indd 92 26/10/2023 10:54 AM 26/10/2023 10:54 AM...
- Page 96 Etablissements Darty & fils ©, 9 Rue des Bateaux-Lavoirs, 94200 Ivry-sur-Seine, France IH2350M_OP 25oct 1.indd 93 IH2350M_OP 25oct 1.indd 93 26/10/2023 10:54 AM 26/10/2023 10:54 AM...