Publicité
Liens rapides
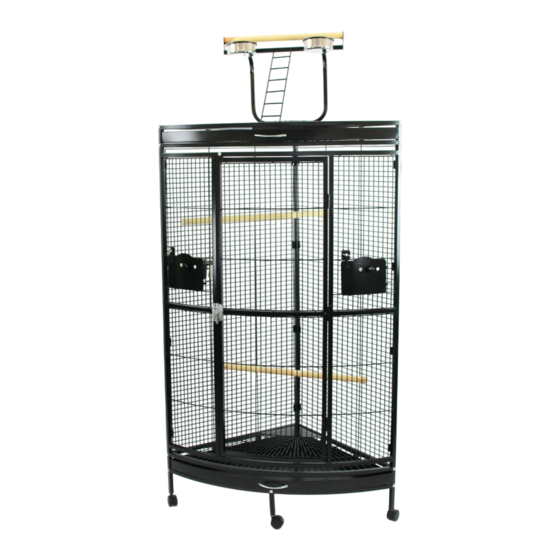
EN- Zolia Eclectus Corner Parrot Cage / FR- Cage Zolia Eclectus Cage d'Angle pour Perroquets / ES- Zolia Eclectus Jaula
de esquina para periquitos / DE- Zolia Eclectus Hoekpapegaaienkooi / IT- Gabbia per pappagalli angolare Zolia Eclectus /
PT- Gaiola de canto Zolia Eclectus para periquitos / NL- Zolia Eclectus Hoekpapegaaienkooi
Publicité

Sommaire des Matières pour Zolia Eclectus Cage
- Page 1 EN- Zolia Eclectus Corner Parrot Cage / FR- Cage Zolia Eclectus Cage d’Angle pour Perroquets / ES- Zolia Eclectus Jaula de esquina para periquitos / DE- Zolia Eclectus Hoekpapegaaienkooi / IT- Gabbia per pappagalli angolare Zolia Eclectus / PT- Gaiola de canto Zolia Eclectus para periquitos / NL- Zolia Eclectus Hoekpapegaaienkooi...
- Page 2 EN - FR - ES - A. Front wire mesh A. Panneau avant A. Rejilla frontal A. Vorderseite Drahtgitter B. stand frame B. cadre du support B. marco de soporte B. Ständerrahmen C. connect piece C. pièce de liaison C. pieza de enlace C.
- Page 3 IT - PT - NL - A. Griglia anteriore A. Grade frontal A. Draadgaas aan de voorkant B. telaio di supporto B. estrutura de suporte B. Standaardframe C. pezzo di collegamento C. peça de conexão C. Connector D. telaio posteriore D.
- Page 4 EN - Screw C and B with x1 M1(position as drawing), then connect B and A with x5 of M1 FR - Vissez la pièce C avec le cadre B en utilisant x1 vis M1 (comme sur le dessin), puis assemblez le cadre B avec le panneau A, avec x5 vis M1.
- Page 5 EN - Insert D into the hole of B,and screw with x1 M1(position as close-up); then put grill K1 onto B(as drawing), slide 2 of E into B along with chutes of A and D FR - Insérez la pièce arrière D dans le trou du Cadre B, et vissez avec x1 vis M1 (comme sur le dessin zoomé), puis posez la grille K1 sur le cadre B (comme sur le dessin).
- Page 6 EN - Fix H1 and H2 onto G with x4 of M2 and nut N; insert D into hole of G and screw by x1 M1(as close-up); screw the other end of G with x4 of M1 FR - Fixez les tubes gauches et droits, H1 et H2 à G avec x4 vis M2 et x4 boulons N;...
- Page 7 EN - Connect I and H1&H2 with x2 of M1; put K2 and 2 of L into the drawing position FR - Reliez le support I aux tubes H1&H2 avec x2 vis M1. Posez le panneau K2 + les 2 plateaux L comme sur le dessin. ES - Conecte I y H1&H2 con x2 tornillos M1;...
- Page 8 Insert bowl holder Q into the holes in I, and place bowls P1 on top. Place ladder O on I. Then place the long pole J1 on J. Fix the x2 parts of the S bowl holders to the door with the feeders, then screw with x4 M3 and x2 R (as shown in the drawing).
- Page 9 EN - Well done ! FR - Félicitations ! ES - ¡Enhorabuena! DE - Gut gemacht ! IT - Congratulazioni! PT - Parabéns ! NL - Goed gedaan !


