Glatz PALAZZO STYLE Notice De Montage Et D'utilisation
Masquer les pouces
Voir aussi pour PALAZZO STYLE:
- Manuel d'utilisation (4 pages) ,
- Notice de montage et d'utilisation (53 pages) ,
- Notice de montage et d'utilisation (13 pages)
Table des Matières
Publicité
Les langues disponibles
Les langues disponibles
Liens rapides
Publicité
Table des Matières

Manuels Connexes pour Glatz PALAZZO STYLE


Sommaire des Matières pour Glatz PALAZZO STYLE
- Page 1 Steuerung Pz14 zu / Pz14 Control for / Commande Pz14 pour / Comando Pz14 per PALAZZO STYLE, NOBLESSE und ROYAL ® Montage- und Bedienungsanleitung / Instructions for Installation and Use / Notice de montage et d'utilisation / Istruzioni per il montaggio e l'uso...
-
Page 2: Sicherheitsvorschriften
Komponentenherstellers (Teleco Automation GmbH) zu entnehmen, welche als Bestandteil dieser Anleitung zu betrachten sind. 1. Sicherheitsvorschriften • Verwenden Sie nur Original GLATZ-Zubehör und Ersatzteile, um • Diese Anleitung muss vor Montage und Inbetriebnahme gelesen Gewähr für Sicherheit, ungetrübten Komfort und einwandfreie und verstanden worden sein. -
Page 3: Elektrischer Anschluss
2.1 Elektrischer Anschluss 2.1.1 Hauptleitung Bauseits ist die Zuleitung bereit zu stellen. Diese muss für Installations- und Wartungsarbeiten getrennt und gegen unbeabsichtigtes Wiederein- schalten gesichert werden können. Anschlusswerte für Anlagen ohne Heizung: - 230 V~ P + N + PE, 50 Hz, 10 A, max. 300 W Markierung Anschlusswerte für Anlagen mit Heizung: - 400 V~ 3P + N + PE, 50 Hz, 16 A, max. - Page 4 2.1.4 Anschluss LED Streifen Die LED-Streifen müssen an die dafür vorgesehenen sauberen und fettfreien Eckgabeln angebracht werden. Dabei wird das Kabel des LED-Streifens durch das ab Werk vorgebohrte Loch (Foto1) in der Eck-Gabel (Foto2) und dem Schieber zur Verteilung durchgeführt und an die entsprechende Verbindungs- klemme (5-Leiter, gemäss Schema) angeschlossen.
- Page 5 Die Phase 1 Braun des 5 × 2.5 Spiralkabel wird nicht benötigt und KA30 / Ø3.0 × 8 ist ohne Funktion. Die Phase Braun ist für die Stromversorgung der Steuerung vorgesehen. 24 V + 24 V - 24 V + / plus = Die Phasen der Heizungen 1 + 2 werden über eine Verbindungsklemme rot;...
-
Page 6: Montage Des Schiebergehäuses
2.1.6 Montage der Befestigungsadapter für die Verbindungsklemmen Nachdem alle Verbindungsklemmen in die Befestigungsadapter eingebaut und gesichert wurden, werden diese an das Schiebergehäuse mit den mitgelieferten Schrauben KA30 / Ø3.0 × 8 befestigt (siehe 3. Bild unter 2.1.4). 2.1.7 Montage des Schiebergehäuses a) ACHTUNG: Achten Sie darauf das Sie bei diesem Vorgang auf keinen Fall Kabel einklemmen oder in der Nähe der Befestigungsschrauben kommen, da dadurch die Kabel beschädigt werden und den Schieber... -
Page 7: Bedienung
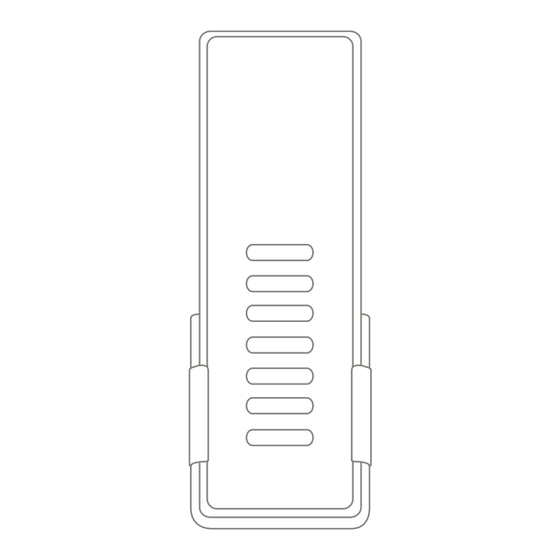
3. Bedienung 3.1.2 Bedienung Heizung Die Bedienung erfolgt immer über eine 3- oder 7-Kanal Fernbedienung. Heizung einschalten: Kanal-Taste 5 drücken. Heizung ausschalten: Kanal-Taste 6 drücken. 3.1 3-Kanal Fernbedienung Die Heizungssteuerung ist mit einer Sicherheitsfunktion ausgestattet. Die 3-Kanal Fernbedienung wird eingesetzt, wenn nur eine der Optionen Diese gibt das Einschalten der Heizungen erst frei wenn der Schirm LED, Heizung oder Motorantrieb vorhanden ist. - Page 8 Bei PALAZZO ROYAL ist der beigelegte Notschliesshaken zum Zuziehen 3.2 7-Kanal Fernbedienung ® Die Fernbedienung 7-Kanal wird eingesetzt, wenn mehr als eine der des Schirmes zu verwenden. Es sind zwei Personen notwendig um die nötige Kraft aufzubringen. Optionen Licht, Heizung und Motorantrieb vorhanden ist. Wiederinbetriebnahme nach Notschliessung: bei entkoppeltem Funktionsweise: Motorantrieb «Schirm schliessen»...
- Page 9 3.2.1 Bedienung LED 3.2.3 Bedienung LED und Heizung Licht einschalten/einstellen auf Maximum: Kanal-Taste 1 drücken. Licht einschalten auf Maximum: Kanal-Taste 7 drücken. Licht einschalten/einstellen auf 75 %: Kanal-Taste 2 drücken. Licht einschalten auf Minimum ca. 25 %: Kanal-Taste 5 drücken. Licht einschalten/einstellen auf 50 %: Kanal-Taste 3 drücken.
- Page 10 Schirm öffnen: Kanal-Taste 1 drücken. 3.2.6 Bedienung LED, Heizung und Motor Schirm schliessen: Kanal-Taste 2 drücken. Licht einschalten auf Maximum: Kanal-Taste 7 drücken. Licht einschalten auf Minimum ca. 25 %: Kanal-Taste 5 drücken. Bewegung stoppen: Funktion für die Gegenrichtung drücken. Beispiel: - Bei sich öffnendem Schirm Kanal-Taste 2 drücken.
-
Page 11: Batteriewechsel An Der Fernbedienung
• Die 4 Schrauben aus dem Schieber herausdrehen, das Schieber- gehäuse abnehmen und die Kontakte lösen. • Defekter LED Streifen entfernen, Kontakstellen von Kleberesten reinigen. • Neuer LED Streifen anbringen. • Elektrische Zuleitung entsichern und wiedereinschalten. Nur LED Streifen welche von der Firma GLATZ freigegeben wurden verwenden! -
Page 12: Eg-Konformitätserklärung
5. EG-Konformitätserklärung Wir, GLATZ AG, Neuhofstrasse 12, CH-8500 Frauenfeld, erklären hiermit, dass das/die nachfolgend genannte/n Produkt/e den Richtlinien der Europä- ischen Gemeinschaften entspricht/entsprechen. 231 00 XXXXXX PALAZZO STYLE –E, alle Grössen Die Übereinstimmung der/s bezeichneten Produkte/s mit den wesent- ®... -
Page 13: Safety Instructions
• The sunshade and accessories must be checked regularly for damage or excessive wear and tear. Any defects should be rectified before further use. • Only use original Glatz accessories and spare parts to ensure safety, complete comfort and proper functioning. -
Page 14: Electrical Connection
2.1 Electrical connection 2.1.1 Main line The supply line has to be provided on site. It has to be possible to disconnect it for installation and maintenance purposes and to protect it against unintentional reactivation. Connection values for systems without heater: - 230 V~ P + N + PE, 50 Hz, 10 A, max. - Page 15 2.1.4 Connection of the LED strips Mount the LED strips at the respective corner forks, which have to be clean and free of grease. For this purpose, guide the cable of the LED strip through the hole pre-drilled in the factory (photo 1) in the corner fork (photo 2) and the slide to the distributor and connect it with the respective connection terminal (5-pin, according to plan).
- Page 16 Die Phase 1 Braun des 5 × 2.52 Spiralkabel wird nicht benötigt und KA30 / Ø3.0 × 8 ist ohne Funktion. Die Phase Braun ist für die Stromversorgung der Steuerung vorgesehen. 24 V + 24 V - 24 V + / plus = The phases of heaters 1 + 2 are connected to phase 2, black of the spiral red;...
- Page 17 2.1.6 Assembly of the mounting adapters for the connecting pieces After having fitted and secured all connecting pieces in the mounting adapters, they are mounted to the slide housing using the supplied KA30 / Ø3.0 × 8 screws (siehe 3. Bild unter 2.1.4).
-
Page 18: How To Operate
3. How to operate 3.1.2 How to operate the heater Sunshades are generally controlled by a 3-channel or 7-channel remote control. Turning on the heater: Press channel key 5 Turning off the heater: Press channel key 6 3.1 3-channel remote control The heater control is equipped with a safety function which releases the The 3-channel remote control is used if only one of the options LED, activation of the heater only if the sunshade is completely open. - Page 19 For PALAZZO ROYAL the supplied emergency closing hook must be used 3.2 7-channel remote control ® The 7-channel remote control is used if more than one of the options to close the sunshade. Two persons are necessary to provide for the required force.
- Page 20 3.2.1 How to operate the LED 3.2.3 How to operate LED and heater Turning on/setting the light to maximum: Press channel key 1 Turning on the light to maximum: Press channel key 7 Turning on/setting the light to 75 %: Press channel key 2 Turning on the light to minimum, approx.
- Page 21 Opening the sunshade: Press channel key 1 3.2.6 How to operate LED, heater and motor Closing the sunshade: Press channel key 2 Turning on the light to maximum: Press channel key 7 Turning on the light to minimum, approx. 25 %: Press channel key 5 Stopping the movement: Press the function for the opposite direction.
- Page 22 • Remove the defective LED strip and clean the contacts from any adhesive residues. • Refit the new LED strip. • Reconnect the power supply lines and turn them on again. Only use LED strips approved by GLATZ!
-
Page 23: Ec Declaration Of Conformity
5. EC Declaration of Conformity We, Glatz AG, Neuhofstrasse 12, CH-8500 Frauenfeld, herewith declare that the product/s mentioned below complies/comply with the directives of the European Community. 231 00 XXXXXX PALAZZO STYLE – E, all sizes The conformity of the mentioned product/s with the basic protective ®... -
Page 24: Consignes De Sécurité
• Utilisez uniquement des accessoires et des pièces de rechange • La présente notice doit être lue et comprise avant le montage et d'origine de Glatz, afin de garantir la sécurité, le confort et la l'utilisation. Elle doit être conservée pour une utilisation ultérieure. -
Page 25: Branchement Électrique
2.1 Branchement électrique 2.1.1 Ligne principale L’alimentation doit être préparée par le client. Celle-ci doit pouvoir être déconnectée pour les travaux d’installation et de maintenance et sécu- risée contre la remise sous tension involontaire. Valeurs de raccordement pour les dispositifs sans chauffage: - 230 V~ P + N + PE, 50 Hz, 10 A, max. -
Page 26: 2.1.4 Raccordement Des Rubans À Led
2.1.4 Raccordement des rubans à LED Les rubans à LED doivent être fixés aux supports d’angle propres et sans graisse prévus à cet effet. Pour ce faire, il faut faire passer le câble du ruban à LED par l’orifice foré préalablement à l’usine (photo 1) du support d’angle (photo 2) et du coulisseau pour que les LEDs soient bien réparties et le raccorder au serre-fils de jonction correspondant (à... -
Page 27: Raccordement Du Chauffage
Die Phase 1 Braun des 5 × 2.52 Spiralkabel wird nicht benötigt und KA30 / Ø3.0 × 8 ist ohne Funktion. Die Phase Braun ist für die Stromversorgung der Steuerung vorgesehen. 24 V + 24 V - 24 V + / positif = Les phases de chauffage 1 + 2 sont raccordées à... -
Page 28: Montage Des Adaptateurs De Fixation Pour Les Bornes De Jonction
2.1.6 Montage des adaptateurs de fixation pour les bornes de jonction Après avoir intégré toutes les bornes de jonction aux adaptateurs de fixation et après les avoir sécurisées, celles-ci sont fixées au boîtier du coulisseau à l’aide des vis fournies KA 30 / Ø3.0 × 8 (siehe 3. -
Page 29: Télécommande 3 Canaux
3. Commande 3.1.2 Commande chauffage La commande s’effectue toujours par le biais d’une télécommande à Allumer le chauffage: presser la touche canal 5. Eteindre le chauffage: presser la touche canal 6. 3 ou 7 canaux. La commande de chauffage est dotée d’une fonction de sécurité. Celle-ci 3.1 Télécommande 3 canaux ne déclenche le démarrage des chauffages que quand le parasol est La télécommande 3 canaux est utilisée quand il n’est question que de... -
Page 30: Télécommande 7 Canaux
En ce qui concerne le modèle PALAZZO ROYAL , il faut utiliser le crochet 3.2 Télécommande 7 canaux ® La télécommande 7 canaux est utilisée quand il est question de plusieurs de fermeture d’urgence joint au colis pour fermer le parasol. Il faut deux personnes pour réunir la force nécessaire. -
Page 31: Commande Éclairage À Led Et Chauffage
3.2.1 Commande LED Allumer la lumière au minimum env. 25%: presser la touche canal 5 Allumer la lumière/allumer au maximum: presser la touche canal 1 Augmenter l’intensité lumineuse presser la touche canal 5 > La lumière Allumer la lumière/allumer à 75 %: presser la touche canal 2 devient plus intense tant que vous appuyez sur la touche ou que le Allumer la lumière/allumer à... -
Page 32: Commande Motorisée Et Chauffage
Ouvrir le parasol: presser la touche canal 1. 3.2.6 Commande motorisée, éclairage à LED, chauffage Fermer le parasol: presser la touche canal 2. Allumer la lumière au maximum: presser la touche canal 7 Allumer la lumière au minimum env. 25%: presser la touche canal 5 Arrêter le mouvement: appuyez sur la fonction du sens inverse. -
Page 33: Entretien
• Enlever le ruban à LED défectueux, enlever le reste de colle des zones de contact • Réinsérer un ruban à LED. • Déverrouiller l’alimentation électrique et remettre sous tension. • N’utiliser que des rubans à LED qui ont été approuvés par la société Glatz! -
Page 34: Déclaration De Conformité Ce
5. Déclaration de conformité CE Nous, Glatz AG, Neuhofstrasse 12, CH - 8500 Frauenfeld, déclarons par la présente, que le /les produit /s cité /s respecte /ent les directives communautaires européennes. 231 00 XXXXXX PALAZZO STYLE –E, toutes dimensions La correspondance du/des produit/s désigné/s par rapport aux exigences ®... -
Page 35: Prescrizioni In Materia Di Sicurezza
• Queste istruzioni devono essere lette e comprese prima del montaggio to ineccepibile, utilizzare esclusivamente accessori e ricambi originali e della messa in funzione dell'ombrellone. Devono inoltre essere Glatz. conservate con cura al fine di una consultazione successiva. • Nell'ambito dell'Unione Europea, il simbolo del cassonetto barrato sta •... -
Page 36: Allacciamento Elettrico
2.1 Allacciamento elettrico 2.1.1 Collegamento principale Il collegamento alla rete elettrica deve essere realizzato da parte del cliente finale. Questo deve essere staccato prima degli interventi di installazione e manutenzione ed assicurato dalla riaccensione non autorizzata. Valori di allacciamento per impianti senza riscaldamento: - 230 V~ P + N + PE, 50 Hz, 10 A, max. - Page 37 2.1.4 Collegamento delle strisce LED Le strisce LED devono essere montate alle forcelle angolari apposite, pulite e sgrassate. Condurre per questo il cavo della striscia LED attraverso il foro pre-realizzato in fabbrica (foto 1) nella forcella angolare (foto 2) ed il cilindro di scorrimento per la distribuzione e collegato al relativo morsetto di collega- mento (a 5 conduttori, in base allo schema).
- Page 38 Die Phase 1 Braun des 5 × 2.52 Spiralkabel wird nicht benötigt und KA30 / Ø3.0 × 8 ist ohne Funktion. Die Phase Braun ist für die Stromversorgung der Steuerung vorgesehen. 24 V + 24 V - 24 V + / plus = Collegare le fasi dei riscaldamenti 1 + 2 attraverso un morsetto rosso;...
-
Page 39: Messa In Funzione
2.1.6 Montaggio dell'adattatore di fissaggio per i morsetti Dopo aver installato ed assicurato tutti i morsetti nell'adattatore di fissaggio, fissarli all'alloggiamento di scorrimento, servendosi delle viti KA30 / Ø3.0 × 8 in dotazione (siehe 3. Bild unter 2.1.4). 2.1.7 Montaggio dell'alloggiamento di scorrimento a) ATTENZIONE: In questo procedimento, accertarsi in ogni caso di non incastrare dei cavi, né... - Page 40 3. Uso 3.1.2 Uso del riscaldamento L'uso avviene sempre attraverso un telecomando a 3 o a 7 canali. Accendere il riscaldamento: premere il tasto canale 5. Spegnere il riscaldamento: premere il tasto canale 6. 3.1 Telecomando a 3 canali Il comando del riscaldamento è dotato di una funzione di sicurezza. Il telecomando a 3 canali è...
- Page 41 In PALAZZO ROYAL , impiegare il gancio di chiusura d'emergenza in 3.2 Telecomando a 7 canali ® Il telecomando a 7 canali è da impiegarsi se è presente più di una delle dotazione per richiudere l'ombrellone. Sono necessarie due persone per apportare la forza richiesta per questo.
- Page 42 3.2.1 Uso dei LED 3.2.3 Uso dei LED e del riscaldamento Accendere/impostare la luce al massimo: premere il tasto canale 1. Accendere la luce al massimo: premere il tasto canale 7. Accendere/impostare la luce al 75 %: premere il tasto canale 2. Accendere la luce al minimo 25 % circa: premere il tasto canale 5.
- Page 43 Aprire l'ombrellone: premere il tasto canale 1. 3.2.6 Uso di LED, riscaldamento e motore Chiudere l'ombrellone: premere il tasto canale 2. Accendere la luce al massimo: premere il tasto canale 7. Accendere la luce al minimo 25 % circa: premere il tasto canale 5. Arrestare il movimento: premere la funzione per il senso contrario.
- Page 44 • Staccare la striscia LED difettosa, pulire i punti di contatto dai resti di adesivo. • Riapplicare la striscia LED. • Sbloccare il collegamento alla rete elettrica e riattivarlo. • Impiegare solo strisce LED autorizzate dalla ditta GLATZ!
-
Page 45: Dichiarazione Di Conformità Ce
5. Dichiarazione di conformità CE Noi, Glatz AG, Neuhofstrasse 12, CH- 8500 Frauenfeld, con la presente dichiariamo che il prodotto / i prodotti di cui di seguito è conforme /sono conformi alle direttive della Comunità Europea. 231 00 XXXXXX PALAZZO STYLE –E, tutte le misure... - Page 48 © GLATZ AG PALAZZO STYLE, NOBLESSE & ROYAL, Int. Patents reg., Int. Design reg. 12.2014/Document 261 00 350 029 ®...