
Manuels Connexes pour Janome 9002D


Sommaire des Matières pour Janome 9002D
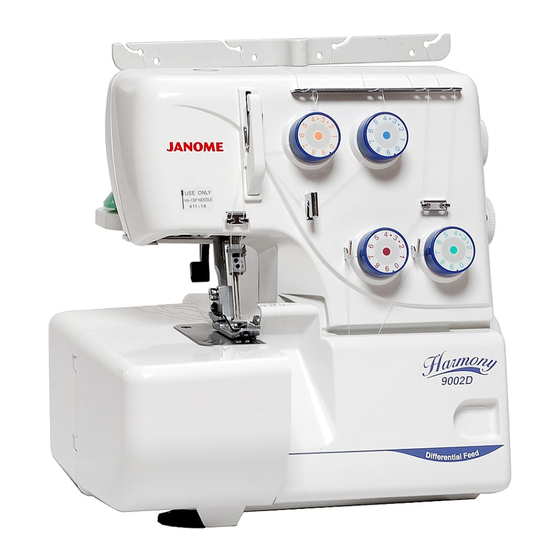
- Page 1 Janome 9002D Instruction Manual Janome Serger Janome 9002D Instruction Manual LIVRET DÕINSTRUCTIONS MANUAL DE INSTRUCCIONES MODEL 9002D MODéLE MODELO www.toews.com 9002D Owners Manual/ User Guide...
- Page 2 Ne modifier la prise en aucune façon. Le contrôleur de pied YC-482J ou TJC-150 doit être utilisé avec la machine à coudre 9102D (pour le marché américain seulement) www.toews.com 9002D Owners Manual/ User Guide...
- Page 3 15. Always unplug the sewing machine from the electrical outlet when removing covers, lubricating, or when making any other adjustments mentioned in the instruction manual. SAVE THESE INSTRUCTIONS www.toews.com 9002D Owners Manual/ User Guide...
- Page 4 15. Siempre desconecte la máquina de coser del tomacorriente eléctrico cuando está retirando las cubiertas, lubricando, o cuando esté haciendo cualquier ajuste de servicio mencionado en el manual de instrucciones. GUARDE ESTAS INSTRUCCIONES www.toews.com 9002D Owners Manual/ User Guide...
- Page 5 15. Debrancher toujours la machine a coudre de la prise de courant avant dÅ f enlever les couvercles, de lubrifier ou de faire dÅ f autres ajustements mentionnes dans ce manuel dÅ f instructions. CONSERVER CES DIRECTIVES www.toews.com 9002D Owners Manual/ User Guide...
- Page 6 6. Lors des premiers usages de la machine à coudre, placer un vieux tissu sous le pied presseur et faire marcher la machine sans fil pendant quelques minutes. Essuyer toute huile présente, s’il y a lieu. www.toews.com 9002D Owners Manual/ User Guide...
- Page 7 How to use Guide Lines ........48 Sewing Continuously .......... 48 Securing Ends............. 50 Thread Tension (4 threads) ........52 Threading the Machine (3 threads) ....... 56 Thread Tension (3 threads) ........58 Thread and Needle Chart ........60 www.toews.com 9002D Owners Manual/ User Guide...
- Page 8 Cómo asegurar los cabos .......... 51 Tensión del hilo (4 hilos) .......... 53 Enhebrar la máquina (3 hilos) ........57 Tensión del hilo (3 hilos) .......... 59 Cuadro de hilos y agujas .......... 61 www.toews.com 9002D Owners Manual/ User Guide...
- Page 9 Nouer les extrémités ..........51 Tension des fils (4 fils) ..........53 Enfilage de la machine (3 fils) ......... 57 Tension des fils (3 fils) ..........59 Tableau des fils et des aiguilles ........ 61 www.toews.com 9002D Owners Manual/ User Guide...
- Page 10 Needle plate setting knob Thread cutter Presser foot lifter Needle plate Upper knife release knob Cutting width adjusting dial Upper looper Lower looper Upper knife Lower knife Standard Accessories Screwdrivers Tweezers Set of needles www.toews.com 9002D Owners Manual/ User Guide...
- Page 11 Perilla para soltar la cuchilla superior Boucleur inférieur Regulador para el corte de anchura Couteau supérieur Enhebrador superior Couteau inférieur Enhebrador inferior Cuchilla superior Cuchilla inferior Accesorios estándar Accessoires standard Tournevis Destornilladores Pince Pinzas Ensemble d’aiguilles Juego de agujas www.toews.com 9002D Owners Manual/ User Guide...
- Page 12 — when leaving the machine unattended. — when attaching or removing parts. — when threading or cleaning the machine. * Do not place anything on the foot control, otherwise the machine will start inadvertently. www.toews.com 9002D Owners Manual/ User Guide...
- Page 13 * No coloque ningún objeto en el pedal de control, í pues la máquina podn a comenzar a funcionar * Ne rien plaser sur la pédale de contrôle, sinon la machine risque de couder par mégarde. inadvertidmate. www.toews.com 9002D Owners Manual/ User Guide...
- Page 14 Lift the looper cover and push it against the machine. The looper cover snaps into its position automatically. Looper cover Note: Always close both side cover and looper cover when the machine is in use. www.toews.com 9002D Owners Manual/ User Guide...
- Page 15 Couvercle du boucleur Nota: Note: Siempre cierre la cubierta lateral y la cubierta del Toujours fermer le couvercle latéral et le couvercle du enhebrador cuando la máquina esté funcionando. boucleur lors de l’utilisation de la machine. www.toews.com 9002D Owners Manual/ User Guide...
- Page 16 2. If the thread slips down from the spool during threading and/or sewing, put a net on the spool as illustrated to prevent jamming. * The spool holder cap and net are optional accessories. Spool pin www.toews.com 9002D Owners Manual/ User Guide...
- Page 17 * Le capuchon du porte-bobine et le filet sont des * La tapa y la red del porta carrete son accesorios accessoires facultatifs. opcionales. Filet Broche à bobine Espiga del carrete www.toews.com 9002D Owners Manual/ User Guide...
- Page 18 By raising or lowering the presser foot lifter, the presser foot goes up or down. * While in operation, keep the presser foot lowered except when threading the machine or test- running without threads. Presser foot Presser foot lifter www.toews.com 9002D Owners Manual/ User Guide...
- Page 19 * Pendant la couture, garder le pied presseur abaissé máquina o probando su funcionamiento sin hilos. sauf pour enfiler la machine ou faire des tests sans fil. Pied presseur Pie prensatela Releveur du pied presseur Elevador del pie prensatela www.toews.com 9002D Owners Manual/ User Guide...
- Page 20 –– counterclockwise for lightweight fabric. * For normal sewing, set the adjusting screw so that it sits 1mm below the top of the machine. To decrease To increase Adjusting screw Top of the machine www.toews.com 9002D Owners Manual/ User Guide...
- Page 21 1mm debajo de tope de la máquina. Diminuer Vea la ilustration. Augmenter Vis de réglage Para aumentar Haut de la machine Para disminuir Tornillo de ajuste Parte superior de la máquina www.toews.com 9002D Owners Manual/ User Guide...
- Page 22 Differential feed dial Setting mark How to adjust • If the sewn fabric is stretched, turn the dial counterclockwise (toward 2.2). • If the sewn fabric is gathered, turn the dial clockwise (toward 0.5). Stretched Gathered www.toews.com 9002D Owners Manual/ User Guide...
- Page 23 • Si le tissu cousu est froncé, tourner le cadran dans • Si la tela cosida se frunce, voltee el regulador en el sentido del reloj (hacia 0.5). le sens horaire (vers 0.5). Estirada Étiré Fruncida Froncé www.toews.com 9002D Owners Manual/ User Guide...
- Page 24 4. Close the looper cover and side cover. Upper knife release knob Stopper pin www.toews.com 9002D Owners Manual/ User Guide...
- Page 25 4. Fermer le couvercle du boucleur et le couvercle 4. Cierre las cubiertas del enhebrador y lateral. latéral. Perilla para soltar la cuchilla superior Bouton de dégagement du couteau supérieur Espiga de retén Goupille d’arrêt www.toews.com 9002D Owners Manual/ User Guide...
- Page 26 When cutting width is too wide. Turn the cutting width adjusting dial counterclockwise (B). Lower knife will move to left. 5. Set the upper knife to up position. 6. Close the looper cover and side cover. www.toews.com 9002D Owners Manual/ User Guide...
- Page 27 5. Fije la cuchilla superior en su posición alta. 5. Régler le couteau supérieur à la position haute. 6. Cierre las cubierta del enhebrador y cubierta 6. Fermer le couvercle du boucleur et le couvercle lateral. latéral. www.toews.com 9002D Owners Manual/ User Guide...
- Page 28 (B) Rolled Hemming * Pull the needle plate setting knob from “S” to “R” position, so that the fabric edge will be rolled for hemming, picot edging and narrow hemming. www.toews.com 9002D Owners Manual/ User Guide...
- Page 29 à picot ou une hacia usted posicuón de “S” a “R”, as í que el borde de couture d’ourlet étroit. la tela será rodado para enrollado,borde picot o ruedo angosto. www.toews.com 9002D Owners Manual/ User Guide...
- Page 30 Make sure to clear the needle threads out from below the needle plate and draw them to the back and under the presser foot about 10 cm (4˝). www.toews.com 9002D Owners Manual/ User Guide...
- Page 31 à aiguille et les tirer vers l’arrière et sous le están debajo de la plancha de aguja y sacarlos pied presseur sur environ 10 cm (4˝). hacia atrás unos 10 cm (4 pulgadas), por debajo del pie prensatela. www.toews.com 9002D Owners Manual/ User Guide...
- Page 32 2. Pass the thread through the holes on the right side of the thread guide plate as illustrated. Thread guide plate 3. Pass the thread through the right side of the looper thread guide, sliding the thread from left to right. Looper thread guide www.toews.com 9002D Owners Manual/ User Guide...
- Page 33 3. Enfiler le fil dans le guide-fil du boucleur de droite, guía-hilos del enhebrador, deslizando el hilo de en glissant le fil de la gauche vers la droite. izquierda a derecha. Guide-fil du boucleur Guía-hilos del enhebrador. www.toews.com 9002D Owners Manual/ User Guide...
- Page 34 Then, turn the handwheel towards you to move the lower looper to the right position. Lower looper thread guide (5) (1) Lower looper thread (2) Looper threader www.toews.com 9002D Owners Manual/ User Guide...
- Page 35 Luego, gire el volante hacia usted para mover el enhebrador inferior hacia la derecha. Guide-fil du boucleur inférieur (5) (1) Fil du boucleur inférieur Guía-hilo del enhebrador inferior (5) (2) Enfileur du boucleur (1) Hilo del enhebrador inferior (2) Enfilador del enhebrador www.toews.com 9002D Owners Manual/ User Guide...
- Page 36 NOTE: How to thread woolly nylon/polyester thread. * The illustration at left shows one of the easiest ways to pass woolly nylon/polyester thread through the lower looper. Lower looper Ordinary thread Woolly nylon/polyester thread www.toews.com 9002D Owners Manual/ User Guide...
- Page 37 Boucleur inférieur Enhebrador inferior Fil ordinaire Hilo corriente Fil en nylon/polyester Hilo de lana de nailon/poliéster www.toews.com 9002D Owners Manual/ User Guide...
- Page 38 Thread guide plate 3. Pass the thread through the left side of looper thread guide sliding the thread from right to left. Looper thread guide www.toews.com 9002D Owners Manual/ User Guide...
- Page 39 3. Passer le fil dans le côté gauche du guide-fil du guía-hilos del enhebrador, deslizando el hilo de boucleur en glissant le fil de la droite vers la gauche. derecha a izquierda. Guide-fil du boucleur Guía-hilos del enhebrador. www.toews.com 9002D Owners Manual/ User Guide...
- Page 40 Turn the handwheel toward you until the upper looper comes to the middle point of its travel, and unhook the thread of the lower looper from the upper looper. Thread the upper looper. Lower looper thread Upper looper www.toews.com 9002D Owners Manual/ User Guide...
- Page 41 à partir du boucleur supérieur. hilo del enhebrador inferior desde el enhebrador superior. Enfiler le boucleur supérieur. Enhebre el enhebrador superior. Fil du boucleur inférieur Hilo del enhebrador inferior Boucleur supérieur Enhebrador superior www.toews.com 9002D Owners Manual/ User Guide...
- Page 42 (B) Thread guide 2. Pass the thread through the holes in the second row from the left of the thread guide plate as illustrated. Thread guide plate www.toews.com 9002D Owners Manual/ User Guide...
- Page 43 2. Passer le fil dans les trous de la deuxième rangée à agujeros en la izquierda de la placa guía-hilos, partir de la gauche de la plaque guide-fil comme como se muestra. illustré. Placa guía-hilos Plaque guide-fil www.toews.com 9002D Owners Manual/ User Guide...
- Page 44 7. Thread the right needle from front to back and pull the thread about 10 cm (4˝) from the eye of the needle to the back. Needle thread guide Needle bar thread guide Right needle 5 6 7 www.toews.com 9002D Owners Manual/ User Guide...
- Page 45 10 cm (4 pulgadas) del ojo de la l’aiguille vers l’arrière. aguja hacia atrás. Guide-fil de l’aiguille Guía-hilo de la aguja Guide-fil de la barre à aiguille Guía-hilo de la barra de aguja Aiguille droite Aguja derecha www.toews.com 9002D Owners Manual/ User Guide...
- Page 46 (B) Thread guide 2. Pass the thread through the holes on the left of thread guide plate as illustrated. Thread guide plate www.toews.com 9002D Owners Manual/ User Guide...
- Page 47 2. Passer le fil dans les trous de la plaque guide-fil 2. Pase el hilo por los agujeros de la izquierda de la placa guía-hilos, como se muestra en la ilustración. gauche comme illustré. Placa guía-hilos Plaque guide-fil www.toews.com 9002D Owners Manual/ User Guide...
- Page 48 – Run threads under the presser foot and lower the presser foot. – Close side cover and looper cover. – Turn handwheel toward you to chain off three or four stitches. The sewing preparation is now complete. www.toews.com 9002D Owners Manual/ User Guide...
- Page 49 – Gire el volante hacia usted para hacer tres o – Tourner le volant vers soi pour coudre trois ou cuatro puntadas. quatre points. Se ha terminado la preparación para coser. La préparation de couture est à présent terminée. www.toews.com 9002D Owners Manual/ User Guide...
- Page 50 Please use them as sewing guides. Mark L indicates the distance from the left needle. Mark R indicates the distance from the right needle. The distance between center of guide line and needle position is 5/8 inch. www.toews.com 9002D Owners Manual/ User Guide...
- Page 51 La distancia entre el centro de la línea guía y la posición La distance entre le centre de la ligne-guide et la position de la aguja es 1,6 cm (5/8 de pulgada). de l’aiguille est de 5/8 pouce. www.toews.com 9002D Owners Manual/ User Guide...
- Page 52 2. Raise the needle and presser foot, and gently pull the threads off the chaining finger. 3. Turn the fabric over so that the under side is up. 4. Serge about 2.5 cm (1˝) over stitching and angle off the fabric. www.toews.com 9002D Owners Manual/ User Guide...
- Page 53 4. Haga un sobrehilado de 2,5 cm (1 pulgada) sobre 4. Surfiler environ 2,5 cm (1") sur les points et retirer la costura y en ángulo para fuera de la tela. le tissu en faisant un angle. www.toews.com 9002D Owners Manual/ User Guide...
- Page 54 Left needle thread tension dial Right needle thread tension is too loose The illustration shows sewing results when the right needle thread tension is too loose. Remedy: Tighten the right needle thread tension. Right needle thread tension dial www.toews.com 9002D Owners Manual/ User Guide...
- Page 55 Ajuste la tensión del hilo de la aguja derecha. Resserrer la tension du fil de l’aiguille droite. Regulador de la tensión del hilo de la aguja derecha 12 Cadran de la tension du fil de l’aiguille droite www.toews.com 9002D Owners Manual/ User Guide...
- Page 56 Remedy: Loosen upper looper thread tension and/or tighten lower looper thread tension. Upper looper thread tension dial Lower looper thread tension dial www.toews.com 9002D Owners Manual/ User Guide...
- Page 57 Regulador de la tensión del hilo del enhebrador Cadran de la tension du fil du boucleur supérieur superior Cadran de la tension du fil du boucleur inférieur Regulador de la tensión del hilo del enhebrador inferior www.toews.com 9002D Owners Manual/ User Guide...
- Page 58 Turn off the power switch and unplug the machine. Remove the needle and the thread on the right. Then retighten the needle clamp screw on the right to prevent losing the screw. Needle on the left Needle clamp screw on the right www.toews.com 9002D Owners Manual/ User Guide...
- Page 59 Aiguille gauche para no perder el tornillo. Vis de pince-aiguille droite Aguja de la izquierda Tornillo de sujeción de la aguja de la derecha www.toews.com 9002D Owners Manual/ User Guide...
- Page 60 Remedy: Loosen upper looper thread tension and/or tighten lower looper thread tension. Upper looper thread tension dial Lower looper thread tension dial www.toews.com 9002D Owners Manual/ User Guide...
- Page 61 Cadran de la tension du fil du boucleur supérieur Regulador de la tensión del hilo del enhebrador superior Cadran de la tension du fil du boucleur inférieur Regulador de la tensión del hilo del enhebrador inferior www.toews.com 9002D Owners Manual/ User Guide...
- Page 62 Woolly nylon (For looper thread) Woolly polyester (For looper thread) * Refer to page 20 for adjusting the stitch length and differential feed ratio. NOTE: Your overlock uses standard sewing needles (HA-1 SP, No.11, No.14). www.toews.com 9002D Owners Manual/ User Guide...
- Page 63 * Se référer à la page 21 pour le réglage de la longueur des points et du rapport de l’entraînement différentiel. NOTE: Le surjet utilise des aiguilles à coudre standard (HA-1 SP, N ° 11, N ° 14). www.toews.com 9002D Owners Manual/ User Guide...
- Page 64 Lower looper Correct thread thread thread Thread Tension Upper Upper Upper looper looper Right side Right side looper Right side thread thread of fabric of fabric thread of fabric Needle thread Needle thread Needle thread www.toews.com 9002D Owners Manual/ User Guide...
- Page 65 Hilo de Lado derecho de la tela Lado derecho de la tela la aguja la aguja Lado derecho de la tela la aguja Hilo del Hilo del Hilo del enhebrador enhebrador enhebrador superior superior superior www.toews.com 9002D Owners Manual/ User Guide...
- Page 66 Endroit Endroit Endroit du tissu du tissu Fil de l’aiguile Fil de l’aiguile du tissu Fil de l’aiguile Fil du boucleur Fil du boucleur Fil du boucleur supérieur supérieur supérieur www.toews.com 9002D Owners Manual/ User Guide...
- Page 67 Janome 9002D Instruction Manual Janome Serger (Blank page) www.toews.com 9002D Owners Manual/ User Guide...
- Page 68 Remedy: Loosen upper looper thread tension and/or tighten lower looper thread tension. Upper looper thread tension dial Lower looper thread tension dial www.toews.com 9002D Owners Manual/ User Guide...
- Page 69 Regulador de tensión del hilo del enhebrador Cadran de la tension du fil du boucleur supérieur superior. Cadran de la tension du fil du boucleur inférieur Regulador de tensión del hilo del enhebrador inferior. www.toews.com 9002D Owners Manual/ User Guide...
- Page 70 The illustration at left shows sewing results with correct tension settings. Wrong side of fabric Right side of fabric Right needle thread Upper looper thread Lower looper thread Refer to pages 58 for the adjustment. www.toews.com 9002D Owners Manual/ User Guide...
- Page 71 Hilo del enhebrador superior Fil du boucleur supérieur Hilo del enhebrador inferior Fil du boucleur inférieur * Remítase a la página 59 para hacer las * Se référer à la page 59 pour le réglage. modificaciones. www.toews.com 9002D Owners Manual/ User Guide...
- Page 72 : No. 50~80 Medium Woven Upper looper thread Synthetic : No. 60~80 Silk : No. 50~80 Fabric Lower looper thread Machine Setting Needle plate setting knob Upper knife : Up HA-1 SP No. 11 or 14 www.toews.com 9002D Owners Manual/ User Guide...
- Page 73 Graduación de la máquina Réglage de la machine Perilla de graduación de la plancha de aguja : S Bouton de véglage de la plaque à aíguille : S Cuchilla superior : Arriba Couteau supérieur : Haut www.toews.com 9002D Owners Manual/ User Guide...
- Page 74 Left needle position line on the presser foot Right side of fabric Open the fold flat and press the pin tucks to one side. NOTE: After you finish sewing,return the upper knife to rhe original position. Pin tucking www.toews.com 9002D Owners Manual/ User Guide...
- Page 75 Ouvrir le pli à plat et repasser les nervures d’un côté. a un lado. NOTE: Après avoir terminé de coudre, ramener le couteau NOTA: Después de terminar la costura,regrese la cuchilla supérieur à sa position d’origine. superior a su posición original. Alforzas Nerrue www.toews.com 9002D Owners Manual/ User Guide...
- Page 76 The lower knife will last over one year in normal use. However, if you run over a pin or a hard object, it may be required to replace both upper and lower knives at the same time. www.toews.com 9002D Owners Manual/ User Guide...
- Page 77 épingle ou un objet la cuchilla superior como la inferior al mismo dur. tiempo. www.toews.com 9002D Owners Manual/ User Guide...
- Page 78 5. Brush out the lint around the feed dogs to the front by using the lint brush or use a vacuum cleaner. 6. Reattach the needle plate, presser foot and needles. Close the looper cover and side cover. Feed dog 5, 6 www.toews.com 9002D Owners Manual/ User Guide...
- Page 79 6. Replacer la plaque à aiguille, le pied presseur et les Cierre las cubiertas del enhebrador y lateral. aiguilles. Fermer le couvercle du boucleur et le couvercle Dientes de avance latéral. Griffe d’entraînement www.toews.com 9002D Owners Manual/ User Guide...
- Page 80 Open the side cover and apply oil. Open the looper cover and apply oil. Carrying the Machine Put your fingers into the hole on the back side of the machine as illustrated. www.toews.com 9002D Owners Manual/ User Guide...
- Page 81 Transporte de la máquina Transport de la machine Ponga sus dedos en el hueco posterior de la máquina Mettre les doigts dans l’ouverture du dos de la machine como se muestra en la figura. comme illustré. www.toews.com 9002D Owners Manual/ User Guide...
- Page 82 The fabric is not 1. The position of the upper knife is not adjusted cut neatly. properly. See page 74. 2. The upper knife is dull. Replace the upper knife. (See page 74.) www.toews.com 9002D Owners Manual/ User Guide...
- Page 83 Vea la página 75. La tela no está 1. La posición de la cuchilla superior no está cortada ajustada adecuadamente. Reemplace la cuchilla superior. pulcramente 2. La cuchilla superior está sin filo. (Vea la página 75) www.toews.com 9002D Owners Manual/ User Guide...
- Page 84 Le tissu est mal 1. La position du couteau supérieur est mal ajustée. Se référer à la page 75. coupé. 2. Le couteau supérieur est émoussé. Remplacer le couteau supérieur. (Se référer à la page 75). www.toews.com 9002D Owners Manual/ User Guide...
- Page 85 Janome 9002D Instruction Manual Janome Serger (Blank page) www.toews.com 9002D Owners Manual/ User Guide...
- Page 86 Piping foot (3/16ý) strengthen. Needle threader For easy threading and changing needle. Gathering foot Use to sew sleeves, yokes, frills, etc. 200-203-104 200-204-208 200-207-108 200-208-109 200-214-108 200-217-101 200-218-102 200-216-100 200-219-103 200-220-107 200-254-605 200-248-101 www.toews.com 9002D Owners Manual/ User Guide...
- Page 87 Para enhebrar con facilidad y Enfile-aiguille Pour enfiler et changer aguja cambiar la aguja. facilement l’aiguille Pie para fruncido Se usa para coser mangas, Pied fronceur Pour coudre les manches, canesú, volantes, etc. empiècements, volants, etc. www.toews.com 9002D Owners Manual/ User Guide...
- Page 88 Janome 9002D Instruction Manual Janome Serger Printed in Taiwan Impreso en Taiw‡n ImprimŽ ˆ Taiwan 792-800-004 (E/F/S) www.toews.com 9002D Owners Manual/ User Guide...