Publicité
Les langues disponibles
Les langues disponibles
Liens rapides
Instruction and safety manual
Manuel d'instructions et de sécurité
Instrucciones y manual de seguridad
Model
NR 3690DC • NR 3690DR
Modèle
Modelo
NR3690DC
Improper use of this Nailer can result in death or serious injury!
This Manual contains important information about product safety.
Read and understand this Manual before operating the Nailer.
Never allow anyone who has not reviewed this manual to use the tool.
This manual should be stored in safe place.
Une utilisation incorrecte et sans respecter la sécurité de ce cloueur risque d'entraîner
la mort ou des blessures graves !
Ce manuel renferme des instructions importantes sur la sécurité de l'outil.
Lire et bien assimiler ce manuel avant d'utiliser le cloueur.
Cet outil ne doit jamais être utilisé par une personne n'ayant pas pris connaissance du
manuel.
Ce mode d'emploi doit être conservé dans un endroit sûr.
¡La utilización inadecuada e insegura de este clavador puede resultar en lesiones serias
o en la muerte!
Este manual contiene información importante sobre la seguridad del producto.
Lea y entienda este manual antes de utilizar el martillo neumático.
La herramienta no deberá utilizarse sin haber leído previamente este manual.
Este manual debe ser guardado en un lugar seguro.
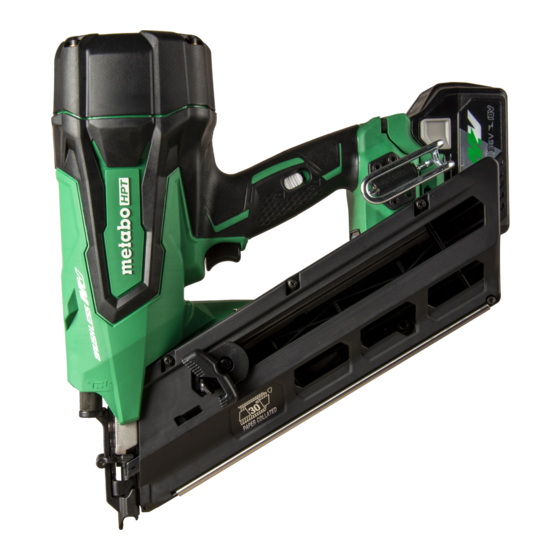
Cordless Framing Nailer
Cloueuse à charpente sans fi l
Clavadora inalambrica para armazon
DANGER
DANGER
PELIGRO
NR3690DR
Publicité

Manuels Connexes pour Metabo HPT NR 3690DC


Sommaire des Matières pour Metabo HPT NR 3690DC
- Page 1 Instruction and safety manual Manuel d’instructions et de sécurité Instrucciones y manual de seguridad Model Cordless Framing Nailer NR 3690DC • NR 3690DR Modèle Cloueuse à charpente sans fi l Modelo Clavadora inalambrica para armazon NR3690DC NR3690DR DANGER Improper use of this Nailer can result in death or serious injury! This Manual contains important information about product safety.
- Page 2 NOTE emphasizes essential information. EXPLANATION OF THE NAILING ACTION OF THE metabo HPT NAILER ○ FULL SEQUENTIAL ACTUATION MECHANISM: First, press the push lever against the wood; next, pull the trigger to drive the fastener. Follow the same sequence to continue driving fasteners.
- Page 3 English SAFETY GENERAL POWER TOOL SAFETY WARNINGS WARNING Read all safety warnings and all instructions. Failure to follow the warnings and instructions may result in electric shock, fi re and/or serious injury. Save all warnings and instructions for future reference. The term “power tool”...
- Page 4 English SAFETY — Continued 4) Power tool use and care b) Use power tools only with specifi cally a) Do not force the power tool. Use the correct designated battery packs. power tool for your application. Use of any other battery packs may create a risk of injury and fi...
- Page 5 English SAFETY — Continued NAILER SAFETY WARNINGS WARNING – Always assume that the tool contains fasteners. – Disconnect the tool from the power source when Careless handling of the nailer can result in the fastener jams in the tool. While removing a unexpected fi...
- Page 6 7. STORE NAILER PROPERLY, AND BATTERY FASTENING OPERATION SWITCHING DEVICE. REMOVED. This metabo HPT nailer includes a fastening When not in use, the Nailer, battery and battery operation switching device. charger should be stored in a dry place. Keep out of Before starting work, check the setting of the reach of children.
- Page 7 HPT authorized service center. 29. NEVER USE NAILER FOR APPLICATIONS OTHER 23. REMOVE ALL REMAINING FASTENERS AND THAN THOSE SPECIFIED IN THIS MANUAL.
- Page 8 English SAFETY — Continued 3. To reduce risk of injury, charge metabo HPT 7. An extension cord should not be used unless rechargeable battery multi volt type series and BSL18 absolutely necessary. Use of improper extension series. Other type of batteries may burst causing cord could result in a risk of fi...
- Page 9 English SAFETY — Continued 4. NEVER insert any objects into the battery charger’s WARNING air vents. Electric shock or damage to the battery charger may result. In order to prevent any battery leakage, heat generation, 5. NEVER charge outdoors. Keep the battery away smoke emission, explosion and ignition beforehand, from direct sunlight and use only where there is low please be sure to heed the following precautions.
- Page 10 English SAFETY — Continued CAUTION Power Output 1. If liquid leaking from the battery gets into your eyes, do not rub your eyes and wash them well with fresh clean water such as tap water and contact a doctor 2 to 3 digit number immediately.
- Page 11 English SAFETY — Continued SAVE THESE INSTRUCTIONS MAKE THEM AVAILABLE TO OTHER USERS OWNERS OF THIS TOOL!
- Page 12 English OPERATION NOTE The information contained in this Manual is designed to assist you in the safe operation of the Nailer. Some illustrations in this Manual may show details or attachments that diff er from those on your own Nailer. NAME OF PARTS 1.
- Page 13 English SPECIFICATIONS 1. Cordless Framing Nailer Model NR3690DC NR3690DR Motor DC Brushless Applicable Nail Length 2" to 3-1/2" (50 to 90) Nail Loading capacity [nails] Firing mode Full sequential / Contact (Selectable) Cycle rate [Nails/ second] 3 (Intermittent) Battery Model BSL36A18 Type Li-ion battery...
- Page 14 English NAIL SELECTION WARNING ● Be sure to use only the genuine metabo HPT nails for the NR3690DC or the NR3690DR. The use of any other nails can result in tool malfunction and/or nail breakdown, leading to serious injuries. Only nails shown in the Table below can be driven with this Nailer.
- Page 15 English NR3690DR Plastic-collated strip nails Min. Max. Full-head nails .286" (7 mm) .3" (7.6 mm) 21° .113" (2.9 mm) .131" (3.3 mm)
- Page 16 English ACCESSORIES DANGER ● Accessories other than those shown below can lead to malfunction and resulting injuries. STANDARD ACCESSORIES NR3690DC NR3690DR (XC) Safety glasses ..................1 Battery (BSL36A18) ................1 Battery Charger (UC18YSL3) ..............1 Contractor bag ..................1 Battery cover (Code No. 329897) ............1 Allen wrench for M5 screw ..............
- Page 17 If charged at voltage higher than indicated on Accessories are subject to change without any the nameplate, the charger will burn out. obligation on the part of metabo HPT. 1. Connect the charger’s power cord to a receptacle. When the power cord is connected, the charge APPLICATIONS indicator lamp will blink in red.
- Page 18 English Table 2 Indications of the charge indicator lamp Lights for 0.5 seconds. Does not light Before Blinks for 0.5 seconds. Plugged into power source charging (RED) (off for 0.5 seconds) Lights for 0.5 seconds. Does not light Blinks for 1 second. Battery capacity at less than (BLUE) (off...
- Page 19 English Regarding electric discharge in case of new HOW TO RECHARGE USB DEVICE batteries, etc. When an unexpected problem occurs, the data in a USB As the internal chemical substance of new batteries device connected to this product may be corrupted or lost. and batteries that have not been used for an extended Always make sure to back up any data contained in the period is not activated, the electric discharge might...
- Page 20 English HOW TO OPERATE OPERATION ○ Charging a USB device and battery from a electrical outlet PANEL Power Nailing operation Power indicator switch indicator Nailing Information indicator operation switch (2) Turn the USB power switch ON When you turn the USB power switch ON, the USB power indicator lamp will light up.
- Page 21 English (3) Select Nailing operation mode Status of indicator (Full sequential actuation / Contact actuation) Contact metabo HPT for After power switch turn ON, always set in Full inspection. sequential actuation mode as initial. (Nailing operation indicator light in blue.)
- Page 22 Before actually beginning the nailing work, test the Nailer by using the checklist below. Conduct the tests in the following order. If abnormal operation occurs, stop using the Nailer and contact a metabo HPT authorized service center Nailing operation switch immediately. (1) REMOVE ALL NAILS AND BATTERY FROM NAILER.
- Page 23 English Nailing operation indicator Without touching the trigger, depress the push ● Lighting (Blue): lever against the workpiece with pulling back the FULL SEQUENTIAL ACTUATION MECHANISM, feeder knob. ● Blinking (Blue): Next, pull the trigger. CONTACT ACTUATION MECHANISM Make sure the battery indicator is not blinking. □...
- Page 24 English LOADING NAILS ● Use nail strip of more than 10 nails. ● Use an unbroken nail strip with nails of all the same WARNING length. ● When loading nails into Nailer, The Nailer is now ready to operate. 1) remove battery from the nailer; 2) do not pull trigger;...
- Page 25 1) loading nails; ● To avoid double fi ring or accidental fi ring due 2) turning the adjuster. to recoil. This metabo HPT nailer is equipped with a nailer 1) Set to FULL SEQUENTIAL ACTUATION MECHANISM. operation switching device. Use FULL SEQUENTIAL ACTUATION MECHANISM or 2) Pull the trigger rapidly and fi...
- Page 26 WARNING ● Keep hands and body away from the discharge area. This metabo HPT nailer may ● To avoid double fi ring or accidental fi ring due bounce from the recoil of driving a nail and to recoil.
- Page 27 English NOTE If nails are driven too shallow, turn the adjuster to the ● If all warnings and instructions are followed, deep side. safe operation is possible with all two systems: Stop turning the adjuster when a suitable position is FULL SEQUENTIAL ACTUATION MECHANISM, reached for a nailing test.
- Page 28 Remove all nails. Remove the M5 bolts with wrench. Attach the magazine to the injector and tighten with the M5 bolt. NOTE ● In case of frequent jam, contact a metabo HPT authorized service center. Do not loosen these screws...
- Page 29 English REMAINING BATTERY INDICATOR Remaining battery Remaining battery You can check the battery’s remaining capacity by indicator lamp indicator switch pressing the remaining battery indicator switch to light the indicator lamp. (Table 5) The indicator will shut off approximately 3 seconds after the remaining battery indicator switch is pressed.
- Page 30 A new WARNING LABEL is available from a the batteries two to fi ve times. metabo HPT authorized service center. If the battery usage time is extremely short despite repeated charging and use, consider the batteries...
- Page 31 Promote operator safety and effi cient Blow clean daily. Nailer operation. Operator troubleshooting Most minor problems can be resolved quickly and easily using the table below. If problems persist, contact a metabo HPT authorized service center for assistance. 1. Power tool PROBLEM CHECK METHOD CORRECTION Power switch doesn’t turn on.
- Page 32 Magazine is dirty. Blow and wipe clean the magazine. Check for a jam. Clear a jam (refer to page 28). Driver blade worn or damaged? Contact metabo HPT for inspection. Ribbon spring weakened or Replace ribbon spring. damaged? Nail feeder damaged? Replace nail feeder.
- Page 33 Avoid blocking the vents. causing its internal components to overheat. The cooling fan is not running. Contact a metabo HPT Authorized Service Center for repairs. The USB power lamp has switched The battery’s capacity has become Replace the battery with one that has off...
- Page 34 REMARQUE met en relief les informations essentielles. EXPLICATION DE L’ACTION DE CLOUAGE DU CLOUEUR metabo HPT ○ MÉCANISME DE DÉCLENCHEMENT SÉQUENTIEL COMPLET: Appuyer tout d’abord le levier-poussoir contre le bois, puis tirer sur la gâchette pour enfoncer le clou. Procéder de la même façon pour continuer à...
- Page 35 Français SECURITE AVERTISSEMENTS DE SÉCURITÉ GÉNÉRAUX CONCERNANT LES OUTILS ÉLECTRIQUES AVERTISSEMENT Lire tous les avertissements de sécurité et toutes les instructions Tout manquement à observer ces avertissements et instructions peut engendrer des chocs électriques, des incendies et/ou des blessures graves. Conservez tous les avertissements et toutes les instructions pour vous y référer ultérieurement.
- Page 36 Français SECURITE — Suite Transporter les outils électriques avec le doigt sur Les outils électriques sont dangereux entre les l’interrupteur ou brancher les outils électriques mains d’utilisateurs non habilités. avec l’interrupteur en position de marche peut e) Entretenir les outils électriques. Vérifi er entraîner des accidents.
- Page 37 Français SECURITE — Suite 6) Service a) Faire entretenir l’outil électrique par un technicien habilité à l’aide de pièces de rechange identiques exclusivement. Cela garantira le maintien de la sécurité de l’outil électrique. – AVERTISSEMENT – Pour réduire tout risque de blessure, l’utilisateur doit lire le mode d’emploi.
- Page 38 Français SECURITE — Suite CONSIGNES DE SECURITE IMPORTANTES POUR L’UTILISATION DU CLOUEUR LIRE TOUTES CES INSTRUCTIONS DANGER 1. LES OPÉRATEURS ET LES AUTRES PERSONNES DANS L’AIRE DE TRAVAIL DOIVENT PORTER DES LUNETTES DE PROTECTION AVEC VISIÈRES LATÉRALES. Quand on utilise le cloueur, toujours porter des lunettes de protection avec visières latérales, et veiller à...
- Page 39 COMMUTATION NORMALEMENT. L’OPÉRATION DE CLOUAGE. Si le cloueur semble ne pas fonctionner comme Ce cloueur metabo HPT comprend un dispositif de d’habitude, qu’il fait des bruits bizarres ou qu’il commutation de l’opération de clouage. semble défectueux, cesser immédiatement de Avant de commencer le travail, vérifi er le réglage du l’utiliser et le faire réparer par un service après-vente...
- Page 40 émissions de fumée ou une exclusivement au personnel d’entretien formé par ignition. metabo HPT, au distributeur ou à l’employeur. 26. GARDEZ LES BORNES DE L’OUTIL (FIXATION 33. NE JAMAIS MODIFIER NI ALTÉRER UN DE LA BATTERIE) EXEMPTES DE COPEAUX ET CLOUEUR.
- Page 41 3. Pour réduire tout risque de blessure, NE recharger 7. Ne pas utiliser de cordon de rallonge si cela n’est QUE les batteries rechargeables metabo HPT des pas absolument nécessaire. L’utilisation d’un cordon séries de type multi-volt et des séries BSL18. Les de rallonge incorrect pourrait entraîner un feu ou une...
- Page 42 Français SECURITE — Suite PRÉCAUTIONS RELATIVES A LA AVERTISSEMENT BATTERIE AU LITHIUM ION Une utilisation incorrecte de la batterie ou du Pour prolonger sa durée de vie, la batterie lithium-ion chargeur de batterie risque de provoquer des est équipée d’une fonction de protection qui coupe blessures.
- Page 43 Français SECURITE — Suite 2. Ne percez pas la batterie à l’aide d’un objet pointu tel 3. En cas de détection de rouille, de mauvaise odeur, qu’un clou. Ne la frappez pas à l’aide d’un marteau. de surchauff e, de décoloration, de déformation et/ou Ne marchez pas dessus, ne la lancez pas et ne la autres anomalies lors de la première utilisation de la soumettez pas un à...
- Page 44 Français SECURITE — Suite RESPONSABILITES DE L’EMPLOYEUR Puissance de sortie 1. Veiller à ce que ce MANUEL reste à la disposition des personnes qui doivent utiliser ou entretenir le cloueur. Nombre de 2 à 3 chiff res 2. Veiller à ce que les cloueurs soient utilisés exclusivement lorsque les opérateurs et les autres personnes présentes dans l’aire de travail portent des LUNETTES DE PROTECTION.
- Page 45 Français UTILISATION REMARQUE Les informations contenues dans ce manuel ont pour but d’aider l’opérateur à utiliser le cloueur en toute sécurité. Certaines des illustrations du manuel peuvent montrer des détails ou des accessoires qui diff èrent de ceux de votre cloueur. NOM DES PIÈCES 1.
- Page 46 Français SPECIFICATIONS 1. Cloueuse à charpente sans fi l Modèle NR3690DC NR3690DR Moteur sans balais CC Longueur de clous utilisables 2 po à 3-1/2 po (50 – 90) Capacité de chargement de clous [clous] Mode de déclenchement Entièrement séquentiel/par contact (Sélectionnable) Fréquence du cycle [Clous par seconde] 3 (Intermittent) Modèle...
- Page 47 AVERTISSEMENT ● Bien utiliser exclusivement clous metabo HPT d’origine avec le NR3690DC ou le NR3690DR. L’utilisation d’autres clous risque de provoquer un mauvais fonctionnement de l’outil et/ou une rupture des clous, et d’entraîner des blessures. Seuls les clous indiqués dans le tableau ci-dessous pourront être utilisés avec ce cloueur.
- Page 48 Français NR3690DR Recharge de clous à assemblage Min. Max. plastique .286" (7 mm) .3" (7,6 mm) Clous à tête 21° .113" (2,9 mm) .131" (3,3 mm)
- Page 49 Français ACCESSORIES DANGER ● Les accessoires autres que ceux indiqués ci-dessous risquent de mal fonctionner et de provoquer des blessures. ACCESSOIRES STANDARD NR3690DC NR3690DR (XC) Lunettes de sécurité................1 Batterie (BSL36A18) ................1 Chargeur de batterie (UC18YSL3) ............1 Sac à outils .................... 1 Couvercle de batterie (N°...
- Page 50 Les accessoires sont sujets à modifi cation sans ○ La tension de la source d’alimentation est indiquée préavis et sans aucune obligation de la part de sur la plaque signalétique. metabo HPT. ○ Le cordon n’est pas endommagé. APPLICATIONS AVERTISSEMENT Ne pas eff...
- Page 51 Français Tableau 2 Indications du témoin de charge S’allume pendant 0,5 seconde, Ne Avant la Clignote s’allume pas pendant 0,5 seconde, Branché à la source charge (ROUGE) (Éteint pendant 0,5 seconde) d'alimentation S’allume pendant 0,5 seconde, Ne Clignote s’allume pas pendant 1 seconde, Capacité...
- Page 52 Français En ce qui concerne le courant de décharge d’une CHARGEMENT DU DISPOSITIF USB batterie neuve Lorsqu’un problème inattendu survient, les données Etant donnée que les substances chimiques internes sur un dispositif USB connecté à ce produit risque sont restées inactives dans le cas des batteries d’être endommagées ou perdues.
- Page 53 Français ○ Charger un dispositif USB à partir d’une prise ○ Mettez le commutateur d’alimentation USB sur arrêt électrique et débranchez le câble d’alimentation de la prise électrique. ○ Retirez la batterie du chargeur et placez le cache en caoutchouc sur le port USB. AVANT L’UTILISATION Lire la section intitulée “SECURITE”...
- Page 54 Pour changer de mode de clouage, enfoncez le Communiquez avec bouton de clouage une fois. À chaque pression, le metabo HPT pour mode bascule entre “Entièrement séquentiel” et “Par inspection. contact”. 2 voyants DEL clignotent Allumé (bleu) : en orange, au bout MÉCANISME...
- Page 55 Eff ectuer les essais dans l’ordre indiqué. S’il se produit un fonctionnement anormal, cesser immédiatement d’utiliser le cloueur et contacter un service après-vente agréé metabo HPT. (1) SORTIR TOUS LES CLOUS ET LA PILE DU CLOUEUR. Mettez l’outil sous tension en maintenant enfoncé...
- Page 56 Français REMARQUE (5) Eloigner le levier-poussoir de la pièce. ● Ne pas appuyer sur le levier-poussoir et/ou tirer sur Ensuite, diriger le cloueur vers le bas, tout en tirant la gâchette pendant que vous mettez l'interrupteur vers l’arrière le bouton de l’alimenteur, enclencher la d'alimentation sur MARCHE.
- Page 57 Français Détacher le bras de contact de la pièce à usiner, (3) Tirer le bouton d’alimentation vers l’arrière pour presser la détente. engager l’alimenteur de clous (B) sur la bande de Enfoncer le bras de contact par pression contre la clous.
- Page 58 1) on charge les clous; afi n d’éviter tout risque de 2) on tourne l’ajusteur. déclenchement accidentel. Ce cloueur metabo HPT est équipé d’un dispositif de ● Ne pas utiliser le cordon électrique s’il est commutation de l’opération de clouage. endommagé.
- Page 59 Français La machine dispose d’un mécanisme pour prévenir Retirer le doigt de la détente et détacher le fonctionnement sans charge. complètement l’outil de la surface du bois. La machine passe dans un état où le levier-poussoir ne Pour continuer à clouer à un autre endroit, déplacer le peut être enfoncé.
- Page 60 ● Ne pas approcher les mains ni le corps de la section de sortie des clous. Ce cloueur Pas assez metabo HPT risque de faire un bond sous Tourner l’ajusteur. A ras profond l’eff et du rappel après l’enfoncement d’un clou, ce qui pourrait enfoncer un autre clou non prévu et provoquer des blessures.
- Page 61 Français ÉLIMINATION D’UN BLOCAGE Brancher la batterie dans le cloueur. TOUJOURS PORTER LUNETTES Si un clou se coince dans la tête de clouage, on le dégage PROTECTION. et on règle le clouage par la démarche suivante. Eff ectuer un essai de clouage. ATTENTION Sortir la batterie du cloueur.
- Page 62 REMARQUE et les caractéristiques de la batterie. Utilisez donc ce ● Si les clous se coincent fréquemment, contacter un tableau comme référence. service après-vente metabo HPT agréé. TÉMOIN DE BATTERIE RÉSIDUELLE Témoin indicateur Commutateur de Vous pouvez vérifi er la capacité résiduelle de la batterie...
- Page 63 Lire la section intitulée “SECURITE” (pages 35–44). procurer nouvelle ETIQUETTE D’AVERTISSEMENT auprès d’un service après- vente metabo HPT agréé. AVERTISSEMENT ● Retirer du cloueur la batterie et tous les clous restant lorsque : 1) on entretient ou on inspecte le cloueur ; et Etiquette 2) on retire des clous coincés.
- Page 64 ● Les réparations du cloueur seront confi ées tenir une charge. exclusivement au personnel d’entretien Il est cependant possible de recouvrer la capacité formé par metabo HPT, au distributeur ou à d’autonomie d’une batterie considérablement l’employeur.
- Page 65 Guide de dépannage pour l’utilisateur La plupart des problèmes bénins peuvent être rapidement et facilement corrigés au moyen du tableau ci-dessous. Si le problème persiste, communiquez avec un centre de service metabo HPT autorisé pour obtenir de l’aide. 1. Outil électrique PROBLÈME...
- Page 66 Vérifi ez la position de l’ajusteur de Réajustez selon les pages 60–61. Cycle lent. profondeur des clous. La lame d’entraînement est-elle Communiquer avec metabo HPT usée? pour l’inspection. La pression de l'air comprimé est Communiquer avec metabo HPT devenue faible.
- Page 67 éléments internes. Le ventilateur de refroidissement ne Communiquer avec un centre de fonctionne pas. service metabo HPT autorisé pour solliciter une réparation. Le témoin d’alimentation USB s’est La capacité de la batterie est Remplacer la batterie par une batterie éteint et le périphérique USB a cessé...
- Page 68 NOTA enfatiza información esencial. EXPLICACIÓN LA ACCIÓN DE CLAVADO DEL CLAVADOR metabo HPT ○ MECANISMO DE ACTUACIÓN COMPLETAMENTE SECUENCIAL: En primer lugar, presione la palanca de empuje contra la madera y, a continuación, jale el gatillo para introducir el sujetador.
- Page 69 Español SEGURIDAD ADVERTENCIAS DE SEGURIDAD GENERAL DE LA HERRAMIENTA ELÉCTRICA ADVERTENCIA Lea todas las instrucciones y todas las advertencias de seguridad. Si no se siguen las advertencias e instrucciones, podría producirse una descarga eléctrica, un incendio y/o daños graves. Guarde todas las advertencias e instrucciones para futura referencia. El término “herramienta eléctrica”...
- Page 70 Español SEGURIDAD — Continuación d) Retire las llaves de ajuste antes de encender e) Mantenimiento herramientas la herramienta eléctrica. eléctricas. Compruebe piezas Si se deja una llave en una pieza giratoria de la móviles están mal alineadas o unidas, si herramienta eléctrica podrían producirse daños hay alguna pieza rota u otra condición que personales.
- Page 71 Español SEGURIDAD — Continuación El líquido expulsado de la pila podría causar irritación o quemaduras. 6) Revisión a) Lleve su herramienta a que la revise un experto cualifi cado que utilice sólo piezas de repuesto idénticas. Esto garantizará el mantenimiento de la seguridad de la herramienta eléctrica.
- Page 72 Español SEGURIDAD — Continuación INSTRUCCIONES IMPORTANTES DE SEGURIDAD PARA LA UTILIZACIÓN DEL CLAVADOR LEA TODAS LAS INSTRUCCIONES PELIGRO 1. LOS OPERADORES Y DEMÁS PERSONAS QUE SE ENCUENTREN EN EL ÁREA DE TRABAJO DEBEN USAR GAFAS PROTECTORAS CON BLINDAJES LATERALES. Antes de utilizar el clavador, utilice siempre gafas protectoras con blindajes laterales, y asegúrese de que también sea utilizada por todas las personas que se encuentren en el área de trabajo.
- Page 73 23. QUITE TODOS LOS SUJETADORES RESTANTES OPERACIÓN DE SUJECIÓN. Y LA BATERÍA DE LA CLAVADORA CUANDO: Este clavador metabo HPT incluye un dispositivo de 1) realice trabajos de mantenimiento e inspección, conmutación para la operación de sujeción. 2) control del buen funcionamiento de la palanca de Antes de empezar a trabajar, verifi...
- Page 74 3. Para reducir el riesgo de lesiones, cargue la No permita nunca que los niños, personas no batería recargable metabo HPT de la serie del familiarizadas o no autorizadas, toquen el clavador. tipo multivoltaje y de la serie BSL18. Otros tipos de 29.
- Page 75 9. No utilice el cargador de baterías si ha recibido un RECUERDE: ¡UTILICE SOLAMENTE UNA BATERÍA golpe, si ha caído, o si está dañado de alguna otra metabo HPT DEL TIPO BSL36A18. LOS DEMÁS TIPOS forma. Llévelo a un técnico cualifi cado. DE BATERÍAS PODRÍAN EXPLOTAR Y CAUSAR 10.
- Page 76 Español SEGURIDAD — Continuación 3. NUNCA cortocircuite la batería. 3. Si la batería se calienta excesivamente al realizar 4. NUNCA inserte ningún objeto en las ranuras de un trabajo de sobrecarga, la potencia de la batería ventilación del cargador. Si lo hiciese podría recibir podría pararse.
- Page 77 Español SEGURIDAD — Continuación 11. Si hay una fuga de la batería, mal olor, se genera A PROPÓSITO DEL TRANSPORTE DE color, está descolorida o deformada, o de algún modo LA BATERÍA DE IONES DE LITIO funciona de forma anormal durante su utilización, recarga o almacenamiento, retírela inmediatamente Al transportar una batería de iones de litio, tenga en del equipo o del cargador de la batería y detenga su...
- Page 78 Español SEGURIDAD — Continuación RESPONSABILIDADES DEL EMPRESARIO 1. Asegúrese de que este MANUAL esté al alcance de los operadores y del personal de mantenimiento. 2. Asegúrese de que el clavador se utilice solamente cuando el operador y demás personas que se encuentren en el área de trabajo estén utilizando GAFAS PROTECTORAS PARA LOS OJOS.
- Page 79 Español OPERACIÓN NOTA La información contenida en este manual ha sido diseñada para ayudarle a utilizar con seguridad este clavador. Algunas de las ilustraciones de este manual pueden mostrar detalles o accesorios diferentes a los de su propio clavador. NOMBRE DE LAS PIEZAS 1.
- Page 80 Español ESPECIFICACIONES 1. Clavadora inalambrica para armazon Modelo NR3690DC NR3690DR Motor DC sin escobillas Longitud del clavo aplicable De 2" a 3-1/2" (50 a 90) Capacidad de carga de clavos [clavos] Modo de disparo Totalmente secuencial/Contacto (seleccionable) Velocidad del ciclo [Clavos/segundo] 3 (intermitente) Modelo BSL36A18...
- Page 81 SELECCIÓN DE CLAVOS ADVERTENCIA ● Asegúrese de usar únicamente clavos legítimos metabo HPT para el NR3690DC o el NR3690DR. El uso de otros clavos puede producir un fallo de funcionamiento de la herramienta y/o la rotura del clavo, lo que provocaría a su vez lesiones de gravedad.
- Page 82 Español NR3690DR Clavos colocadas en ristra de plástico. Min. Max. Clavos con cabeza completa. .286" (7 mm) .3" (7.6 mm) 21° .113" (2.9 mm) .131" (3.3 mm)
- Page 83 Español ACCESORIOS PELIGRO ● Los accesorios que no sean los mostrados a continuación pueden provocar el mal funcionamiento del clavador y resultar en lesiones. ACCESORIOS ESTÁNDAR NR3690DC NR3690DR (XC) Gafas protectoras ................. 1 Batería (BSL36A18) ................1 Cargador de baterías (UC18YSL3) ............1 Bolsa de herramientas ................
- Page 84 Los accesorios están sujetos a cambios sin ninguna quemaría. obligación por parte de metabo HPT. APLICACIONES 1. Conecte el cable de alimentación del cargador a una toma. Cuando el cable de alimentación esté...
- Page 85 Español Tabla 2 Indicaciones del testigo indicador de carga Se enciende durante 0.5 segundos. Antes de Parpadea No se enciende durante 0.5 segundos Conectada a la fuente de la carga (ROJO) (apagada durante 0.5 segundos). alimentación Se enciende durante 0.5 segundos. Parpadea No se enciende durante 1 segundo.
- Page 86 Español Descarga eléctrica en caso de baterías nuevas, CÓMO RECARGAR EL DISPOSITIVO etc. Como la substancia química interna de las baterías Cuando se produce un problema inesperado, los datos nuevas o las que no se hayan utilizado durante en un dispositivo USB conectado a este producto podrían mucho tiempo no está...
- Page 87 Español ○ Cargar un dispositivo USB desde una toma de ANTES DE LA OPERACIÓN corriente eléctrica Lea la sección titulada “SEGURIDAD” (páginas 69– 78). Antes de la utilización, cerciórese de lo siguiente. PREPARACIÓN DE LA BATERÍA Consulte la sección “SEGURIDAD, INSTRUCCIONES IMPORTANTES SEGURIDAD PARA...
- Page 88 LED y el interruptor accionamiento en totalmente secuencial, al igual que de alimentación. de forma inicial. (Indicador de operación de clavado Contáctese con iluminado en azul). metabo HPT para su Iluminado en azul inspección. 2 LED parpadean en naranja, luego de aproximadamente 10 segundos, el interruptor de alimentación se...
- Page 89 Si se produce alguna operación anormal, deje de utilizar el clavador y póngase inmediatamente en contacto con un centro de reparaciones autorizado por metabo HPT. (1) RETIRE LOS CLAVOS Y LA BATERÍA DE LA CLAVADORA.
- Page 90 Español Asegúrese de que el indicador de alimentación (5) Retire el dedo del gatillo y presione la palanca de parpadea en verde y el indicador de la operación de empuje contra la pieza de trabajo. clavado está iluminado en azul. (MECANISMO DE A continuación, apunte con el clavador hacia abajo, ACTUACIÓN COMPLETAMENTE SECUENCIAL) mientras tira de la perilla del alimentador, presione...
- Page 91 Español Separe la palanca retráctil de la pieza de trabajo, (3) Tire del pomo de alimentación hacia atrás para apriete el gatillo. encajar el alimentador de clavos (B) en la tira de Presione nuevamente la palanca retráctil sobre la clavos. pieza de trabajo en un lapso de 2 segundos.
- Page 92 1) cargando los clavos; hacia otras personas del área de 2) gire del ajustador. trabajo. Este clavador metabo HPT está equipado con un dispositivo de conmutación para la operación de clavado. ● Para evitar un disparo accidental, mantenga Utilice MECANISMO ACTUACIÓN...
- Page 93 Español ○ MECANISMO DE ACTUACIÓN POR CONTACTO: Presione a fondo la palanca de empuje. 1. Apriete el gatillo. Apriete el gatillo para clavar el clavo. 2. Presione la palanca de empuje contra la madera Quite el dedo del gatillo y levante completamente para clavar un clavo.
- Page 94 ● Mantenga las manos y el cuerpo alejados del Gire el ajustador. A ras profundidad área de descarga. Este clavador metabo HPT podría rebotar por la reculada producida al meter un clavo, y producir la introducción no intencional del siguiente clavo, con el riesgo de sufrir lesiones.
- Page 95 Español (3) Instale el gancho en el otro lateral y asegure Deje de girar el ajustador cuando alcance la posición fi rmemente con el tornillo. apropiada realizando una prueba de clavado. Inserte la pila en la clavadora. UTILICE SIEMPRE GAFAS DE SEGURIDAD. Realice una prueba.
- Page 96 NOTA ● En caso de atasco frecuente, póngase en contacto Lámpara Interruptor del con un centro de servicio autorizado por metabo HPT. indicadora de indicador de INDICADOR DE BATERÍA RESTANTE batería restante batería restante Puede comprobar la capacidad restante de la batería...
- Page 97 Lea la sección titulada “SEGURIDAD” (páginas 69– Solicite la nueva ETIQUETA DE PRECAUCIÓN a un 78). centro de reparaciones autorizado por metabo HPT. ADVERTENCIA ● Remueva la batería y todos los sujetadores Etiqueta de restantes de la clavadora cuando: precaución...
- Page 98 Resolución de problemas del operador La mayoría de problemas menores pueden ser resueltos de manera rápida y sencilla utilizando la tabla a continuación. Si el problema persiste, contáctese con un centro de servicio técnico autorizado de metabo HPT para solicitar asistencia. 1. Herramienta eléctrica PROBLEMA MÉTODO DE COMPROBACIÓN...
- Page 99 23°F (-5°C)) o demasiado se caliente en la condición adecuada. caliente. Electrónica interna dañada. Póngase en contacto con metabo HPT para la inspección. La clavadora opera, pero no se El cartucho está sucio. Sople y limpie el cartucho. expulsa ningún clavo.
- Page 100 Reemplace el resorte de la cinta. debilitado? ¿La hoja del motor está gastada o Póngase en contacto con dañada? metabo HPT para la inspección. Los clavos se atascan. Compruebe si los clavos son los Utilice solo los clavos recomendados. El clavo clavado está doblado.
- Page 101 Español PROBLEMA MÉTODO DE COMPROBACIÓN CORRECCIÓN El indicador luminoso de La capacidad de la batería es baja. Sustituya la batería por una que alimentación USB se ha apagado y el tenga capacidad. dispositivo USB ha detenido la carga. Enchufe la toma de corriente del cargador a una toma eléctrica.
- Page 104 Please contact Koki Holdings America Ltd. at 1-800-59-TOOLS (toll free), or metabo HPT AUTHORIZED POWER TOOL SERVICE CENTER regarding COLLECTION. Pour le RAMASSAGE,contacter Koki Holdings America Ltd. au 1-800-59-TOOLS (appel gratuit), ou UN SERVICE APRÈS-VENTE D’OUTILS ÉLECTRIQUE AGRÉÉ PAR metabo HPT.