
Manuels Connexes pour Sigma BC 1009 STS


Sommaire des Matières pour Sigma BC 1009 STS
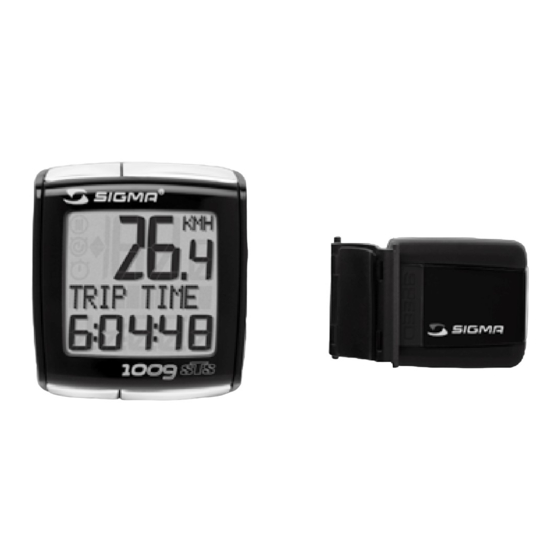
- Page 1 All manuals and user guides at all-guides.com BIKE COMPUTER TOPLINE PAGE 4-62 · Deutsch English · Français Italiano · Español Nederlands PAGE 63-97 · Português Polski · Magyar Česky BC 1009 www.sigmasport.com...
- Page 2 All manuals and user guides at all-guides.com 1 Inhalt / Contents / Contenu / Contenuti / Contenido / Inhoud...
- Page 3 All manuals and user guides at all-guides.com 1 Inhalt / Contents / Contenu / Contenuti / Contenido / Inhoud...
- Page 4 Für die Vorbaumontage lösen Sie die 4 Schrauben auf der Rückseite, drehen die Platte um 90° und befestigen Sie wieder. Gelbe Folie entfernen. Das SIGMA Logo muss immer nach vorne zeigen! Der Geschwindigkeitssender kann entweder mit Kabelbinder (dauerhafte Anbringung) oder wahlweise mit den O-Ringen montiert werden.
- Page 5 All manuals and user guides at all-guides.com 2 Le montage The SIGMA logo must always face forwards. Speed transmitter can either be installed with cable ties (permanent attachment) or optionally using the O-rings. In order to achieve the necessary 12 mm or less install the transmittter and the magnet closer to the wheel hub.
- Page 6 90° e fissare nuovamente. Rimuovere la pellicola gialla. Il logo SIGMA deve sempre essere rivolto in avanti. Trasmettitore di velocità possono essere montati sia con fascette per cablaggio (fissaggio resistente) sia con O-ring. Per ottenere i 12 mm o meno necessari, montare il trasmettitore e il magnete vicino al mozzo.
- Page 7 All manuals and user guides at all-guides.com 2 Montage El logotipo de SIGMA siempre tiene que ser visible por delante. Emisor de velocidad pueden montarse tanto con abrazaderas para cables (montaje permanente) u opcionalmente con las juntas tóricas. Para conseguir los 12 mm necesarios o menos, monte el emisor y el imán más cerca en el cubo.
- Page 8 The display automatically jumps to setting mode. Le BC 1009 STS est fourni sans pile afin de limiter la consommation d‘énergie. Mettre la pile en place en ouvrant le couvercle du compar- timent à...
- Page 9 1009 Por razones de consumo de energía el BC 1009 STS se suministra sin batería. Coloque la batería abriendo la tapa del compartimento de la batería con una moneda. Una vez que se ha colocado la batería cierre la tapa con ayuda de la moneda.
- Page 10 All manuals and user guides at all-guides.com 3.1 Tastenbelegung / Key functions TAGES KM UHRZEIT TRIP DIST CLOCK FAHRZEIT GESAMT KM* TRIP TIME TOTAL ODO* DURCH. KMH GESAMTZEIT* AVG. SPEED TOTAL TIME* MAX. KMH MAX. SPEED RESET MODE 2 RESET MODE 2 * Nicht während * Not whilst...
- Page 11 All manuals and user guides at all-guides.com 3.1 Touches KM JOUR HEURE TEMPS PARC KM TOTAL* VIT MOYEN. TEMPSTOTAL* VIT MAX. RESET MODE 2 * Pas pendant la conduite 1009 MODE 1 LANGUE KM JOUR KMH/MPH TEMPS PARC DIM. ROUE 1/2 VIT MOYEN.
- Page 12 All manuals and user guides at all-guides.com 3.1 Assegnazione delle funzioni ai tasti / Las funciones de las teclas DIST GIORN OROLOGIO KM DIA HORA TEMPO PERC DIST TOT* TIEMPO PAR KM TOTAL* VEL MEDIA TEMPO TOT* VEL MEDIA TIEMPO TOT* VEL MAX VAL MAXIMA RESET...
- Page 13 All manuals and user guides at all-guides.com 3.1 Toetsfuncties TRIP KM KLOK TRIP TIJD TOTAAL KM* GEM.SNELH. TOTAALTIJD* MAX. KMH RESET MODE 2 * Niet tijdens de rit 1009 MODE 1 TAAL TRIP KM KMH/MPH TRIP TIJD WIELOMTREK GEM.SNELH. KLOK MAX.
- Page 14 All manuals and user guides at all-guides.com 4 Anzeigenwechsel / Display change / Changement d‘affichage MODE 1/2-Taste drücken, bis die gewünschte Funktion angezeigt wird. Mit MODE 1- TAGES KM, FAHRZEIT, DURCH-KMH, MAX KMH aktivieren. Mit MODE 2- UHRZEIT, GESAMT KM*, GESAMTZEIT* aktivieren. * Nicht während der Fahrt Press MODE 1/2 until the desired function is displayed.
- Page 15 All manuals and user guides at all-guides.com 4 Cambio display / Cambio de indicación / Meldingenwissel Premere il tasto MODE 1/2 fino alla visualizzazione della funzione desiderata. MODE 1- DIST GIORN, TEMPO PERC, VEL MAX, VEL MEDIA MODE 2- OROLOGIO, DIST TOT*, TEMPO TOT* * Non durante la corsa Pulsar la tecla MODE 1/2 hasta que aparezca la función deseada.
- Page 16 Sie bitte die MODE 1-Taste länger als 3 Sek. um eine manuelle Synchronisierung zu starten. SYNCH RESET blinkt im Display.) Installation of the BC 1009 STS into the mounting bracket – The zero of the speed is flashing. To synchronise the speed there are 2 options: Set off, usually the receiver has paired with the transmitter within 3 or 4 wheel turns.
- Page 17 3 sec. to start manual pairing. SYNCH RESET flashes on the display.) 1009 Placer le BC 1009 STS sur son support – Le zéro de la vitesse clignote. Il existe deux façons de synchroniser la vitesse: Rouler, en général le récepteur s‘est synchronisé avec l‘emetteur après 3 à...
- Page 18 All manuals and user guides at all-guides.com 5 Synchronisierung / Connection / Apareado Innestare il BC 1009 STS in posizione sul manubrio. – Lo zero della visualizzazione della velocità lampeggia. Per sincronizzare la velocità ci sono due possibilità: Partire, il ricevitore normalmente si collega al trasmettitore dopo 3-4 giri di ruote.
- Page 19 1009 sincronización manual. En la pantalla parpadea SYNCH RESET.) Plaats de BC 1009 STS in de houder. – De nul op de snelheidsindicator knippert. Er zijn 2 mogelijkheden om de snelheid te synchroniseren: Wegrijden, in de regel heeft de ontvanger zich na 3 wielomwentelingen met de zender gepaird.
- Page 20 All manuals and user guides at all-guides.com 6 Grundeinstellungen / Basic settings / Réglages de base Öffnen Sie das Einstellungsmenü, indem Sie SET 3 Sekunden gedrückt halten bis die voreingestellte Sprache in der Anzeige erscheint (SETTINGS OPEN (EINGABE OPEN) blinkt). Open the setting menu by pressing the SET button 3 sec.
- Page 21 All manuals and user guides at all-guides.com 6 Impostazioni base / Ajustes básicos / Basisinstellingen Tenere premuto il tasto SET per 3 secondi finché la LINGUA impostata (English) appare sul display (SETTINGS OPEN (IMMISSIONE OPEN) lampeggia). Mantener presionada la tecla SET durante 3 segundos hasta que el IDIOMA preajustado (inglés) aparezca en la indicación (parpadea SETTINGS OPEN (INTRODUCIR OPEN)).
- Page 22 All manuals and user guides at all-guides.com 6.1 Eingabe Sprache / Language entry / Reglage langue k Mit MODE 1-Taste zur ENGLISH-Anzeige wechseln. k SET-Taste kurz drücken, Anzeige blinkt. k Mit RESET/MODE 2-Taste gewünschte Sprache einstellen. k Mit SET-Taste bestätigen. SET OK erscheint im Display. k Switch to ENGLISH display with MODE 1 button.
- Page 23 All manuals and user guides at all-guides.com 6.1 Impostazione lingua / Ajustar el idioma / Ingave taal k Con il tasto MODE 1 passare a ENGLISH. D,GB,F,I,E,S,NL k Premere brevemente il tasto SET. Il display lampeggia. RESET! !MODE 2 k Mediante il tasto RESET/MODE 2 impostare la lingua desiderata.
- Page 24 All manuals and user guides at all-guides.com 6.2 Eingabe KMh/MPh / KMh/MPh Entry / Reglage KMh/MPh k Mit MODE 1-Taste zur KMH-Anzeige wechseln. k SET-Taste kurz drücken. k In der Anzeige erscheint KMH und blinkt. k Mit RESET/MODE 2-Taste MPH oder KMH einstellen. k Mit SET-Taste bestätigen.
- Page 25 All manuals and user guides at all-guides.com 6.2 Impostazione KMh/MPh / Ajuste KMh/MPh / Instellen KMh/MPh KMH , k Mediante il tasto MODE 1 passare alla visualizzazione di KMH/MPH. RESET! !MODE 2 k Premere brevemente il tasto SET. k Sul display appare KMH e lampeggia. k Mediante il tasto RESET/MODE 2 impostare MPH o KMH.
- Page 26 All manuals and user guides at all-guides.com 6.3 Radumfang berrechnen / Measure wheel size / Mesurer la roue k Aus Tabelle „Radgröße“ (nächste Seite) den Ihrer Reifengröße entsprechenden Wert ermitteln. k Diesen Wert eingeben. k Alternativ: WS berechnen/ermitteln (Tab. oder Tab. k Determine the correct value for your wheel size from Table “Wheel Size Chart”...
- Page 27 All manuals and user guides at all-guides.com 6.3 Larghezza ruota / Dimensiones de la rueda / Wielomvang opmeten k Dalla tabella “Wheel Size Chart” (vedi pagina seguente) rilevare il valore corrispondente alla misura della ruota. k Immettere questo valore. k Alternativa: calcolare/rilevare la misura della ruota, WS (tab.
- Page 28 All manuals and user guides at all-guides.com 6.4 Wheel size chart (Radgröße / Wheel size / Circonference de roue) km/h: mm x 3,14 WS = mm x 3,14 mph: WS = mm x 3,14 km/h: WS = mm mph: WS = mm = WS (mm)
- Page 29 All manuals and user guides at all-guides.com 6.4 Wheel size chart (Misura della ruota / Tamaño de rueda / Wielmaat) ETRTO ETRTO 16x1.75x2 1272 32-630 27x1 1/4 2199 47-305 47-406 20x1.75x2 1590 28-630 27x1 1/4 Fifty 2174 37-540 24x1 3/8 A 1948 40-622 28x1.5...
- Page 30 All manuals and user guides at all-guides.com 6.5 Eingabe Radumfang / Set wheel size / Reglage de la circonference de la roue k Mit MODE 1-Taste zur RADUMFANG-Anzeige wechseln. k SET-Taste kurz drücken, die erste Ziffer der Eingabe blinkt. k Mit RESET/MODE 2-Taste Wert einstellen. k Mit MODE 1-Taste zur nächsten Stelle wechseln.
- Page 31 All manuals and user guides at all-guides.com 6.5 Impostare ruota / Ajustar circunferencia / Wielomtrek instellen k Con il tasto MODE 1 passare alla MSURARUOTA. k Premere brevemente il tasto SET. La prima cifra da immettere lampeggia. k Impostare il valore con il tasto MODE 2 o con quello di RESET. k Con il tasto MODE 1 passare alla posizione successiva.
- Page 32 All manuals and user guides at all-guides.com 6.6 Eingabe Uhrzeit / Time entry / Reglage heure k Mit MODE 1-Taste zur UHRZEIT-Anzeige wechseln. k SET-Taste kurz drücken. Eingabe blinkt. k Mit RESET/MODE 2-Taste Stunden einstellen. k Mit MODE 1-Taste zur Minuteneingabe wechseln. 1009 k Mit RESET/MODE 2-Taste Minuten einstellen.
- Page 33 All manuals and user guides at all-guides.com 6.6 Immissione Orologio / Ajustar la hora / Ingave tijd k Con il tasto MODE 1 passare alla visualizzazione di OROLOGIO. k Premere brevemente il tasto SET. Il display lampeggia. k Mediante il tasto RESET/MODE 2 regolare l‘ora. k Con il tasto MODE 1 passare all‘inserimento dei minuti.
- Page 34 All manuals and user guides at all-guides.com 6.7 Eingabe Gesamtdaten / Total data entry / Réglage des valeurs totales KM RAD ZEIT RAD Eingabe wie beim RADUMFANG. Hier können Sie die GESAMT KM z.B. von Ihrem alten Gerät auf dieses neue Gerät übertragen. Bei der Gesamtzeit können auch die Minuten eingegeben werden.
- Page 35 All manuals and user guides at all-guides.com 6.7 Dati complessivi / Datos totales / Ingave totale gegevens KM BICICLETTA TEMPO BICICLETTA Immissione come nella larghezza ruota. Qui è possibile, all‘acquisto di questo apparecchio, trasferire il numero complessivo di km, ad esempio, da un altro computer per biciclette. Nel tempo 1009 totale possono essere impostati anche i minuti.
- Page 36 All manuals and user guides at all-guides.com 6.8 Eingabe Kontrast / Contrast entry / Reglage contraste k Mit MODE 1-Taste zur KONTRAST-Anzeige wechseln. k SET-Taste kurz drücken. Anzeige blinkt. k Mit RESET/MODE 2-Taste Wert einstellen (1=schwach, 3 = stark). k Mit SET-Taste bestätigen. SET OK erscheint im Display. 1009 k Change the display to CONTRAST using the MODE 1 button.
- Page 37 All manuals and user guides at all-guides.com 6.8 Immissione contrasto / Introducción contraste / Ingave contrast RESET! !MODE 2 k Con il tasto MODE 1 passare alla visualizzazione di CONTRASTO. k Premere brevemente il tasto SET. Il display lampeggia. k Impostare il valore (1=debole, 3=forte) con il tasto MODE 2 o con quello di RESET.
- Page 38 All manuals and user guides at all-guides.com 6.9 Grundeinstellungen verlassen / Exiting basic settings / Quitter les reglages de base Um die Grundeinstellungen zu verlassen, SET-Taste 3 Sekunden gedrückt halten (EINGABE CLOSE blinkt). Press the SET button down for 3 seconds in order to stop entering settings (SETTINGS CLOSE flashes).
- Page 39 All manuals and user guides at all-guides.com 6.9 Uscire dalle impostazioni base / Abandonar los ajustes básicos / Basisinstellingen verlaten Per terminare le impostazioni tenere premuto il tasto SET per 3 secondi (IMMISSIONE CLOSE lampeggia). Para finalizar los ajustes, mantenga presionada la tecla SET durante 3 segundos (parpadea INTRODUCIR CLOSE).
- Page 40 All manuals and user guides at all-guides.com 7 Geschwindigkeits Vergleich / Compare speed / Comparaison de la vitesse Bei annähernd gleicher Geschwindigkeit wird nichts angezeigt, bei geringerer ( ) und bei höherer ( ). Die Anzeige erfolgt bei allen Funktionen außer in den Grund- einstellungen.
- Page 41 All manuals and user guides at all-guides.com 7 Paragone della velocità / Comparación de velocidad / Vergelijking Raggiungendo la stessa velocità non appare nulla sul display. In caso di riduzione della velocità avviene la visualizzazione di ( ). In caso di aumento della velocità avviene la visualizzazione di ( ). Questa visualizzazione avviene con tutte le funzioni eccetto quelle nelle impostazioni base.
- Page 42 All manuals and user guides at all-guides.com 7.1 Löschen / Reset / Remise a zero k MODE 1-Taste drücken bis gewünschte Funktion erscheint. k RESET-Taste gedrückt halten. Anzeige blinkt. Nach 2 Sekunden wird nur die angezeigte Funktion auf 0 zurückgesetzt. k RESET-Taste länger als 4 Sekunden gedrückt halten, setzt die Anzeigen von TAGES KM, FAHRZEIT, DURCH.
- Page 43 All manuals and user guides at all-guides.com 7.1 Resettare / Puesta a cero / Reset RESET > 4 sec. k Premere il tasto MODE 1 fino alla visualizzazione della funzione desiderata. k Tenere premuto il tasto RESET. Il display lampeggia. Dopo 2 sec.
- Page 44 All manuals and user guides at all-guides.com 7.2 Service-Intervall / Service interval / Intervalle d‘entretien Das Service-Intervall teilt Ihnen mit sobald die Kilometerleistung bis zur nächsten Fahrradinspektion erreicht ist. Das Service-Intervall kann nur von Ihrem Fachhändler ein-/ausge- schaltet bzw. vorprogrammiert werden. Im Lieferzustand ist das Service-Intervall ausgeschaltet.
- Page 45 All manuals and user guides at all-guides.com 7.2 Spia manutenzione / intervalo de servicio / Service-interval La spia manutenzione comunica il raggiungimento dei chilometri percorsi per la successiva manutenzione del ciclo. La spia manutenzione può essere attivata/deattivata o preimpostata solamente dal vostro rivenditore specializzato.
- Page 46 1009 En cas de transport sur un porte-vélo ou dans une voiture (lorsqu‘il est enclenché sur son support), le BC 1009 STS doit être placé en mode de transport au moyen du capteur de mouvement intégré. TRANSPORT apparaît à l‘écran.
- Page 47 En el caso de un transporte sobre el soporte de bicicletas o en el coche (si el soporte está encajado), el BC 1009 STS es colocado por el sensor de movimiento integrado en el llamado modo de transporte. En la pantalla aparece TRANSPORTE.
- Page 48 Le BC 1009 STS est compatible PC. Les valeurs totales et quotidiennes peuvent être rapidement et aisément chargées 1009 sur votre PC après l‘achat du Logiciel SIGMA DATA CENTER et de sa station de connexion (n° art.: 00431). Votre BC 1009 STS peut en outre être réglé rapidement et aisément.
- Page 49 De BC 1009 STS kan aangesloten worden op de PC. Na aanschaf van de SIGMA DATA CENTER Software en het Docking Station (Art.nr.: 00431), kunt u de totaal- en de dagwaarden eenvoudig en snel op uw PC downloaden. Bovendien kunt u uw BC 1009 STS gemakkelijk en snel instellen.
- Page 50 All manuals and user guides at all-guides.com 8 Technische Daten / Technical data / Données techniques GB US Geschwindigkeit Speed Vitesse Velocità Velocidad TAGES KM TRIP DIST KM JOUR DIST GIORN KM DIA FAHRZEIT TRIP TIME TEMPS PARC TEMPO PERC TIEMPO PAR DURCH.
- Page 51 All manuals and user guides at all-guides.com 8 Dati tecnici / Datos técnicos / Technische gegevens Default Units Snelheid 199,8* kmh/mph TRIP KM 0,00 9.999,9 0,00 km/mi TRIP TIJD 0:00:00 999:59 0:00:00 h:mm:ss k hh:mm k hhh:mm MAX. KMH 0,00 199,99 0,00...
- Page 52 All manuals and user guides at all-guides.com 8.1 Batteriewechsel / Change battery Batteriewechsel wird im Display angezeigt. Batterie: Lithium Knopfzelle CR 2032, 3V Computerkopf: Sender: k Deckel mit Münze öffnen. k Deckel mit Werkzeug öffnen. k Polarität beachten! k Polarität beachten! k Falls Dichtungsring lose, wieder einlegen.
- Page 53 All manuals and user guides at all-guides.com 8.1 Changement de pile / Sostituzione batterie Le changement de pile est affiché est affiché sur l‘écran. Pile : Pile-bouton lithium 2032, 3V Compteur : Emetteurs : k Ouvrir le couvercle avec une pièce. k Ouvrir le couvercle avec l‘outil.
- Page 54 All manuals and user guides at all-guides.com 8.1 Cambio de baterías / Batterij verwisselen El cambio de pila se muestra en la pantalla. Pila: Pila de litio tipo botón 2032, 3V Cabeza del ordenador: Emisor: k Abrir la tapa con una moneda. k Abrir la tapa con una herramienta.
- Page 55 All manuals and user guides at all-guides.com 8.2 Problemlösungen KMh keine Anzeige KMh zeigt falsch an k Alten Lenkerhalter mit Funküber- k 2 Magnete montiert? k Magnet richtig positioniert? tragung (RDS) verwendet? k Computer richtig auf Halterung k Radumfang (WS) falsch eingestellt? eingerastet? k Kontakte auf Oxidation/Korrosion Displayanzeige schwarz/träge...
- Page 56 All manuals and user guides at all-guides.com 8.2 Trouble Shooting KMh no display KMh wrong display k Old handlebar bracket with wireless k 2 magnets installed? k Magnet positioned correctly? transmission (RDS) used? k Computer correctly slotted into k Wheel size set wrongly? mounting bracket? k Contacts checked for oxidation/ Display black /changes slowly?
- Page 57 All manuals and user guides at all-guides.com 8.2 Resolution des problemes KMh aucun affichage Affichage KMh incorrect k Utilisation d‘un ancien système de k 2 aimants montés ? k L‘aimant est-il correctement transmission sans fil (RDS)? k Le compteur est-il correctement positionné...
- Page 58 All manuals and user guides at all-guides.com 8.2 Soluzioni ai problemi Assenza di visualizzazione di KMh La visualizzazione di KMh è errata k È stato utilizzato il vecchio supporto k Sono stati montati 2 magneti? k I magneti sono stati posizionati in per manubrio con radiotrasmissione modo corretto? (RDS)?
- Page 59 All manuals and user guides at all-guides.com 8.2 Solución de problemas KMh sin indicación Los KMh están mal indicados k ¿Se usa un soporte de manillar viejo k ¿2 imanes montados? k ¿Imán posicionado correctamente? con radiotransmisión (RDS)? k ¿Está el ordenador correctamente k ¿Dimensiones de la rueda (WS) mal ajustadas? encajado sobre el soporte?
- Page 60 All manuals and user guides at all-guides.com 8.2 Probleemoplossingen KMh geen opgave KMh geeft verkeerd aan k Oude stuurhouder met zender k 2 Magneten gemonteerd? (RDS) gebruikt? k Magneet goed gepositioneerd? k Computer goed op de houder k Wielomvang (WS) verkeerd vastgeklikt? ingesteld? k Contacten gecontroleerd op...
- Page 61 Im Falle der Gewährleistung wenden Sie sich bitte an den Händler, bei dem Sie Ihren Fahrrad Computer gekauft haben. Sie können den Fahrrad Computer mit Ihrem Kaufbeleg und allen Zubehörteilen auch an die nachfolgende Adresse senden. Bitte achten Sie dabei auf ausreichende Frankierung. SIGMA Elektro GmbH Dr.-Julius-Leber-Straße 15 D-67433 Neustadt/Weinstraße Tel.
- Page 62 All manuals and user guides at all-guides.com 8.3 Warranty / Garantie / Garanzia / Garantía / Garantie We are liable to our contracting partners for defects as defined by law. Batteries are excluded from the guarantee. Nous sommes responsables, vis-à-vis de notre partenaire contractuel respectif, des vices conformément aux prescriptions légales.
- Page 63 All manuals and user guides at all-guides.com Batterien können nach Gebrauch zurückgegeben werden. Batteries can be returned after use. Le batterie possono essere restituite dopo l’ uso. Les piles peuvent être redonnées après usage. Las pilas pueden ser devueltas después de su uso. Batterijen na gebruik inleveren.
- Page 64 All manuals and user guides at all-guides.com Note...
- Page 65 All manuals and user guides at all-guides.com You can find the CE Declaration under: www.sigmasport.com Prohlašujeme, že tento výrobek odpovídá požadavkům směrnice 1999/5/EC (NV č.426/2000 Sb.) v platném znění.
- Page 66 All manuals and user guides at all-guides.com BIKE COMPUTER TOPLINE SIGMA Elektro Gmbh SIGMA SPORT USA SIGMA SPORT ASIA Dr.-Julius-Leber-Straße 15 1067 Kingsland Drive 7F -1, No. 193, Ta-Tun 6 Street, D-67433 Neustadt /Wstr. Batavia, IL 60510, U.S.A. Taichung City 408, Taiwan...
- Page 67 The mounting bracket included in the package is intended for handlebar mounting. For assembly on the stem release the 4 screws on the back, turn the plate by 90° and secure again. INSTALLATION OF THE BC 1009 STS AND BC 1609 STS 90° k Remove the yellow foil www.sigmasport.com...
- Page 68 Battery wait for 1 minute battery soon empty! Battery wait for 1 minute CR 2032 Ref. No. 00342 SIGMA Elektro GmbH SIGMA SPORT USA SIGMA SPORT ASIA Dr.-Julius-Leber-Straße 15 1067 Kingsland Drive 7F -1, No. 193, Ta-Tun 6 Street, D-67433 Neustadt /Wstr.