
Manuels Connexes pour E-FLITE P-51D Mustang 280


Sommaire des Matières pour E-FLITE P-51D Mustang 280
- Page 1 All manuals and user guides at all-guides.com P-51D Mustang 280 Instruction Manual Bedienungsanleitung Manuel d’utilisation Manuale di Istruzioni...
-
Page 2: Safety Precautions And Warnings
All manuals and user guides at all-guides.com NOTICE All instructions, warranties and other collateral documents are subject to change at the sole discretion of Horizon Hobby, Inc. For up-to-date product literature, visit www.horizonhobby.com and click on the support tab for this product. Meaning of Special Language: The following terms are used throughout the product literature to indicate various levels of potential harm when operating this product:... -
Page 3: Table Des Matières
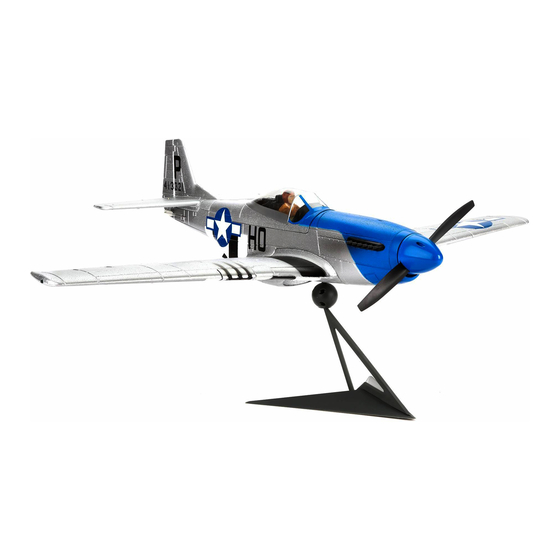
E-fl ite lineup. The E-fl ite ® P-51D Mustang 280 BNF Basic is right at home in the line of 280- to 300-size E-fl ite warbirds. Fitted with the proven power system from the Edge 540QQ, this Mustang will deliver speed and performance not commonly seen in warbirds of this size. -
Page 4: Battery Charging
All manuals and user guides at all-guides.com Battery Charging Choose a charger designed to balance charge 3S Li-Po batteries. We recommend the Celectra 80W AC/DC Multi-Chemistry Battery Charger. Refer to your charger manual for charging instructions. Charging Warnings • Always disconnect the battery after charging, and CAUTION: All instructions and warnings must let the charger cool between charges. -
Page 5: Wing Installation
All manuals and user guides at all-guides.com Wing Installation 1. Remove the canopy by pulling it up, then back to disengage the canopy’s guide pins from the fuselage. 2. Turn the model over so the bottom of the fuselage faces up. 3. -
Page 6: Transmitter And Receiver Binding
All manuals and user guides at all-guides.com Transmitter and Receiver Binding Binding is the process of programming the receiver to recognize the GUID (Globally Unique Identifi er) CAUTION: When using a Futaba transmitter ® code of a single specifi c transmitter. You need with a Spektrum DSM module, you must reverse ™... -
Page 7: Battery Installation
All manuals and user guides at all-guides.com Battery Installation 1. Remove the canopy. 2. Install the battery (A) in the battery cavity towards the front of the fuselage. Refer to the Center of Gravity instructions for the battery’s position. 3. Connect the fully charged flight battery to the ESC. -
Page 8: Control Direction Test
All manuals and user guides at all-guides.com Control Direction Test Bind your aircraft and transmitter before doing these tests. Move the controls on the transmitter to make sure the aircraft control surfaces move correctly and in the proper direction. Always keep throttle at the low position during testing. Make sure the tail linkages move freely and that paint or decals are not adhered to them. -
Page 9: Dual Rates And Expos
All manuals and user guides at all-guides.com Dual Rates and Expos High Rate Low Rate We recommend using a DSM radio capable of dual rates and expo. The settings to the right are Aileron 10mm recommended starting settings for intermediate Elevator 9mm pilots. -
Page 10: Flying Tips And Repairs
All manuals and user guides at all-guides.com Flying Tips and Repairs Consult local laws and ordinances before NOTICE: If a crash is imminent, reduce the throttle choosing a location to fl y your aircraft. and trim fully. Failure to do so could result in extra damage to the airframe, as well as damage to the We recommend fl... -
Page 11: Service Of Power Components
All manuals and user guides at all-guides.com Service of Power Components Disassembly CAUTION: Always disconnect the battery before handling or adjusting the propeller or motor. Failure to do so could result in personal injury. Propeller 1. Remove the 2 screws (A) from the spinner (B). Carefully separate the spinner from the back plate (C). -
Page 12: Troubleshooting Guide
All manuals and user guides at all-guides.com Troubleshooting Guide Problem Possible Cause Solution Aircraft will ESC did not arm because throttle stick and/or Lower throttle stick and throttle trim to lowest not respond throttle trim too high setting to throttle but Throttle channel is reversed Reverse throttle channel on transmitter responds to... -
Page 13: Limited Warranty
All manuals and user guides at all-guides.com Limited Warranty What this Warranty Covers WARRANTY SERVICES Horizon Hobby, Inc. (“Horizon”) warrants to the original Questions, Assistance, and Services purchaser that the product purchased (the “Product”) will Your local hobby store and/or place of purchase cannot be free from defects in materials and workmanship at the provide warranty support or service. -
Page 14: Warranty And Service Contact Information
(in accordance with ISO/IEC 17050-1) No. HH2013070301 This product must not be disposed of with other waste. Instead, it is the Product(s): P-51D Mustang 280 user’s responsibility to dispose of their Item Number(s): EFL6150 waste equipment by handing it over Equipment class: 1... -
Page 15: Warnungen Und Sicherheitshinweise
All manuals and user guides at all-guides.com HINWEIS Allen Anweisungen, Garantien und anderen zugehörigen Dokumenten sind Änderungen nach Ermessen von Horizon Hobby, Inc. vorbehalten. Aktuelle Produktliteratur fi nden Sie unter www. horizonhobby.com im Support-Abschnitt für das Produkt. Begriffserklärung Die folgende Begriffe werden in der gesamte Produktliteratur verwendet, um die Gefährdungsstufen im Umgang mit dem Produkt zu defi... -
Page 16: Lieferumfang
All manuals and user guides at all-guides.com ielen Dank für den Kauf der E-fl ite P-51D Mustang. Die Maschine ist eine aufregende Ergänzung der E-fl ite Flugzeugserie der 280 - 300 Warbirds. Ausgestattet mit dem Hochleistungsantrieb der Edge 540QQ bietet die Mustang Speed und Performace, die für Warbirds dieser Größe selten ist . Fans dieser fl... -
Page 17: Laden Des Akkus
All manuals and user guides at all-guides.com Laden des Akkus Wählen Sie ein Ladegerät das zum Balanceladen von 3S LiPo Akkus geeignet ist. Wir empfehlen den Celectra 80W Multilader. Bitte lesen Sie in der Bedienungsanleitung des Ladegerätes für Anweisungen zum Akkuladen nach. Warnungen zum Laden •... -
Page 18: Montage Der Tragfl Ächen
All manuals and user guides at all-guides.com Montage der Tragfl ächen 1. Heben Sie die Kabinenhaube am hinteren Ende an und ziehen diese mit den Führungsstiften nach hinten ab. 2. Drehen Sie das Modell um, so dass die Unterseite der Tragfl ächen nach oben zeigt. 3. -
Page 19: Binden Von Sender Und Empfänger
All manuals and user guides at all-guides.com Binden von Sender und Empfänger Beim Bindeprozess wird der Empfänger programmiert, um den GUID- (Global eindeutiger ACHTUNG: Wenn Sie einen Futaba -Sender Identifi kations-) Code eines einzelnen speziellen mit einem Spektrum DSM-Modul verwenden, Senders zu erkennen. -
Page 20: Einsetzen Des Akku
All manuals and user guides at all-guides.com Einsetzen des Akku 1. Nehmen Sie die Kabinenhaube ab. 2. Setzen Sie den Akku (A) nach vorne in das Akkufach ein. Bitte lesen Sie in diesem Zusammenhang auch die Informationen über den Schwerpunkt. 3. -
Page 21: Test Der Steuerung
All manuals and user guides at all-guides.com Test der Steuerung Binden Sie Sender und Empfänger bevor Sie diesen Test durchführen. Bewegen Sie die Kontrollen um sich zu überzeugen, dass die Ruder korrekt arbeiten. Halten Sie während des Testen das Gas immer auf Leerlauf/Moto Aus. Stellen Sie sicher, dass sich die Leitwerksanlen-kungen frei bewegen können und nicht durch Farbe oder Dekor gehalten werden. -
Page 22: Dual Rate Und Expo
All manuals and user guides at all-guides.com Dual Rate und Expo High Rate Low Rate Wir empfehlen einen DSM Sender mit Dual (Grosse (Kleine Rate und Expofunktion. Die unten aufgeführten Ausschläge) Ausschläge) Einstellungen sind empfohlene Starteinstellungen für erfahrene Piloten. Stellen Sie nach den ersten Querruder 10mm Flügen den Sender nach Ihren persönlichen... -
Page 23: Tipps Zum Fliegen Und Reparieren
All manuals and user guides at all-guides.com Tipps zum Fliegen und Reparieren Bitte beachten Sie vor der Auswahl des HINWEIS: Sollte ein Crash bevorstehen reduzieren Fluggeländes lokale Vorschriften und Gesetze. Sie unverzüglich das Gas und die Gastrimmung auf niedrigste Einstellung. Wir empfehlen das Flugzeug draussen nur bei moderaten Windstärken oder in sehr grossen Hallen Das nicht befolgen könnte einen zusätzlichen... -
Page 24: Checkliste Nach Dem Fliegen
All manuals and user guides at all-guides.com Checkliste nach dem Fliegen 1. Trennen Sie den Flugakku vom Regler 4. Laden Sie den Flugakku wieder auf. (erforderlich aus Sicherheitsgründen und 5. Bewahren Sie den Flugakku separat vom zur Verlängerung der Akkulebensdauer). Flugzeug auf, und überwachen Sie die 2. -
Page 25: Problemlösung
All manuals and user guides at all-guides.com Problemlösung Problem Mögliche Ursache Lösung Flugzeug nimmt kein Gasstick nicht auf Leerlauf oder Bringen Sie den Gasknüppel und Trimmung auf die Gas an, alle anderen Gastrimmung zu hoch unterste Stellung Funktionen arbeiten Gaskanal ist reversiert (umgedreht) Reversieren (drehen) Sie den Gaskanal am Sender einwandfrei Motor ist vom Regler getrennt... -
Page 26: Garantie Und Serviceinformationen
All manuals and user guides at all-guides.com Garantie und Serviceinformationen Warnung die Verwendung oder die Wartung des Produktes oder Ein ferngesteuertes Modell ist kein Spielzeug. Es etwaiger Produktkombinationen, die vom Käufer gewählt- kann, wenn es falsch eingesetzt wird, zu erheblichen werden. -
Page 27: Garantie Und Service Kontakt Informationen
Declaration of conformity (in accordance with ISO/IEC 17050-1) No. HH2013070301 Horizon Hobby GmbH Christian-Junge-Straße1 D-25337 Elmshorn erklärt das Produkt: P-51D Mustang 280 (EFL6150) declares the product: P-51D Mustang 280 (EFL6150) Geräteklasse: equipment class im Einklang mit den Anforderungen der unten aufgeführten Bestimmungen nach den Bestimmungen des FTEG (Artikel 3 der R&TTE), und europäischen EMV Richtlinie 2004/108/EG:... -
Page 28: Précautions Et Avertissements Liés À La Sécurité
All manuals and user guides at all-guides.com REMARQUE La totalité des instructions, garanties et autres documents est sujette à modifi cation à la seule discrétion d’Horizon Hobby, Inc. Pour obtenir la documentation à jour, rendez-vous sur le site www.horizonhobby.com et cliquez sur l’onglet de support de ce produit. Signifi... -
Page 29: Caractéristiques
All manuals and user guides at all-guides.com ous vous remercions pour l’achat de ce nouveau modèle de la gamme E-fl ite. L’E-fl ite P-51D Mustang 280 BNF Basic est dans la continuité des warbirds E-fl ite de catégorie 280-300. Equipé de la motorisation du Edge 540QQ qui a fait ses preuves, ce Mustang atteint un niveau de performances jamais vu sur des warbirds de cette dimension. -
Page 30: Charge De La Batterie
All manuals and user guides at all-guides.com Charge de la batterie Choisissez un chargeur conçu pour charger et équilibrer les batteries Li-Po 3S. Nous vous recommandons le chargeur Celectra AC/DC 80W. Référez-vous au manuel de votre chargeur pour les instructions relatives à la charge. Avertissements relatifs à... -
Page 31: Installation De L'aile
All manuals and user guides at all-guides.com Installation de l’aile 1. Retirez la verrière en la soulevant par l’arrière, puis en la désengageant des plots de centrage du fuselage. 2. Retournez le modèle de façon à avoir le dessous face à vous. 3. -
Page 32: Affectation De L'émetteur Au Récepteur
All manuals and user guides at all-guides.com Affectation de l’émetteur au récepteur L’affectation est le processus qui programme le récepteur pour qu’il reconnaisse le code (appelé ATTENTION : Si vous utilisez un émetteur GUID- Globally Unique Identifi er) d’un émetteur Futaba avec un module Spektrum DSM, il vous spécifi... -
Page 33: Installation De La Batterie
All manuals and user guides at all-guides.com Installation de la batterie 1. Retirez la verrière 2. Installez la batterie (A) dans la cavité située à l’avant du fuselage. Référez-vous aux instructions relatives au centre de gravité pour positionner la batterie. 3. -
Page 34: Test De Contrôle De La Direction
All manuals and user guides at all-guides.com Test de contrôle de la direction Affectez votre émetteur à votre avion avant de procéder à ces tests. Actionnez les commandes de l’émetteur pour vous assurer que les gouvernes de l’avion bougent correctement. Pendant les tests, maintenez les gaz en position basse. -
Page 35: Double-Débattements Et Expos
All manuals and user guides at all-guides.com Double-débattements et expos Grands Petits Nous vous recommandons d’utiliser une radio débattements débattements DSM possédant les double débattements et les expos. Les valeurs suivantes sont recommandées Ailerons 10mm pour les premiers vols des pilotes de niveau Profondeur 9mm intermédiaire. -
Page 36: Conseils De Vol Et Réparations
All manuals and user guides at all-guides.com Conseils de vol et réparations Consultez les réglementations locales avant de REMARQUE : Si un crash est imminent, baissez choisir un lieu pour faire voler votre avion. totalement le manche et le trim des gaz. Si vous n’effectuez pas cela, vous risquez d’augmenter Nous vous recommandons de ne pas faire voler les dégâts causés à... -
Page 37: Maintenance De La Motorisation
All manuals and user guides at all-guides.com Maintenance de la motorisation Démontage ATTENTION : Toujours débrancher la batterie avant de manipuler ou de régler le moteur ou l’hélice. Un non-respect de cette consigne vous expose à un risque de blessure corporelle. L’hélice 1. -
Page 38: Guide De Dépannage
All manuals and user guides at all-guides.com Guide de dépannage Problème Cause possible Solution L’avion ne La manette des gaz et/ou le trim des gaz sont Réinitialisez les commandes en plaçant la manette répond pas à trop élevés des gaz et le trim des gaz à leur position la plus la commande basse des gaz... -
Page 39: Garantie Et Réparations
All manuals and user guides at all-guides.com Problème Cause possible Solution Commandes Les réglages de l’émetteur sont inversés Effectuez les essais de direction des commandes et inversées réglez les commandes au niveau de l’émetteur en fonction des résultats Le moteur/ La sécurité... -
Page 40: Coordonnées De Garantie Et De Service
(conformément à la norme ISO/IEC 17050-1) des D3E pour les utilisateurs No. HH2013070301 résidant dans l’Union européenne Produit(s): P-51D Mustang 280 Numéro d’article(s): EFL6150 Ce produit ne doit pas être éliminé Catégorie d’équipement: avec d’autres déchets. Il relève de la L’objet de la déclaration décrit ci-dessus est en... - Page 41 All manuals and user guides at all-guides.com AVVISO Istruzioni, garanzie e tutti gli altri documenti accessori sono soggetti a modifi che a totale discrezione di Horizon Hobby, Inc. Per avere la documentazione aggiornata sul prodotto, visitare il sito Web www. horizonhobby.com e fare clic sulla scheda “support” per questo prodotto. Signifi...
-
Page 42: Contenuto Della Scatola
All manuals and user guides at all-guides.com razie per aver acquistato questo ultimo arrivo nella linea E-fl ite. Questo P-51D Mustang 280 BNF Basic E-fl ite ® è di casa nella linea dei caccia con le dimensioni 280-300. Unito al collaudato sistema di propulsione dell’Edge 540QQ, questo Mustang potrà... -
Page 43: Carica Della Batteria
All manuals and user guides at all-guides.com Carica della batteria Scegliere un caricatore adatto per bilanciare la carica delle batterie LiPo 3S. Noi consigliamo il Celectra 80W AC/DC adatto per caricare vari tipi di batterie. Per le istruzioni specifi che si faccia riferimento alle istruzioni del caricatore. -
Page 44: Installazione Dell'ala
All manuals and user guides at all-guides.com Installazione dell’ala 1. Togliere la capottina tirandola verso l’alto e poi all’indietro per sganciare le sue guide dalla fusoliera. 2. Girare il modello con la sua parte inferiore rivolta verso l’alto. 3. Far passare il fi lo del servo (A) attraverso il foro sotto alla fusoliera. -
Page 45: Connettere (Binding) Il Trasmettitore Con Il Ricevitore
All manuals and user guides at all-guides.com Connettere (binding) il trasmettitore con il ricevitore Il binding è il processo di programmazione del ricevitore dell’unità di controllo per il riconoscimento ATTENZIONE: Quando si utilizza un del codice GUID (Globally Unique Identifi er) di trasmettitore Futaba con un modulo Spektrum DSM, una particolare trasmittente. -
Page 46: Installazione Della Batteria
All manuals and user guides at all-guides.com Installazione della batteria 1. Togliere la capottina 2. Installare la batteria (A) nella sua sede verso la parte anteriore della fusoliera. Per posizionare correttamente la batteria si faccia riferimento alle istruzioni riguardanti la posizione del baricentro. 3. -
Page 47: Controllo Dei Comandi
All manuals and user guides at all-guides.com Controllo dei comandi Bisogna effettuare il binding dell’aereo e del trasmettitore prima di eseguire questi test. Muovere i comandi sul trasmettitore per assicurare che le superfi ci di controllo dell’aereo si muovano correttamente e nella giusta direzione. -
Page 48: Riduttori Di Corsa Ed Esponenziali
All manuals and user guides at all-guides.com Riduttori di corsa ed esponenziali Corsa max Corsa min Si raccomanda di usare un radiocomando DSM con i riduttori di corsa lineari ed esponenziali. Alettoni 10mm Le impostazioni indicate sono consigliate ai piloti di media esperienza per iniziare. -
Page 49: Consigli Per Il Volo E Riparazioni
All manuals and user guides at all-guides.com Consigli per il volo e riparazioni Consultare le leggi locali e le ordinanze prima di AVVISO: se fosse imminente un impatto violento scegliere un posto dove far volare questo aereo. con il suolo, ridurre completamente il motore. In caso contrario si avrebbero ulteriori danni alla Noi raccomandiamo di far volare questo modello struttura e anche al motore con il suo regolatore. -
Page 50: Manutenzione Del Gruppo Propulsivo
All manuals and user guides at all-guides.com Manutenzione del gruppo propulsivo Smontaggio ATTENZIONE: scollegare sempre la batteria prima di maneggiare o regolare l’elica o il motore. In caso contrario ci si potrebbe ferire. Elica 1. Togliere le 2 viti (A) dall’ogiva (B). Staccare con attenzione l’ogiva dal suo fondello (C). -
Page 51: Guida Alla Soluzione Dei Problemi
All manuals and user guides at all-guides.com Guida alla soluzione dei problemi Problema Causa possibile Soluzione L’aereo non Lo stick motore e/o il suo trim non sono posizionati Resettare i comandi con stick e trim motore risponde al in basso completamente in basso comando Il canale del motore è... -
Page 52: Garanzia
All manuals and user guides at all-guides.com Garanzia Periodo di garanzia Indicazioni di sicurezza La garanzia esclusiva - Horizon Hobby, Inc., (Horizon) Questo è un prodotto sofi sticato di hobbistica e non è un garantisce che i prodotti acquistati (il “Prodotto”) sono giocattolo. -
Page 53: Informazioni Per I Contatti
Istruzioni per lo smaltimento di (in conformità con ISO/IEC 17050-1) WEEE da parte di utenti dell’Unione No. HH2013070301 Europea Prodotto(i): P-51D Mustang 280 Numero(i) articolo: EFL6150 Non smaltire questo prodotto assieme Classe dei dispositivi: ai rifi uti domestici. È responsabilità... -
Page 54: Pièces De Rechange
E-fl ite P-51D Mus- Fuselage avec dérive : Fusoliera con timone: EFL615001 der: P-51D Mustang tang 280 : Rumpf mit P-51D Mustang 280 P-51D Mustang 280 Ruder Wing: P-51D Mus- E-fl ite P-51 D Mus- Aile : P-51D Mustang Ala: P-51D Mustang... -
Page 55: Pièces Optionnelles Et Accessoires
All manuals and user guides at all-guides.com – Optional Parts and Accessories – – Optionale Bauteile und Zubehörteile – – Pièces optionnelles et accessoires – – Parti opzionali e accessori – Part # • Nummer Description Beschreibung Description Descrizione Numéro • Codice Charger Lead with E-fl... - Page 56 All manuals and user guides at all-guides.com © 2013 Horizon Hobby, Inc. E-fl ite, Celectra, DSM, DSM2, DSMX, ModelMatch, Bind-N-Fly and the Bind-N-Fly logo are trademarks or registered trademarks of Horizon Hobby, Inc. The Spektrum trademark is used with permission of Bachmann Industries, Inc. Futaba is a registered trademark of Futaba Denshi Kogyo Kabushiki Kaisha Corporation of Japan.