
Manuels Connexes pour FUAVE SV9010


Sommaire des Matières pour FUAVE SV9010
- Page 1 77.772820.01.001_77.772821.01.001_IM.indd 1 77.772820.01.001_77.772821.01.001_IM.indd 1 17-11-2020 12:43:11 17-11-2020 12:43:11...
- Page 2 FUAVE SV9010 Bedieningshandleiding Instruction manual Mode d’emploi Bedienungsanleitung Statiefventilator / Stand fan / Ventilateur sur pied / Standventilator 77.772820.01.001_77.772821.01.001_IM.indd 2 77.772820.01.001_77.772821.01.001_IM.indd 2 17-11-2020 12:43:17 17-11-2020 12:43:17...
-
Page 3: Table Des Matières
INHOUD Veiligheid Onderdelenbeschrijving Voor het eerste gebruik Montage Gebruik Reiniging en onderhoud Milieu 77.772820.01.001_77.772821.01.001_IM.indd 1 77.772820.01.001_77.772821.01.001_IM.indd 1 17-11-2020 12:43:17 17-11-2020 12:43:17... -
Page 4: Veiligheid
VEILIGHEID • Lees alle instructies voordat u uw product in gebruik neemt. Als u de veiligheidsinstructies negeert, kan de fabrikant niet verantwoordelijk worden gehouden voor de mogelijke schade. Bij gebruik van een elektrisch apparaat dient u altijd de gebruikelijke veiligheidsinstructies in acht te nemen, waaronder: •... -
Page 5: Onderdelenbeschrijving
• DIT PRODUCT IS UITSLUITEND BEDOELD VOOR HUISHOUDELIJK GEBRUIK. Gebruik dit apparaat uitsluitend voor het doel waarvoor het is gemaakt. Gebruik het apparaat niet buitenshuis. • Dit apparaat is bedoeld voor huishoudelijk en soortgelijk gebruik, zoals: - Personeelskeukens in winkels, kantoren en andere werkomgevingen. - Door gasten in hotels, motels en andere residentiële omgevingen. -
Page 6: Voor Het Eerste Gebruik
Afstandsbediening Bedieningspaneel 1. Aan/uit-toets 1. Lampje voor nachtmodus 2. Snelheidstoets (+) 2. Lampje voor zwenken 3. Toets voor inschakeltimer 3. Lampje voor inschakel-/ 4. Zwenktoets uitschakeltimer 5. Toets voor nachtmodus 4. Led-displayvenster 6. Snelheidstoets (-) 5. Toets voor aan/uit en 7. -
Page 7: Gebruik
Het blad installeren 6. Plaats het blad goed in de motorschacht. 7. Draai het blad vast met de bladmoer. De voorbehuizing installeren 8. Lijn de haak van de voorbehuizing uit met het gemarkeerde punt op de achterbehuizing. Lijn de voor- en achterbehuizing uit en plaats deze op volgorde van onder naar boven (ga helemaal rond). - Page 8 Knop voor snelheidsaanpassing • Draai aan de knop voor snelheidsaanpassing om de gewenste snelheid te kiezen (1-24). • Draai de aanpassingsknop met de klok mee om de snelheid te verhogen en tegen de klok in om de snelheid te verlagen. De ingestelde snelheid wordt op het led-displayvenster weergegeven.
-
Page 9: Reiniging En Onderhoud
– Slaapmodus: De nachtmodus is vergelijkbaar met de natuurmodus. Er wordt gestart met de geselecteerde beginsnelheid en er wordt automatisch geschakeld tussen niveaus. De ventilator doet een stap van 4 standen in 1 keer per half uur. Zodra het laagste niveau is bereikt, blijft deze modus actief op de ventilator tot het apparaat handmatig of op basis van de nachttimer wordt uitgeschakeld. - Page 10 INDEX Safety Parts description Before the first use Assembly Cleaning and maintenance Environment 77.772820.01.001_77.772821.01.001_IM.indd 7 77.772820.01.001_77.772821.01.001_IM.indd 7 17-11-2020 12:43:18 17-11-2020 12:43:18...
- Page 11 SAFETY • Read all instructions before using your product. By ignoring the safety instructions the manufacturer cannot be held responsible for the damage. When using an electrical appliance, basic safety precautions should always be observed, including the following: • IMPORTANT: This appliance is not intended for use by persons with reduced physical, sensory or mental capabilities, or lack of experience and knowledge, unless they have been given supervision or instruction concerning use of the appliance by a person responsible for their safety.
- Page 12 • This appliance is intended to be used in household and similar applications such as: – Staff kitchen areas in shops, offices and other working environments. – By clients in hotels, motels and other residential type environments. – Bed and breakfast type environments. –...
- Page 13 Remote control Control panel 1. On/Off button 1. (Night) mode lamp 2. Speed button (+) 2. (Swing) lamp 3. On timer button 3. (On/off timer) lamp 4. Swing button 4. Led display window 5. Night mode button 5. On/off & speed adjustment button 6.
- Page 14 Installing the front guard 8. Align the hook of front guard with the marked spot at the top of rear guard. Match front and rear guards, insert in order from top to bottom (all the way around). Engage the clip to fix the front and rear guard as shown in the figure and fix with screw.
- Page 15 • Turn the adjustment in the clockwise direction could strengthen the speed, counter clockwise of direction could moderate the speed. The set speed will be shown on the LED display window. Timer button - On timer setting: • Press the timer button to start the time setting, each push adds / decreases 1 hour with a maximum of 8 hours.
- Page 16 CLEANING AND MAINTENANCE • Clean the appliance with a damp cloth. Never use harsh and abrasive cleaners, scouring pad or steel wool, which damages the device. • Never immerse the electrical device in water or any other liquid. The device is not dishwasher proof. ENVIRONMENT This appliance should not be put into the domestic garbage at the end of its durability,...
- Page 17 TABLE DES MATIÈRES Sécurité Description des pièces Avant la première utilisation Montage Utilisation Nettoyage et entretien Environnement 77.772820.01.001_77.772821.01.001_IM.indd 14 77.772820.01.001_77.772821.01.001_IM.indd 14 17-11-2020 12:43:18 17-11-2020 12:43:18...
- Page 18 SÉCURITÉ • Lisez toutes les instructions avant d’utiliser votre produit. Si vous ignorez les consignes de sécurité, le fabricant ne peut être tenu pour responsable des dommages. Pour l’utilisation d’un appareil électrique, il convient d’observer à tout moment des précautions de base, donc ce qui suit : •...
- Page 19 • CE PRODUIT EST CONÇU POUR UNE UTILISATION DOMESTIQUE ET À L’INTÉRIEUR UNIQUEMENT. N’utilisez cet appareil aucune autre fin que celle à laquelle il est destiné. Ne l’utilisez pas à l’extérieur. • Cet appareil est destiné à une utilisation domestique et aux applications similaires, notamment : –...
- Page 20 Télécommande Panneau de commande 1. Bouton Marche/Arrêt 1. Voyant de mode (Nuit) 2. Bouton de vitesse (+) 2. Voyant (Oscillation) 3. Bouton d’activation de la minuterie 3. Voyant (Minuterie activée/désactivée) 4. Bouton d’oscillation 4. Écran d’affichage LED 5. Bouton de mode Nuit 5.
- Page 21 Installation de la pale 6. Insérez fermement la pale dans l’arbre du moteur. 7. Serrez la pale au moyen de l’écrou. Installation de la protection avant 8. Alignez le crochet de la protection avant sur la marque située en haut de la protection arrière.
- Page 22 Bouton de réglage de la vitesse • Appuyez sur le bouton de réglage de la vitesse pour sélectionner la vitesse souhaitée entre 1 et 24. • Tournez le bouton de réglage dans le sens horaire pour augmenter la vitesse et dans le sens antihoraire pour la diminuer. La vitesse sélectionnée s’affiche sur l’écran d’affichage LED.
- Page 23 – Mode Nuit : le mode Nuit fonctionne un peu comme le mode Nature. Chaque demi-heure, le ventilateur ralentit de 4 vitesses. Une fois le niveau le plus bas atteint, il reste à cette vitesse jusqu’à son extinction manuelle ou automatique (via la minuterie). Bouton de mode Nuit •...
- Page 24 INHALT Sicherheit Teilebeschreibung Vor der ersten Benutzung Montage Benutzung Reinigung und Instandhaltung Umwelt 77.772820.01.001_77.772821.01.001_IM.indd 21 77.772820.01.001_77.772821.01.001_IM.indd 21 17-11-2020 12:43:18 17-11-2020 12:43:18...
- Page 25 SICHERHEIT • Lesen Sie vor Benutzung Ihres Produkts bitte aufmerksam alle Anweisungen. Beim Ignorieren der Sicherheitshinweise kann der Hersteller nicht für Schäden haftbar gemacht werden. Bei Benutzung eines Elektrogeräts sollten immer die folgenden grundlegenden Sicherheitsvorkehrungen getroffen werden: • WICHTIG: Dieses Gerät ist nicht zur Benutzung durch Personen mit eingeschränkten physischen, sensorischen oder mentalen Fähigkeiten oder mit mangelnden Erfahrungen oder Kenntnissen geeignet, außer sie werden beaufsichtigt oder durch eine für ihre Sicherheit verantwortliche Person in...
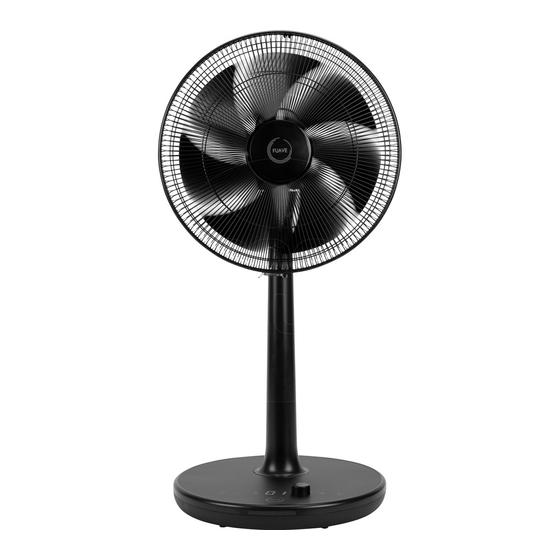
- Page 26 TEILEBESCHREIBUNG Teilebezeichnung 1. Motor 2. Griff 3. Motorwelle 4. Hinteres Gitter 5. Gittermutter 6. Flügel 7. Flügelmutter 8. Vorderes Gitter 9. Clip 10. Ständer 11. Höhenverstellung 12. Sockel 13. Bedienfeld 14. Mutter 15. Netzkabel 16. Fernbedienung 17.Fernbedienungshalter 18.Fernbedienungsempfänger 77.772820.01.001_77.772821.01.001_IM.indd 23 77.772820.01.001_77.772821.01.001_IM.indd 23 17-11-2020 12:43:19 17-11-2020 12:43:19...
- Page 27 Fernbedienung Bedienfeld 1. Taste Ein/Aus 1. LED (Nacht) Modus 2. Taste Geschwindigkeit (+) 2. LED (Schwenken) 3. Taste Timer Ein 3. LED (Timer Ein/Aus) 4. Taste Schwenken 4. LED-Anzeige 5. Taste Nachtmodus 5. Taste Ein/Aus + Geschwindigkeit 6. Taste Geschwindigkeit (-) 6.
- Page 28 Flügelmontage 6. Führen Sie den Lüfterflügel in die Motorwelle ein. 7. Fixieren Sie den Flügel mit der Flügelmutter. Montage des vorderen Gitters 8. Richten Sie den Haken am vorderen Gitter mit dem markierten Punkt am hinteren Gitter aus. Setzen Sie vorderes und hinteres Gitter von oben nach unten (ringsum) zusammen.
- Page 29 Geschwindigkeitseinstellung • Wählen Sie mit der Einstelltaste die gewünschte Geschwindigkeitsstufe von 1 bis 24. • Im Uhrzeigersinn gedreht wird die Geschwindigkeit erhöht, gegen den Uhrzeigersinn gedreht wird sie verringert. Die eingestellte Geschwindigkeit erscheint auf der LED-Anzeige. Timer - Einstellung „Timer Ein“: •...
- Page 30 den Stufen wechselt. Jede halbe Stunde reduziert der Ventilator die Drehzahl um 1 Stufe. Wenn die unterste Geschwindigkeitsstufe erreicht ist, bleibt das Gerät in diesem Modus, bis es durch den Sleep-Timer oder manuell ausgeschaltet wird. Nachtmodus • Wenn Sie diese Taste drücken, wechselt das LED-Licht zum normalen Licht ->...