Publicité
Liens rapides
Publicité

Manuels Connexes pour Alphacool Eisbaer 420


Sommaire des Matières pour Alphacool Eisbaer 420
- Page 1 EISBAER...
- Page 3 Intel Socket 775 /1156 / 1155 / 1150 / 1151 / 1366 / 2011 / 2011-3 / 2066 / 604 / 771 AMD Socket 754 / 939 / AM2 / AM2+ / AM3 / AM3+ / AM4 [ RYZEN ] / FM1 / FM2 / FM2+ / 940 / C32 / G34 Eisbaer 420 Eisbaer 280 Eisbaer 360...
- Page 4 mounting material - Montagematerial - Matériel de montage PWM-adapter version varies depending on the product you purchased screws bracket Intel 2011 / 2011-3 screws Intel Intel 775 / backplate 1156 / 1155 / 1150 / 1151 / 1366 / 604 / 771 screws springs Intel...
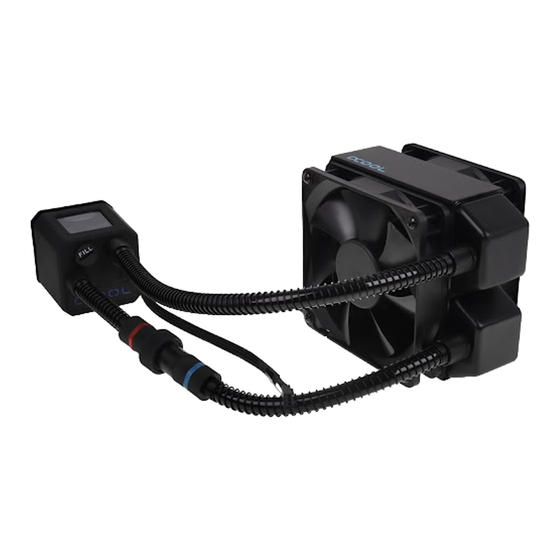
- Page 5 DC-LT 2600 ultra low noise en céramique se trouve directement au-dessus. Une ouverture pour le remplissage se trouve dans la partie supérieure. Ainsi le système peut facilement être nettoyé, rerempli et agrandi. Alphacool DC-LT Power consumption: 2,04W Operating voltage: 7 - 13,5V Flow rate: max.
- Page 6 functionality / technology - Funktionsweise/ Technologie - fonctionnalité / technologie Full-copper radiator The use of copper in all important areas, like the front chamber, the cooling fi ns and also the corresponding channels, raises cooling performance to a whole new level. This has been shown in many tests by independent media.
- Page 7 functionality / technology - Funktionsweise/ Technologie - fonctionnalité / technologie Quick release Fitting Quick release Fitting The hoses are encased in anti-kink springs to prevent bending and the resulting blockage The hoses are encased in anti-kink springs to prevent bending and the resulting blockage of the water fl...
- Page 8 functionality / technology - Funktionsweise/ Technologie - fonctionnalité / technologie Fans The Eiswind fans were developed specifi cally to fi t the requirements of radiators, and can be controlled through a PWM connection. The corres- ponding cable is included so that all fans can be controlled simultaneously over one connection.
- Page 9 installation - Montage - montage Intel 775 / 1156 / 1155 / 1150 / 1151 / 1366 / 604 / 771 10-11 Intel 2011 / 2011-3 / 2066 12-13 754 / 939 / AM2 / AM2+ / AM3 / AM3+ / FM1 / FM2 / FM2+ / 940 / C32 / G34 14-15 AM4 [ RYZEN ] 16-17...
- Page 10 Intel screw mounting - Schraubenmontage - montage de vis 1156 1155 1150 1151 1366 Select corresponding bracket + screws 1. Plug bracket together screw 2. Place compression springs and washers onto screws + attach to bracket with nuts spring ...
- Page 11 Intel CPU mounting - CPU Montage - montage de CPU 3. Spread thermal grease on the CPU (< 0,5mm coating thickness) 3. Spread thermal grease on the CPU (< 0,5mm coating thickness) 4. Mount the cooler – using the included backplate – onto the socket ...
- Page 12 Intel screw mounting - Schraubenmontage - montage de vis 2011 2011-3 2066 Select corresponding bracket + screws 1. Plug bracket together 2. Place compression springs and washers onto screws + attach to screw bracket with nuts spring Passende Halterung + Schrauben wählen 1.
- Page 13 Intel CPU mounting - CPU Montage - montage de CPU 3. Spread thermal grease on the CPU (< 0,5mm coating thickness) 3. Spread thermal grease on the CPU (< 0,5mm coating thickness) 4. Mount the cooler onto the socket Hand-tighten screws crosswise 3.
- Page 14 screw mounting - Schraubenmontage - montage de vis UNC 6-32 AM2+ AM3+ 10,5 FM2+ screw Select corresponding bracket + screws 1. Plug bracket together 2. Place compression springs and washers onto screws + attach to spring bracket with nuts washer ...
- Page 15 CPU mounting - CPU Montage - montage de CPU 3. Spread thermal grease on the CPU (< 0,5mm coating thickness) 3. Spread thermal grease on the CPU (< 0,5mm coating thickness) 4. Mount the cooler – using the backplate (included with the motherboard) – onto the socket ...
- Page 16 screw mounting - Schraubenmontage - montage de vis RYZEN UNC 6-32 10,5 screw Select corresponding bracket + screws 1. Plug bracket together 2. Place compression springs and two different washers onto screws + attach to spring mount with nuts washer ...
- Page 17 CPU mounting - CPU Montage - montage de CPU 3. Spread thermal grease on the CPU (< 0,5mm coating thickness) 3. Spread thermal grease on the CPU (< 0,5mm coating thickness) 4. Mount the cooler – using the backplate (included with the motherboard) – onto the socket ...
- Page 18 radiator mounting - Radiator Montage - montage de radiateur 1. Choose suitable place in your case 1. Passende Öffnung im Gehäuse wählen 1. Sélectionner ouverture appropriée dans le boîtier 2. Mount the radiator with M3 screws 2. Radiator mit M3 Schrauben montieren 2.
- Page 19 connecting fans & pump - Lüfter & Pumpe anschließen - brancher ventilateur & pompe fan adapter pump 1. Connect fans with PWM adapter 1. Connect fans with PWM adapter 1. Lüfter mit PWM Adapter verbinden 1. Lüfter mit PWM Adapter verbinden 1.
- Page 20 expanding with Eiswolf AiO - Erweitern mit Eiswolf AiO - expansion avec Eiswolf AiO 1. Switch off the PC 1. Switch off the PC 2. Loosen the quick release connector (attention, 1-2 drops of water may leak) 3. Insert graphics card with Eiswolf cooler 4.
- Page 21 radiator placement tips - Radiator Platzierungs Tipps - Conseils de radiateur placement...
- Page 23 Imprint: Alphacool International GmbH Marienberger Str. 1 38122 Braunschweig Head Office: +49 (0) 531 28874 - 0 Fax: +49 (0) 531 28874 - 22 E-Mail: info@alphacool.com General Manager: Fabian Noelte WEEE-Reg.-Nr.: DE 54464644 Trade Register: Amtsgericht Braunschweig HRB 202390 VAT.ID.Nr.:...