Table des Matières
Publicité
Les langues disponibles
Les langues disponibles
Liens rapides
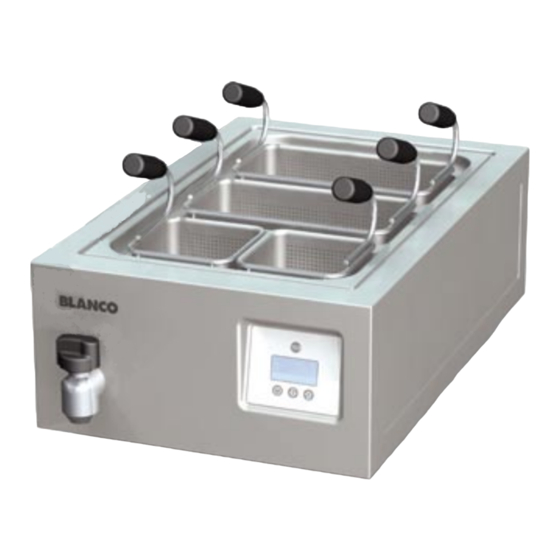
CUOCIPASTA
PASTA COOKER
PASTAKOCHER
BC PC 4200
CUISEUR À PÂTES
COCEDOR DE PASTA
PASTAKOKER
MANUALE D'USO E INSTALLAZIONE
USE AND INSTALLATION MANUAL
BEDIEN- UND INSTALLATIONSHANDBUCH
MANUEL D'UTILISATION ET D'INSTALLATION
MANUAL DE USO E INSTALACIÓN
GEBRUIKS- EN INSTALLATIEHANDLEIDING
IT
Italiano
GB
English
DE
Deutsch
FR
Français
ES
Español
NL
Nederlands
Ed. 1
3142700
09/2008
153053
Publicité
Chapitres
Table des Matières

Manuels Connexes pour Blanco BC PC 4200

Sommaire des Matières pour Blanco BC PC 4200
- Page 1 CUOCIPASTA PASTA COOKER PASTAKOCHER BC PC 4200 CUISEUR À PÂTES COCEDOR DE PASTA PASTAKOKER MANUALE D’USO E INSTALLAZIONE USE AND INSTALLATION MANUAL BEDIEN- UND INSTALLATIONSHANDBUCH MANUEL D’UTILISATION ET D’INSTALLATION MANUAL DE USO E INSTALACIÓN GEBRUIKS- EN INSTALLATIEHANDLEIDING Italiano English Deutsch Français...
- Page 2 L'apparecchio deve essere riparato solo da personale qualificato ed addestrato da BLANCO. In caso di danni contattare il servizio di assistenza BLANCO. DESCRIZIONE DEI DIFETTI Per la descrizione delle anomalie, il servizio di assistenza BLANCO necessita dei seguenti dati riportati sulla targhetta: • Numero di articolo •...
-
Page 3: Table Des Matières
INDICE rif. capitoli pag. 1 INFORMAZIONI GENERALI ..........2 2 INFORMAZIONI TECNICHE ..........3 3 SICUREZZA ............... 5 PARTE 4 USO E FUNZIONAMENTO ..........7 5 MANUTENZIONI .............. 11 6 GUASTI ................12 7 MOVIMENTAZIONE E INSTALLAZIONE ......14 8 REGOLAZIONI ..............17 PARTE 9 SOSTITUZIONE PARTI ........... -
Page 4: Informazioni Generali
INFORMAZIONI GENERALI RACCOMANDAZIONI PER IL LETTORE parte: contiene tutte le informazioni ne- Per rintracciare facilmente gli argomenti specifici di interesse, consultare l'indice analitico posto all'ini- cessarie ai destinatari omogenei, cioè tutti gli zio del manuale. operatori esperti e autorizzati a movimentare, Questo manuale è... -
Page 5: Modalità Di Richiesta Assistenza
E)Numero di matricola M)Frequenza (Hz) F) Grado di protezione P)Potenza dichiarata (kW) G)Paese di destinazione Q)Indicatore tensione collaudo H)Tensione (V) R)Data di costruzione L) Assorbimento (A) S)Simbolo RAEE MODALITÀ DI RICHIESTA ASSISTENZA Per qualsiasi esigenza rivolgersi ad uno dei centri dati riportati sulla targhetta di identificazione ed il autorizzati. -
Page 6: Segnali Di Sicurezza E Informazione
L'illustrazione indica la posizione dei dispositivi. A)Termostato di sicurezza a ripristino automa- tico: blocca l’alimentazione elettrica principale in caso di surriscaldamento della vasca. Importante L'intervento del termostato a ripristino au- tomatico è segnalato da un allarme "ALL" sul display della scheda. B)Sensore termico: è... -
Page 7: Accessori A Richiesta
ACCESSORI A RICHIESTA A richiesta l'apparecchiatura può essere corredata dei seguenti accessori. A)"Kit" cestelli con supporto. B)Base refrigerata. C)Base armadio caldo. D)Base armadio neutro. SICUREZZA NORME PER LA SICUREZZA Il costruttore, in fase di progettazione e costruzione, Utilizzare l'apparecchiatura solo per gli usi ha posto particolare attenzione agli aspetti che pos- previsti dal fabbricante. -
Page 8: Norme Per La Sicurezza Sull'impatto Ambientale
In caso di inattività prolungata, oltre a scollegare tut- Durante il lavaggio dell'apparecchiatura non dirige- te le linee di alimentazione, è necessario effettuare re getti d'acqua. una pulizia accurata di tutte le parti interne ed ester- Non lasciare oggetti o materiale infiammabile all'in- ne dell'apparecchiatura e dell'ambiente circostante, terno del vano o in prossimità... -
Page 9: Uso E Funzionamento
USO E FUNZIONAMENTO RACCOMANDAZIONI PER L’USO Importante L'incidenza degli infortuni derivanti dall'uso Attuare solo gli usi previsti dal costruttore di apparecchiature dipende da molti fattori e non manomettere nessun dispositivo per che non sempre si riescono a prevenire e ottenere prestazioni diverse da quelle pre- controllare. -
Page 10: Accensione E Spegnimento Apparecchiatura
ACCENSIONE E SPEGNIMENTO APPARECCHIATURA Accensione Il display (e6) visualizzerà in rosso la temperatura. 1 - Agire sull'interruttore sezionatore per attivare Spegnimento l'allacciamento alla linea elettrica principale. 1 - Tenere premuto il pulsante (A) per ±6 secondi La icona (e5) si accende. per spegnere l’apparecchiatura. - Page 11 SVUOTAMENTO VASCA Svuotamento Per questa operazione procedereb nel modo indi- cato. 1 - Posizionare un recipiente, di dimensioni ade- guate, in corrispondenza del rubinetto di scari- co (B). 2 - Agire sulla manopola (A) per aprire il rubinetto e svuotare la vasca. 3 - Riportare la manopola nella posizione iniziale a svuotamento concluso.
-
Page 12: Inattività Prolungata Dell'apparecchiatura
INATTIVITÀ PROLUNGATA DELL’APPARECCHIATURA Se l'apparecchiatura rimane inattiva per un lungo 3 - Cospargere con un velo d'olio alimentare le su- tempo, procedere nel modo indicato. perfici in acciaio inox. 1 - Agire sull'interruttore sezionatore dell'apparec- 4 - Eseguire tutte le operazioni di manutenzione. chiatura per disattivare l'allacciamento alla li- 5 - Ricoprire l'apparecchiatura con un involucro e nea elettrica principale. -
Page 13: Manutenzioni
MANUTENZIONI RACCOMANDAZIONI PER LA MANUTENZIONE so a tutti i dispositivi che potrebbero, se atti- Mantenere l'apparecchiatura in condizioni di massi- vati, provocare condizioni pericolo ma efficienza, grazie alle operazioni di manutenzio- inatteso causando danni alla sicurezza e alla ne programmata previste dal costruttore. Se ben salute delle persone. -
Page 14: Pulizia Vasca
PULIZIA VASCA Per questa operazione procedere come di seguito 4 - Risciacquare con acqua potabile ed eseguire lo indicato. svuotamento della vasca (vedi pag. 9) 1 - Spegnere e lasciare raffreddare l’apparecchiatura. 5 - Cospargere la vasca con un prodotto specifico 2 - Agire sull’interruttore sezionatore per disattiva- o una soluzione di acqua e aceto per eliminare re l’alimentazione elettrica. - Page 15 TABELLA SEGNALAZIONE ALLARMI Allarme Causa Rimedio Lasciar raffreddare l’apparecchia- tura e riportare la scheda in stato di ON. Intervento del termostato di sicurezza a ripristino automatico. Importante Se il problema persiste con- tattare il Servizio assistenza. Importante Contattare il servizio assi- La termocoppia TCJ è...
-
Page 16: Movimentazione E Installazione
MOVIMENTAZIONE E INSTALLAZIONE RACCOMANDAZIONI PER LA MOVIMENTAZIONE E INSTALLAZIONE Importante Eseguire la movimentazione e l'installa- Chi è autorizzato ad eseguire queste ope- zione nel rispetto delle informazioni forni- razioni dovrà, se necessario, organizzare te dal costruttore e riportate direttamente un "piano di sicurezza" per salvaguardare sull'imballo, sull'apparecchiatura e nelle l'incolumità... -
Page 17: Installazione Apparecchiatura
INSTALLAZIONE APPARECCHIATURA Tutte le fasi di installazione devono essere conside- rate sin dalla realizzazione del progetto generale. Prima di iniziare tali fasi, oltre alla definizione della zona di installazione, chi è autorizzato ad eseguire queste operazioni dovrà, se necessario, attuare un "piano di sicurezza"... -
Page 18: Allacciamento Elettrico
LIVELLAMENTO Per questa operazione procedere nel modo indicato. 1 - Svitare il dado (A). 2 - Agire sui piedi di appoggio (B) per livellare l'ap- parecchiatura. 3 - Stringere il dado (A). ALLACCIAMENTO ELETTRICO morsettiera (D) , facendolo passare il cavo at- Importante traverso il passacavo (E) dell'apparecchiatura L'allacciamento deve essere effettuato da per-... -
Page 19: Regolazioni
COLLAUDO APPARECCHIATURA 1 - Verificare che la tensione di rete sia conforme a Importante quella dell'apparecchiatura. Prima della messa in servizio, deve essere 2 - Agire sull'interruttore sezionatore automatico eseguito il collaudo dell'impianto, al fine di per verificare il collegamento elettrico. valutare le condizioni operative di ogni sin- 3 - Verificare il corretto funzionamento dei disposi- golo componente ed individuare le eventuali... -
Page 20: General Information
REPAIRS AUTHORIZED PERSONS The unit may only be repaired by professionals trained by BLANCO. Notify BLANCO Service in case of da- mage. DESCRIPTION OF PROBLEM In order to describe the problem BLANCO Service requires the following information from the rating plate: •... - Page 21 CONTENTS ref. chapters page 1 GENERAL INFORMATION ..........2 2 TECHNICAL INFORMATION ..........3 3 SAFETY ................5 PART 4 USE AND OPERATION ............. 7 5 SERVICING ..............11 6 FAULT ................12 7 HANDLING AND INSTALLATION ........14 8 ADJUSTMENTS ............... 17 PART 9 REPLACING PARTS ............
-
Page 22: Information For The Reader
GENERAL INFORMATION INFORMATION FOR THE READER To find the specific topics of interest to you quickly, pliance. refer to the index at the start of the manual. While users are instructed to refer to the 1st part on- This manual is subdivided into two parts. ly, the 2nd part is addressed to skilled operators. -
Page 23: Procedure For Requesting Service
E)Serial number M)Frequency (Hz) F) Protection rating P)Rated power (kW) G)Country of destination Q)Test voltage indicator H)Voltage (V) R)Date of construction L) Absorption (A) S)WEEE Symbol PROCEDURE FOR REQUESTING SERVICE Contact one of the authorised service centres for all When requesting service, state the data provide on requirements. -
Page 24: Important
The illustration shows the position of the devices. A)Safety thermostat with automatic reset: cuts off the mains electricity supply in case of plate overheating. Important Tripping of the thermostat with automatic reset is indicated by an "ALL" alarm on the circuit board display. -
Page 25: Optional Accessories
OPTIONAL ACCESSORIES The appliance can be equipped with the following accessories on request. A)Set of baskets with support. B) Refrigerated counter C) Hot cupboard counter D) Ambient cupboard counter SAFETY SAFETY REGULATIONS During design and construction, the constructor has Use the appliance only for the functions in- paid special attention to factors which may cause tended by the manufacturer. - Page 26 and the gas supply lines disconnected. During routine use of the appliance, the Operator's constant presence is required. In case of lengthy downtimes, as well as discon- necting all supply lines it is also essential to clean When washing the appliance do not point pressu- all internal and external parts of the appliance and rized water jets at it.
-
Page 27: Use And Operation
USE AND OPERATION RECOMMENDATIONS FOR USE Important The rate of accidents deriving from the use and the main functions. Use only as intend- of appliances depends on many factors ed by the constructor and never tamper which cannot always be foreseen and con- with any device to obtain performance lev- trolled. -
Page 28: Switching The Appliance On And Off
SWITCHING THE APPLIANCE ON AND OFF Switching on Switching off 1 - Hold button (A) down for ±6 seconds to switch 1 - Turn off the appliance's circuit breaker to disconnect it from the electrical mains. the appliance off. Icon (e5) illuminates. Icon (e5) illuminates. -
Page 29: Resetting The Appliance
EMPTYING THE WELL Emptying To carry out this operation, proceed as follows. 1 - Place a container of suitable size underneath the drain tap (B). 2 - Use the knob (A) to turn on the tap and empty the well. 3 - Return the knob to its original position once the well has been drained RESETTING THE APPLIANCE... -
Page 30: Lengthy Downtimes Of Appliance
LENGTHY DOWNTIMES OF APPLIANCE If the appliance is to be out of use for a lengthy pe- 3 - Spread a film of edible oil over the stainless riod, proceed as follows. steel surfaces. 1 - Cut off the mains electricity supply using the ap- 4 - Carry out all the servicing procedures. -
Page 31: Servicing
SERVICING RECOMMENDATIONS FOR SERVICING At the end of each session of use and whenever Keep the appliance at peak efficiency by carrying out the scheduled servicing procedures recom- necessary, clean: mended by the constructor. Proper servicing will al- – The well (see page 11) low the best performance, a longer working life and –... -
Page 32: Fault
CLEANING THE WELL To carry out this operation, proceed as follows. 4 - Rinse the well with drinking water and drain 1 - Switch the appliance off and leave it to cool. (see page 9). 2 - Turn off the circuit-breaker to disconnect it from 5 - Apply a specific product or a water and vinegar the electrical mains. - Page 33 TABLE OF ALARM INDICATIONS Alarm Cause Remedy Allow the appliance to cool and return it to ON status. Safety thermostat with automatic Important reset tripped. If the problem persists, con- tact the After Sales Service. Important Contact the after-sales ser- Thermocouple TCJ has failed or is vice.
-
Page 34: Recommendations For Handling And Installation
HANDLING AND INSTALLATION RECOMMENDATIONS FOR HANDLING AND INSTALLATION Important When handling and installing the appliance use. If necessary, the person authorised to comply with the information provided by carry out these operations must organise a the constructor directly on the packaging, "safety plan"... -
Page 35: Installation Of The Appliance
INSTALLATION OF THE APPLIANCE All installation stages must be considered right from production of the general layout. Before starting these stages, as well as deciding the place of instal- lation, if necessary, the person authorised to carry out these operations must organise a "safety plan" to protect the people directly involved, and he must also ensure strict compliance with all legal require- ments, especially those relating to mobile work-... -
Page 36: Electrical Connection
LEVELLING To carry out this operation, proceed as follows. 1 - Unscrew the nut (A). 2 - Adjust the feet (B) to level the appliance. 3 - Tighten the nut (A). ELECTRICAL CONNECTION 2 - Undo the screws (B) of the terminal board sup- Important port (C). -
Page 37: Adjustments
TESTING OF THE APPLIANCE that of the appliance. Important 2 - Operate the appliance's circuit-breaker to Before it is put into service, the system check the electrical connection. must be tested to check the operating con- 3 - Check that the safety device is operating cor- ditions of every single component and rectly. - Page 38 Die Gewährleistung wird mit dem Kaufbeleg, der das Kaufdatum trägt, geltend gemacht. Des Weiteren gel- ten unsere Geschäfts- und Lieferbedingungen. REPARATUR BEFUGTE PERSONEN Das Gerät darf ausschließlich durch von -BLANCO geschultes Fachpersonal repariert werden. Im Schadensfall ist der BLANCO-Service zu verständigen. DEFEKT-BESCHREIBUNG Der BLANCO-Service benötigt zur Störungsbeschreibung folgende Angaben auf dem Typenschild: •...
- Page 39 INHALTSVERZEICHNIS Ref. Kapitel Seite 1 ALLGEMEINES ..............2 2 TECHNISCHE INFORMATIONEN ........3 3 SICHERHEIT ..............5 1. TEIL 4 GEBRAUCH UND BETRIEB ..........7 5 WARTUNG ............... 11 6 DEFEKTE ................. 12 7 HANDHABUNG UND INSTALLATION ......14 8 EINSTELLUNGEN ............17 2.
-
Page 40: Allgemeines
ALLGEMEINES INFORMATIONEN FÜR DEN LESER 2. Teil: Diese Informationen wenden sich an Konsultieren Sie das Sachregister, das am Anfang des Handbuchs zu finden ist, um leichter unter be- eine bestimmte Zielgruppe. Sie sind für erfahre- stimmten Themen von besonderem Interesse ne Bediener bestimmt, die für Handhabung, nachschlagen zu können. -
Page 41: Kundendienst Anfordern
E)Seriennummer M)Frequenz (Hz) F) Schutzart P)Installierte Leistung (Kw) G)Bestimmungsland Q)Angabe der Prüfspannung H)Spannung (V) R)Baujahr L) Stromaufnahme (A) S)WEEE-Symbol KUNDENDIENST ANFORDERN Wenden Sie sich für sämtliche anfallenden Be- dienstzentrum nicht nur den aufgetretenen Scha- darfsfälle an eines der autorisierten Kundenzen- den, sondern auch die Daten an, die auf dem tren. -
Page 42: Sicherheitshinweise Und Informationen
A)Sicherheitsthermostat automatischer Rücksetzung: Er unterbricht die Stromversor- gung der Bratplatte bei Überhitzung. Wichtig Die Auslösung des Thermostaten, der auto- matisch zurückgesetzt wird, wird durch die Alarmmeldung „ALL" auf dem Display der Platine signalisiert . B)Ein Wärmesensor, der den mittleren Heizwiderstand des Geräts bei Überhitzung der Komponenten zeit- weilig ausschaltet. -
Page 43: Optionales Zubehör
OPTIONALES ZUBEHÖR Auf Wunsch kann das Gerät mit folgenden Zube- hörteilen ausgestattet werden. A) "Satz" Körbe mit Halterung. B)Unterteil Kühltisch C)Unterteil Wärmeschrank D)Unterteil neutraler Schrank SICHERHEIT SICHERHEITSVORSCHRIFTEN Der Hersteller hat bei Entwicklung und Fertigung Auch nach angemessener Aufarbeitung der dieses Produkts besondere Sorgfalt auf Aspekte Dokumentation kann es bei der ersten Verwendung verwendet, die eine Gefahr für die Sicherheit und erforderlich sein, einige Probemanöver zu simulie-... - Page 44 schädliche Stoffe enthalten, sind absolut zu Umfeldes erforderlich, wobei die Hinweise des Her- vermeiden. Die betreffenden Reinigungsarbeiten stellers und die einschlägigen geltenden Gesetzes- müssen jedes Mal dann ausgeführt werden, wenn vorschriften zu beachten sind. ein nachweislicher Bedarf festgestellt wird und Beim täglichen Gebrauch des Geräts ist die ständi- nach Abschluss jeder Verwendung.
-
Page 45: Gebrauch Und Betrieb
GEBRAUCH UND BETRIEB EMPFEHLUNGEN FÜR DEN GEBRAUCH Wichtig Das Auftreten von Unfällen bei der Verwendung chen. Beschränken Sie sich auf die vom Her- von Geräten hängt von vielen Faktoren ab, die steller vorgesehenen Verwendungszwecke, nicht immer zu vermeiden und zu steuern sind. ohne Änderungen an den Vorrichtungen vorzu- Einige Unfälle können von unvorhersehbaren nehmen, um nicht vorgesehene Leistungen... -
Page 46: Ein- Und Ausschalten Des Geräts
EIN- UND AUSSCHALTEN DES GERÄTS Einschalten Ausschalten 1 - Das Gerät mit seinem Trennschalter mit dem 1 - Die Taste (A) für ungefähr 6 Sekunden ge- Hauptstromnetz verbinden. drückt halten, um das Gerät auszuschalten. Das Symbol (e5) leuchtet auf. Das Symbol (e5) leuchtet auf. 2 - Die Taste (A) drücken, um die Platine in den Wichtig Bereitschaftszustand zu schalten. -
Page 47: Entleeren Des Beckens
ENTLEEREN DES BECKENS Entleeren Für diesen Vorgang in der angegebenen Weise verfahren. 1 - Einen Behälter von passender Größe unter dem Ablasshahn (B) positionieren. 2 - Mit dem Schalter (A) den Hahn öffnen und das Becken entleeren. 3 - Den Schalter nach erfolgter Entleerung in die Ausgangsposition bringen. -
Page 48: Längerer Stillstand Des Geräts
LÄNGERER STILLSTAND DES GERÄTS Verfahren Sie folgendermaßen, falls das Gerät län- 3 - Tragen Sie eine hauchdünne Schicht Lebens- gere Zeit nicht eingesetzt werden soll: mittelöl auf die Edelstahlflächen auf. 1 - Das Gerät mit seinem Trennschalter vom 4 - Führen Sie sämtliche Wartungsarbeiten aus. Hauptstromnetz trennen. -
Page 49: Empfehlungen Für Die Wartung
WARTUNG EMPFEHLUNGEN FÜR DIE WARTUNG Folgende Elemente sind nach jedem Einsatz und Sorgen Sie dafür, dass das Gerät im Zustand maxima- ler Leistungsfähigkeit bleibt, indem Sie die vom Herstel- bei Bedarf zu reinigen: ler vorgesehenen planmäßigen Wartungsarbeiten – Das Becken (siehe S. 11) ausführen. -
Page 50: Reinigung Des Beckens
REINIGUNG DES BECKENS Für diesen Vorgang in der angegebenen Weise 4 - Mit Trinkwasser nachspülen und das Becken verfahren. leeren (siehe S. 9). 1 - Das Gerät ausschalten und abkühlen lassen. 5 - Dann ein spezifisches Mittel oder eine Wasser- 2 - Mit dem Trennschalter die Stromzufuhr unter- Essig-Lösung eingießen, um die Reinigungs- brechen. - Page 51 TABELLE DER FEHLERMELDUNGEN Fehlermeldung Ursache Lösung Das Gerät abkühlen lassen und erneut auf EIN stellen. Auslösung des Wichtig Sicherheitsthermostats mit Wenn sich das Problem so automatischer Rücksetzung. nicht beheben lässt, den Kundendienst verständigen. Wichtig Den Kundendienst verstän- Das Thermoelement TCJ ist digen.
-
Page 52: Handhabung Und Installation
HANDHABUNG UND INSTALLATION EMPFEHLUNGEN FÜR DIE INSTALLATION UND HANDHABUNG Wichtig Beachten Sie die Hinweise des Herstellers, nen autorisierte Person wird bei Bedarf die direkt auf der Verpackung, auf dem Ge- einen „Sicherheitsplan" aufstellen müssen, rät selbst oder in der Gebrauchsanweisung um die Unversehrtheit der direkt an dem zu finden sind, wenn Sie das Gerät handha- Vorgang beteiligten Personen zu gewähr-... -
Page 53: Installation Des Geräts
INSTALLATION DES GERÄTS Es müssen sämtliche Phasen der Installation, schon von der Umsetzung des allgemeinen Projekts an, berücksichtigt werden. Die für diese Operationen au- torisierte Person wird vor Einleitung dieser Phasen den Installationsstandort bestimmen und bei Bedarf einen „Sicherheitsplan" aufstellen, um die Unver- sehrtheit der direkt am Vorgang beteiligten Personen zu gewährleisten und die gesetzlichen Bestimmun- gen zu befolgen. - Page 54 NIVELLIEREN Für diesen Vorgang in der angegebenen Weise verfahren. 1 - Die Mutter (A) abschrauben. 2 - Das Gerät mit den Stützfüßen (B) waagrecht ausrichten. 3 - Die Mutter (A) festziehen. STROMANSCHLUSS 2 - Die Schrauben (B) des Klemmenleistenhalters Wichtig (C) ausschrauben.
-
Page 55: Einstellungen
TESTLAUF ZUR ABNAHME DES GERÄTS 1 - Sicherstellen, dass die Netzspannung der Wichtig Nennspannung des Geräts entspricht. Vor der Inbetriebnahme muss ein Testlauf 2 - Den Trennschalter betätigen , um den Strom- der Anlage durchgeführt werden, um den anschluss zu überprüfen. Betriebszustand jeder einzelnen Kompo- 3 - Eine Funktionsprüfung der Sicherheitseinrich- nente zu überprüfen und eventuelle An-... -
Page 56: Généralités
L'appareil peut uniquement être réparé par du personnel spécialisé formé par BLANCO. En cas de dom- mage, il faut avertir le service après-vente de BLANCO. DESCRIPTION DE DÉFAUT En plus de la description du défaut, le service après-vente BLANCO a besoin des indications suivantes se trouvant sur la plaque signalétique: • Référence •... -
Page 57: Index Analytique
INDEX réf. chapitres page 1 INFORMATIONS GÉNÉRALES ......... 2 2 INFORMATIONS TECHNIQUES ........3 3 SÉCURITÉ ................. 5 PARTIE 4 UTILISATION ET FONCTIONNEMENT ......7 5 ENTRETIEN ..............11 6 PANNES ................12 7 MANUTENTION ET INSTALLATION ....... 14 8 RÉGLAGES ..............17 PARTIE 9 REMPLACEMENT DE PIÈCES ........ -
Page 58: Informations Générales
INFORMATIONS GÉNÉRALES INFORMATIONS POUR LE LECTEUR 2e partie: elle contient toutes les informa- Pour retrouver facilement les sujets qui vous inté- ressent, consulter l’index analytique au début du tions nécessaires aux destinataires homogè- manuel. nes, c’est-à-dire tous les opérateurs experts Ce manuel est divisé... -
Page 59: Demande D'assistance
E)Numéro de série M)Fréquence (Hz) F) Degré de protection P)Puissance déclarée (kW) G)Pays de destination Q)Indicateur de tension d'essai H)Tension (V) R)Date de fabrication L) Absorption (A) S)Symbole DEEE DEMANDE D'ASSISTANCE Pour toute exigence, s’adresser à l’un des centres quer les données reportées sur la plaque d’identifi- autorisés. -
Page 60: Signaux De Sécurité Et Information
A)Thermostat de sécurité à réarmement auto- matique: il bloque l'alimentation électrique prin- cipale dans le cas de surchauffe de la plaque. Important L'intervention du thermostat à réarmement automatique est signalée par une alarme " ALL " sur l'afficheur de la carte. B)Capteur thermique : c 'est un capteur de chaleur qui interrompt le fonctionnement de la résistance centrale de l'appareil en cas de surchauffe. -
Page 61: Accessoires Sur Demande
ACCESSOIRES SUR DEMANDE Sur demande l'appareil peut être équipé des acces- soires suivants. A) " Kit " paniers avec support. B)Base réfrigérée. C)Base armoire chaude. D)Base armoire neutre. SÉCURITÉ NORMES DE SÉCURITÉ Le fabricant, lors de la conception et de la fabrication, a Utiliser l’appareil uniquement pour les usages fait très attention aux aspects qui peuvent provoquer prévus par le fabricant. - Page 62 En cas d’inutilisation prolongée, non seulement dé- dant l’utilisation quotidienne de l’appareil. sactiver toutes les lignes d’alimentation, mais effec- Pendant le lavage de l'appareil, ne pas diriger de tuer aussi un nettoyage soigné de l’intérieur et de jets d'eau. l’extérieur de l’appareil et de ce qui l’entoure, selon les indications fournies par le fabricant et par les Ne pas laisser d’objets ou de matériau inflammable lois en vigueur en la matière.
-
Page 63: Utilisation Et Fonctionnement
UTILISATION ET FONCTIONNEMENT RECOMMANDATIONS POUR L'UTILISATION Important L’incidence des accidents dérivant de l’uti- les. Utiliser seulement comme prévu par le lisation d’appareils dépend de beaucoup de fabricant et ne modifier aucun dispositif facteurs que l’on ne peut pas toujours pré- pour obtenir des performances différentes venir et contrôler. -
Page 64: Allumage Et Extinction De L'appareil
ALLUMAGE ET EXTINCTION DE L’APPAREIL Allumage Extinction 1 - Tenir pressé le bouton (A) pendant ±6 secon- 1 - Agir sur l'interrupteur sectionneur pour activer le branchement à la ligne électrique principale. des pour éteindre l'appareil. L'icône (e5) s'allume. L'icône (e5) s'allume. 2 - Appuyer sur le bouton (A) pour porter la carte Important en Stand-by. -
Page 65: Vidange De La Cuve
VIDANGE DE LA CUVE Vidange Pour cette opération, procéder comme indiqué. 1 - Placer un récipient, de dimensions appro- priées, sous le robinet de vidange (B). 2 - Agir sur la manette (A) pour ouvrir le robinet et vider la cuve. 3 - Reporter la manette à... -
Page 66: Inutilisation Prolongée De L'appareil
INUTILISATION PROLONGÉE DE L’APPAREIL Si l'appareil reste inactif pendant longtemps, procé- 3 - Étaler un voile d’huile alimentaire sur les surfa- der comme suit. ces en acier inox. 1 - Agir sur l'interrupteur sectionneur de l’appareil 4 - Exécuter toutes les opérations d’entretien. pour désactiver le branchement à... -
Page 67: Recommandations Pour L'entretien
ENTRETIEN RECOMMANDATIONS POUR L’ENTRETIEN Après chaque utilisation et lorsque cela s’avère Maintenir l'appareil en parfait état de fonctionne- ment en effectuant les opérations d'entretien pro- nécessaire, nettoyer: grammé prévues par le fabricant. Un bon entretien – La cuve de cuisson (voir p. 11) permettra d'obtenir les meilleures performances, –... -
Page 68: Nettoyage De La Cuve
NETTOYAGE DE LA CUVE Pour cette opération, procéder comme suit. 4 - Rincer avec de l’eau potable et vider la cuve 1 - Eteindre et laisser refroidir l’appareil. (voir page 9). 2 - Agir sur l’interrupteur sectionneur pour désacti- 5 - Verser dans la cuve un produit spécifique ou ver l’alimentation électrique. - Page 69 TABLEAU SIGNALISATIONS DES ALARMES Alarme Cause Solution Laisser refroidir l'appareil et le ral- lumer. Intervention du thermostat de sé- Important curité à réarmement automatique. Si le problème persiste, se mettre en contact avec le Service Assistance. Important Se mettre en contact avec le Le thermocouple TCJ est en ava- Service Assistance.
-
Page 70: Manutention Et Installation
MANUTENTION ET INSTALLATION RECOMMANDATIONS POUR LA MANUTENTION ET L’INSTALLATION Important Effectuer la manutention et l’installation en effectuer ces opérations devra, si nécessai- respectant les informations fournies par le re, organiser un « plan de sécurité » pour fabricant, reportées directement sur l’em- sauvegarder la sécurité... -
Page 71: Mise En Place De L'appareil
MISE EN PLACE DE L’APPAREIL Toutes les phases de mise en place doivent être prises en considération, dès la réalisation du projet général. Avant de commencer ces phases, outre la définition de la zone de mise en place, celui qui est autorisé... -
Page 72: Mise À Niveau
MISE À NIVEAU Pour cette opération, procéder comme suit. 1 - Dévisser l'écrou (A). 2 - Agir sur les pieds d'appui (B) pour mettre de ni- veau l'appareil. 3 - Serrer l'écrou (A). BRANCHEMENT ÉLECTRIQUE nier (D) en faisant passer le câble dans le collier Important (E) de l'appareil comme indiqué... -
Page 73: Réglages
ESSAI DE L’APPAREIL 2 - Vérifier que la tension de réseau corresponde à Important celle de l’appareil. Avant la mise en service, l’essai de l’instal- 3 - Agir sur l’interrupteur sectionneur automatique lation doit être fait pour évaluer les condi- pour vérifier le branchement électrique. - Page 74 CO. En el caso de defecto deberá informar el servicio técnico de BLANCO. DESCRIPCIÓN DE DEFECTOS Comunique al servicio técnico de BLANCO junto con una descripción detallada del defecto, los siguientes datos de la placa identificativa: • Número de artículo •...
- Page 75 ÍNDICE ref. capítulos pág 1 INFORMACIONES DE CARÁCTER GENERAL ....2 2 INFORMACIONES DE CARÁCTER TÉCNICO ....3 3 SEGURIDAD ..............5 PARTE 4 USO Y FUNCIONAMIENTO ..........7 5 MANTENIMIENTO ............11 6 AVERÍAS ................12 7 DESPLAZAMIENTO E INSTALACIÓN ......14 8 REGULACIONES .............
-
Page 76: Informaciones De Carácter General
INFORMACIONES DE CARÁCTER GENERAL INFORMACIONES PREVIAS 2a parte: contiene todas las informaciones Para ubicar fácilmente los temas específicos de in- terés, consúltese el índice analítico que se encuen- necesarias para destinatarios homogéneos, tra al inicio del manual. esto es, todos los operadores expertos y au- Este manual comprende dos partes. -
Page 77: Modalidad Para Requerir Asistencia
E)Número de matrícula M)Frecuencia (Hz) F) Grado de protección P)Potencia declarada (kW) G)País de destino Q)Indicador tensión de prueba H)Tensión (V) R)Fecha de fabricación L) Consumo (A) S)Símbolo RAEE MODALIDAD PARA REQUERIR ASISTENCIA En caso de ser necesario, dirigirse a uno de los los datos reproducidos en la placa de identificación centros autorizados. -
Page 78: Señalizaciones De Seguridad E Información
La ilustración indica la posición de los dispositivos. A)Termostato de seguridad de reinicialización automática: interrumpe la alimentación eléctrica principal en caso de recalentamiento de la plancha. Importante La intervención del termostato de reseteo automático es indicada mediante una alar- ma "ALL" en el display de la tarjeta. B) Sensor térmico: es un sensor de calor que inte- rrumpe el funcionamiento de la resistencia central del aparato en caso de sobretemperatura en los... -
Page 79: Accesorios Bajo Pedido
ACCESORIOS BAJO PEDIDO Bajo pedido, el equipo puede ser suministrado con los accesorios que a continuación se indican. A)"Kit" cestos con soporte. B)Base refrigerada C)Base armario caliente D)Base armario neutro SEGURIDAD NORMAS DE SEGURIDAD Durante las fases de diseño y producción el fabri- do y apagado y sus principales funciones. - Page 80 En caso de períodos prolongados de inactividad, Durante el uso cotidiano del aparato se requiere la además de desconectar todas las líneas de alimen- presencia constante del operador. tación, es necesario limpiar prolijamente todas las Durante el lavado del aparato no dirigir chorros de partes internas y externas del equipo y del ambien- agua.
-
Page 81: Uso Y Funcionamiento
USO Y FUNCIONAMIENTO RECOMENDACIONES DE USO Importante El porcentaje de accidentes derivados del Se deben ejecutar sólo operaciones pro- uso de equipos depende de muchos facto- pias de los usos previstos por el fabricante. res que no siempre se logran prevenir y No alterar los equipos con el fin de obtener controlar. -
Page 82: Encendido Y Apagado Del Aparato
ENCENDIDO Y APAGADO DEL APARATO Encendido Apagado 1 - Mantener presionado el pulsador (A) durante ± 1 - Operar con el interruptor aislador para efectuar la conexión a la línea eléctrica principal. 6 segundos para apagar el aparato. Se enciende el icono (e5). Se enciende el icono (e5). -
Page 83: Vaciado De La Cuba
VACIADO DE LA CUBA Vaciado Para ejecutar esta operación se debe proceder de la manera que se indica. A)Colocar un recipiente de dimensiones adecua- das en correspondencia con el grifo de descarga (B); B)Operar con el mando (A) para abrir el grifo y vaciar la cuba;... -
Page 84: Período Prolongado De Inactividad Del Equipo
PERÍODO PROLONGADO DE INACTIVIDAD DEL EQUIPO En caso de que el equipo deba permanecer inacti- ble una capa delgada de aceite comestible. vo durante un período prolongado de tiempo, se 4 - Efectuar todas las operaciones de manteni- deberán efectuar las siguientes operaciones. miento. -
Page 85: Mantenimiento
MANTENIMIENTO RECOMENDACIONES PARA EFECTUAR EL MANTENIMIENTO Siempre al final del servicio y cada vez que sea Mantener el equipo en condiciones de máximo rendi- miento, con las operaciones de mantenimiento progra- necesario, limpiar: mado previstas por el fabricante. Un mantenimiento –... -
Page 86: Búsqueda De Averías
LIMPIEZA CUBA Para efectuar esta operación, aplicar las siguientes 4 - Enjuague con agua potable y vacíe la cuba instrucciones. (véase pág. 9). 1 - Apagar y dejar enfriar el aparato. 5 - Aplicar en el interior de la cuba un producto es- 2 - Operar con el interruptor aislador para inte- pecífico o una solución de agua y vinagre para rrumpir la alimentación eléctrica. -
Page 87: Tabla De Señalización De Las Alarmas
TABLA DE SEÑALIZACIÓN DE LAS ALARMAS Alarma Causa Remedio Dejar enfriar el aparato y a conti- nuación disponerlo nuevamente en ON. Intervención del termostato de seguridad de restablecimiento Importante automático. Si no se logra resolver el problema dirigirse al Servi- cio de asistencia. -
Page 88: Desplazamiento E Instalación
DESPLAZAMIENTO E INSTALACIÓN RECOMENDACIONES PARA EL DESPLAZAMIENTO Y LA INSTALACIÓN Importante Efectuar el desplazamiento e instalación rizada para efectuar estas operaciones de- respetando las indicaciones proporciona- berá, si fuera necesario, organizar un "plan das por el fabricante, reproducidas directa- de seguridad", a fin de salvaguardar la in- mente sobre el embalaje, en el equipo y en columidad de las personas directamente las instrucciones de uso. -
Page 89: Instalación Del Equipo
INSTALACIÓN DEL EQUIPO Durante la realización del proyecto general, deben ser consideradas todas las fases de la instalación. Antes de comenzar dichas fases, además de esta- blecer la zona de instalación, la persona autorizada a efectuar estas operaciones deberá, si fuera nece- sario, aplicar un "plan de seguridad"... -
Page 90: Conexión Eléctrica
NIVELACIÓN Para efectuar esta operación, aplicar las siguientes instrucciones. 1 - Aflojar la tuerca (A). 2 - Regular los pies de apoyo (B) para nivelar el aparato. 3 - Apretar la tuerca (A). CONEXIÓN ELÉCTRICA 2 - Desenroscar los tornillos (B) del soporte bor- Importante nera (C). -
Page 91: Regulaciones
PRUEBA DE FUNCIONAMIENTO DEL EQUIPO lar la estanqueidad de la conexión. Importante 2 - Verificar que la tensión de red sea aquélla re- querida para el aparato. Antes de la puesta en servicio debe efec- 3 - Accionar el interruptor automático aislador para tuarse la prueba de funcionamiento del sis- controlar la eficiencia de la conexión eléctrica. - Page 92 Het apparaat mag uitsluitend worden gerepareerd door door BLANCO opgeleid technisch personeel. Bij schade moet contact worden opgenomen met de BLANCO-service. DEFECTOMSCHRIJVING De BLANCO-service heeft bij het doorgeven van storingen de volgende gegevens van het typeplaatje no- dig: • Artikelnummer •...
-
Page 93: Alfabetische Inhoudsopgave
INHOUDSOPGAVE ref. hoofdstukken pag. 1 ALGEMENE INFORMATIE ..........2 2 TECHNISCHE INFORMATIE ..........3 3 VEILIGHEID ............... 5 1e DEEL 4 GEBRUIK EN WERKING ........... 7 5 ONDERHOUD ..............11 6 STORINGEN ..............12 7 VERPLAATSING EN INSTALLATIE ........ 14 8 REGELINGEN .............. -
Page 94: Algemene Informatie
ALGEMENE INFORMATIE AANBEVELINGEN VOOR DE LEZER 2e deel: bevat alle noodzakelijke informatie voor Gebruik de alfabetische inhoudsopgave aan het be- de homogene ontvangers, dat wil zeggen alle gin van deze handleiding om snel de specifieke argu- deskundige operators, bevoegd voor het ver- menten waarin u geïnteresseerd bent op te zoeken. -
Page 95: Technische Informatie
D)Isolatieklasse M)Frequentie (Hz) E)Serienummer P)Verklaard vermogen (kW) F) Graad van bescherming Q)Indicator testspanning G)Land van bestemming R)Bouwjaar H)Spanning (V) S)AEEA symbool L) Absorptie (A) WIJZEN VAN VERZOEK OM ASSISTENTIE Voor iedere behoefte wordt u verzocht één van de Bij ieder verzoek om technische assistentie moet u erkende centra te raadplegen. - Page 96 De illustratie toont de positie van de beveiligingen. A)Veiligheidsthermostaat met automatische re- set: blokkeert de elektrische stroomvoorziening bij oververhitting van de bak. Belangrijk De interventie van de thermostaat met auto- matische reset wordt aangegeven door een alarm "ALL" op de display van de kaart. B)Warmtesensor: is een thermische sensor die de werking van het centrale element van het appa- raat onderbreekt bij oververhitting van de compo-...
-
Page 97: Op Bestelling Beschikbare Accessoires
OP BESTELLING BESCHIKBARE ACCESSOIRES Op verzoek kan het apparaat worden uitgerust met de volgende accessoires. A) "Kit" manden met plaat B)Gekoeld onderstel C)Onderstel warme kast D)Onderstel neutrale kast VEILIGHEID NORMEN VOOR DE VEILIGHEID De fabrikant heeft tijdens het ontwerp en de bouw bij- ontsteken en het uitschakelen. - Page 98 Bij een langdurige buitengebruikstelling moet u niet al- de constante aanwezigheid van de bediener ver- leen de voedingslijnen loskoppelen, maar moet u ook eist. alle delen aan de binnen- en buitenkant van het appa- Richt tijdens het wassen ervan geen onder druk raat en de omringende omgeving grondig schoonma- staande waterstralen op het apparaat.
-
Page 99: Gebruik En Werking
GEBRUIK EN WERKING AANBEVELINGEN VOOR HET GEBRUIK Belangrijk Verwondingen als gevolg van het gebruik van ganen en functies te herkennen. Beperk u tot de apparaten zijn het gevolg van talloze factoren door de fabrikant voorziene gebruikstoepassin- die niet altijd gecontroleerd en voorkomen kun- gen en voer geen werkzaamheden uit op enige nen worden. -
Page 100: Het Apparaat In- En Uitschakelen
HET APPARAAT IN- EN UITSCHAKELEN Inschakeling tuur weergegeven. 1 - Gebruik de sectieschakelaar om de aansluiting Uitschakelen op de primaire elektriciteitslijn in te schakelen. 1 - Houd de drukknop (A) ±6 seconden lang inge- Het pictogram (5) gaat branden. drukt om het apparaat uit te schakelen. 2 - Druk knop (A) in om de kaart op Stand-by te Het pictogram (e5) gaat branden. - Page 101 LEEGMAKEN BAK Leegmaken Hiertoe moet u als volgt te werk gaan. 1 - Plaats een recipiënt van passende afmetingen onder het afvoerkraantje (B). 2 - Gebruik knop (A) om het kraantje mee te ope- nen en de bak mee leeg te maken. 3 - Zet de knop na voltooiing weer in de beginstand terug.
-
Page 102: Tips Voor Het Gebruik
LANGDURIGE STILSTAND VAN HET APPARAAT Indien het apparaat gedurende langere tijd niet 3 - Breng een heel dun laagje consumptie-olie aan wordt gebruikt, moet u als volgt te werk gaan. op de roestvrijstalen oppervlakken. 1 - Gebruik de sectieschakelaar van het apparaat 4 - Voer alle onderhoudswerkzaamheden uit. -
Page 103: Onderhoud
ONDERHOUD AANBEVELINGEN VOOR HET ONDERHOUD dien geactiveerd, onverwachte gevaarlijke si- Zorg ervoor dat het apparaat altijd zo efficiënt mo- tuaties zouden kunnen veroorzaken en schade gelijk blijft dankzij de door de fabrikant voorziene kunnen berokkenen aan de veiligheid en ge- geprogrammeerde onderhoudsbeurten. -
Page 104: Storingen
DE BAK SCHOONMAKEN Hiertoe moet u als volgt te werk gaan. 4 - Spoel de bak af met drinkwater en maak hem 1 - Schakel het apparaat uit en laat het afkoelen. leeg (zie pag. 9). 2 - Gebruik de sectieschakelaar om de elektrische 5 - Gebruik een specifiek product of een oplossing stroomvoorziening mee te desactiveren. - Page 105 TABEL SIGNALERING ALARMEN Alarm Oorzaak Oplossing Laat het apparaat afkoelen en zet de kaart weer in de stand ON. Interventie veiligheidsthermostaat Belangrijk met automatische reset. Wanneer het probleem aan- houdt moet u zich wenden tot de technische assistentie. Belangrijk Raadpleeg technische Het TCJ thermokoppel is defect of assistentie.
-
Page 106: Verplaatsing En Installatie
VERPLAATSING EN INSTALLATIE AANBEVELINGEN VOOR DE VERPLAATSING EN INSTALLATIE Belangrijk Voer de verplaatsing en installatie uit vol- van deze werkzaamheden zal, indien nood- gens de informatie verstrekt door de fabri- zakelijk, "veiligheidsplan" moeten kant en die vermeld op de verpakking, op voorbereiden om de veiligheid van de het apparaat en in de gebruiksinstructies. -
Page 107: Installatie Apparaat
INSTALLATIE APPARAAT Alle installatiefasen moeten in beschouwing wor- den genomen, vanaf de uitvoering van het algeme- ne project. Voordat de voor deze werkzaamheden bevoegde persoon met deze fasen begint moet hij, afgezien van het bepalen van de plek voor de in- stallatie, een "veiligheidsplan"... -
Page 108: Elektrische Aansluiting
WATERPASSTELLING Hiertoe moet u als volgt te werk gaan. 1 - Draai de moer (A) los. 2 - Verdraai de pootjes (B) om het apparaat water- pas te stellen. 3 - Draai de moer (A) weer vast. ELEKTRISCHE AANSLUITING 3 - Sluit de sectieschakelaar (A) met de kabel door Belangrijk de kabelgeleider (E) aan op het klemmenbord (D) van het apparaat, volgens de aanwijzingen... -
Page 109: Regelingen
UITTESTEN VAN HET APPARAAT 1 - Controleer of de netspanning overeenstemt Belangrijk met die van het apparaat. Vóór de inwerkingstelling moet de installatie 2 - Gebruik de automatische sectieschakelaar om worden uitgetest om de werkomstandighe- de elektrische aansluiting te controleren. den van elke afzonderlijke component te be- 3 - Controleer de correcte werking van de beveili- oordelen en de eventuele afwijkingen te... - Page 110 Modelo Tensión - Spanning Frecuencia - Frequentie Corriente - Stroom Vermogen Model BC PC 4200 4,2 kW 400V3~N 50-60Hz 6,5 A SCHEDA ALLACCIAMENTI - CONNECTION CARD - ANSCHLUSSSCHEMA - FICHE DES RACCORDEMENTS - FICHA DE ENLACES - KAART MET AANSLUITINGEN...
- Page 111 SCHEMA ELETTRICO - ELECTRIC DIAGRAM - SCHALTBILD SCHÉMA ÈLECTRIQUE - ESQUEMA ELÉCTRICO - ELEKTRISCH SCHEMA Fig.1 Fig.2 Fig.3 1) Morsettiera - Terminal board - Klemmenbrett - Plaque à - Clavier des commandes - Teclado de mandos - bornes - Regleta de conexión - Klemmenbord Toetsenbord bedieningen 2) Termostato...
- Page 112 ESPLOSO RICAMBI - SPARE PARTS LIST - LISTE PIÈCES DETACHÉES - RSATZTEILELISTE - DESPIECES RECAMBIOS - GEDETAILLEERDE TEKENING VERVANGINGSONDERDELEN 3123340: Pannello Comandi - Dashboard - Schaltfeld - Panneau De 3075860: Serie Cavi - Cable Group - Serie Kabel - Serie Cables - Se-rie Controle - Entrefino Mando - Bedieningspaneel.
- Page 113 BLANCO CS GmbH + Co KG Catering Systeme Postfach 13 10 75033 Oberderdingen Telefon 07045 44 - 81416 Telefax 07045 44 - 81508 E-Mail cs.service@blanco.de Internet www.blanco.de BLANCO CS GmbH + Co KG Catering Systems P.O. Box 13 10 75033 Oberderdingen...