Publicité
Les langues disponibles
Les langues disponibles
Liens rapides
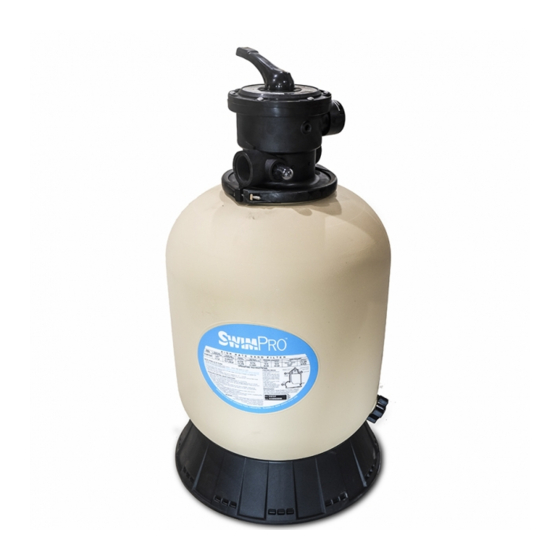
HIGH RATE SAND FILTER
Your Sandmaster high rate sand lter is a high performance
totally corrosion-proof
characteristics and features with ease of operation. It
represents the very latest in high rate sand
technology. It is virtually foolproof in design and operation
and when installed, operated and maintained according to
instructions, your lter will produce clear, sparkling water
with only the least attention and care.
HOW IT WORKS
The Sandmaster uses special lter sand to remove dirt
particles from pool water. Sand is loaded into the lter tank
and functions as the permanent dirt removing media. The
pool water, which contains suspended dirt particles, is
pumped through your piping system and is automatically
directed by the patented lter control valve to the top of
the lter tank. As the pool water is pumped through the
lter sand, dirt particles are trapped by the sand bed, and
ltered out. The cleaned pool water is returned from the
bottom of the lter tank, through the control valve and
back to the pool through the piping system. This entire
sequence is continuous and automatic and provides for
total recirculation of pool water through your lter and
piping system. After a period of time the accumulated dirt
in the lter causes a resistance to ow, and the ow
diminishes. This means it is time to clean (backwash) your
lter. With the control valve in the backwash position, the
water ow is automatically reversed through the lter so
that it is directed to the bottom of the tank, up through the
sand, ushing the previously trapped dirt and debris out of
the waste line. Once the lter is backwashed (cleaned) of
dirt, the control valve is manually resequenced to Rinse,
and then Filter, to resume normal ltering.
OWNER'S GUIDE
lter that blends superior
www.haywardpool.ca
INSTALLATION
ow
Only simple tools (screwdriver and wrenches), plus pipe
sealant for plastic adapters, are required to install and/or
lter
service the lter.
1.
The lter system should be placed on level, very rm
ground, or equivalent, as recommended by your pool
dealer. Position the
connections, control valve and winter drain are
convenient and accessible for operation, servicing and
winterizing.
2.
Assemble the Pump to the platform base. The exible
hose and adapters must now be installed to connect
the pump/ lter system.
a.
Screw straight adapter, using Te on pipe sealant
tape or Permatex No. 2, securely into 1 1/2" pump
discharge.
b.
Screw other straight adapter, using Te on pipe
sealant tape or Permatex No. 2, securely into
opening in control valve marked PUMP. (Do not
overtighten.)
STOP here and load media per instructions (No. 3).
c.
Place hose clamps on hose and
straight adapters and secure with clamps. If hose is
di cult to t over adapters, place hose in hot water
for several minutes.
NOTE: To prevent breakage and damage to pump and
control valve, use only pipe sealants speci cally formulated
for plastics. Do not overtighten ttings or adapters.
IS 1706T HC 11
lter so that the piping
t hose over
Publicité

Sommaire des Matières pour Hayward Sand MASTER SM1706T
- Page 1 IS 1706T HC 11 OWNER’S GUIDE HIGH RATE SAND FILTER Your Sandmaster high rate sand lter is a high performance INSTALLATION totally corrosion-proof lter that blends superior Only simple tools (screwdriver and wrenches), plus pipe characteristics and features with ease of operation. It sealant for plastic adapters, are required to install and/or represents the very latest in high rate sand lter...
- Page 2 SPECIFICATIONS EFFECTIVE MAXIMUM WORKING MEDIA REQUIRED DESIGN FLOW RATE SIDE CLEARANCE ABOVE CLEARANCE MODEL NO. PRESSURE FILTRATION AREA FT² M² INCH INCH TYPE SM1706T 1.50 0.14 3.45 .45 mm - .55 mm No 20 or No 1/2 SM1906T 1.80 0.17 3.45 Silica Filter Sand...
- Page 3 Loading sand media. Filter sand media is loaded through the Turn pump o and set valve to RINSE position. Start pump and top opening of the lter. operate until water in sight glass is clear - about 1/2 to 1 minute.
- Page 4 SERVICE & REPAIRS set valve pointer on valve top between any position. Consult your local authorized Hayward dealer or service This will allow water to drain from the valve. Leave valve center. No returns may be made directly to the factory in this “inactive”...
-
Page 5: Filtre À Sable À Débit Élevé
IS 1706T HCF 11 GUIDE DU PROPRIÉTAIRE FILTRE À SABLE À DÉBIT ÉLEVÉ INSTALLATION Votre ltre à sable à débit élevé Sandmaster est un ltre à haut rendement entièrement à l'épreuve de la corrosion Il su t de simples outils (tournevis et clés) et d'enduit qui allie supériorité... -
Page 6: Fiche Technique
FICHE TECHNIQUE ZONE DE CONCEPTION PRESSION DE DÉGAGEMENT No DE DÉGAGEMENT MATIÈRE REQUISE FILTRAGE SERVICE MAXIMALE MODÈLE DU DÉBIT CÔTÉ DESSUS EFFICACE PI² M² LB/PO² GENRE SM1706T 1,50 0,14 3,45 .45 mm - .55 mm No 20 or No 1/2 SM1906T 1,80 0,17... - Page 7 Remplir le réservoir de sable à ltrer par l'ouverture supérieure du ltre. Arrêter la pompe et régler la soupape en mode de RINÇAGE. Remettre la pompe en marche et la faire fonctionner jusqu'à ce que l'eau soit claire Desserrer l'étier à rebord et enlever la soupape de commande du dans le voyant en verre, soit environ 1/2-1 minute.
- Page 8 40 à 70 ppm d’eau qui n’a pas été traitée à l’acide cyanurique (acide cyanurique) MANUFACTURÉ EXCLUSIVEMENT PAR HAYWARD 2880 PLYMOUTH DRIVE, OAKVILLE, ONTARIO L6H 5R4 • TÉL. 1-888-238-7665 ® Produits De Piscines Hayward Canada , Inc – Titulaire de licence www.haywardpool.ca...


