Table des Matières
Publicité
Les langues disponibles
Les langues disponibles
Liens rapides
INSTALLATION GUIDE
PROFESSIONAL STEPPER-MOTOR
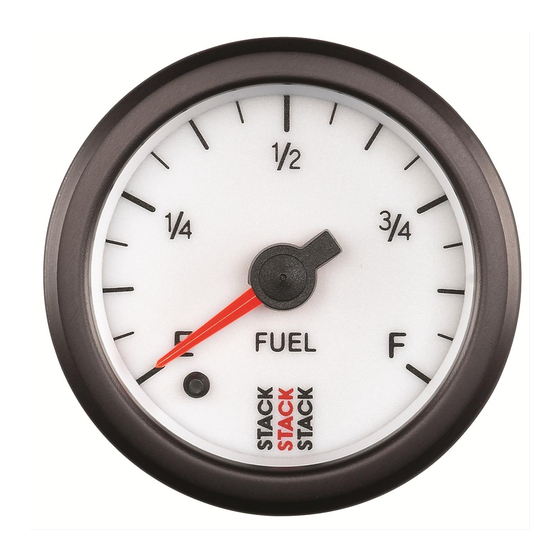
ANALOGUE FUEL LEVEL GAUGE
2650-1290-00 Rev. B
Installation
1. Check that you have all parts required for installation, and that the engine is cool.
2. Disconnect the negative (-) battery cable.
3. Gauge mounts in a 52.4mm hole.
4. Connect the purple sensor wire to the fuel level sensor. Existing wires may be used, or route the purple
sensor wire to the fuel tank. (The standard fuel level gauge, if equipped, must be disconnected.)
5. Connect the white wire to dash lighting or switchable 12V light source.
6. Connect one of the black wires on gauge connector to a good ground. (Either black wire, does not
matter which one)
7. Connect the red power wire to a switched +12V source.
8. Reconnect the negative (-) battery cable.
CAUTION!
As a safety precaution, the red wire
of this product should be fused before
connecting to the 12V ignition switch.
We recommend using a 3 AMP
automotive type fuse.
Setting the Sensor Type
1. The brown and black wires are used to set the sensor type. The gauge ships pre-programmed to read 0-90 ohm sensors.
If using a 0-90 ohm sensor, separately insulate the ends of the brown and black wires with electrical tape, and coil them up
under the dash.
2. If any other sensor type is required, connect a momentary switch to the black and brown wires (see illustration above), or
alternately touch the stripped ends of the black and brown wires to simulate pushing the button.
3. Press and hold the button, and apply power to the gauge. The needle will sweep back and forth stopping momentarily on each
1
-tank mark, indicating that the gauge is in sensor select mode.
⁄
8
4. Allow the needle to move to the appropriate location on the dial per the sensor select chart (see next page), and release the
button. The needle can be bumped to the next position by momentarily pressing the button.
5. Remove power from the gauge to store the new sensor type by turning off ignition switch.
6. Re-apply power to the gauge, and confirm that it reads the proper fuel level. If the proper fuel level is not displayed, return to
step 3 and recalibrate. If the proper fuel level is still not indicated, perform Custom Sensor Calibration.
7. Remove power from the gauge by turning off ignition switch.
8. Remove switch if used, and tape the ends of the brown and black wires, so they can not touch.
9. Coil the wires up under the dash.
MOMENTARY SWITCH
(OPTIONAL)
CONNECT TO FUEL
LEVEL SENSOR (ENSURE
SENSOR IS GROUNDED)
+ 12V DASH LIGHTING
(SEE CAUTION LEFT)
BROWN
FOR CLASSIC GAUGES ONLY
CONNECT TO
12V LIGHTING
BLACK
CONNECT
TO GOOD
GROUND
PURPLE
FUSE
+ 12V CONNECTION
LIGHT
WHITE
BLACK
BLACK
GOOD ENGINE
GROUND/EARTH
GB
Publicité
Table des Matières

Manuels Connexes pour Stack ST3365

Sommaire des Matières pour Stack ST3365
- Page 1 INSTALLATION GUIDE PROFESSIONAL STEPPER-MOTOR ANALOGUE FUEL LEVEL GAUGE 2650-1290-00 Rev. B Installation 1. Check that you have all parts required for installation, and that the engine is cool. 2. Disconnect the negative (-) battery cable. 3. Gauge mounts in a 52.4mm hole. 4.
- Page 2 12 MONTH LIMITED WARRANTY STACK, Ltd. warrants to the consumer that all STACK products will be free from defects in material and workmanship for a period of twelve (12) months from date of the original purchase. Products that fail within this 12 month warranty period will be repaired or replaced at STACK’s option to the consumer, when it is determined by STACK, Ltd. that the product failed due to defects in material or workmanship.
- Page 3 EINBAUANWEISUNG VOLLSTÄNDIG DURCHLAUFENDE ELEKTRISCHE KRAFTSTOFFANZEIGE 2650-1290-00 Rev. B VORSICHT! +12V Als Schutzmaßnahme INSTRUMENTENBRETT- muss der 12V-Anschluss BELEUCHTUNG BRAUN dieses Produktes (für klassische Instrumente) abgesichert werden, bevor MOMENTSCHALTER er an den 12V-Zündschalter Licht Sockel (OPTIONAL) angeschlossen werden kann. SCHWARZ SCHWARZ Wir empfehlen eine flinke 3AG-Patronensicherung, 1A.
-
Page 4: Garantie
Garantie Stack Limited rechtfertigt dieses Produkt (mit Ausnahme von assoziierte Sensoren, die konsumierbare Stücke sind), um von Defekten frei zu sein, verursachte für 1 Jahre vom Datum des Verbraucherkaufes durch fehlerhafte Materialien oder schlechte Arbeitsqualität. Diese Garantie gilt nur für den originalen Erwerber des Produktes und ist unübertragbar. Alle vorausgesetzten Garantien werden in Dauer oben auf die besagten Garantieperioden beschränkt werden. -
Page 5: Jauge De Carburant Électrique Àbalayage Complet
GUIDE D'INSTALLATION JAUGE DE CARBURANT ÉLECTRIQUE À BALAYAGE COMPLET 2650-1290-00 Rev. B AVERTISSEMENT MARRON VERS ÉCLAIRAGE DU Par mesure de sécurité, la borne +12 V de ce produit COMMUTATEUR doit être protégée par un (pour les instruments classiques) MOMENTANÉ fusible avant d'être reliée NOIR (FACULTATIF) Prise de lumière... -
Page 6: Étalonnage De Capteur Personnalisé
Garantie Stack Limited garantit ce produit (à l’exception des capteurs qui sont consommables) d’être à l’abri de défauts causés par des matériaux défectueux ou de mauvaise main-d’oeuvre pour 1 an à compter de la date d’achat des consommateurs. Cette garantie s’applique uniquement à l’acheteur original du produit et n’est pas transférable. Toutes les garanties implicites est limitée à une durée de ladite garantie périodes ci- dessus. -
Page 7: Guida All'installazione
GUIDA ALL'INSTALLAZIONE INDICATORE ELETTRICO DI LIVELLO CARBURANTE 2650-1290-00 Rev. B ATTENZIONE! A scopo di sicurezza, il ILLUMINAZIONE morsetto +12 V di questo prodotto deve essere (per strumenti classici) MARRONE protetto da un fusibile, Presa luce prima della connessione INTERRUTTORE all'interruttore di avviamento MOMENTANEO NERO NERO... - Page 8 Garanzia Stack Limited garantisce questo prodotto (ad eccezione associati sensori che sono oggetti di consumo) che devono essere privi di difetti causati da difetti di materiali poveri o di fabbricazione per 1 anno dalla data di acquisto dei consumatori. Questa garanzia è valida solo per l’acquirente originale del prodotto e non è trasferibile. Tutte le garanzie implicite sono limitate nel tempo per i periodi di garanzia ha detto sopra. Rompere il sigillo strumento, uso improprio o installazione non corretta, incidenti, danni, abusi, le riparazioni non autorizzati o alterazioni dei vuoti questa garanzia.