
Manuels Connexes pour De Dietrich AD345


Sommaire des Matières pour De Dietrich AD345
- Page 1 230V Thermostat Programmable Programmable thermostat Programmierbarer thermostat Termostato programmabile...
-
Page 3: Table Des Matières
Notice d’installation et d’utilisation Sommaire 1 - Description 2 - Emplacement 3 - Raccordement 4 - Fixation 5 - Mise en service 7 - Mise à l’heure 6 - Réglage des températures 8 - Programmation 9 - Mode automatique 10 - Mode absence 11 - Mode manuel 12 - Mode arrêt 13 - Aide... -
Page 4: Consignes De Sécurité
Consignes de sécurité Pour votre sécurité Respecter scrupuleusement ces consignes de sécurité afin d’éviter tout risque et tout dommage pour les personnes et les biens. Explication des consignes de sécurité Danger Ce symbole met en garde contre les dommages pour les personnes. - Page 5 Attention Surveillez les enfants. Veillez à ce qu’il ne jouent pas avec l’appareil. Danger Des travaux non réalisés dans les règles de l’art sur l’installation de chauffage risque d’induire des accidents qui pourraient être mortels. • Les travaux sur les conduites de gaz ne devront être effectués que par un installateur qualifié.
- Page 6 Consignes de sécurité Comportement en cas d’odeur de fumées Danger Les fumées peuvent entraîner des intoxications mortelles. • Arrêter l’installation de chauffage. • Aérer la chaufferie • Fermer les portes des pièces d’habitation. Comportement en cas d’incendie Danger Il y a risque de brûlures et d’explosion en cas d’incendie.
- Page 7 Conditions à remplir par la chaufferie Attention Un environnement inadapté risque d’entraîner des dommages sur l’installation de chauffage et d’entraîner des dysfonctionnements. • Assurer une température ambiante supérieure à 0°C et inférieure à 35°C. • Eviter toute pollution de l’air par des hydrocarbures halogénés (contenus dans les peintures, les solvants et les produits de nettoyage, par exemple) et la poussière abondante (travaux de meulage, par exemple).
-
Page 8: Description
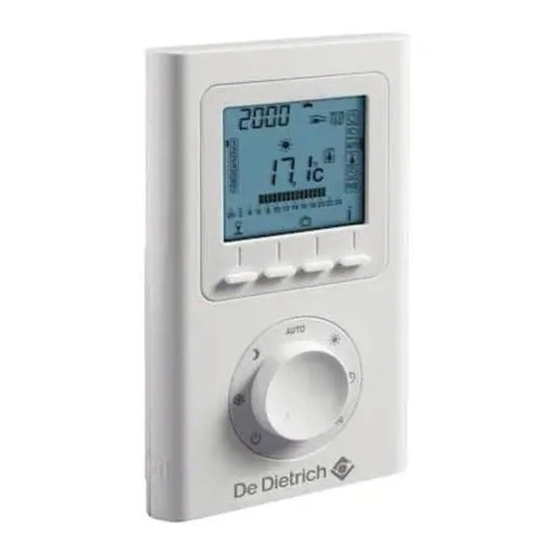
1 - Description Allure en cours (ex : confort) Jour en cours Heure Demande de Température chauffe (consigne ou mesurée) Profil du programme Touches de réglage Mode automatique Confort Economie Réglage Absence de l’heure Arrêt Programmation Molette de sélection... -
Page 9: Emplacement
2 - Emplacement La sonde de mesure de la température étant dans le boîtier, vous devez placer la boîte d’encastrement du thermostat : - Sur un mur accessible à une hauteur de 1,50 m, - A l’abri des sources de chaleur (cheminée, influence du soleil) et des courants d’air (fenêtre, porte). -
Page 10: Raccordement
3 - Raccordement Par souci de clarté, les schémas réalisés sont à retenir dans leur principe. N’y figurent pas les protections et autres accessoires exigés par les normes. La norme NF C15-100 et les règles de l’art doivent être respectées. Il est nécessaire que les appareils connectés ou environnants ne créent pas de perturbations trop fortes. - Page 11 Remplacer un thermostat 3 fils • Coupez le courant et débranchez l’ancien thermostat. • Si ce thermostat possède une fil à supprimer : résistance anticipatrice, - résistance anticipatrice, supprimez le fil correspondant. - raccordement à la terre (fil vert/jaune). fils de l’ancien thermostat •...
-
Page 12: Fixation
4 - Fixation Avant toute manipulation, coupez l’alimentation. • Soulevez le capot à l’aide d’un tournevis. • Séparez le thermostat de son socle en dévissant la vis de verrouillage ❶ (vis imperdable). • Fixez le socle uniquement sur une boîte d’encastrement (entraxe 60 mm). - Page 13 Raccordement 230V • Raccordez les 2 fils d’alimentation sur les bornes 4 et 5. 1 2 3 • Accrochez le thermostat sur la patte du socle et immobilisez-le avec la vis de verrouillage ❶. • Replacez le capot sur le thermostat •...
-
Page 14: Mise En Service
5 - Mise en service • Tournez la molette sur Arrêt et appuyez 5 secondes sur la touche de droite jusqu’à afficher H100 vx:xx (menu de maintenance réservé à l’installateur). • Appuyez sur OK. L’écran affiche CF01. 5 sec. CF01 - Correction de la mesure de la température ambiante S’il existe un écart entre la température constatée (thermomètre) et la température... - Page 15 0 Affichage permanent de la CF02 température ambiante Température affichée 1 Affichage permanent de la consigne CF03 - Régulation de la température Confort Appuyez sur + ou - pour effectuer votre choix, sur OK pour valider et passer au menu suivant. 0 Température régulée par le thermostat CF03 1 Température régulée par l’élément...
-
Page 16: Mise À L'heure
7 - Mise à l’heure Jours • Tournez la molette sur Heures Les jours clignotent. • Appuyez sur + ou - pour effectuer votre choix, sur OK pour valider et passer au Minutes réglage suivant. Recommencez les opérations pour régler les heures et les minutes. -
Page 17: Programmation
8 - Programmation A la mise en service, le programme “Confort de 6h à 23h” est appliqué à tous les jours de la semaine. • Tournez la molette sur PROG. Le 1er créneau horaire clignote. Programmation rapide : • Pour appliquer le même programme au jour suivant, maintenez appuyée la touche OK environ 3 secondes jusqu’à... -
Page 18: Mode Automatique
9 - Mode automatique • Tournez la molette sur AUTO. A la mise en service, la température mesurée par le thermostat s’affiche (le symbole apparaît au-dessus de °C). • Appuyez sur la touche i pour afficher la température de consigne. Il est possible d’inverser l’affichage de la température (menu CF02 de la mise en service) : - mode automatique : température de consigne... -
Page 19: Mode Absence
10 - Mode absence Ce mode permet de régler une température (de 5 à 15°C) pour une durée réglable de 1 à 365 jours. • A partir du mode automatique (AUTO), appuyez sur la touche Le nombre de jours clignote. •... -
Page 20: Mode Manuel
11 - Mode manuel ) Jusqu’au prochain changement du programme Mode Manuel Ce mode permet de passer de confort à en cours économie (ou inversement) jusqu’au prochain changement du programme. Exemple : vous êtes en économie, un appui sur la touche permet de passer en confort. -
Page 21: Mode Arrêt
Mode Manuel • Appuyez sur + ou - pour régler la en cours température (de 10°C à 30°C). • Validez par OK. Pour annuler le mode manuel, appuyez sur la touche C ou tournez la molette. 12 - Mode arrêt Pour mettre en arrêt le chauffage (en été, par exemple) : •... -
Page 22: Aide
13 - Aide Retour aux réglages initiaux Vous pouvez faire une initialisation générale pour revenir aux paramètres réglés en usine : - Les réglages installateur (en grisé dans les menus de mise en service), - L’heure et le jour, - Les températures de consigne, - La programmation par défaut. -
Page 23: Caractéristiques Techniques
14 - Caractéristiques techniques • Alimentation 230V, +/-- 10%, 50 Hz • Sauvegarde de l’horloge en cas de coupure secteur : 4h (par condensateur) • Consommation : 2 VA • Isolement classe II • Sortie contact inverseur 2A max., 230 V •... - Page 25 Installation instructions and using Content 1 - Description 2 - Location 3 - Connection 4 - Mounting 5 - Activation 6 - Setting the time 7 - Setting temperatures 8 - Programming 9 - Automatic mode 10 - Absence mode 11 - Manual mode 12 - Off mode 13 - Troubleshooting...
-
Page 26: Safety Instructions
Safety instructions For your safety You must strictly comply with these safety instructions so as to avoid any risk for, or damage to, people and belongings. Safety markings explained Danger This symbol warns of a danger of injury to people. Caution This symbol warns of a danger of damage to belongings or the environment. - Page 27 Caution Supervise children. Please ensure that they do not play with the device. Danger Substandard work carried out on the heating system has a risk of causing accidents that could result in death. • Works on gas pipes must only be performed by a qualified installer.
-
Page 28: Security Instructions
Security instructions What to do if you smell fumes Danger Fumes can cause intoxication that could be fatal. • Turn the heating system off. • Air the boiler room • Close doors to habitable rooms. What to do in the case of fire Danger There is a risk of burns and explosion in the case of a fire. - Page 29 Conditions to meet for the boiler room Caution An unsuitable environment can cause damage to the heating system and cause it to malfunction. • Ensure room temperature is above 0°C and below 35°C. • Avoid any air pollution from halogenated hydrocarbons (contained in paint, solvents and cleaning products, for example) and excessive dust (grinding work, for example).
-
Page 30: Description
1 - Description Current mode (e.g. comfort) Current day Time Heating demand mode Temperature (set or measured) Program profile Adjustment buttons Automatic mode Comfort Economy Frost Protection Time setting Shutdown Programming... -
Page 31: Location
2 - Location Since the temperature measurement sensor is inside the box, you must install the thermostat flush-mounting box: - On an accessible wall at a height of 1.50 m - away from heat sources (fireplaces, sunlight) and draughts (windows, doors) IMPORTANT: Do not install the thermostat on a wall in contact with the outdoors or with an unheated room (e.g. -
Page 32: Connection
3 - Connection The diagrams provided are simplified for greater clarity. Protections and other accessories required by standards are not illustrated. - Standard NF C15-100 and good practice must be complied with. Connected or nearby units must not generate excessive interference. Use rigid 1.5 mm²... - Page 33 Replace a 3-cable thermostat • Turn the power off and remove the old thermostat. • If this thermostat has a heat anticipator, remove the corresponding wire. • If the existing thermostat is connected to the earth (yellow/green cable) remove the corresponding cable.
-
Page 34: Mounting
4 - Mounting Switch off the mains power before handling the device. • Use a screwdriver to lift off the cover. • Separate the thermostat from its base unit by loosening the clamp screw ❶ (captive screw). • Only attach the base to a flush-mounted box (distance between centres 60 mm). - Page 35 230 V connection • Connect the 2 supply cables to terminals 4 and 5. 1 2 3 • Fit the thermostat onto the tab of the base and secure it with the clamp screw ❶. • Replace the cover on the thermostat •...
-
Page 36: Activation
5 - Activation • Turn the selector knob to Off and hold the right-hand button down for 5 seconds until P441 is displayed (maintenance menu only for installer). • Press OK. The screen displays CF01. CF01 - Correction of room temperature measurement If there is a difference between the actual temperature (taken with a thermometer) and... - Page 37 Continuous room temperature CF01 display Temperature displayed Continuous display of the set-point CF03 - Adjustment of comfort temperature Press + or - to make the required adjustment, then OK to confirm and go to the next menu. CF03 Comfort temperature set by the thermostat Comfort temperature set on each Controlling the radiator or convector.
-
Page 38: Setting The Time
6 - Setting the time • Turn the selector knob to The days flash. Hours • Press + or - to make the required Minutes adjustment, then OK to confirm and go to the next setting. Repeat these steps to set the hours and minutes. -
Page 39: Programming
8 - Programming Upon activating, the "Comfort from 06:00 to 23:00" program is applied for every day of the week. • Turn the selector knob to PROG. The 1st time slot flashes on and off. Quick programming: • To apply the same program for the next day, keep the OK button pressed for around 3 seconds until the program for the following day is displayed. -
Page 40: Automatic Mode
9 - Automatic mode • Turn the selector knob to AUTO. Upon activation, the temperature measured by the thermostat is displayed (the symbol appears above °C). • Press the i button to display the current target temperature. The display of the temperature can be switched (activation menu CF02): - Automatic mode: target temperature - Press i button: measured temperature... -
Page 41: Absence Mode
10 - Absence mode This mode allows a temperature to be set (from 5 to 15°C) for an adjustable period from 1 to 365 days. • From automatic mode (AUTO), press the button. The number of days flashes. • Press + or - to adjust the number of days. For example: if you leave on 10th January and return on 19th January, then specify 9 days. -
Page 42: Manual Mode
11 - Manual mode ) Until next program change Manual mode This mode allows you to transfer from is the current mode comfort to economy (or vice versa) until the next program change. Example: you are in economy mode, pressing button will change it to comfort. -
Page 43: Off Mode
Manual mode is the current mode • Press + or - to adjust the temperature (from 10°C to 30°C). • Confirm with OK. To cancel this manual mode, press the C button or turn the selector knob. 12 - Off mode To switch off the heating (in the summer, for example): •... -
Page 44: Troubleshooting
13 - Troubleshooting Reset to factory settings You can perform a general reset to return to the configurations set in the factory: - Installer settings (in grey in the activation menus), - The time and date, - The temperature settings, - The default programming. -
Page 45: Technical Characteristics
14 - Technical characteristics • 230 V, +/- 10%, 50 Hz power supply • Clock backup during mains power failure: 4 hours (by capacitor) • Consumption: 2 VA • Class II insulation • Change-over contact output 2A max., 230 V •... - Page 47 Einbau- und Betriebsanleitung Inhalt 1 - Beschreibung 2 - Einbauort 3 - Anschluss 4 - Befestigung 5 - Inbetriebnahme 6 - Uhrzeiteinstellung 7 - Einstellen der Temperaturen 8 - Programmierung 9 - Automatikbetrieb 10 - Abwesenheitsbetrieb 11 - Manueller Modus 12 - Ausschalten 13 - Hilfe 14 - Technische Eigenschaften...
-
Page 48: Sicherheitshinweise
Sicherheitshinweise Zu Ihrer Sicherheit Bitte halten Sie sich an diese Sicherheitshinweise, um jegliche Risiken sowie Personen- bzw. Sachschäden auszuschließen. Erklärung der Sicherheitshinweise Gefahr Dieses Symbol warnt vor eventuellen Personenschäden. Achtung Dieses Symbol warnt vor eventuellen Sach- und Umweltschäden. Anmerkungen Die Angaben nach einer „Anmerkung“ enthalten zusätzliche Informationen. - Page 49 Achtung Beaufsichtigen Sie Kinder! Achten Sie darauf, dass sie nicht mit dem Gerät spielen. Gefahr Nicht sachgemäß ausgeführte Arbeiten am Heizsystem können zu tödlichen Unfällen führen. • Arbeiten an den Gasleitungen dürfen ausschließlich von einem qualifizierten Fachmann ausgeführt werden. • Arbeiten am Stromkreislauf dürfen ausschließlich von Elektrikern ausgeführt werden.
- Page 50 Sicherheitshinweise Verhalten bei Wahrnehmung von Rauchgeruch Gefahr Rauch kann zu tödlichen Vergiftungen führen. • Das Heizsystem ausschalten. • Den Heizraum lüften. • Die Türen des Wohnbereichs schließen. Verhalten bei Bränden Gefahr Bei Bränden besteht Verbrennungs- und Explosionsgefahr. • Das Heizsystem ausschalten. •...
- Page 51 Heizraumanforderungen Achtung Eine ungeeignete Umgebung kann das Heizsystem beschädigen und zu Störungen führen. • Sicherstellen, dass die Raumtemperatur zwischen 0 °C und 35 °C liegt. • Luftverschmutzungen durch halogenierte Kohlenwasserstoffe (bspw. enthalten in Farben, Lösungsmittel und Reinigungsmittel) und übermäßig viel Staub (bspw.
-
Page 52: Beschreibung
1 - Beschreibung Aktueller Modus (z.B.. Comfort) Aktueller Wochentag Uhrzeit Heizanzeige Temperatur (eingestellt oder gemessen) Programm Steuerungstasten AUTO-Modus COMFORT-Modus ECO-Modus Frostschutz Zeiteinstellung ON/OFF Programmierung... -
Page 53: Einbauort
2 - Einbauort Da das Raumthermostat in das Gehäuse integriert ist, muss die Unterputzdose des Thermostats wie folgt angebracht werden: - An einer Wand in zugänglicher Höhe (1,50 m). - Vor Hitze (Kamin, Sonnenlicht) und Durchzug (Fenster, Tür) geschützt. WICHTIG: Das Raumthermostat nicht an einer Wand mit Außenkontakt oder in einem nicht beheizten Raum (z. -
Page 54: Anschluss
3 - Anschluss Aus Gründen der Übersichtlichkeit sind die Schaubilder als allgemeine Darstellung zu verstehen. Schutzvorrichtungen und sonstiges in einschlägigen Normen vorgeschriebenes Zubehör sind nicht abgebildet. Die NF-Norm C15-100 sowie der aktuelle Stand der Technik müssen berücksichtigt werden. Starke Störungen durch angeschlossene oder in der Nähe stehende Geräte sind zu vermeiden. - Page 55 Ersetzen eines 3-Draht-Thermostats • Unterbrechen Sie die Stromversorgung und klemmen Sie das alte Thermostat ab. • Falls das Thermostat über einen einen Antizipationswiderstand verfügt, klemmen Sie den dazugehörigen Draht ab. • Ist das vorhandene Thermostat geerdet (grüner/gelber Draht), klemmen Sie den entsprechenden Draht ab.
-
Page 56: Befestigung
4 - Befestigung Unterbrechen Sie vor jeglichen Eingriffen stets die Stromversorgung. • Heben Sie den Deckel mit einem Schraubenzieher an. • Entnehmen Sie das Thermostat durch Ausdrehen der Klemmschraube ❶ (unverlierbare Schraube) dem Sockel. • Befestigen Sie den Sockel ausschließlich mit einer Unterputzdose (Achsabstand: 60 mm). - Page 57 230V-Anschluss • Verbinden Sie die 2 Stromversorgungsdrähte mit der Klemmleiste 4 und 5. 1 2 3 • Befestigen Sie das Thermostat am Befestigungseisen des Sockels und blockieren Sie es mit der Klemmschraube ❶. • Bringen Sie den Deckel wieder am Thermostat an.
-
Page 58: Inbetriebnahme
5 - Inbetriebnahme • Drehen Sie den Wahlschalter auf Aus und drücken Sie 5. Sek. lang die rechte Taste, bis H100 vx:xx (Wartungsmenü für den Installateur) auf dem Display erscheint. • Drücken Sie auf OK. Auf dem Display wird CF01 angezeigt. CF01 - Berichtigung der gemessenen Raumtemperatur Falls die (per Thermometer) gemessene... - Page 59 Anzeige der gemessenen CF02 Raumtemperatur angezeigte Temperatur Anzeige der eingestellten Temperatur CF03 - Einstellung der Komforttemperatur Drücken Sie zur Auswahl auf + oder - und auf OK, um Ihre Auswahl zu bestätigen und das folgende Menü zu öffnen. Regulierung der Komfort-Temperatur CF03 Regulierung der Komfort-Temperatur Regelung der...
-
Page 60: Uhrzeiteinstellung
6 - Uhrzeiteinstellung Wochentag • Drehen Sie den Wahlschalter auf Stunden Die Anzeige der Wochentage blinkt. • Drücken Sie zur Auswahl auf + oder - Minuten und dann auf OK, um zu bestätigen und auf die nächste Einstellung überzugehen. Stellen Sie die Stunden und Minuten nach dem gleichen Verfahren ein. -
Page 61: Programmierung
8 - Programmierung Bei Inbetriebnahme wird automatisch das 'Komfortprogramm 6 - 23 Uhr' für alle Wochentage angewendet. • Drehen Sie den Wahlschalter auf PROG. Das erste Zeitfenster blinkt. Schnellprogrammierung: • Halten Sie die Taste OK ca. 3 Sek. lang gedrückt, bis das Programm des nächsten Tages angezeigt wird, um dieses auf den nächsten Tag anzuwenden. -
Page 62: Automatikbetrieb
9 - Automatikbetrieb • Drehen Sie den Wahlschalter auf AUTO. Bei der Inbetriebnahme wird die vom Thermostat gemessene Temperatur angezeigt (das Zeichen erscheint über dem Symbol °C). • Drücken Sie die Taste i, um die Solltemperatur anzuzeigen. Die Temperaturanzeige kann auch umgekehrt werden (Menü Inbetriebnahme CF02): - Automatikmodus: Solltemperatur. -
Page 63: Abwesenheitsbetrieb
10 - Abwesenheitsbetrieb Dieser Modus ermöglicht das Einstellen einer Temperatur (5 - 15 °C) für eine Dauer von 1 - 365 Tagen. • Drücken Sie im Automatikbetrieb (AUTO) die Taste Die Tagesanzahlanzeige blinkt. • Drücken Sie auf + oder -, um die Anzahl der Tage einzustellen. Beispiel: Für eine Abreise am 10. -
Page 64: Manueller Modus
11 - Manueller Modus ) Bis zum nächsten Programmwechsel Bei dieser Betriebsart kann bis zum nächsten Programmwechsel von Komfort- auf Sparbetrieb (und umgekehrt) Manueller Modus aktuell geschaltet werden. Beispiel: Drücken Sie im Sparbetrieb auf um in den Komfortbetrieb umzuschalten. Drücken Sie erneut die Taste oder drehen Sie den Wahlschalter, um den manuellen Modus zu unterbrechen. -
Page 65: Ausschalten
• Bestätigen Sie mit OK. Manueller Modus aktuell Die Temperaturanzeige blinkt. • Drücken Sie auf + oder -, um die Temperatur (10 - 30 °C) • Bestätigen Sie mit OK. Drücken Sie die Taste C oder drehen Sie den Wahlknopf, um den manuellen Modus zu unterbrechen. -
Page 66: Hilfe
13 - Hilfe Rückkehr zu ursprünglichen Einstellungen Die allgemeine Initialisierung ermöglicht folgende Elemente auf die Werkseinstellung zurückzusetzen: - Die Installationseinstellungen (in den Menüs der Inbetriebnahme grau unterlegt). - Die Uhrzeit und das Datum. - Die Solltemperaturen. - Das Standardprogramm. • Stellen Sie den Wahlschalter auf Aus und drücken Sie 10 Sek. -
Page 67: Technische Eigenschaften
14 - Technische Eigenschaften • Spannungsversorgung 230 V, +/- 10 %, 50 Hz • Speicherdauer der Zeitschaltuhr bei Stromausfall: 4 Std. (je Kondensator) • Stromverbrauch: 2 VA • Schutzklasse II • Wechselkontaktausgang max. 2A, 230 V • Vorgang vom Typ 1.C (Mikroabschaltung) •... -
Page 69: Istruzioni Per L'installazione E L'uso
Istruzioni per l’installazione e l'uso Sommario 1 - Descrizione 2 - Posizionamento 3 - Collegamento 4 - Fissaggio 5 - Messa in funzione 7 - Impostazione dell’ora 6 - Impostazione delle temperature 8 - Programmazione 9 - Modalità automatica 10 - Modalità assenza 11 - Modalità... -
Page 70: Istruzioni Di Sicurezza
Istruzioni di sicurezza Per la sicurezza dell’utente Rispettare rigorosamente queste istruzioni di sicurezza al fine di evitare eventuali rischi e danni alle persone e alle cose. Spiegazione delle istruzioni di sicurezza Pericolo Questo simbolo mette in guardia dai danni per le persone. Attenzione Questo simbolo mette in guardia dai danni per le cose e l’ambiente. - Page 71 Attenzione Sorvegliare i bambini. Fare attenzione che non giochino con il dispositivo. Pericolo In caso di lavori sull’impianto di riscaldamento non effettuati a regola d’arte, potrebbero verificarsi incidenti potenzialmente letali. • I lavori sui tubi del gas dovranno essere eseguiti esclusivamente da un installatore qualificato.
- Page 72 Istruzioni di sicurezza Comportamento in caso di odore di fumo Pericolo I fumi possono provocare intossicazioni letali. • Spegnere l’impianto di riscaldamento. • Aerare la sala caldaia • Chiudere le porte delle stanze della casa. Comportamento in caso d’incendio Pericolo In caso d'incendio sussiste il rischio di ustioni e di esplosione.
- Page 73 Condizioni che la sala caldaia deve soddisfare Attenzione Un ambiente non idoneo rischia di causare malfunzionamenti e danni all’impianto di riscaldamento. • Fare in modo che la temperatura ambiente sia superiore a 0°C e inferiore a 35°C. • Evitare che l’aria sia inquinata da idrocarburi alogenati (contenuti per esempio nelle vernici, nei solventi e nei detergenti) e la presenza di abbondante polvere (per esempio lavori di molatura).
-
Page 74: Descrizione
1 - Descrizione Tipo di funzionamento in corso (es.: comfort) Giorno in corso Richiesta di Temperatura riscaldamento (di riferimento o misurata) Profilo del programma Tasti di impostazione Modalità automatica Comfort Risparmio Impostazione Assenza dell’ora Arresto Programmazione Rotella di selezione... -
Page 75: Posizionamento
2 - Posizionamento La sonda di misurazione della temperatura è situata nella scatola, pertanto è necessario collocare la scatola da incasso del termostato: - Su di un muro accessibile a un’altezza di 1,50 m, - Al riparo dalle fonti di calore (camino, raggi del sole) e dalle correnti d'aria (finestra, porta). -
Page 76: Collegamento
3 - Collegamento Per maggiore chiarezza, in linea di principio tenere conto degli schemi indicati. Non vi figurano le protezioni, né altri accessori richiesti dalle norme. La norma NF C15-100 e le regole dell’arte devono essere rispettate. Gli apparecchi collegati o presenti nell’ambiente circostante non devono creare perturbazioni troppo forti Utilizzare cavi rigidi di 1,5 mm²... - Page 77 Sostituire un termostato a 3 fili • Togliere la corrente e scollegare il vecchio termostato. • Se questo termostato possiede filo da eliminare: una resistenza anticipatrice, - resistenza anticipatrice, eliminare il filo corrispondente. - collegamento a terra (filo verde/giallo). filo del vecchio termostato •...
-
Page 78: Fissaggio
4 - Fissaggio Prima di ogni operazione, disinserire l'alimentazione. • Sollevare il coperchio usando un cacciavite. • Separare il termostato dalla sua base svitando la vite di blocco ❶ (vite imperdibile). • Fissare la base esclusivamente su di una scatola da incasso (interasse 60 mm). Nota: la base deve essere fissata con 3 viti. - Page 79 Collegamento 230V • Collegare i 2 fili di alimentazione ai morsetti 4 e 5. 1 2 3 • Agganciare il termostato alla staffa della base e fissarlo con la vite di blocco ❶. • Rimettere il coperchio sul termostato • Il termostato è pronto per essere messo in funzione.
-
Page 80: Messa In Funzione
5 - Messa in funzione • Ruotare la rotella su Arresto e premere per 5 secondi il tasto a destra finché non si visualizza H100 vx:xx (menu di manutenzione riservato all’installatore). • Premere OK. Sul display si visualizza CF01. 5 sec. CF01 - Correzione della misurazione della temperatura ambiente Se esiste uno scarto tra la temperatura... - Page 81 0 Visualizzazione permanente della CF02 temperatura ambiente Temperatura 1 Visualizzazione permanente della visualizzata temperatura di riferimento CF03 - Impostazione della temperatura Comfort Premere i tasti + o - per effettuare la scelta, premere OK per confermare e passare al menu seguente. 0 Temperatura impostata tramite il termostato CF03 Impostazione...
-
Page 82: Impostazione Dell'ora
6 - Impostazione dell’ora Giorni • Ruotare la rotella su I giorni lampeggiano. • Premere i tasti + o - per effettuare la scelta, premere OK per confermare e Minuti passare all’impostazione successiva. Ripetere la procedura per impostare le ore e i minuti. -
Page 83: Programmazione
8 - Programmazione Alla messa in funzione, il programma “Comfort dalle 6 alle 23” viene applicato a tutti i giorni della settimana. • Ruotare la rotella su PROG. La 1 fascia oraria lampeggia. Programmazione rapida • Per applicare lo stesso programma al giorno seguente, tenere premuto il tasto OK per 3 secondi circa finché... -
Page 84: Modalità Automatica
9 - Modalità automatica • Ruotare la rotella su AUTO. Alla messa in funzione, si visualizza la temperatura misurata dal termostato (il simbolo compare sopra i °C). • Premere il tasto i per visualizzare la temperatura di riferimento. È possibile invertire la visualizzazione della temperatura (menu CF02 di messa in funzione): - modalità... -
Page 85: Modalità Assenza
10 - Modalità assenza Questa modalità permette di impostare una temperatura (da 5 a 15°C) per una durata regolabile da 1 a 365 giorni. • In modalità automatica (AUTO), premere il tasto Il numero di giorni lampeggia. • Premere i tasti + o - per impostare il numero di giorni. -
Page 86: Modalità Manuale
11 - Modalità manuale ) Fino al prossimo cambio di programma Modalità Manuale Questa modalità permette di passare da in corso Comfort a Risparmio (o il contrario) fino al prossimo cambio di programma. Esempio: in modalità Risparmio, premendo una volta il tasto si passa alla modalità... -
Page 87: Modalità Di Arresto
Modalità Manuale • Premere i tasti + o - per impostare la in corso temperatura (da 10°C a 30°C). • Confermare premendo OK. Per annullare la modalità Manuale, premere il tasto C o ruotate la rotella. 12 - Modalità di arresto Per mettere in arresto il riscaldamento (per esempio in estate): •... -
Page 88: Assistenza
13 - Assistenza Ripristino delle impostazioni iniziali È possibile effettuare un reset generale per tornare ai parametri predefiniti: - Le impostazioni installatore (di colore grigio nei menu di messa in funzione), - L’ora e il giorno, - Le temperature di riferimento, - La programmazione predefinita. -
Page 89: Caratteristiche Tecniche
14 - Caratteristiche tecniche • Alimentazione 230V +/-- 10%, 50 Hz • Salvataggio dell’orologio in caso di interruzione di corrente: 4 ore (attraverso il condensatore) • Consumo: 2 VA • Isolamento classe II • Uscita contatto invertitore 2A max., 230 V •...