Publicité
Les langues disponibles
Les langues disponibles
Liens rapides
Bauanleitung
D
Building instructions
GB
Notice de construction
F
Instruzioni di montaggio
I
Instrucciones de montaje
ES
Abbildungen
Illustrations
... 25-31
Illustrations
Illnstrazioni
Iiustraciónes
© Copyright by MULTIPLEX Modellsport GmbH & Co. KG 2015
# 21 4278
Ersatzteile
Replacement parts
Pièces de rechanges
Parti di ricambio
Repuestos
RR
# 26 4278
2 ... 10
11 ... 19
20 ... 35
36 ... 44
45 ... 53
54-56
Version 1.0
Publicité

Manuels Connexes pour Multiplex ROCKSTAR


Sommaire des Matières pour Multiplex ROCKSTAR
- Page 1 Instruzioni di montaggio 36 ... 44 Instrucciones de montaje 45 ... 53 Abbildungen Ersatzteile Illustrations Replacement parts ... 25-31 54-56 Illustrations Pièces de rechanges Illnstrazioni Parti di ricambio Iiustraciónes Repuestos © Copyright by MULTIPLEX Modellsport GmbH & Co. KG 2015 Version 1.0...
- Page 2 WERDEN! ABNEHMBARE KLEINTEILE DES MODELLS KÖNNEN VON KINDERN UNTER 3 JAHREN VERSCHLUCKT WERDEN. ERSTICKUNGSGEFAHR! Beim Betrieb des Modells müssen alle Warnhinweise der BETRIEBSANLEITUNG beachtet werden. Die Multiplex Mo- dellsport GmbH & Co. KG ist nicht haftungspfl ichtig für Verluste und Beschädigungen jeder Art, die als Folge falschen Betriebes oder Missbrauches dieses Produktes, einschließlich der dazu benötigten Zubehörteile entstehen.
- Page 3 Modell, des Akkus und des Ladegerätes beachten, Elektronik vor Wasser schützen. Auf ausreichende Kühlung bei Regler und Akku achten. Die Anleitungen unserer Produkte dürfen nicht ohne ausdrückliche Erlaubnis der Multiplex Modellsport GmbH & Co. KG (in schriftlicher Form) - auch nicht auszugsweise in Print- oder elektronischen Medien reproduziert und / oder veröffentlicht werden.
- Page 4 Machen Sie sich mit dem Bausatz vertraut! MULTIPLEX – Modellbaukästen unterliegen während der Produktion einer ständigen Materialkontrolle. Wir hoffen, dass Sie mit dem Baukasteninhalt zufrieden sind. Wir bitten Sie jedoch, alle Teile (nach Stückliste) vor Verwendung zu prü- fen, da bearbeitete Teile vom Umtausch ausgeschlossen sind. Sollte ein Bauteil einmal nicht in Ordnung sein, sind wir nach Überprüfung gern zur Nachbesserung oder zum Umtausch bereit.
- Page 5 Wichtiger Hinweis Dieses Modell ist nicht aus Styropor ™! Daher sind Verklebungen mit Weißleim, Polyurethan oder Epoxy nicht möglich. Diese Kleber haften nur oberfl ächlich und platzen im Ernstfall einfach ab. Verwenden Sie nur Cyanacrylat-/Sekunden- kleber mittlerer Viskosität, vorzugsweise Zacki -ELAPOR® # 85 2727, der für ELAPOR® Partikelschaum optimierte und angepasste Sekundenkleber.
- Page 6 Kleben Sie den Instrumentenbrett-Aufkleber (Dekorbogen) Herzlichen Glückwunsch zu Ihrem neuen MULTIPLEX- auf das angeformte Panel im Cockpit. Wenn Sie mit der ROCKSTAR! Gestaltung Ihres Cockpits zufrieden sind, kleben Sie die Kabinenhaube 26 mit UHU Por auf den Rumpf. Zum Bau des Modells benötigen Sie folgendes Werk- Abb.
- Page 7 61 und vier Schrauben 60 (M4x65) mit U-Scheiben 65 in grammieren Sie das Modell gemäß den angegebenen den Rumpf. Ruderausschlägen. Die Steckerordnung bei MULTIPLEX ist Abb. 35 (sofern nicht anderweitig frei zugeordnet) folgendermaßen: Setzen Sie auf die Motorwelle den Luftschraubenmitnehmer 1.
- Page 8 Befestigen Sie den Empfänger mit Klettband auf der Un- 9. Empfohlene Ruderausschläge terseite des M-Frames. Für eine feste Verbindung des Klettbandes am Holz empfehlen wir ein paar Tropfen Zacki für klassischen Programmkunstfl ug: hinzu zu geben. Zusätzlich können Sie den Empfänger mit einem Kabelbinder sichern.
- Page 9 Stückliste KIT ROCKSTAR # 21 4278 & RR ROCKSTAR # 26 4278: Lfd. Kit RR Bezeichnung Material Abmessungen Bauanleitung KIT Papier 80g/m² DIN-A4 Reklamationsmeldung Modelle Papier 80g/m² DIN-A4 Dekorbogen Klebefolie 700 x 1000mm Rumpfhälfte links Elapor geschäumt Fertigteil Rumpfhälfte rechts Elapor geschäumt...
- Page 10 Lfd. Kit RR Bezeichnung Material Abmessungen Ruderhorn „Twin“ Kunststoff gespritzt Fertigteil Aufnahme Kardanbolzen-Querruderverb. Kunststoff gespritzt Fertigteil Kardanbolzen ROT Metall Ø6 x 8mm Kardanbolzen GRÜN Metall Ø6 x 8mm Kardanbolzen KLAR Metall Ø6 x 8mm Gestängeanschluss KLAR Metall Ø6 x 8mm 11 11 Inbus-Gewindestift Metall...
- Page 11 UNDER THREE YEARS. CHOKING HAZARD! All the warnings in the OPERATING INSTRUCTIONS must be observed whenever the model is operated. Multiplex Modellsport GmbH & Co. KG accepts no liability for loss or damage or any kind which occurs as a result of incorrect operation or misuse of this product, including the accessories required for its operation.
- Page 12 Ensure that the speed controller and battery are adequately cooled. The instructions which accompany our products must not be reproduced and / or published, in full or in part, in print or any electronic medium, without the express written approval of Multiplex Modellsport GmbH & Co. KG. Seite 12...
- Page 13 Examine your kit carefully! MULTIPLEX model kits are subject to constant quality checks throughout the production process, and we sincerely hope that you are completely satisfi ed with the contents of your kit. However, we would ask you to check all the parts before you start construction, as we cannot exchange components which you have already worked on.
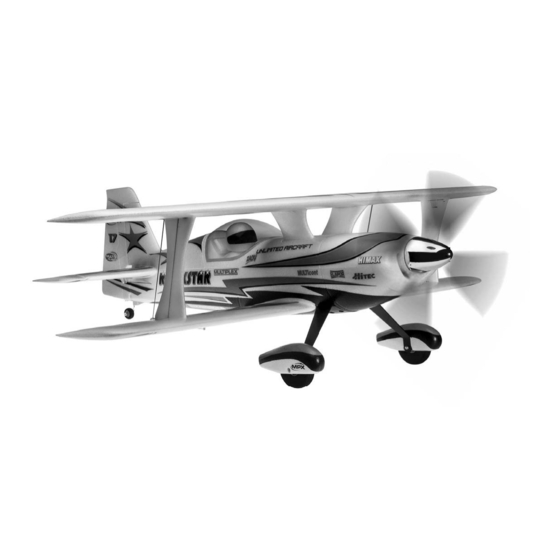
- Page 14 Paint must always be applied thinly and evenly, otherwise the component will warp. Then you really will have bent parts, and they will also be heavy and perhaps even unusable. We have found that matt-fi nish paints produce the best visual effect. Technical information ROCKSTAR: Wingspan: 1050 mm...
- Page 15 Congratulations on your new ROCKSTAR! isfi ed with the appearance of your cockpit, glue the canopy 26 to the fuselage using UHU Por. You will need the following tools to build the model: Fig. 14 2 x Zacki-Elapor # 85 2727 (KIT) (1xRR)
- Page 16 Unless you have changed the channel assignment screws supplied, not forgetting to apply a drop of medi- at the transmitter, the standard sequence for MULTIPLEX um-strength thread-lock fl uid to each screw! Now install the radio systems is as follows: motor in the fuselage using the stand-off pillars 61 and four M4 x 65 mm machine screws 60 and washers 65.
- Page 17 7. Final airframe assembly (KIT+RR) Mixer (linear): 3,5mm aileron to rudder, opposite The fi rst step is to attach the bottom wing to the fuselage: travel turn the fuselage onto its back, then guide the leading edge ài.e.: ailerons defl ect left by of the wing into the corner between the undercarriage and 3,5mm at full right-rudder the undercarriage fairing.
- Page 18 Partlist KIT ROCKSTAR # 21 4278 and RR ROCKSTAR # 26 4278: No. Kit RR Description Material Dimensions KIT building instructions Paper 80 g/m² DIN-A4 Model complaints form Paper 80 g/m² DIN-A4 Decal sheet Printed self-adhesive fi lm 700 x 1000mm L.H.
- Page 19 No. Kit RR Description Material Dimensions 49 3 „Twin“ control surface horn Inj.-moulded plastic Ready made 50 4 Aileron link rod barrel support Inj.-moulded plastic Ready made 51 2 Swivel barrel RED Metal 6 Ø x 8mm 52 2 Swivel barrel GREEN Metal 6 Ø...
- Page 20 Lors de l’utilisation de votre modèle il est impératif de respecter toutes les indications relatives aux dangers décrits dans la NOTICE D’UTISATION. La société Multiplex Modellsport GmbH & Co. KG ne peut pas être tenue pour responsable concernant la perte ou tout type d’endommagement de votre modèle résultant à un abus ou une mauvaise utilisation de ce produit, ainsi que des accessoires.
- Page 21 Toute reproduction / publication sous forme papier ou électronique, même partielle, des notices de nos différents produits sont strictement interdit sauf par autorisation exclusive de le société Multiplex Modellsport GmbH & Co. KG (sous forme écrite).
- Page 22 Famillarisez-vous avec le kit d’assemblage! Les kits d’assemblages MULTIPLEX sont soumis pendant la production à des contrôles réguliers du matériel. Nous espérons que le contenu du kit répond à vos espérances. Nous vous prions de vérifi er le contenu (suivant la liste des pièces) du kit avant l’assemblage, car les pièces utilisées ne sont pas échangées.
- Page 23 MPX Primer # 602700, de telle manière à nettoyer le modèle. Les couches de laques ne doivent surtout pas être vapo- risées d’une manière trop épaisse et irrégulière, sinon le modèle se déforme. Celui-ci sera déformé, lourd et souvent même inutilisable! Des laques satinées procurent un plus bel effet optique. Données techniques ROCKSTAR: Envergure: 1050 mm...
- Page 24 Félicitations pour l’acquisition de votre nouveau modèle déformer voire gonfl er! ROCKSTAR Multiplex. Collez les instruments de bord (planche de décoration) sur le tableau du Cockpit. Si vous êtes satisfait de votre amé- Pour le montage du modèle, il vous faut l’outillage nagement Cockpit, vous pouvez coller la verrière 26 sur le...
- Page 25 pic. 01 51-53 pic. 02 Seite 25...
- Page 26 33+34 pic. 03 pic. 04 37+37 pic. 05 pic. 06 pic. 07 pic. 08 73+74 pic. 09 pic. 10 Seite 26...
- Page 27 pic. 12 pic. 11 pic. 13 pic. 14 pic. 15 pic. 16 pic. 18 pic. 17 Seite 27...
- Page 28 pic. 20 pic. 19 pic. 21 pic. 22 pic. 23 pic. 24 71+55 pic. 26 pic. 25 Seite 28...
- Page 29 pic. 28 pic. 27 53+55 pic. 29 pic. 30 pic. 31 pic. 32 53+55 pic. 34 pic. 33 Seite 29...
- Page 30 86+87 pic. 36 pic. 35 pic. 37 pic. 38 pic. 39 pic. 40 53+55 pic. 42 pic. 41 Seite 30...
- Page 31 pic. 44 pic. 43 51+55 51+55 pic. 45 pic. 46 100mm pic. 47 Seite 31...
- Page 32 à l’aide des entretoises 61, des quatre vis 60 (M4x65) et programmez le modèle en fonction des débattements recommandés. Chez MULTIPLEX, les sorties récepteurs avec les rondelle U 65. sont attribuées de la manière suivante (si elles ne sont pas Vue 35 attribuées librement par ailleurs):...
- Page 33 7. Montage fi nal du modèle (KIT+RR) 9. Débattements recommandés des gouvernes Montez d’abord l’aile inférieure sur le fuselage. Retournez le fuselage et positionnez l’aile par son bord d’attaque entre Pour un programme de voltige classique: le train d’atterrissage et les carénages de roue. Branchez maintenant les cordons servos des ailerons sur le récepteur.
- Page 34 Liste de pièces KIT ROCKSTAR # 214278 & RR ROCKSTAR # 26 4278: Rep. Kit RR Désignation Matériau Dimensions Notice de montage KIT Papier 80g/m² DIN-A4 Fiche de réclamation Papier 80g/m² DIN-A4 Planche de décoration Imprimé autocollant 700 x 1000mm Demi-fl...
- Page 35 Rep. Kit RR Désignation Matériau Dimensions Guignol „Twin“ plastique moulée par injection, Pièce terminée Support cardan - liaison ailerons, plastique moulée par injection, Pièce terminée Cardan ROUGE Métal Pièce terminée Ø6 x 8mm Cardan VERT Métal Pièce terminée Ø6 x 8mm Cardan CLAIR Métal Pièce terminée Ø6 x 8mm...
- Page 36 Sicurezza per gli aeromodelli MULTIPLEX Il modello NON È UN GIOCATTOLO nel senso comune del termine. Con la messa in funzione del modello l’utente dichiara di conoscere e aver capito il contenuto delle istruzioni per l’uso, in particolare le avvertenze sulla sicurezza, gli interventi di manutenzione, le limitazioni di funzionamento e i vizi.
- Page 37 Le istruzioni dei nostri prodotti non devono essere riprodotte e /o pubblicate senza espressa autorizzazione della Multiplex Modellsport GmbH & Co. KG (per iscritto) - neanche solo in parte né sotto forma di stampa né in formato elettronico. Seite 37...
- Page 38 Familiarizzate con il contenuto della scatola di montaggio! Le scatole di montaggio per modelli della MULTIPLEX vengono sottoposte costantemente a controlli del materiale du- rante la produzione. Speriamo che siate soddisfatti del contenuto della scatola di montaggio. Vi preghiamo tuttavia, di controllare tutte le parti (consultando la lista materiale) prima dell’utilizzo, visto che le parti già...
- Page 39 602700 come se voleste pulire il modello. Gli strati di vernice non devono essere in alcun caso troppo grossi o ir- regolari , altrimenti il modello si deforma. Diventa curvo, pesante e spesso perfi no inutilizzabile! Vernici opache danno spesso il miglior risultato estetico. Dati tecnici ROCKSTAR: Apertura alare: 1050 mm...
- Page 40 Congratulazioni per il vostro nuovo Multiplex ROCKSTAR. cockpit. Quando si è soddisfatti dell’allestimento del cockpit, incollare la capottina cabina 26 con UHU Por sulla fusoliera. Per costruire il modello avete bisogno dei seguenti Fig. 14 utensili: Per fi ssare il cupolino motore 6 incollare le quattro calamite 2x Zacki-Elapor # 85 2727 (KIT) (1xRR) 58 nelle loro apposite posizioni.
- Page 41 La dispo- dei perni distanziatori 61 e le quattro viti 60 (M4x65) con sizione dei connettori presso la MULTIPLEX è la seguente rondelle a U 65 nella fusoliera. (per quanto non assegnata liberamente da altri): Fig.
- Page 42 7. Montaggio fi nale dell’aereo (KIT+RR) 9. Escursioni dei timoni consigliate Inserire innanzitutto l’ala inferiore nella fusioliera. Girare a tal scopo la fusoliera sul retro e inserire la semiala con il Per un volo acrobatico classico: bordo di entrata nell’angolo tra il carrello e il rivestimento della ruota.
- Page 43 Distinta base KIT ROCKSTAR # 21 4278 & RR ROCKSTAR # 2 64278: Pos. Kit RR Designazione Materiale Dimensioni KIT Istruzioni per il montaggio Carta 80g/m² DIN-A4 Comunicazione di reclamo modelli, Carta 80g/m² DIN-A4 Decal Foglio adesivo stampato 700 x 1000mm Semiguscio della fusoliera sx.
- Page 44 Pos. Kit RR Designazione Materiale Dimensioni Squadretta per timone „Twin“ Plastica stampata ad iniezione, Finito Supporto perno cardanico-elemento di connessione degli alettoni Perno cardanico ROSSO Metallo Finito Ø6 x 8mm Perno cardanico VERDE Metallo Finito Ø6 x 8mm Perno caradanico TRASPARENTE, Metallo Finito Ø6 x 8mm Collegamento rinvii TRASPARENTE, Metallo Finito Ø6 x 8mm...
- Page 45 MENORES DE 3 AÑOS! ¡PELIGRO DE ASFIXIA! Al manejar el modelo deben respetarse todas las advertencias del MANUAL DE INSTRUCCIONES. Multiplex Modellsport GmbH & Co. KG no será responsable de las pérdidas y daños de cualquier tipo que puedan ocurrir debido a un manejo erróneo y/o indolente de este producto, incluyendo cualquiera de los accesorios necesarios para su uso.
- Page 46 Otros riesgos Incluso utilizando el modelo según las normas y respetando todos los aspectos de seguridad, siempre hay un riesgo determinado. Por tanto, un seguro de responsabilidad civil es obligatorio. En caso de que vaya a entrar en un club o una asociación, puede realizar la gestión del seguro por esa vía.
- Page 47 ¡Familiarícese con su Kit! Durante la producción, los materiales de los kits MULTIPLEX se someten a continuos controles. Esperamos que el contenido del kit sea de su agrado. Aun así, le rogamos, que compruebe que todas las piezas (según la lista de com- ponentes) están incluidas antes de empezar a montar, ya que cualquier pieza que haya sido manipulada no podrá...
- Page 48 Bajo ningún concepto debe aplicar gruesas capas o de manera irregular, podría estropear su modelo. ¡Se torcerá, se volverá pesado y a menudo hasta frágil! Con una pintura mate conseguirá los mejores resultados. Características técnicas ROCKSTAR: Envergadura:...
- Page 49 Le damos la enhorabuena por su nuevo Multiplex Coloque el adhesivo del cuadro de instrumentos (lámina ROCKSTAR. decorativa) en el panel preformado de la cabina. Cuando esté a gusto con la decoración de tablero de instrumentos, Para montar el modelo necesitará las siguientes her- pegue la cabina 26 con UHU Por al fuselaje.
- Page 50 4. Instalación del motor (KIT+RR) camos. La asignación de los conectores con MULTIPLEX Fije el motor a la cuaderna parallamas de aluminio 59 es (mientras no se asignen de otro modo) de esta forma: usando los cuatro tornillos suministrados.
- Page 51 7. Montaje fi nal del avión (KIT+RR) 9. Recorridos recomendados de los timones Comience montado el ala inferior en el fuselaje. Para ello, ponga el fuselaje boca arriba y coloque el ala con el borde a Para el programa de acrobacia clásica: ataque entre el tren de aterrizaje y la carena de las ruedas.
- Page 52 Lista de partes KIT ROCKSTAR # 21 4278 / RR ROCKSTAR # 26 4278: Num. Kit RR Descripción Material Dimensiones Instrucciones KIT Papel 80gr./m² DIN-A4 Formulario reclamación modelos, Papel 80gr./m² DIN-A4 Láminas decorativas Lámina adhesiva impresa 700 x 1000mm. Mitad izquierda del fuselaje...
- Page 53 Num. Kit RR Descripción Material Dimensiones Horn „Twin“ 10x20 Plástico inyectado Pieza prefabricada Soportes pernos cardan-unión alerones, Plástico inyectado, Pieza prefabricada Pernos cardan ROJO Metal Pieza prefabricada Ø6 x 8mm. Pernos cardan VERDE Metal Pieza prefabricada Ø6 x8mm. Pernos cardan COLOR CLARO, Metal Pieza prefabricada Ø6 x 8mm.
- Page 54 Ersatzteile / Spareparts # 22 4400 Rumpfteileset fuselage parts set # 22 4330 RR-Rumpf mit Dekor RR fuselage with decals # 224422 # 22 4402 Motorhaube / Akkudeckel Cowl / fuselage hatch # 22 44404 # 22 4426 Kabinenhaube / Spinner Canopy / spinner Seite 54...
- Page 55 # 22 4412 # 22 4414 Kleinteilesatz / RR-Fahrwerk small parts set / RR landing gear # 22 4406 # 22 4424 Flächenstreben und Baldachin/ Radverkleidungen wing struts and cabane/ wheel pants # 22 4416 # 22 4410 Motorträger / Leitwerkssatz/ motor mount / tail set # 22 4408 Tragfl...
- Page 56 # 33 3046 # 7 2236 # 11 2088 Himax C 4220-0620 MULTIcont BL-60 SD Servo HS-82MG MULTIPLEX Modellsport GmBH & Co. KG. Westliche Gewerbestrasse 1 D-75015 Bretten-Gölshausen www.multiplex-rc.de Seite 56...