Table des Matières
Publicité
Les langues disponibles
Les langues disponibles
Liens rapides
Publicité
Table des Matières

Manuels Connexes pour Spypoint LIVE-3G


Sommaire des Matières pour Spypoint LIVE-3G
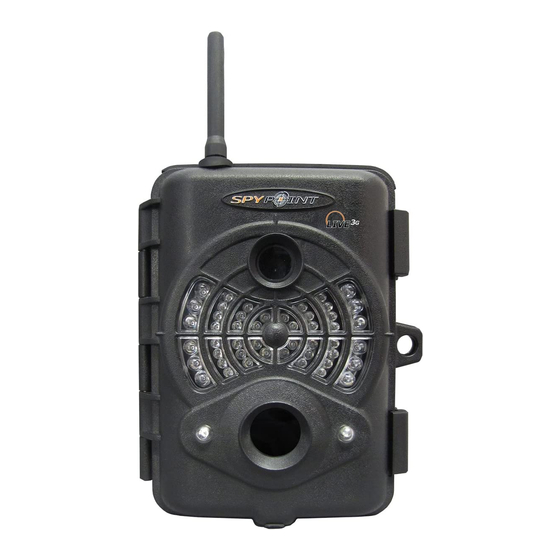
- Page 1 3G Cellular Camera Caméra Cellulaire 3G 3G Funk-Kamera LIVE-3G model S-LIVE-3G model Modèle LIVE-3G Modèle S-LIVE-3G Modell LIVE-3G Modell S-LIVE-3G User manual / Manuel d'utilisation / Bedienungsanleitung www.spypoint.com...
- Page 2 Thank you for choosing the SPYPOINT LIVE-3G/ ® S-LIVE-3G monitoring system. This manual will help you get the most out of your new device. For the latest version of the user manual or for additional information, visit our website at www.spypoint.com.
- Page 3 ™ TV output Composite video (PAL/NTSC) This camera is compatible with Remos™ Technology Computer output USB 2.0 SPYPOINT Remos™ Technology ® (see REMOS™ TECHNOLOGY (accessories sold separately, see « Options ») Power supply: section). Alkaline or lithium 8x AA...
-
Page 4: Installing The Sim Card
CONTENTS 1. Unscrew the cover screw using a Phillips screwdriver. 2. Slide the metal bracket in the OPEN position. • SPYPOINT LIVE-3G or S-LIVE-3G 3. Lift up the metal bracket. ® 4. Insert the SIM card as indicated. • 3G cellular antenna 5. -
Page 5: Solar Panel
LITHIUM BATTERY PACK Power source Switch position The camera can be powered by a rechargeable lithium battery pack • 8 AA LIT-09/LIT-C-8 (sold separately, see OPTIONS). This type of • 12V battery is less affected by cold temperatures and lasts up to 3 times •... - Page 6 MAIN MENU When PHOTO mode is selected, the camera Cellular/Security: connects to the mySPYPOINT ™ service and displays the connection Use the ▲ ▼ button to navigate the interface or to modify a status on the screen. The test light on the front of the camera flashes selection, the OK button to select and the BACK button to return to for 60 seconds to allow the user to leave the area without being the previous menu.
-
Page 7: Settings Menu
How to properly install your camera With 3.5" built-in screen: When VIEW mode is selected, the last recorded using the supplied installation strap: image or video automatically appears on the screen. ◄ ► Press the button to view the next or previous file. - Page 8 When selected, some options affect the behaviour of other Allows the camera to take several consecutive Multi-shot: options from the list of the settings menu. In this case, the (1/2/3/4/5/6 shots at each detection with a 10 second delay consecutive shots) selected option is displayed in yellow and options affected are between each photo.
- Page 9 Select or cancel printing the date, time, Sets the operating mode of the camera. Stamp: Mode: (Yes/No) (Standalone/ temperature and moon phases on photos. Cellular/Security) When «Standalone» mode is activated: • The camera operates normally by recording New moon: photos or videos locally on the memory card. Waxing Crescent: •...
- Page 10 Defines at what time of day the camera When «Security» mode is activated, the Synchronize communicates with mySPYPOINT ™ operation is the same as in «Cellular» mode, server in order to update its status or except: • The camera makes a self check every minute to send photos on the user’s account.
- Page 11 Sets the detection sensitivity of the camera. Allows the camera to operate in continuous Continuous: Sensitivity: (Low/Medium/ (Yes/No) mode. When there is no more space available on High) Note: The system detects only heat sources in the memory card to record photo or video, the motion.
- Page 12 Displays system information: 2. Phone no.: Info: Up to five different phone numbers can be • Model name assigned when the SMS mode is set to use a • Serial number cellular account. • SIM card number To change or add a number, select the •...
- Page 13 SMS CONFIGURATION DOWNLOADING TO A COMPUTER To transfer or view pictures and videos using a computer, the camera ENABLING SMS ALERTS must be powered and set to the main menu before connecting the The camera offers the ability to send SMS alerts (fees may apply USB cable (supplied) to the computer.
-
Page 14: Error Message
To obtain more information on the available options, go to • Camera is set in PHOTO or VIDEO mode. The red light in front of www.spypoint.com. The following items are options which can be the camera flashes for 60 seconds to allow the user to leave without being photographed or recorded. - Page 15 It can rotate 360° and tilt approx +/-90°, also from electrical supply. available in black. Cable lock, CL-6ft Solar Panel, SP-12V Cable lock, fits all SPYPOINT cameras and ® Solar panel with adjustable steel mounting more, 6ft . kit. Can be used to maintain recharged...
-
Page 16: Repair Service
For technical assistance, write • Connect the equipment into an outlet on a circuit to tech@spypoint.com. Give a description of the problem with different from that to which the receiver is connected. a phone number where you can be reached. - Page 17 Pour la plus récente version du manuel d’utilisateur ou pour toutes informations additionnelles, consultez notre site web au www.spypoint.com. Si vous désirez obtenir de l’information ou vous abonner au service mySPYPOINT , rendez-vous au www.myspypoint.com.
- Page 18 SPÉCIFICATIONS Panneau solaire Panneau solaire (SP-12V) (Prise 12V) combiné avec bloc pile lithium (LIT-09/LIT-C-8) Enregistrement Photo: Résolution photo 8 MP Système de détection: Format de fichier photo Détecteur de mouvement Option Multi-photos Jusqu’à 6 photos par détection Angle de détection 30°...
-
Page 19: Contenu De L'emballage
CONTENU DE L’EMBALLAGE 1. Dévisez et ouvrez le couvercle à l'aide d'un tournevis cruciforme. 2. Faites glisser le support métallique en position OPEN. • Caméra modèle SPYPOINT LIVE-3G ou S-LIVE-3G 3. Soulevez le support métallique vers le haut. • Antenne cellulaire 3G 4. -
Page 20: Mémoire De Stockage
BLOC PILE LITHIUM Source d'alimentation Position du commutateur La caméra peut être alimentée au moyen d’un bloc pile lithium • 8 AA rechargeable LIT-09/LIT-C-8 (vendu séparément, voir section • 12V OPTIONS DISPONIBLES). Ce type de pile est moins affecté par •... -
Page 21: Menu Principal
MENU PRINCIPAL : Lorsque le mode PHOTO est sélectionné, la Cellulaire/Sécurité caméra se connecte au service mySPYPOINT et affiche le statut Utilisez les boutons ▲ ▼ pour naviguer sur l’interface ou de la connexion à l’écran. La lumière de test sur le devant de la modifier une sélection, le bouton OK pour sélectionner et le bouton caméra clignote durant 60 secondes pour permettre à... - Page 22 Comment installer correctement votre caméra VISIONNEMENT Permet de visionner les photos ou les vidéos sur l’écran à l'aide de la courroie d'installation fournie: intégré 3.5" ou sur un téléviseur. Visionner avec l’écran intégré 3.5" : Lorsque le mode VISIONNEMENT est sélectionné, la dernière photo ou la dernière vidéo enregistrée apparaît automatiquement ◄...
-
Page 23: Menu De Configuration
MENU DE CONFIGURATION Permet de choisir l’intervalle de temps d’attente Délai: (10s/1min/3min/5 avant que la caméra enregistre la prochaine Permet de paramétrer les options avancées de la caméra. min/10min/15min/ photo ou vidéo. Pour configurer le système en français, appuyez sur 30min) le bouton ▼... - Page 24 Permet la prise de photos à intervalles réguliers Note: Les heures peuvent être inscrites sur une Time Lapse: (Désactivé/10min/ prédéfinis. Cette option permet entre autres, période de 12 ou 24 heures, se référer à l'option 30min/1h/2h) l’obtention de photos de gibiers en dehors du «Format heure»...
- Page 25 En cas de vol, cette option permet à l'appareil de Permet de choisir le mode de fonctionnement Alerte voleur: Mode: (Oui/Non) (Autonome/ passer en état d'alerte. de la caméra. Cellulaire/Sécurité) • L'utilisateur reçoit un message d'alerte à son Lorsque le mode «Autonome» est activé: adresse courriel ou par message texte (des frais •...
- Page 26 Permet de choisir le nombre de synchronisations Lorsque le mode «Sécurité» est activé, le Synchronisation (1/2/6/12 fois par que la caméra effectue par jour avec le serveur. fonctionnement est le même que le mode jour) «Cellulaire» en plus de: • La caméra effectue vérification...
- Page 27 Permet de choisir la taille des photos envoyées Permet de sélectionner le type d’alimentation Format trans.: Alimentation: (Aperçu/Grand) (Piles/Électricité) sur le compte mySPYPOINT de l’utilisateur. utilisé. Aperçu: 160x120 pixels Choisissez «Électricité» si l'appareil est branché Grand: 640x480 pixels à une prise électrique (utilisant un adaptateur 12 volts AD-12V, vendu séparément).
- Page 28 Permet la prise de photos ou vidéos en continu. Permet à la caméra de déclencher à distance, Continu: IR-Booster: (Oui/Non) Lorsqu’il n’y a plus d’espace sur la carte dans une zone de 15m., un ou plusieurs (Remos mémoire pour enregistrer une photo ou une appareils d'éclairage infrarouge de type IR- (Oui/Non) vidéo, la caméra continue l’enregistrement...
-
Page 29: Fonction Gps
Permet de tester la connexion cellulaire avec le 1. Mode SMS: Test conn. serveur mySPYPOINT et affiche les étapes Désactivé: Aucun message texte ne peut • de connexion à l'écran. être envoyé par la caméra et la liste des numéros de téléphone est désactivée. •... -
Page 30: Transfert Vers L'ordinateur
TRANSFERT VERS L’ORDINATEUR 1. En activant l'option «Alerte Voleur»: La caméra est dotée d'un système de sécurité lui permettant de détecter les chocs ou Permet de transférer ou visionner les photos ou vidéos à l’aide les déplacements inattendus (en cas de vol ou de vandalisme) et d’un ordinateur. -
Page 31: Options Disponibles
• L’appareil est en mode PHOTO ou VIDEO et la lumière de test disponibles, visitez le www.spypoint.com. Voici les principales clignote durant 60 secondes pour permettre à l’utilisateur de quitter options disponibles pour la caméra LIVE-3G/ S-LIVE-3G. les lieux sans être photographié ou filmé. L'écran de l'appareil s'éteint: •... - Page 32 11lbs (5kg) Avec plaque de fixation amovible. Fonctionne avec la Capteur de mouvement sans fil, MS-1 plupart des produits SPYPOINT Capteur de mouvement sans fil. Fonctionne avec toutes les caméras compatibles avec la technologie Remos . Nécessite une pile 9V alcaline ou une source d’alimentation 12V...
-
Page 33: Garantie Limitée
• Réorientez l’antenne de réception. garantie seront facturées à prix raisonnables. Pour le soutien technique, s.v.p. écrire un courriel à tech@spypoint.com. Décrire • Éloignez l’appareil du composant qui reçoit les le problème rencontré et indiquer un numéro de téléphone pour ondes. - Page 34 ® Bedienungsanleitung hilft Ihnen dabei, Ihr neues Gerät optimal zu nutzen. Die aktuellste Version der Bedienungsanleitung sowie zusätzliche Informationen finden Sie auf unserer Website unter www.spypoint.com.Um weitere Informationen zu erhalten oder mySPYPOINT™ um sich für den -Service anzumelden, gehen Sie auf www.myspypoint.com.
-
Page 35: Technische Daten
Vollständig online über die (Zubehör separat erhältlich, siehe Stromversorgung: -Website einstellbar mySPYPOINT™ „Optionen“) Diese Kamera ist kompatibel Remos™ Alkali- oder Lithium- 8 x AA mit SPYPOINT REMOS™ ® -Technologie Batterien -Technologie (sh. auch Kapitel Lithium-Akku Wiederaufladbarer Akku "REMOS™ -Technologie"). (LIT-09/LIT-C-8) -
Page 36: Lieferumfang
Temperaturbereich: Betriebstemperatur (-20 °C bis + 50 °C) Lagertemperatur (-30 °C bis + 75 °C) LIEFERUMFANG • SPYPOINT LIVE-3G oder S-LIVE-3G ® • 3G-Mobilfunkantenne • Befestigungsgurt • USB-Kabel • Audio-Video-Kabel • Bedienungsanleitung EINSETZEN DER SIM-KARTE Setzen Sie Ihre SIM-Karte in das dafür vorgesehene Fach an der Kamera ein. - Page 37 AA-BATTERIEN SOLAR-PANEL Für diese Kamera werden 8 AA-Batterien benötigt (1,5 V). Wir Dieses Modell bietet die Möglichkeit des Anschlusses an ein empfehlen die Verwendung von Alkali- oder Lithium-Batterien. SP-12V Solar-Panel (separat erhältlich, siehe „Optionen“), um Beachten Sie auch, dass die Spannung wiederaufladbarer Batterien damit einen LIT-09/LIT-C-8 Lithium-Akku aufzuladen (separat (1,2 V) nicht ausreicht, um die Kamera mit Strom zu versorgen.
- Page 38 HAUPTMENÜ Wenn der „Foto“-Modus ausgewählt Mobilfunk/Sicherheit: wird, verbindet sich die Kamera mit dem mySPYPOINT™ -Dienst Benutzen Sie die Tasten „ ▲ “ und „ ▼ “, um im Menü zu und zeigt den Verbindungsstatus auf dem Display an. Das Testlicht navigieren oder einen ausgewählten Wert zu ändern, die Taste an der Vorderseite der Kamera blinkt für 60 Sekunden, sodass der „OK“...
- Page 39 Wie Sie Ihre Kamera mit dem mitgelieferten WIEDERGABE Ermöglicht es dem Benutzer, Fotos oder Videos auf Installations-Befestigungsgurt richtig installieren: dem integrierten 3.5“-Display der Kamera oder einem Fernsehbildschirm anzusehen. Mit integriertem 3.5“ Display: Wenn der Modus „Ansicht“ ausgewählt wird, wird das zuletzt aufgenommene Bild oder Video automatisch auf dem Display ◄...
- Page 40 EINSTELLUNGSMENÜ Einstellung des Zeitintervalls zwischen den Verzögerung: (10s/1min/3min/ einzelnen Erfassungen, bevor die Kamera das Ermöglicht dem Benutzer die Anpassung der erweiterten 5min/10min/ nächste Foto oder Video aufnimmt. 15min/30min) Einstellungen der Kamera. Um das System auf eine andere Sprache umzustellen, drücken Sie die Taste „▼“, bis die Zusatzeinstellung: Es ist möglich, mit dem Option „Sprache“...
- Page 41 Ermöglicht Kamera, Bilder Wählen oder löschen Sie die Angabe von Zeitraffer: Stempel: (Aus/10min/3 (Ja/Nein) regelmäßigen, voreingestellten Abständen Datum, Uhrzeit, Temperatur und Mondphasen 0min/1h/2h) aufzunehmen. Diese Option kann nützlich sein auf den Fotos. für Aufnahmen von Tieren, die sich außerhalb des Erfassungsbereiches der Kamera befinden. Neumond: Erstes Viertel: Wenn die Option „Zeitraffer“...
- Page 42 Einstellung des Betriebsmodus der Kamera. Modus: Wenn der Modus „Sicherheit“ aktiviert (Standalone/ ist, ist die Funktion wie im „Mobilfunk“- Mobilfunk/ Modus, mit folgenden Ausnahmen: Wenn der „Standalone“-Modus aktiviert ist: Sicherheit) • Die Kamera führt jede Minute einen • Die Kamera funktioniert normal, nimmt Fotos Selbstcheck durch, um zu prüfen, ob Bilder oder Videos auf und speichert sie lokal auf der aufgenommen wurden.
- Page 43 Einstellung täglichen Anzahl Einstellung Fotogröße, Übertra- Synchronisie- Synchronisierungen zwischen der Kamera und -Benutzerkonto übertragen mySPYPOINT™ gungsformat: ren: (1/2/6/12 Mal am (Miniatur/Groß) dem Server. wird. Tag) Diese Option ändert die Häufigkeit, mit der Miniatur: 160x120 Pixel die Kamera mit dem mySPYPOINT™ -Server Groß: 640x480 Pixel kommuniziert, um ihren Status zu aktualisieren...
- Page 44 Zur Auswahl der Art der Stromversorgung. Ermöglicht den durchgehenden Betrieb der Power: Beibehalten: (Batterien/ (Ja/Nein) Kamera. Wenn auf der Speicherkarte kein Elektrizität) Wählen Sie „Netz“, wenn die Kamera über Speicherplatz für Foto- oder Videoaufnahmen einen Netzanschluss betrieben wird (mit einem vorhanden ist, nimmt die Kamera weiter auf, 12-Volt-Gleichstromadapter AD-12V,...
- Page 45 Ermöglicht es, die Kamera drahtlos durch ein 2. Telefonnr.: MS-1: oder mehrere MS-1-Geräte auszulösen (Details (Remos™) Wenn der SMS-Modus auf die Nutzung eines (Ein/Aus) siehe „Optionen“). Mobilfunkkontos eingestellt ist, können bis zu fünf verschiedene Telefonnummern eingegeben Zeigt Systeminformationen an: Info: werden.
- Page 46 TONAUFNAHMEN REMOS™ TECHNOLOGIE Diese REMOS™ -kompatible Kamera profitiert von Drahtlos- Die Kamera bietet die Möglichkeit, im „VIDEO“-Modus Funktionen und kann mit folgendem Zubehör kombiniert werden: Tonaufnahmen zu machen. Wenn der „VIDEO“-Modus ausgewählt wird, nimmt die Kamera automatisch auch den Ton auf. Das Mikrofon •...
-
Page 47: Fehlermeldungen
Bildschirm schaltet sich nach einer Zeit von 60 Sekunden, um OPTIONEN die Batterie zu schonen. Besuchen Sie Ihren Händler vor Ort oder www.spypoint.com, um mehr über die erhältlichen Produkte zu erfahren. Die folgenden Produkte sind beliebte Ergänzungen für die SPYPOINT ®... - Page 48 Ermöglicht es dem Benutzer, Fotos und Videos 12-Volt-Stromkabel, CB-12FT direkt auf einen Computer zu laden, ohne Ein ca. 3,5 m langes Kabel, mit dem der dass dazu die SPYPOINT ® -Kamera benötigt Benutzer die Kamera an eine externe 12-Volt- wird. Dieses Lesegerät funktioniert mit 25 Gleichstromversorgung anschließen kann.
-
Page 49: Garantiebedingungen
EUROHUNT GmbH Harzblick 25 BEKANNTMACHUNGEN 99768 Harztor OT Ilfeld/ Germany Tel. +49 (0) 36331-50540 Hiermit erklärt GG Telecom, dass Live-3G-Kamera in Fax +49 (0) 36331-505422 Übereinstimmung mit den grundlegenden Anforderungen info@eurohunt.de und anderen relevanten Bestimmungen der Richtlinie 1999/5/EC entspricht. Der Benutzer kann eine Kopie der Konformitätserklärung per E-Mail an info@spypoint.com erhalten.