Table des Matières
Publicité
Les langues disponibles
Les langues disponibles
Liens rapides
Publicité
Chapitres
Table des Matières

Manuels Connexes pour Storch VarioVac 50


Sommaire des Matières pour Storch VarioVac 50
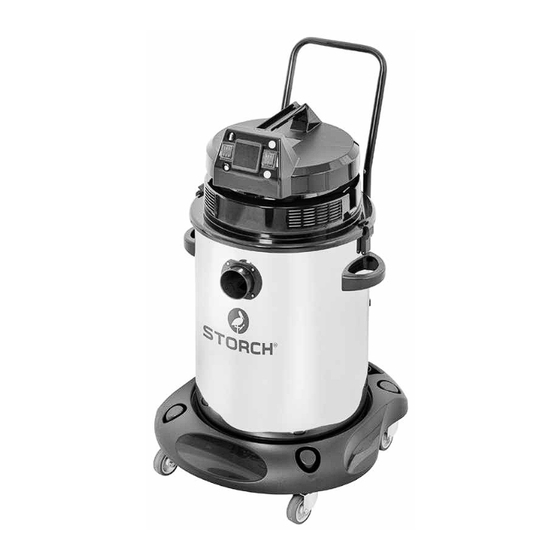
- Page 1 Nass- und Trockensauger VarioVac 50 Nat- en droogzuiger VarioVac 50 Aspirateur eau et poussières VarioVac 50 Aspiratore per polveri e liquidi VarioVac 50 Wet and dry vacuum cleaner VarioVac 50 Vysavač VarioVac 50 pro suché a mokré odsávání...
-
Page 2: Vysavač, 2 M Sací Hadice Ø 45 Mm, 3 M Sací Hadice Ø 32 Mm Včetně Univerzálního Adaptéru Pro Elektrické Nářadí
Vielen Dank für Ihr Vertrauen zu STORCH. Mit dem Kauf haben Sie sich für ein Qualitäts-Produkt entschieden. Haben Sie trotzdem Anregungen zur Verbesserung oder aber vielleicht einmal ein Problem, so freuen wir uns sehr, von Ihnen zu hören. Bitte sprechen Sie mit Ihrem Außendienst-Mitarbeiter oder in dringenden Fällen auch mit uns direkt. - Page 3 - Keine brennbaren, explosionsfähigen Stoffe mit dem VarioVac 50 aufsaugen. - Vor Wartungsarbeiten ist grundsätzlich der Netzstecker zu ziehen. - Der Hersteller bzw. Storch haftet in keinem Fall bei unsachgemäßem Gebrauch, bei am Gerät vorgenommenen Änderungen und bei unzureichender Wartung.
- Page 4 Gebrauch Aufbau (Abb. “AB”) Setzen Sie den Behälter so in das Fahrgestell ein, daß der untere Rand des Kessels unter die vordere Aufnahme greift. Die Kesselnaht muß nach hinten zeigen. Schieben Sie den Halter (E) über den hinteren Rand des Kessels und schrauben ihn fest.
- Page 5 ACHTUNG: Die Steckdose im Saugkopf ist für den Anschluß von Elek- trowerkzeugen mit einer Nennleistung von bis zu 2.000 Watt geeig- net. Beim Betrieb des Elektrowerkzeugs über die Steckdose des VarioVac 50 ist unbe- dingt zu beachten: ACHTUNG: Niemals Elektrowerkzeuge mit höherer Nennleistung als der unter der Steckdose abgegebenen einsetzen.
- Page 6 Verwendung des Filtereinsatzes (Abb. „B4“ - „B5“) Gerätekopf vom Behälter ablösen und auf den Kopf stellen (Abb.”B4). Filtereinsa- tz auf seinen Sitz stecken, fest hineindrücken und mit der am Boden befindlichen Knebelschraube im Uhrzeigersinn fest drehen. (Abb.”B4”). Überprüfen Sie den festen Halt des Filtereinsatzes, indem Sie ihn leicht nach oben ziehen (Abb.“B5”).
- Page 7 Wartung des Gerätes ACHTUNG: Bevor irgendeine Wartung, Reinigung oder Ersatz des Filtersystems vorgenommen wird, immer den Stecker aus der Netzsteckdose ziehen. Staubsack Staubsäcke nicht wiederverwenden, sondern stets durch neue ersetzen. Vliesfilterbeutel (Abb.”D1”) Um den Vliesfilterbeutel zu reinigen, ist er in einem Mülleimer auszuschlagen. Gegebenenfalls mit Druckluft ausblasen.
- Page 8 Fehlerbehebung Problem Ursache Lösung Das Gerät läuft nicht an Kein Strom Steckdose und Sicherungen Stromkabel oder Motor defekt überprüfen Wenden Sie sich an Ihren Händler Staub tritt aus den Filter nicht gesäubert bzw. Filter überprüfen und Abluftschlitzen aus Filter beschädigt gegebenenfalls ersetzen Saugleistung läßt nach Schmutzbehälter ist zu voll...
- Page 9 Detailzeichnung Originalanleitung...
- Page 10 Detailzeichnung Originalanleitung...
- Page 11 Ersatzteilliste Pos. Art.-Nr. Bezeichnung Pos. Art.-Nr. Bezeichnung 31 65 12 79 Fahrbügel 1 65 12 46 Griff Saugkopf 32 65 12 81 Klammer zur Befestigung 2 65 12 47 Saugkopf Oberteil Saugkopf 3 65 12 27 Hauptschalter mit 33 65 12 82 Behältergriff Schutzkappe 34 65 12 83...
- Page 12 Bei Vorliegen eines Gewährleistungs- bzw. Garantiefalles bitten wir, dass das komplette Gerät zusammen mit der Rechnung frei an unser Logistik Center in Berka oder an eine von uns autorisierte Service- Station eingeschickt wird. Zuvor bitten wir Sie, uns unter unserer kostenlosen STORCH Service-Hotline 08 00. 7 86 72 47 zu kontaktieren. Gewährleistungs- bzw. Garantieanspruch: Reparaturansprüche bestehen ausschließlich an Werkstoff- oder Fertigungsfehler sowie ausschließlich bei bestim-...
- Page 13 EG-Konformitätserklärung Name / Anschrift des Ausstellers: STORCH Malerwerkzeuge & Profigeräte GmbH Platz der Republik 6-8 D - 42107 Wuppertal Wir erklären hiermit, dass das nachstehend genannte Gerät aufgrund dessen Konzipierung und Bauart sowie in der von uns in Verkehr gebrachten Ausführung den einschlägigen, grundlegenden Sicherheits- und Gesundheitsanforderungen der EG-Richtli- nien entspricht.
-
Page 14: Table Des Matières
Hartelijk dank voor uw vertrouwen in STORCH. Met deze aankoop hebt u voor een kwaliteitsproduct gekozen. Als u desondanks een tip voor verbeteringen hebt of wellicht ooit een probleem ondervindt, dan horen wij graag van u. Neem contact op met de medewerker buitendienst of in dringende gevallen rechtstreeks met ons. -
Page 15: Afbeeldingsoverzicht
- Zuig geen brandbare, explosieve stoffen op met VarioVac 50. - Trek altijd eerst de stekker uit het stopcontact voordat er onderhoudswerkzaamheden worden uitgevoerd. - De fabrikant resp. Storch is in geen enkel geval aansprakelijk bij ondeskundig gebruik, bij aan het apparaat doorgevoerde veranderingen of bij onvoldoende onderhoud. -
Page 16: Gebruik
Gebruik Opbouw (afb. “AB”) Plaats het reservoir zodanig in het onderstel dat de onderste rand van de ketel zich onder de voorste opname vastgrijpt. De naad van de ketel moet zich aan de achter- kant bevinden. Schuif de houder (E) over de achterrand van de ketel en schroef hem vast. -
Page 17: Filter
2.000 Watt. Neem het volgende in acht bij gebruik van elektro-gereedschap via het stop- contact van de VarioVac 50: PAS OP: Nooit elektro-gereedschap aansluiten met een hoger nomin- aal vermogen dan wat er onder het stopcontact staat aangegeven. -
Page 18: Gebruik Van Het Apparaat
Gebruik van de filterinzet (afb. "B4“ - "B5“) Apparaatkop losmaken van reservoir en op de kop zetten (afb.”B4). Filterinzet op de houder zetten, goed vast drukken en met de knevelschroef aan de onderkant in de richting van de klok vastdraaien. (Afb.”B4”). Controleer of de filterinzet goed vast zit door deze lichtjes naar boven te trekken (afb.“B5”). -
Page 19: Onderhoud Van Het Apparaat
Onderhoud van het apparaat LET OP: Voordat er enig onderhoud, reiniging of vervanging van het filtersysteem wordt uitgevoerd altijd eerst de stekker uit het stopcontact trekken. Stofzak Stofzak niet hergebruiken, maar altijd door een nieuwe vervangen. Vliesfilterzak (afb.”D1”) Klop de vliesfilterzak in een vuilnisbak uit om deze te reinigen. Eventueel met perslucht uitblazen. -
Page 20: Fouten Oplossen
Fouten oplossen Probleem Oorzaak Oplossing Apparaat start niet Geen stroom Stopcontacten en zekeringen contro- Stroomkabel of motor defect leren Neem contact op met uw handelaar Stof komt uit de Filter niet gereinigd resp. Filter controleren en eventueel ver- afvoerluchtspleten Filter beschadigd vangen Zuigvermogen onvoloende Vuilreservoir is te vol... -
Page 21: Detailtekening
Detailtekening Vertaling van de originele handleiding... - Page 22 Detailtekening Vertaling van de originele handleiding...
-
Page 23: Lijst Met Vervangende Onderdelen
Lijst met vervangende onderdelen Pos. Art. nr. Benaming Pos. Art. nr. Benaming 31 65 12 79 Rijbeugel 1 65 12 46 Greep zuigkop 32 65 12 81 Klem voor bevestiging van 2 65 12 47 Bovenste deel zuigkop zuigkop 3 65 12 27 Hoofdschakelaar met 33 65 12 82 Reservoirgreep... -
Page 24: Garantie
Bij een garantieclaim vragen wij u het gehele apparaat samen met de rekening franco aan ons logistiekcentrum in Ber- ka of naar een door ons geautoriseerd servicestation te verzenden. Neem eerst contact op met de STORCH Service-Hotline (hiervoor worden kosten in rekening gebracht): +49 (0)202 . 49 20 – 110. -
Page 25: Eg-Conformiteitverklaring
EG-conformiteitsverklaring Naam/adres van de opsteller: STORCH Malerwerkzeuge & Profigeräte GmbH Platz der Republik 6 - 8 D - 42107 Wuppertal Wij verklaren hiermee: Dat het hieronder vermelde apparaat op basis van zijn ontwerp en type in de door ons in omloop gebrachte uitvoering aan de toepasselijke elementaire veiligheids- en gezondheidseisen van de EU-richtlijnen voldoet. -
Page 26: 240 Mbar
Si vous avez malgré tout des suggestions pour l‘amélioration ou si vous deviez rencontrer un problème, nous sommes avec plaisir à votre disposition. Dans ce cas, contactez votre représentant, ou directement notre service clients, s‘il s‘agit d‘un problème urgent. Salutations dévouées SAV STORCH Tél.: +49 (0) 2 02 . 49 20 - 112 Fax: +49 (0)2 02 . -
Page 27: Vue D'ensemble Des Illustrations
- Ne pas aspirer de matières combustibles ou explosives avec le VarioVac 50. - Retirer la fiche secteur avant les travaux d'entretien. - Le fabricant et/ou la société Storch n'est, en aucun cas, responsable en cas d'utilisation non conforme, de modifications apportées à... - Page 28 Usage Structure (Fig. «AB») Introduisez le récipient dans le châssis de sorte que le bord inférieur de la chaudière se trouve sous le loge- ment avant. La soudure de la chaudière doit apparaître à l'arrière. Placez le support (E) au-dessus du bord arrière de la chaudière et le vissez.
-
Page 29: Filtre
Raccordement d'un outil électrique à l'aspirateur eau et poussières (Fig. «A4» - «A5») Il convient d'abord d'introduire la fiche de l'outil électrique dans la prise de cou- rant qui se trouve dans la tête de l'aspirateur eau et poussières, puis de raccorder ce dernier au secteur. -
Page 30: Utilisation
Utilisation du filtre cartouche (Fig. «B4» - «B5») Détacher la tête de l'appareil du récipient et placer sur la tête (Fig. «B4»). Placer le filtre cartouche sur son siège, l'enfoncer en appuyant et tourner dans le sens des aiguilles d'une montre avec la vis papillon se trouvant sur le sol (Fig. «B4»). Contrôlez la stabilité... -
Page 31: Maintenance De L'appareil
Maintenance de l'appareil ATTENTION : avant de procéder à la maintenance, au nettoyage ou au remplacement du système de filtra- ge, il convient de toujours retirer la fiche de la prise de courant. Sac à poussière Ne pas réutiliser les sacs à poussière, mais les remplacer systématiquement par de nouveaux. -
Page 32: Suppression Des Erreurs
Suppression d'erreurs Problème Cause Solution L'appareil ne fonctionne pas Pas d'alimentation Vérifier la prise de courant et les Câble d'alimentation ou moteur fusibles défectueux Adressez-vous à votre revendeur De la poussière s'échappe des Le filtre est sale et/ou Contrôler le filtre et, le cas échéant, fentes d'évacuation d'air endommagé... -
Page 33: Dessin Détaillé
Dessin détaillé Traduction des instructions d‘origine... - Page 34 Dessin détaillé Traduction des instructions d‘origine...
-
Page 35: Nomenclature
Nomenclature Pos. Réf. art. Désignation Pos. Réf. art. Désignation 31 65 12 79 Étrier de conduite 1 65 12 46 Poignée tête d'aspiration 32 65 12 81 Agrafe pour fixer la tête 2 65 12 47 Tête d'aspiration partie d'aspiration supérieure 33 65 12 82 Poignée de récipient... -
Page 36: Garantie
à Berka accompagné de la facture ou de l'expédier à un service SAV agréé par nous. Veuillez contacter préalablement l‘assistance téléphonique payante de la société STORCH: +49 (0)202 . 49 20 – 110. Demande de prise en garantie : Les droits de réparation sont exclusivement appliqués pour les défauts de matériau ou les vices de fabrication ainsi... -
Page 37: Déclaration De Conformité Ce
Déclaration de conformité CE Nom / Adresse de l'exposant : STORCH Malerwerkzeuge & Profigeräte GmbH Platz der Republik 6-8 D - 42107 Wuppertal Nous déclarons, par le présent acte : que le produit cité ci-après respecte les exigences fondamentales et en vigueur en matière de sécurité et de santé des directives européennes de par leur conception ainsi que dans la version commercialisée par nos soins. -
Page 38: Materiale Compreso Nella Fornitura
Grazie per la fiducia accordata a STORCH. Con l‘acquisto avete scelto un prodotto di qualità. Se comunque avete dei suggerimenti volti a migliorare la nostra offerta o se doveste incontrare qualche difficoltà, non esitate a rivolgerVi a noi. Contattate il Vostro rappresentante oppure rivolgeteVi direttamente a noi in casi urgenti. -
Page 39: Sommario Delle Figure
- Non aspirare sostanze infiammabili o esplosive con il VarioVac 50. - Prima di eseguire dei lavori di manutenzione occorre sempre staccare la spina elettrica. - Il produttore, risp. Storch, non è responsabile in caso di uso improprio, modifiche apportate all'apparecchio oppure in caso di un'insufficiente manutenzione. -
Page 40: Utilizzo
Utilizzo Montaggio (fig. "AB”) Inserire il contenitore nel carrello in modo che il bordo inferiore entri nella sede. Il cordone del contenitore deve puntare verso il retro. Spingere il supporto (E) oltre il bordo posteriore del conte- nitore e avvitarlo. Spingere il manico di spinta dal di sopra nelle sedi (F). - Page 41 ATTENZIONE: La presa nella testa aspiratrice è adatta per il collega- mento di elettroutensili con una potenza nominale di fino a 2.000 Watt. Quando si collega un elettroutensile alla presa del VarioVac 50 occorre assoluta- mente osservare quanto segue: ATTENZIONE: Mai utilizzare elettroutensili con una potenza nomi- nale superiore a quella indicata sotto la presa.
-
Page 42: Filtro
Utilizzo dell'inserto filtro (fig. "B4" - "B5") Sganciare la testa dal contenitore e capovolgerla (fig. "B4"). Inserire la cartuccia filtro nella sede, spingerla a fondo e ruotare in senso orario la manopola. (Fig. "B4"). Tirare leggermente verso l'alto per assicurarsi che il filtro sia perfettamente agganciato (fig. -
Page 43: Gratis Bestel-Fax: 08 00. 7 86
Manutenzione dell'apparecchio ATTENZIONE: Prima di eseguire qualsiasi lavoro di manutenzione, pulizia o sostituzione del sistema filt- rante, togliere sempre la spina dalla rete di alimentazione elettrica. Sacco polvere Non riutilizzare i sacchi per la polvere, sempre sostituirli. Sacco filtro (fig.”D1”) Per pulire il sacco filtro, sbatterlo in un contenitore per immondizia. -
Page 44: Gratis Bestel-Hotline: 08 00. 7 86
Risoluzione di guasti Problema Causa Soluzione L'apparecchio non si avvia Nessuna corrente Controllare la presa ed i fusibili Guasto al cavo d'alimentazione Rivolgersi al venditore o al motore Polvere fuoriesce dalle Filtro non pulito risp. Controllare filtro, sostituire se fessure dell'aria di scarico Filtro danneggiato necessario La potenza di aspirazione diminuisce... -
Page 45: Disegno Dettagliato
Disegno dettagli Traduzione delle istruzioni originali... - Page 46 Disegno dettagli Traduzione delle istruzioni originali...
-
Page 47: Ligne D'assistance Sav Gratuite: +49 800 7 86
Elenco dei pezzi di ricambio Pos. N. art. Descrizione Pos. N. art. Descrizione 31 65 12 79 Manico di spinta 1 65 12 46 Presa Testa aspiratrice 32 65 12 81 Morsetto per il fissaggio della 2 65 12 47 Testa aspiratrice parte superiore testa aspiratrice 3 65 12 27... -
Page 48: Garanzia
In casi in cui si intende far valere il diritto di garanzia, vi preghiamo di inviarci l'apparecchio in modo completo con fat- tura, franco nostro centro di logistica a Berka oppure ad una service-station da noi autorizzata. Si prega di consultare prima la Hotline di servizio STORCH a pagamento: 02 - 66 22 77 15 Diritto alla garanzia: I diritti si possono far valere solo per errori di materiale o di produzione nonché... -
Page 49: Dichiarazione Di Conformità Ce
Dichiarazione di conformità CE Nome / indirizzo dell'emittente: STORCH Malerwerkzeuge & Profigeräte GmbH Platz der Republik 6-8 D - 42107 Wuppertal Con la presente la società dichiara che: Che l'apparecchio in seguito specificato, a causa della sua concezione e il suo tipo costruttivo come anche della sua esecuzione da noi messa in circolazione corrisponde alle pertinenti ed essenziali esigenze sulla sicurezza e salute ripor- tate nelle Direttive CE. -
Page 50: Scope Of Delivery
Thank you for purchasing a STORCH product. You have purchased a quality product. If you would like to suggest an improvement, or experience a problem with your product, please do not hesitate to contact us. Please contact your field sales representative or, in urgent cases, contact us directly. -
Page 51: Overview Figure
- Do not use the VarioVac 50 to vacuum combustible or explosive substances. - Always remove the mains plug before performing maintenance work. - The manufacturer or Storch is not liable for incorrect use of the device, modifications made to the the device or insufficient maintenance. -
Page 52: Use
Layout (Fig. "AB") Insert the container in the frame so that the bottom edge of the barrel engages under the front mount. The seam of the barrel must point to the rear. Push the bracket (E) over the rear edge of the barrel and screw tight. -
Page 53: Filter
2,000 Watt. The following must always be observed when operating the electric tool via the socket of the VarioVac 50: ATTENTION: never use electric tools that have a nominal power that is higher than that specified under the socket. -
Page 54: Using The Device
Using the filter cartridge (Fig. "B4" - "B5") Remove the device head from the container and put it on its head (Fig. "B4"). Put the filter cartridge in its mount, press in tight and screw tight in place clockwise using the Tommy screw located on the base. (Fig. "B4".) Check the tight fit of the filter cartridge by pulling it upwards slightly (Fig. -
Page 55: Maintenance Of The Device
Maintaining the device ATTENTION: before carrying out any maintenance, cleaning or before replacing the filter system, always pull the plug out of the socket. Dust bag Never re-use dust bags, always replace them. Fleece filter bag (Fig. "D1") In order to clean the fleece filter bag, it must be knocked-out in a dustbin. Where necessary, use compressed air. -
Page 56: Fault Elimination
Fault elimination Problem Cause Solution The device does not start No power Check the socket and fuse Power cable or motor defective Consult your dealer Dust escapes from the Filter is not cleaned or Check filter and replace if necessary exhaust air slots filter is damaged Vacuum build up drops... -
Page 57: Detailed Drawing
Detailed drawing Translation of the original instruction... - Page 58 Detailed drawing Translation of the original instruction...
-
Page 59: Spare Parts List
List of spare parts Pos. Art. No. Designation Pos. Art. No. Designation 31 65 12 79 Handle 1 65 12 46 Handle suction head 32 65 12 81 Clamp for fastening the suction 2 65 12 47 Suction head upper part head 3 65 12 27 Main switch with dust protection... -
Page 60: Warranty
Repairs: All repairs have to be conducted on our premises or by an authorised STORCH service centre. Translation of the original instruction... -
Page 61: Ec Declaration Of Conformity
EC Declaration of Conformity Name / Address of issuer: STORCH Malerwerkzeuge & Profigeräte GmbH Platz der Republik 6 - 8 D - 42107 Wuppertal We herewith declare: that the machine designated below complies with the fundamental health and safety requirements of the EC Directives in terms of its design, construction and version we have brought into circulation. -
Page 62: Rozsah Dodávky
Děkujeme Vám za důvěru ve firmu STORCH. S nákupem výrobku jste se rozhodli pro kvalitní produkt. Pokud přesto máte podněty na zlepšení nebo možná nějaký problém, tak bychom byli velmi rádi, kdybyste se nám ozvali. Promluvte si s příslušným externím spolupracovníkem naší firmy nebo se v naléhavých případech obracejte přímo na nás. -
Page 63: Přehled Zobrazení
- S přístrojem VarioVac 50 neodsávejte žádné hořlavé, výbušné látky. - Před prováděním údržbových prací je zásadně třeba vytáhnout zástrčku ze sítě. - Výrobce příp. firma Storch neposkytuje v žádném případě záruku při nesprávném použití, při provedení změn na přístroji a při nedostatečné údržbě. -
Page 64: Použití
Použití Sestavení (obr. “AB”) Nasaďte nádrž do podvozku tak, že spodní okraj nádo- by se zachytí pod přední uchycení. Šev nádoby musí směřovat dozadu. Posuňte držák (E) přes zadní okraj nádoby a pevně ho přišroubujte. Držadlo k pojíždění vsuňte zeshora do úchytů (F). Potom držadlo v úchytech pevně... -
Page 65: Filtr
POZOR: Zásuvka v sací hlavě je vhodná pro připojení elektro nářadí s jmenovitým výkonem až do 2.000 wattů. Při provozu elektro nářadí přes zásuvku vysavače VarioVac 50 je bezpodmínečně třeba respektovat: POZOR: Nikdy nepoužívejte elektro nářadí s vyšším jmenovitým výkonem než... -
Page 66: Používání Přístroje
Použití filtrační vložky (obr. „B4“ - „B5“) Hlavu přístroje oddělte od nádrže a postavte ji obráceně na hlavu (obr.”B4). Filtrační vložku nastrčte na její místo k osazení, pevně ji přimáčkněte a šroubem s kolíkovou rukojetí nacházejícím se na dně pevně otočte ve směru hodinových ručiček. -
Page 67: Údržba Přístroje
Údržba přístroje POZOR: Pře prováděním jakékoli údržby, čištění nebo výměny filtračního systému vždy vytáhněte zástrčku ze zásuvky el.sítě. Sáček na prach Sáčky na prach nikdy znovu nepoužívejte, při výměně vždy vezměte nový sáček. Tkaninový filtrační vak (obr.”D1”) Tkaninový filtrační vak vyčistěte vyklepáním do nádoby na odpad. Případně ho vyfoukejte stlačeným vzduchem. -
Page 68: Odstranění Chyb
Odstranění chyb Problém Příčina Řešení Přístroj nenabíhá Není proud Zkontrolujte zásuvku a pojistky Je vadný kabel el. proudu nebo motor Obraťte se na Vašeho prodejce Prach uniká z výstupních Není vyčištěn filtr příp. Filtr zkontrolujte a případně ho otvorů odváděného vzduchu je filtr poškozen vyměňte Sací... -
Page 69: Podrobný Výkres
Podrobný výkres Překlad originálu návodu... - Page 70 Podrobný výkres Překlad originálu návodu...
-
Page 71: Seznam Náhradních Dílů
Seznam náhradních dílů Obj.č. Označení Pol. Pol. Obj.č. Označení 31 65 12 79 Pojízdný třmen 1 65 12 46 Rukojeť sací hlavy 32 65 12 81 Svorka k upevnění sací hlavy 2 65 12 47 Horní část sací hlavy 33 65 12 82 Rukojeť... -
Page 72: Záruka
V případě záručního příp. garančního případu žádáme, aby byl zaslán kompletní přístroj dohromady s fakturou do našeho střediska Logisitk Center v Berka nebo do námi autorizované servisní stanice. Kontaktujte prosím nejdříve placený hotline servis firmy STORCH: +49 (0)202 . 49 20 – 110. Nárok na záruku příp. garanci: Nároky na opravu vznikají... -
Page 73: Prohlášení O Shodě Es
Prohlášení o shodě ES Název / adresa výstavce: STORCH Malerwerkzeuge & Profigeräte GmbH Platz der Republik 6-8 D - 42107 Wuppertal Tímto prohlašujeme: Že následně uvedené zařízení na základě své koncipace a druhu konstrukce a také v provedení námi uvedeném do pro- vozu odpovídá... - Page 76 Art.-Nr. Bezeichnung 65 12 00 Nass- und Trockensauger VarioVac 50 Art. nr. Beschrijving 65 12 00 Nat- en droogzuiger VarioVac 50 Référence Désignation 65 12 00 Aspirateur eau et poussières VarioVac 50 N. art. Denominazione 65 12 00 Aspiratore per polveri e liquidi Vario-Vac 50 Art.