Table des Matières
Publicité
Les langues disponibles
Les langues disponibles
Liens rapides
IDROPULITRICI ELETTRICHE
IT •
ELECTRIC HIGH-PRESSURE WATER CLEANERS
EN •
NETTOYEURS HAUTE PRESSION ELECTRIQUES
FR •
ELEKTRISCHE WASSER-HOCHDRUCKREINIGER
DE •
STATIC 1700 - STATIC 1900
MANUALE D'ISTRUZIONE - USO E MANUTENZIONE
(IT )
INSTRUCTION MANUAL - USE AND MAINTENANCE
(EN)
NOTICE TECHNIQUE - UTILISATION ET ENTRETIEN
(FR)
BEDIENUNGS - UND WARTUNGSANLEITUNG
(DE)
IT • ATTENZIONE. Leggere le istruzioni prima dell'uso e dell'assemblaggio
EN • WARNING. Read the instructions before use and assembly
FR • ATTENTION. Lire les instructions avant l'utilisation et l'assemblage
DE • ACHTUNG. Vor der Verwendung und dem Zusammenbau die Anweisungen lesen
ITALIANO
IT
IT
7
ENGLISH
EN
EN
14
FRANÇAIS
FR
FR
21
DEUTSCH
DE
ES
28
Publicité
Table des Matières

Manuels Connexes pour Comet STATIC 1700


Sommaire des Matières pour Comet STATIC 1700
- Page 1 FR • ELEKTRISCHE WASSER-HOCHDRUCKREINIGER DE • ITALIANO ENGLISH FRANÇAIS DEUTSCH STATIC 1700 - STATIC 1900 MANUALE D’ISTRUZIONE - USO E MANUTENZIONE (IT ) INSTRUCTION MANUAL - USE AND MAINTENANCE (EN) NOTICE TECHNIQUE - UTILISATION ET ENTRETIEN (FR) BEDIENUNGS - UND WARTUNGSANLEITUNG (DE) IT •...
- Page 3 2° 1°...
- Page 5 1° 3° 2°...
- Page 6 1° 2°...
-
Page 7: Caratteristiche E Dati Tecnici
Leggere e tener presente quanto riportato nel MANUALE ATTENZIONE D'ISTRUZIONE - AVVERTENZE DI SICUREZZA. CARATTERISTICHE E DATI TECNICI STATIC 1700 STATIC 1900 CLASSIC EXTRA CLASSIC EXTRA COLLEGAMENTO ELETTRICO Rete di alimentazione 230 V 1~50 Hz Potenza assorbita 2,4 kW 2,9 kW... -
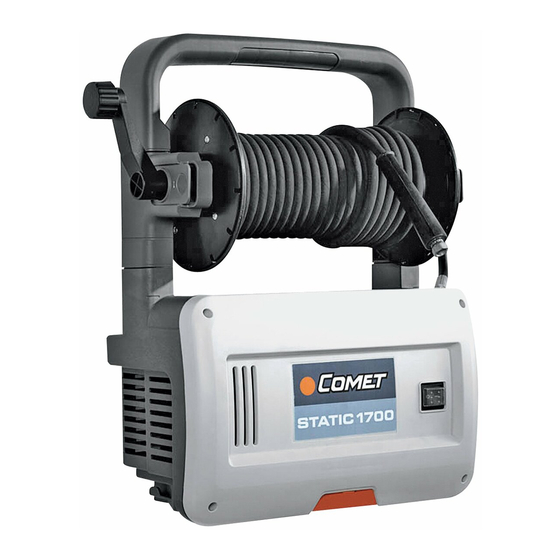
Page 8: Identificazione Dei Componenti
IDENTIFICAZIONE DEI COMPONENTI Fare riferimento alle figure 1, 2 e 3. 18 Filtro ingresso acqua Interruttore generale 19 Lancia schiumogena Maniglia di sollevamento e trasporto Gancio di sicurezza sinistro 20 Dispositivo regolazione aspirazione detergente Targhetta di avvertenza. Informa sui rischi residui: 21 Boccetta detergente divieto di utilizzo prima della lettura del manuale 22 Leva idropistola... -
Page 9: Dotazione Standard
DOTAZIONE STANDARD Accertarsi che nella confezione del prodotto acquistato siano contenuti i seguenti elementi: • idropulitrice ad alta pressione; • avvolgitubo completo di 10 m o 20 m di tubo di mandata ad alta pressione ; (CLASSIC) (EXTRA) • idropistola; •... -
Page 10: Installazione - Fissaggio A Parete
rapido ingresso acqua (25) ed avvitarlo a fondo al raccordo (17). SI VEDA LA FIG. 1. INSTALLAZIONE - FISSAGGIO A PARETE • Individuare una parete idonea al fissaggio dell’idropulitrice: l’idropulitrice deve essere fissata esclusivamente a pareti in muratura o cemento armato di spessore non inferiore a 10 cm/4 in;... - Page 11 luogo sicuro, perchè dovrà essere riutilizzato quando si ricollocherà l’idropulitrice a parete. • Inserire il filtro (18) nel raccordo ingresso acqua (17). Inserire la guarnizione (26) nel portagomma curvo (27) ed avvitarlo al raccordo (17). L’installazione del SI VEDA LA FIG. 1 raccordo curvo di aspirazione garantisce il corretto collegamento del tubo di aspirazione, che, altrimenti, verrebbe ad interferire col pavimento.
-
Page 12: Messa A Riposo
• Portare l’interruttore generale (1) in posizione “0” e collegare la lancia (19) all’idropistola (24). • Riavviare l'idropulitrice, portando l'interruttore generale (1) in posizione "1" ed azionare la leva (22) (l’aspirazione e la miscelazione avvengono automaticamente al passaggio dell’acqua). INTERRUZIONE DEL FUNZIONAMENTO - TOTAL STOP •... -
Page 13: Manutenzione Straordinaria
MANUTENZIONE STRAORDINARIA La manutenzione straordinaria deve essere effettuata esclusivamente da un TECNICO SPECIALIZZATO attenendosi alla tabella seguente (dati indicativi). INTERVALLO DI MANUTENZIONE INTERVENTO Ogni 50 ore • Controllo circuito idraulico (acqua) pompa. • Controllo fissaggio pompa. Ogni 100 ore • Sostituzione olio pompa. •... -
Page 14: Weight And Dimensions
Read and keep in mind that indicated in the INSTRUCTION WARNING MANUAL - SAFETY WARNINGS. TECHNICAL CHARACTERISTICS AND SPECIFICATIONS STATIC 1700 STATIC 1900 CLASSIC EXTRA CLASSIC EXTRA ELECTRICAL CONNECTIONS Power supply 230 V 1~50 Hz Input 2,4 kW 2,9 kW... -
Page 15: Parts Identification
PARTS IDENTIFICATION Refer to figs. 1, 2 and 3. 18 Water inlet filter Main ON/OFF switch 19 Foam spray nozzle Lifting and transport handle Left safety hook 20 Detergent suction adjustment device Warning plate. It informs of residual risks; it is 21 Detergent flask forbidden to use the machine without having read 22 High pressure gun lever... -
Page 16: Standard Fittings
STANDARD FITTINGS Make sure that the following parts are included in the packaging of the purchased product: • High pressure water cleaner. • Hose reel complete with 10 m ( ) or 20 m ( ) of high pressure delivery hose. CLASSIC EXTRA •... - Page 17 INSTALLATION – WALL MOUNTING • Chose a suitable wall where the high pressure water cleaner can be mounted: the high pressure water cleaner must be mounted exclusively on brick walls or reinforced cement walls with thickness of no less than 10 cm/4”; do not mount the high pressure water cleaner on walls made of plasterboard, wood, sheet metal or any other material that is not suitable to take the wall-plugs supplied.
- Page 18 guarantees the correct connection of the suction pipe, which would otherwise interfere with the floor. See FIG. 7-C. • Raise the stops (3) and (7), so that they uncouple from the cowling of the high pressure water cleaner and release the stop (8), pushing it inwards until it clicks in place. SEE FIG.
-
Page 19: Routine Maintenance
STOPPING – TOTAL STOP • Release the lever (22) of the high pressure water gun and the cleaner will stop automatically. The cleaner will start again regularly the next time the lever of the high pressure water gun is pressed. STOPPING •... -
Page 20: Problems, Causes And Remedies
SUPPLEMENTARY MAINTENANCE Supplementary maintenance must be carried out by a , following the QUALIFIED TECHNICIAN table below (guideline data). MAINTENANCE INTERVAL OPERATION Every 50 hours • Check the pump hydraulic circuit (water). • Check pump fixing Every 100 hours • Pump oil replacement. •... -
Page 21: Caractéristiques Et Données Techniques
Lire et respecter le contenu du ATTENTION MODE D’EMPLOI – AVERTISSEMENTS DE SÉCURITÉ. CARACTÉRISTIQUES ET DONNÉES TECHNIQUES STATIC 1700 STATIC 1900 CLASSIC EXTRA CLASSIC EXTRA BRANCHEMENT ÉLECTRIQUE Réseau d’alimentation 230 V 1~50 Hz Puissance absorbée 2,4 kW 2,9 kW Fusibile... -
Page 22: Identification Des Composants
IDENTIFICATION DES COMPOSANTS Se référer aux figures 1, 2 e 3. Interrupteur général 17 Raccord rapide entrée de l’ e au 18 Filtre entrée eau Poignée de soulevement et transport Crochet de sécurité gauche 19 Lance agent moussant 20 Dispositif de réglage de l’apiration du détergent Plaques d’avertissement informent des risques résiduels comme : interdiction d’utiliser le 21 Flacon détergent... -
Page 23: Équipement Standard
• Dispositif de blocage du levier du pistolet haute pression. Fermeture de sécurité (23) qui permet de bloquer le levier (22) du pistolet à jet d’eau haute pression (24) en position de fermeture, évitant ainsi les fonctionnements accidentels (Fig. 3, position S). -
Page 24: Installation - Montage Accessoires
INSTALLATION – MONTAGE ACCESSOIRES • Enfiler et appuyer à fond la poignée (2), puis la fixer grâce aux deux vis (35) fournies. Voir la FIG. 4. • Enfiler jusqu’au déclic le bouton du tambour à tuyau (15). Voir la FIG. 3. •... -
Page 25: Désinstallation Du Mur - Installation Au Sol
cm/1,6-2,0 in, correspondant aux signes tracés précédemment pour le support mural. Pour le serrage des vis, utiliser un tournevis adapté avec empreinte cruciforme (non fourni). Voir la FIG. 6. DÉSINSTALLATION DU MUR – INSTALLATION AU SOL • Dévisser le raccord (25) et enlever le filtre et la garniture. Replacer le raccord Voir la FIG. -
Page 26: Interruption Du Fonctionnement - Total Stop
• Remplir le flacon (21) avec le détergent désiré. • Régler la capacité d’aspiration du détergent de la façon suivante: - extraire la tige (20) de la lance (19); - faire correspondre la dent L de la tige (20) avec un des numéros figurant à l’intérieur de la lance (19) (1 : aspiration minimale;... -
Page 27: Entretien Extraordinaire
Une fois par mois • Nettoyage buse Pour le nettoyage, il est en général nécessaire de passer à l’intérieur de l’ o rifice de la buse le pointeau (31) fourni. Si les résultats obtenus ne sont pas jugés parfaits, remplacer la buse en s’adressant pour l’achat de la pièce de rechange à... -
Page 28: Eigenschaften Und Technische Daten
Lesen und beachten Sie bitte die Hinweise der ACHTUNG GEBRAUCHSANWEISUNG – SICHERHEITSHINWEISE. EIGENSCHAFTEN UND TECHNISCHE DATEN STATIC 1700 STATIC 1900 CLASSIC EXTRA CLASSIC EXTRA ELEKTRISCHE VERBINDUNGEN Stromnetz 230 V 1~50 Hz Leistungsaufnahme 2,4 kW 2,9 kW Sicherung 16 A HYDRAULISCHE VERBINDUNGEN Maximale Temperatur des 40 °C... -
Page 29: Identifikation Der Komponenten
IDENTIFIKATION DER KOMPONENTEN Siehe Abbildungen 1, 2 und 3. 17 Wassereinlaufstutzen Pumpe Hauptschalter 18 Filter Wassereinlauf Griff zum Heben und Transportieren 19 Schaumlanze Sicherheitshaken links 20 Einstelleinrichtung der Reinigungsmittelansangung Warnschild. Weist auf die Restrisiken hin: die Verwendung ist erst nach gründlichem Durchlesen 21 Reinigungsmittelflasche des Handbuchs gestattet;... -
Page 30: Optionales Zubehör
• Blockiervorrichtung des Hebels der Druckpistole. Sicherheitsverriegelung (23), die das Blockieren des Hebels (22) der Druckpistole (24) in geschlossenem Zustand ermöglicht, um so ein ungewolltes Funktionieren zu vermeiden (Abb. 2, Position S). STANDARDAUSSTATTUNG Überprüfen Sie, ob in der Verpackung des gekauften Produkts die folgenden Elemente vorhanden sind: •... - Page 31 • Bausatz 10 m-lange Druckrohrverlängerung: diese ermöglicht, den Aktionsbereich des Hochdruckreinigers zu erweitern. INSTALLATION – EINBAU DER ZUBEHÖRTEILE • Den Griff (2) in seine Aufnahme stecken und fest hineindrücken, danach mit den zwei mitgelieferten Schrauben (35) befestigen. VGL. HIERZU ABB 4. •...
- Page 32 den Hochdruckreiniger vorsichtig anheben und die untere Führung in den Tragbügel (11) schieben bis die Taste (8) einrastet. SIEHE ABB. 5-D. • Die Haken (3) und (7) nach unten verstellen, so dass sie sich im Gehäuse des Hochdruckreinigers einhaken. SIEHE ABBILDUNGEN 5-E u. 5-F. •...
-
Page 33: Übliche Wartung
Anlassen die Vorrichtung aktiviert wird. TOTAL STOP • Zur Inbetriebsetzung des Hochdruckreinigers genügt es, den Hebel (22) der Spritzpistole zu betätigen, womit der Waschvorgang eingeleitet wird. • Die Winkeleinstellung des Wasserstrahls erfolgt über die Sprühdüse (30) (ABB. 2 – POS. A und B) BETRIEB MIT REINIGUNGSMITTEL - SCHAUMLANZE •... -
Page 34: Aussergewöhnliche Wartung
WARTUNGSABSTAND EINGRIFF Bei jedem Gebrauch • Überprüfen Sie Stromkabel, Hochdruckschlauch, Anschlüsse, Druckpistole, Lanzenschlauch • Sollte ein Teil oder mehrere Teile beschädigt sein, benutzen Sie keinesfalls den Hochdruckreiniger und FACHTECHNIKER wenden sich an einen Wöchentlich • Reinigung Filter Wasserzufuhr (18). Schrauben Sie das Schlauchanschlussstück (25) oder (27) auf und entfernen Sie den Filter (18). Für eine Reinigung genügt es normalerweise, den Filter unter Wasser zu halten oder ihn mit Druckluft zu reinigen. - Page 35 Aus der Düse kommt kein Wasser. • Es fehlt Wasser. • Überprüfen Sie, ob der Wasserhahn völlig geöffnet ist und ob der Ansaugschlauch das Wasser erreicht. • Wasserdüse verstopft. • Reinigen und/oder ersetzen Sie die Düse laut den Angaben im Abschnitt “ÜBLICHE WARTUNG”. Der Hochdruckreiniger bleibt während •...
- Page 36 COMET S.p.A. - Via G.Dorso, 4 - 42124 Reggio Emilia - ITALY Tel. +39 0522 386111 E-mail Italia: vendite@comet.re.it - fax +39 0522 386300 E-mail Export: export@comet.re.it - fax +39 0522 386286 www.comet-spa.com 1610 1156 00 - 09/2016 - REV. 02...