Table des Matières
Publicité
Les langues disponibles
Les langues disponibles
Liens rapides
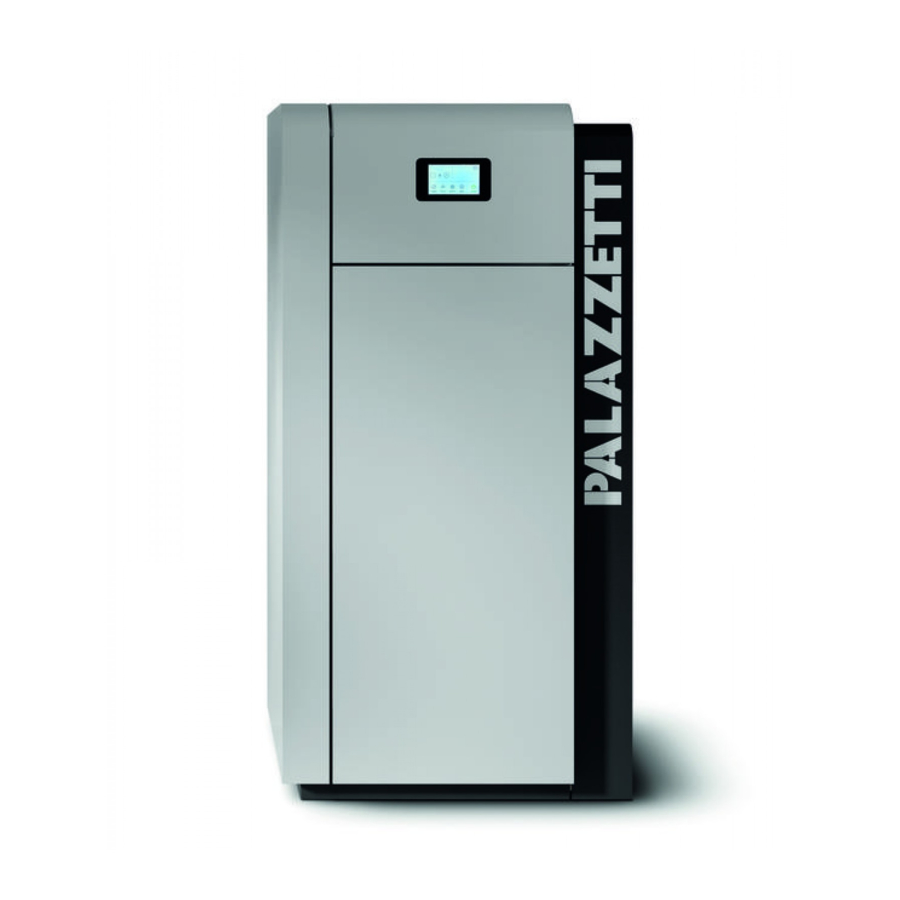
CALDAIA A pELLET Jp
CALDAIA A pELLET Jp ACS
MANUALE DI INSTALLAZIONE E MANUTENZIONE
Il presente manuale è parte integrante del prodotto.
Si raccomanda di leggere attentamente le istruzioni prima
dell'installazione, manutenzione o utilizzo del prodotto.
Istruzioni originali
INSTALLATION AND MAINTENANCE MANUAL
This manual is an integral part of the product.
Read the instructions carefully before installing, servicing or
operating the product.
Translation of the original instructions
INSTALLATIONS UND WARTUNGSANLEITUNGEN
Die vorliegende Anleitung ist fester Bestandteil des Produkts.
Vor der Installation, Wartung und Verwendung die
Anleitugen stets aufmerksam durchlesen.
Übersetzung der Original-Bedienungsanleitung
NOTICE D'INSTALLATION ET D'ENTRETIEN
Le présent manuel fait partie intégrante du produit.
Il est conseillé de lire attentivement les consignes avant
l'installation, l'entretien ou l'utilisation du produit.
Traduction des instructions originales
MANUAL DE INSTALACIÓN Y MANTENIMIENTO
Este manual es parte integrante del producto.
Se recomienda leer detenidamente las instrucciones antes
de la instalación, el mantenimiento y el uso del producto.
Traducción de las instrucciones originales
Publicité
Chapitres
Table des Matières

Manuels Connexes pour Palazzetti CALDAIA A PELLET JP


Sommaire des Matières pour Palazzetti CALDAIA A PELLET JP
- Page 1 CALDAIA A pELLET Jp CALDAIA A pELLET Jp ACS MANUALE DI INSTALLAZIONE E MANUTENZIONE Il presente manuale è parte integrante del prodotto. Si raccomanda di leggere attentamente le istruzioni prima dell’installazione, manutenzione o utilizzo del prodotto. Istruzioni originali INSTALLATION AND MAINTENANCE MANUAL This manual is an integral part of the product.
- Page 2 Gentile cliente, desideriamo innanzitutto ringraziarLa preferenza che ha voluto accordarci acquistando il nostro prodotto e ci congratuliamo con Lei per la scelta. Per consentirLe di utilizzare al meglio la sua Caldaia a pellet, la invitiamo a seguire attentamente quanto descritto nel presente manuale.
-
Page 3: Table Des Matières
ITALIANO ENGLISH DEUTSCH FRANÇAIS ESPAÑOL INDICE 1 PREMESSA GENERALE Simbologia Destinazione d’uso Scopo e contenuto del manuale Conservazione del manuale Aggiornamento del manuale Generalità Principali direttive di riferimento Responsabilità del costruttore Assistenza tecnica e manutenzione 1.10 Parti di ricambio 1.11 Targhetta matricola 1.12 Consegna dell’apparecchio 2 AVVERTENZE PER LA SICUREZZA... - Page 4 6 INSTALLAZIONE Considerazioni generali 6.2 Livellamento dell’apparecchio 6.3 Impianto idraulico 6.4 Modalità di carico/reintegro fluido impianto caldaia (Fig. 21 ÷ Fig. 23) 6.5 Collegamento elettrico 7 CONFIGURAZIONE INIZIALE Configurazione 1 Termostato ambiente 7.2 Configurazione 2 Sonda ambiente 7.3 Configurazione 3 Accumulo con serpentino 7.4 Configurazione 4 ...
-
Page 5: Premessa Generale
1.4 Conservazione del manuale vento di personale specializzato Palazzetti. Palazzetti si riserva il diritto di modificare spe Conservazione e consultazione cifiche e caratteristiche tecniche e/o funzionali Il manuale deve essere conservato con cura e del prodotto in qualsiasi momento senza darne deve essere sempre disponibile per la consul... -
Page 6: Principali Direttive Di Riferimento
• carenza di manutenzione; La responsabilità delle opere eseguite per l’in • eventi eccezionali. stallazione dell'apparecchio non può essere con siderata a carico della Palazzetti; essa è e rimane Assistenza tecnica e a carico dell’installatore, al quale è demandata manutenzione l’esecuzione delle verifiche relative alla canna... -
Page 7: Consegna Dell'apparecchio
ITALIANO ENGLISH DEUTSCH FRANÇAIS ESPAÑOL Il numero di Matricola deve essere sempre indi temperare alle precauzioni di sicurezza previste cato per qualsiasi tipo di richiesta riguardante per legge e in particolare a: l'apparecchio. • non operare in condizioni avverse; 1.12 Consegna dell’apparecchio •... -
Page 8: Caratteristiche Del Combustibile
• non eseguire pulizie di qualunque tipo; Toccare la porta solo ad apparecchio freddo. • non scaricare le ceneri; In caso di incendio del camino spegnere l'ap parecchio con la procedura di spegnimento • non aprire la porta focolare; indicata. •... -
Page 9: Stoccaggio Del Pellet
ITALIANO ENGLISH DEUTSCH FRANÇAIS ESPAÑOL durante il funzionamento dell'apparecchio. Fare attenzione che i bambini non giochino con i componenti dell’imballo (es. pellicole e È vietato usare l'apparecchio come in- polistirolo): ceneritore di rifiuti. Pericolo di soffocamento! 3.2 Stoccaggio del pellet Durante le operazioni di movimento, solleva... -
Page 10: Trasporto
4.2 Trasporto Accertarsi che il carrello sollevatore abbia una portata superiore al peso dell’apparecchiatura da sollevare. Al manovratore dei mezzi di sollevamen- to spetterà tutta la responsabilità del sollevamento dei carichi. Porre particolare attenzione a proteg- gere adeguatamente i pavimenti in legno o parquet per evitare che il peso dell’apparecchio possa rovinarli duran- te lo spostamento. -
Page 11: Luogo D'installazione
ITALIANO ENGLISH DEUTSCH FRANÇAIS ESPAÑOL • deve indossare guanti e scarpe antinfortunisti tà dell'apparecchio per il collegamento del cavo che; di alimentazione. • deve accertarsi che l’area interessata alle fasi di 5.4 Aria comburente montaggio e smontaggio sia libera da ostacoli. L'apparecchio, durante il suo funzionamento, 5.3 Luogo d’installazione necessita di aria comburente. -
Page 12: Raccordo Fumi
Se non fosse possibile realizzare la presa d'aria esterna nel locale, è possibile realizzare il foro esterno in un locale adiacente purché comu nicante in maniera permanente con griglia di transito (Fig. 8 - C = Cassonetto, G = Griglia, S = Serranda). -
Page 13: Scarico A Tetto Mediante Camino Tradizionale
ITALIANO ENGLISH DEUTSCH FRANÇAIS ESPAÑOL installazione. I componenti che costituiscono il si- stema di evacuazione dei fumi devono essere dichiarati idonei alle specifiche condizioni di funzionamento e provvi- sti di marcatura CE. Fig. 12 È obbligatorio realizzare un primo tratto verticale di 1,5 metri minimi per I tratti orizzontali devono avere una lunghezza garantire la corretta espulsione dei massima di 23 m con una pendenza verso l'alto... -
Page 14: Installazione
INSTALLAZIONE Considerazioni generali Nei paragrafi successivi sono riportate alcune indicazioni da rispettare per ottenere il massimo rendimento dal prodotto acquistato. Le seguenti indicazioni rimangono comunque subordinate rispetto di eventuali leggi e normative nazio- nali, regionali e comunali vigenti nel paese dove avviene l’installazione... -
Page 15: Impianto Idraulico
ITALIANO ENGLISH DEUTSCH FRANÇAIS ESPAÑOL 6.3 Impianto idraulico Il collegamento all’impianto idraulico e l’impian to stesso devono essere eseguiti, da personale qualificato, nel rispetto delle leggi e delle norme vigenti nel paese d’installazione. Accertarsi che siano stati installati correttamente tutti gli organi di controllo e sicurezza compresi quelli dati in dotazione (valvole di sicurezza e scarico termico). - Page 16 G) Mandata acqua calda all’impianto (G 3/4”M) H) Ritorno acqua fredda dall’impianto (G 3/4”M) I) Scarico impianto (G 1/2”M) J) Scarico valvola di sicurezza K) Entrata acqua fredda Fig. 19 Caldaia a pellet JP ACS Fig. 17 Fig. 18 Fig. 20 004778300 14/09/2020...
-
Page 17: Modalità Di Carico/Reintegro Fluido Impianto Caldaia (Fig. 21 ÷ Fig. 23)
Fig. 21 Prima di eseguire le operazioni qui sotto elencate, assicurarsi di aver collegato entrambi i tubi della Caldaia a pellet JP ACS mandata e del ritorno (vedi par. 6.3.2). Le opzioni sono le seguenti: 1) Collegare un tubo dell’acqua proveniente dall’acquedotto al raccordo di carico (K), aprire... -
Page 18: Collegamento Elettrico
CONFIGURAZIONE INIZIALE In funzione della tipologia di installazione è ne cessario impostare la configurazione ideale per il corretto funzionamento. È possibile scegliere quattro diverse configurazioni: Descrizione Configurazione Fig. 23 Termostato ambiente 6.5 Collegamento elettrico Sonda ambiente (default) È sufficiente collegare l'apparecchio all'impianto Accumulo con serpentino elettrico attraverso la spina in dotazione (Fig. -
Page 19: Configurazione 1 - Termostato Ambiente
ITALIANO ENGLISH DEUTSCH FRANÇAIS ESPAÑOL Configurazione 1 - Termostato ambiente 22.15 20.3 °C °C 20,0 Termostato esterno ARIA 25,8 °C Componenti compresi nella caldaia Nella configurazione 1 l'apparecchio viene co In questa configurazione l'apparecchio mandato da un termostato (o cronotermostato) si spegne quando il termostato esterno esterno che accende e spegne l'apparecchio in è... - Page 20 7.1.1 Allacciamento elettrico ad un termostato ambiente II termostato esterno deve essere collegato ai due morsetti utilizzati per la sonda ambiente, presen ti sul posteriore dell'apparecchio. Scollegare la sonda e collegare i due contatti del termostato (Fig. 25). 22.15 20.3 °C Fig.
-
Page 21: Configurazione 2 - Sonda Ambiente
ITALIANO ENGLISH DEUTSCH FRANÇAIS ESPAÑOL 7.2 Configurazione 2 - Sonda ambiente Sonda temperatura ambiente Componenti compresi nella caldaia 7.2.1 Allacciamento elettrico sonda ambiente La configurazione 2 è la configurazio- ne di default per questo apparecchio. L'apparecchio esce di fabbrica con la sonda am In questo caso non è... -
Page 22: Configurazione 3 - Accumulo Con Serpentino
7.3 Configurazione 3 - Accumulo con serpentino Pannello solare Sonda accumulo Componenti compresi nella caldaia 7.3.1 Allacciamento elettrico ad un Accumulo Impostare la configurazione 3 quando si intende collegare l'apparecchio ad un accumulo con con serpentino serpentino. In questo caso è sufficiente spostare la sonda di L'apparecchio viene comandato (accensione temperatura ambiente a bordo dell'apparecchio e spegnimento) dalla temperatura letta dalla... -
Page 23: Configurazione 4 - Accumulo Senza Serpentino
ITALIANO ENGLISH DEUTSCH FRANÇAIS ESPAÑOL 7.4 Configurazione 4 - Accumulo senza serpentino Sonda accumulo Componenti compresi nella caldaia 7.4.1 Allacciamento elettrico ad un Accumulo Impostare la configurazione 4 quando si intende collegare l'apparecchio ad un accumulo senza senza serpentino serpentino. In questo caso è... -
Page 24: Primo Avvio
7.5 primo avvio Premere sull’icona per accedere al menu principale. Collegare l'apparecchio alla rete elettrica, agire Premere sull’icona per accedere al menu sull’interruttore di accensione posto sul retro impostazioni. dell'apparecchio posizionandolo su “I”. Potenza Fig. 29 Se il collegamento è corretto l'apparecchio TIMER STATS IMPOST. - Page 25 ITALIANO ENGLISH DEUTSCH FRANÇAIS ESPAÑOL 7.5.1 Impostazione software Impostare l’ora: Accedere al menu configurazione d'impianto: Impostazioni Impostazioni Data Menù installatore Combustibile Menu di servizio Blocco schermo Modalità Eco Lingua Antigelo Info Fig. 34 Fig. 38 Premere su ON: compare la password, impostare 54 e premere OK per confermare.
-
Page 26: Display Reset
Scegliere la configurazione dell'apparecchio in Il display si resetta per qualche secondo. funzione della tipologia di installazione. Nel display appare il logo e una barra verde di Configurazioni avanzamento: Termostato ambiente Sonda ambiente Accumulo serpentino Accumulo NO serp. Fig. 41 Configu- Fig. -
Page 27: Manutenzione
ITALIANO ENGLISH DEUTSCH FRANÇAIS ESPAÑOL MANUTENZIONE Le operazioni di manutenzione devono essere effettuate da parte di un centro di assistenza tecnico autorizzato. Prima di effettuare qualsiasi operazione di manutenzione adottare le seguenti precauzioni: • Assicurarsi che tutte le parti dell'apparecchio siano fredde. •... -
Page 28: Programma Di Controllo E Manutenzione
8.3 programma di controllo e manutenzione OGNI OGNI OGNI 2 1 MESE 1 ANNO ACCENSIONE SETTIMANA SETTIMANE Braciere Cassetto/Vano cenere Vetro Caldaia Collettore fumi (Fig. 47) Guarnizioni porta e bra ciere (*) Condotto di evacuazio ne fumi (*) Ventilatori (*) (*) A cura di un centro di assistenza tecnico abilitato. -
Page 29: Demolizione E Smaltimento
ITALIANO ENGLISH DEUTSCH FRANÇAIS ESPAÑOL DEMOLIZIONE E SMALTIMENTO La demolizione e lo smaltimento dell'apparecchio sono ad esclusivo carico e responsabilità del pro prietario che dovrà agire in osservanza delle leggi vigenti nel proprio Paese in materia di sicurezza, rispetto e tutela dell’ambiente. Smantellamento e smaltimento possono essere affidati anche a terzi, purché... - Page 30 TABLE OF CONTENTS 1 GENERAL INTRODUCTION Symbols Intended use Purpose and content of the manual Preservation of the manual Update of this manual Overview Main reference directives Responsibility of the manufacturer Technical assistance and maintenance 1.10 Spare Parts 1.11 Serial identification plate 1.12 Delivery of the appliance 2 SAFETY WARNING Warnings for the installer...
- Page 31 ITALIANO ENGLISH DEUTSCH FRANÇAIS ESPAÑOL 6 INSTALLATION General considerations 6.2 Levelling of the appliance 6.3 Hydraulic system 6.4 Boiler system fluid filling/topup mode (Fig. 21 ÷ Fig. 23) 6.5 Electrical connection 7 INITIAL CONFIGURATION Configuration 1 Room thermostat 7.2 Configuration 2 Room probe 7.3 Configuration 3 ...
-
Page 32: General Introduction
Pala zzetti specialized personnel. 1.4 preservation of the manual Palazzetti reserves the right to change specifi Preservation and consultation cations and technical and/or functional charac teristics of the product at any time without prior The manual must be kept carefully and must notice. -
Page 33: Main Reference Directives
Responsibility for the works carried out for the in ufacturer;; stallation of the appliance cannot be considered to be taken on by Palazzetti; it is and remains the • lack of maintenance; responsibility of the installer, who is responsible • exceptional events. -
Page 34: Delivery Of The Appliance
The Serial number must always be indicated for Before starting the assembly or disassembly any type of request regarding the appliance. phases of the appliance, the installer must ob serve the safety precautions required by law and 1.12 Delivery of the appliance the following indications in particular: •... -
Page 35: Fuel Characteristics
ITALIANO ENGLISH DEUTSCH FRANÇAIS ESPAÑOL • do not perform any type of cleaning; Do not clean the appliance until the structure and ashes have completely cooled. • do not offload the ashes; Only touch the door when the appliance is cold. •... -
Page 36: Pellet Storage
Make sure that children do not play with the pack It is prohibited to use the appliance as aging components (e.g. films and polystyrene): an incinerator to burn rubbish. Danger of suffocation! 3.2 pellet storage During moving, lifting, and unpacking of the appliance the following is absolutely necessary: Pellets must be kept in a dry place, not too cold and the bags must be kept... -
Page 37: Transportation
ITALIANO ENGLISH DEUTSCH FRANÇAIS ESPAÑOL 4.2 Transportation Make sure that the lifting carriage has a payload higher than the weight of the appliance to be lifted. The full responsi- bility of the lifting of loads lies with the person handling the lifting equipment. Pay particular attention to protecting wooden flooring or parquet floors in order to avoid possibly ruining them... -
Page 38: Place Of Installation
5.3 place of installation 5.4 Combustion air For the minimum distances expressed in cm that The appliance, during its operation, requires must be respected when positioning the appli combustion air. ance with respect to flammable materials and The inflow of combustion air can be obtained in objects, refer to the Product booklet delivered as the following ways: an attachment with the appliance. -
Page 39: Flue Gas Fitting
ITALIANO ENGLISH DEUTSCH FRANÇAIS ESPAÑOL If it is not possible to make an external air intake in the room, it is possible to make the external hole in an adjacent room as long as it perma nently connects via passage grille (Fig. 8 - C = Container, G = Grille, S = Damper). -
Page 40: Roof Exhaust With Traditional Fireplace
The components that make up the gas flue evacuation system must be de- clared suitable for the specific operat- ing conditions and provided with CE marking. It is mandatory to create a first vertical section measuring at least 1.5 meters to Fig. -
Page 41: Installation
ITALIANO ENGLISH DEUTSCH FRANÇAIS ESPAÑOL INSTALLATION General considerations In the following paragraphs some indications are provided to be respected in order to obtain the maximum performance from the purchased product. The following indications are how- ever subject to compliance with any possible national, regional and mu- nicipal laws and regulations in force in the country where the appliance is... -
Page 42: Hydraulic System
6.3 Hydraulic system Connection to the hydraulic system and the system itself must be performed by qualified personnel, in compliance with the laws and reg ulations in force in the country of installation. Make sure that all the control and safety devices have been installed correctly, including those supplied (safety valves and thermal discharge). - Page 43 ITALIANO ENGLISH DEUTSCH FRANÇAIS ESPAÑOL Pellet boiler JP 6.3.1 Hydraulic system description (Fig. 17 ÷ Fig. A) Pressure gauge B) Relief valve C) Expansion vessel closed D) Shutoff valves for removing the hydraulic kit E) Circulator F) Anticondensate valve G) Hot water flow to the system (G 3/4”M) H) Return of cold water from the system (G 3/4”M) I) System discharge (G 1/2”M) J) Safety valve drain...
-
Page 44: Boiler System Fluid Filling/Topup Mode (Fig. 21 ÷ Fig. 23)
Open the relief valve (B) (Fig. 18), open the bypass 6.3.2 Hydraulic connections (Fig. 17 ÷ Fig. 20) tap in the anticondensation valve (N), thus • Connect the appliance to the heating system making the water flow from the system until the using the flow and return pipes (G-H). -
Page 45: Electrical Connection
ITALIANO ENGLISH DEUTSCH FRANÇAIS ESPAÑOL INITIAL CONFIGURATION Depending on the type of installation it is neces sary to set up the ideal configuration for correct operation. It is possible to choose from four different configurations: Description Configuration Room thermostat Fig. 23 Room probe (default) 6.5 Electrical connection Storage tank with... -
Page 46: Configuration 1 - Room Thermostat
Configuration 1 - Room thermostat °C External thermostat ARIA 25,8 °C Components included in the boiler In configuration 1 the appliance is controlled by In this configuration the appliance an external thermostat (or chronothermostat) turns off when the external thermo- which turns the appliance on and off according stat is satisfied, or it will modulate the to the set temperature. - Page 47 ITALIANO ENGLISH DEUTSCH FRANÇAIS ESPAÑOL 7.1.1 Electrical connection to a room thermostat The external thermostat must be connected to the two terminals used for the room probe, located on the rear of the appliance. Disconnect the probe and connect the two contacts of the thermostat (Fig.
-
Page 48: Configuration 2 - Room Probe
7.2 Configuration 2 - Room probe Room temperature probe Components included in the boiler 7.2.1 Room probe electrical connection Configuration 2 is the default configu- ration for this appliance. In this case it The appliance leaves the factory with the room is not necessary to make any changes. -
Page 49: Configuration 3 - Storage Tank With Serpentine
ITALIANO ENGLISH DEUTSCH FRANÇAIS ESPAÑOL 7.3 Configuration 3 - Storage tank with serpentine Solar panel Storage tank probe Components included in the boiler Set configuration 3 when you intend to connect 7.3.1 Storage tank with serpentine electrical the appliance to a storage tank with serpentine. connection The appliance is controlled (switched on and In this case simply move the room temperature... -
Page 50: Configuration 4 - Storage Tank Without Serpentine
7.4 Configuration 4 - Storage tank without serpentine Solar panel Storage tank probe Components included in the boiler Set configuration 4 when you intend to con 7.4.1 Storage tank without serpentine electrical nect the appliance to a storage tank without connection serpentine. -
Page 51: First Start Up
ITALIANO ENGLISH DEUTSCH FRANÇAIS ESPAÑOL 7.5 First start up Press on the icon to access the main menu. Press on the icon to access the settings menu. Connect the appliance to the mains, operate the power switch on the back of the appliance by turning it to "I". - Page 52 Set time: 7.5.1 Software setting Access the system configuration menu: Settings Settings Time Date Installer menu Fuel Service Menu Screen lock Eco mode Language Antifreeze Info Fig. 34 Fig. 38 Time Press ON: the password appears, set 54 and press OK to confirm.
-
Page 53: Reset Display
ITALIANO ENGLISH DEUTSCH FRANÇAIS ESPAÑOL Choose the configuration of the appliance ac The display re-sets for a few seconds. cording to the type of installation. The logo and a green progress bar appear on the Configurations display: External thermostat Room sensor Coil accumulator Non-coil accumulator Fig. -
Page 54: Maintenance
MAINTENANCE Maintenance operations must be performed by an authorised technical assistance centre. Before performing any maintenance operation, take the following precautions: • Ensure that all appliance parts are cold. • Make sure that the ashes are completely extinguished. • Use personal protective equipment provided for by Directive 89/391/EEC. •... -
Page 55: Inspection And Maintenance Schedule
ITALIANO ENGLISH DEUTSCH FRANÇAIS ESPAÑOL 8.3 Inspection and maintenance schedule EVERY TIME THE EVERY 2 APPLIANCE IS EVERY WEEK 1 MONTH 1 YEAR WEEKS TURNED ON Brazier Ash drawer/ compartment Glass Boiler Smoke collector (Fig. 47) Door and brazier seals Flue gas evacuation duct (*) Fans (*) -
Page 56: Demolition And Disposal
DEMOLITION AND DISpOSAL The demolition and disposal of the appliance are the sole liability and responsibility of the owner who must act in compliance with the laws in force in their country regarding safety, respect and protection of the environment. Decommissioning and disposal can be entrusted to a third party, provided to always use companies authorised for recovery and elimination of the materials in question. - Page 57 ITALIANO ENGLISH DEUTSCH FRANÇAIS ESPAÑOL INHALTSVERZEICHNIS 1 ALLGEMEINES Symbole Verwendungszweck Zweck und Inhalt des Handbuchs Aufbewahrung des Handbuchs Aktualisierung des Handbuchs Allgemeines Wichtigste Referenzrichtlinien Herstellerhaftung Technischer Kundendienst und Wartung 1.10 Ersatzteile 1.11 Serienschild 1.12 Lieferung des Geräts 2 SICHERHEITSHINWEISE Warnhinweise für den Installateur 2.2 Hinweise für das Wartungspersonal 2.3 Warnungen für den Benutzer 3 EIGENSCHAFTEN DES BRENNSTOFFS...
- Page 58 6 INSTALLATION Allgemeine Anmerkungen 6.2 Nivellierung des Geräts 6.3 Wasseranlage 6.4 Laden / Nachfüllen der Flüssigkeit der Kesselanlage (Abb. 21 ÷ Abb. 23) 6.5 Elektrischer Anschluss 7 ANFÄNGLICHE KONFIGURATION Konfiguration 1 Raumthermostat 7.2 Konfiguration 2 Raumsonde 7.3 Konfiguration 3 Puffer mit Kühschlange 7.4 Konfiguration 4 ...
-
Page 59: Allgemeines
Sie Zweifel 1.4 Aufbewahrung des Handbuchs haben, wenden Sie sich immer an das Fachperso nal von Palazzetti, das Ihnen helfen oder am Gerät Aufbewahrung und Nachschlagen Reparaturen und Einstellungen vornehmen wird. Das Handbuch muss sorgfältig aufbewahrt Palazzetti behält sich das Recht vor, Spezifika... -
Page 60: Wichtigste Referenzrichtlinien
Die Verantwortung für die für die Installation des Geräts ausgeführten Arbeiten liegt nicht beim • Mangel an Wartung; Unternehmen PALAZZETTI; sie liegt und bleibt • außergewöhnliche Ereignisse. beim Installateur, der mit der Durchführung der Prüfungen bezüglich des Rauchabzugs, des Technischer Kundendienst und Lufteinlasses und der Korrektheit der vorgesehe... -
Page 61: Lieferung Des Geräts
ITALIANO ENGLISH DEUTSCH FRANÇAIS ESPAÑOL Die Seriennummer muss bei jeder Art von Anfragen, • nicht unter ungünstigen Bedingungen arbeiten; die das Gerät betreffen, stets angegeben werden. • in perfekter psychophysischer Verfassung ar beiten und sicherstellen, dass die persönlichen 1.12 Lieferung des Geräts Schutzausrüstungen zur Unfallverhütung un... -
Page 62: Eigenschaften Des Brennstoffs
• keinerlei Reinigungen ausführen; Das Gerät erst reinigen, wenn es selbst und die Asche vollständig abgekühlt sind. • keine Asche herausnehmen; Die Tür nur berühren, wenn das Gerät kalt ist. • die Feuerraumtür nicht öffnen; Im Falle eines Brandes im Schornstein ist das •... -
Page 63: Lagerung Der Pellets
ITALIANO ENGLISH DEUTSCH FRANÇAIS ESPAÑOL Sicherstellen, dass keine Kinder mit den Verpa Es ist verboten, das Gerät als Müllver- ckungsteilen spielen (z.B. Folien und Polystyrol): brennungsanlage zu verwenden. Es besteht Erstickungsgefahr! 3.2 Lagerung der pellets Es ist unbedingt erforderlich, wenn das Gerät bewegt, angehoben und ausgepackt wird: Das Pellet muss an einem trockenen, nicht zu kalten Ort gelagert werden... -
Page 64: Transport
4.2 Transport Sicherstellen, dass der Gabelstapler eine höhere Tragfähigkeit als das Ge- wicht des anzuhebenden Geräts be- sitzt. Der Fahrer des Hebezeugs hat die gesamte Verantwortung für den Hub der Lasten. Achten Sie besonders darauf, Holz- oder Parkettböden zu schützen, um zu vermeiden, dass das Gewicht des Geräts während des Handlings die Böden beschädigt. -
Page 65: Installationsort
ITALIANO ENGLISH DEUTSCH FRANÇAIS ESPAÑOL 5.3 Installationsort 5.4 Verbrennungsluft Zu den Mindestsicherheitsabständen in cm, die Das Gerät benötigt während des Betriebs bei der Aufstellung des Geräts bezüglich von Verbrennungsluft. brennbaren Materialien Gegenständen Die Zufuhr von Verbrennungsluft kann auf fol eingehalten werden müssen, siehe dem Produkt gende Weise erreicht werden: beigelegten Produktbrief. -
Page 66: Rauchanschluss
Wenn es nicht möglich ist, den Lufteinlass in der Rückwand des Gerätes anzusaugen (Nicht Wand), muss in einer Außenwand des Raumes, in dem das Gerät aufgestellt wird, ein Loch ge macht werden. Wenn es nicht möglich ist, der Lufteinlass im Raum anzusaugen, ist es möglich, das Außen... -
Page 67: Rauchableitung Mit Traditionellem Schornstein
ITALIANO ENGLISH DEUTSCH FRANÇAIS ESPAÑOL Die Komponenten des Rauchabzugssys- tems müssen für die jeweiligen Betriebs- bedingungen als geeignet erklärt und mit einer CE-Kennzeichnung versehen werden. Es ist obligatorisch, einen ersten ver- tikalen Abschnitt von mindestens 1,5 Metern auszuführen, um den korrekten Abb. -
Page 68: Installation
INSTALLATION Allgemeine Anmerkungen In den folgenden Absätzen werden einige zu befolgende Anweisungen aufgeführt, um den maximalen Wirkungsgrad des erworbenen Pro dukts zu erhalten. Die folgenden Anweisungen unterlie- gen jedenfalls der Beachtung eventu- eller, geltender Gesetze und nationa- ler, regionaler und lokaler Vorschriften des Installationslandes des Geräts. -
Page 69: Wasseranlage
ITALIANO ENGLISH DEUTSCH FRANÇAIS ESPAÑOL 6.3 Wasseranlage Der Anschluss an die Wasseranlage und an das System selbst muss von qualifiziertem Personal gemäß den im Installationsland geltenden Ge setzen und Vorschriften durchgeführt werden. Sicherstellen, dass alle Steuerungs und Sicher heitsvorrichtungen, einschließlich der mitgelie ferten, korrekt installiert wurden (Sicherheitsven... - Page 70 Pelletkessel JP 6.3.1 Beschreibung des hydraulischen Kreislaufs (Abb. 17 ÷ Abb. 20) A) Druckmesser B) Entlüftungsventil C) Expansionsgefäß D) Absperrventile zum Ausbau Wassersatzes E) Umwälzer F) Kondensatschutzventil G) Warmwasserrücklauf von der Anlage (G 3/4”M) H) Kaltwasserrücklauf von der Anlage (G 3/4”M) I) Anlagenablass (G 1/2”M) J) SicherheitsventilAuslass K) KaltwasserEinlass...
-
Page 71: Laden / Nachfüllen Der Flüssigkeit Der Kesselanlage (Abb. 21 ÷ Abb. 23)
ITALIANO ENGLISH DEUTSCH FRANÇAIS ESPAÑOL 6.3.2 Hydraulische Anschlüsse (Abb. 17 ÷ Abb. 20) Öffnen Sie dann das Entlüftungsventil (B) (Abb. 18), öffnen Sie das BypassVentil im Antikonden • Schließen Sie das Gerät über die Vor und Rück sationsventil (N) und lassen Sie das Wasser aus laufleitung (G-H) an das Heizsystem an. -
Page 72: Elektrischer Anschluss
ANFÄNGLICHE KONFIGURATION Abhängig von der Art der Installation ist es notwendig, die ideale Konfiguration für einen korrekten Betrieb einzustellen. Sie können aus vier verschiedenen Konfigurati onen wählen: by pass geö net by pass geschlossen Beschreibung Konfiguration Abb. 23 Raumthermostat 6.5 Elektrischer Anschluss Raumsonde (Standard) Schließen Sie das Gerät einfach über den mit... -
Page 73: Konfiguration 1 - Raumthermostat
ITALIANO ENGLISH DEUTSCH FRANÇAIS ESPAÑOL Konfiguration 1 - Raumthermostat °C Aussenthermostat ARIA 25,8 °C Im Kessel enthaltene Komponenten In der Konfiguration 1 wird das Gerät durch In dieser Konfiguration schaltet sich ein externes Thermostat (oder Zeitthermostat) das Gerät aus, wenn der externe Ther- gesteuert, welches das Gerät entsprechend der mostat zufrieden ist, oder er moduliert eingestellten Temperatur ein... - Page 74 7.1.1 Elektrischer Anschluss an einen Raumthermostat Der externe Thermostat muss an die beiden für den Raumfühler verwendeten Klemmen auf der Rückseite des Geräts angeschlossen werden. Trennen Sie die Sonde ab und schließen Sie die beiden Kontakte des Thermostats an (Abb. 25). 22.15 20.3 °C Abb.
-
Page 75: Konfiguration 2 - Raumsonde
ITALIANO ENGLISH DEUTSCH FRANÇAIS ESPAÑOL 7.2 Konfiguration 2 - Raumsonde Sonde Raumtemperaturen Im Kessel enthaltene Komponenten 7.2.1 Elektrischer Anschluss der Raumsonde Konfiguration 2 ist die Standardkon- figuration für dieses Gerät. In diesem Das Gerät verlässt das Werk mit der Raumsonde, Fall ist es nicht notwendig, irgendwel- die bereits an die Klemmen angeschlossen und che Änderungen vorzunehmen. -
Page 76: Konfiguration 3 - Puffer Mit Kühschlange
7.3 Konfiguration 3 - puffer mit Kühschlange Solarmodul Puffersonde Im Kessel enthaltene Komponenten Stellen Sie Konfiguration 3 ein, wenn Sie die Ein 7.3.1 Elektrischer Anschluss an einen Puffer mit heit an einen Puffer mit Kühschlange anschlie Kühschlange ßen möchten. In diesem Fall reicht es aus, die Raumtempera Das Gerät wird durch die von der Puffersonde tursonde an Bord des Geräts zu bewegen und abgelesene Temperatur gesteuert (ein... -
Page 77: Konfiguration 4 - Puffer Ohne Kühschlange
ITALIANO ENGLISH DEUTSCH FRANÇAIS ESPAÑOL 7.4 Konfiguration 4 - puffer ohne Kühschlange Puffersonde Im Kessel enthaltene Komponenten Stellen Sie Konfiguration 4 ein, wenn Sie die 7.4.1 Elektrischer Anschluss an einen Puffer Einheit an einen Puffer ohne Kühschlange an ohne Kühschlange schließen möchten. -
Page 78: Erste Inbetriebnahme
7.5 Erste Inbetriebnahme Drücken Sie auf das Symbol , um das Haupt menü aufzurufen. Schließen Sie das Gerät an die Stromversorgung Drücken Sie auf das Symbol , um das Einstel an, stellen Sie den Zündschalter auf der Rücksei lungsmenü aufzurufen. te des Geräts auf "I". - Page 79 ITALIANO ENGLISH DEUTSCH FRANÇAIS ESPAÑOL Stellen Sie die Uhrzeit ein: 7.5.1 SoftwareEinstellung Rufen Sie das Systemkonfigurationsmenü auf: Einstellungen Einstellungen Zeit Datum Installer menu Brennstoff Service-Menü Bildschirmsperre Eco-Modus Sprache Frostschutzmittel Info Abb. 33 Abb. 37 Zeit Drücken Sie ON: das Passwort erscheint, stellen Sie 54 ein und drücken Sie OK zur Bestätigung.
- Page 80 Wählen Sie die Konfiguration des Geräts je nach Das Display wird für einige Sekunden Art der Installation. zurückgesetzt. Konfigurationen Am Display erscheinen das Logo und ein grüner Fortschrittsbalken: Externer Thermostat Sie sehen nun den Startbildschirm der ausge wählten Konfiguration. Umgebungssonde Dieser Bildschirm betrifft die WarmwasserVor...
-
Page 81: Wartung
ITALIANO ENGLISH DEUTSCH FRANÇAIS ESPAÑOL WARTUNG Die Wartungsarbeiten müssen von einem autorisierten technischen Kundendienst ausgeführt werden. Vor jeglichem Wartungseingriff müssen folgende Sicherheitsmaßnahmen getroffen werden: • Sicherstellen, dass alle Teile des Geräts erkaltet sind. • Sicherstellen, dass die Asche vollständig gelöscht ist. •... -
Page 82: Kontroll- Und Wartungsplan
8.3 Kontroll- und Wartungsplan BEI JEDER JEDE ALLE 2 1 MONAT 1 JAHR ANZÜDUNG WOCHE WOCHEN Brennschale Aschenlade/Fach Glas Kessel Rauchabscheider (Abb. 43) Tür und Feuerraum dichtungen (*) Rauchabzugskanal (*) Ventilatoren (*) (*) Von einem qualifizierten technischen Kundendienst. Abb. 43 004778300 ... -
Page 83: Verschrottung Und Entsorgung
ITALIANO ENGLISH DEUTSCH FRANÇAIS ESPAÑOL VERSCHROTTUNG UND ENTSORGUNG Die Verschrottung und Entsorgung des Geräts liegen in der alleinigen Verantwortung des Eigentü mers, der in Übereinstimmung mit den in seinem Land geltenden Gesetzen bezüglich Sicherheit, Respekt und Schutz der Umwelt handeln muss. Die Demontage und die Entsorgung können auch Dritten anvertraut werden, unter der Vorausset... - Page 84 TABLE DE MATIÈRES 1 INTRODUCTION Symboles utilisés Destination d’emploi Objet et contenu du manuel Conservation du manuel Mise à jour du manuel Généralités Normes de référence principales Responsabilité du fabricant Assistance technique et maintenance 1.10 Pièces détachées 1.11 Plaque signalétique 1.12 Livraison de l’appareil 2 AVERTISSEMENTS POUR LA SÉCURITÉ...
- Page 85 ITALIANO ENGLISH DEUTSCH FRANÇAIS ESPAÑOL 6 INSTALLATION Considérations générales Mise à niveau de l’appareil Installation hydraulique 6.4 Modalité de chargement/remplissage fluide installation chaudière (Fig. 21 ÷ Fig. 23) 98 Branchement électrique 7 CONFIGURATION INITIALE Configuration 1 Thermostat ambiant Configuration 2 Sonde ambiante Configuration 3 ...
-
Page 86: Introduction
1.4 Conservation du manuel spécialisé Palazzetti. Conservation et consultation Palazzetti se réserve le droit de modifier les spé cifications et les caractéristiques techniques et/ Le manuel doit être conservé avec soin et toujours ou fonctionnelles du produit à tout moment sans être disponible pour pouvoir être consulté, tant... -
Page 87: Normes De Référence Principales
être considérée • maintenance insuffisante ; à la charge de la société Palazzetti ; en effet, celle • événements exceptionnels. ci est et reste à la charge de l’installateur qui est tenu d’effectuer les contrôles relatifs au conduit... -
Page 88: Livraison De L'appareil
Le numéro de série doit toujours être indiqué • il ne pas intervenir quand les conditions sont pour toute demande concernant l’appareil. défavorables ; • il doit effectuer le travail dans de parfaites 1.12 Livraison de l’appareil conditions psychophysiques et vérifier que les équipements de protection individuelle sont L'appareil est livré... -
Page 89: Caractéristiques Du Combustible
ITALIANO ENGLISH DEUTSCH FRANÇAIS ESPAÑOL • n’effectuer aucun nettoyage d’aucune sorte ; Toucher la porte seulement lorsque l’appareil est froid. • ne pas vider les cendres ; En cas d’incendie de la cheminée, éteindre l’ap • ne pas ouvrir la porte du foyer ; pareil selon la procédure d’arrêt indiquée. -
Page 90: Stockage Des Granulés De Bois
Ne pas laisser les enfants jouer avec les éléments Il est interdit d’utiliser l’appareil comme de l’emballage (film plastique et polystyrène) : incinérateur de déchets. Risque d’étouffement ! 3.2 Stockage des granulés de bois Lors des opérations de déplacement, levage et déballage de l’appareil, il est absolument néces... -
Page 91: Transport
ITALIANO ENGLISH DEUTSCH FRANÇAIS ESPAÑOL 4.2 Transport S’assurer que le chariot élévateur a une capacité supérieure au poids de l’appareil à soulever. Le conducteur de l’engin de levage sera responsable du levage des charges. Porter une attention particulière à la protection des pavements en bois ou du parquet afin d’éviter que le poids de l’appareil ne les endommage lors de... -
Page 92: Lieu D'installation
5.3 Lieu d’installation 5.4 Air de combustion Pour les distances minimales exprimées en cm à L’appareil, lors de son fonctionnement, nécessite respecter lors du positionnement de l’appareil par d’air de combustion. rapport aux matériaux et objets inflammables, se Le flux d’air de combustion peut être obtenu de référer au livret du produit fourni avec l'appareil. -
Page 93: Raccord Des Fumées
ITALIANO ENGLISH DEUTSCH FRANÇAIS ESPAÑOL S'il n'est pas possible de réaliser la prise d'arrivée d'air externe dans la pièce, il est possible de pra tiquer le trou extérieur dans une pièce adjacente à condition qu'elle soit en communication per manente avec une grille de transit (Fig. 8 - C = Caisson, G = Grille, S = Volet). -
Page 94: Évacuation Sur Le Toit À Travers Un Conduit De Cheminée Traditionnel
Les composants constituant le système d'évacuation des fumées doivent être déclarés adaptés aux conditions de fonctionnement spécifiques et porter le marquage CE. Il est obligatoire de réaliser une pre- mière partie verticale de 1,5 mètres au Fig. 12 minimum pour garantir la bonne ex- pulsion des fumées. -
Page 95: Installation
ITALIANO ENGLISH DEUTSCH FRANÇAIS ESPAÑOL INSTALLATION Considérations générales Les paragraphes suivants fournissent des indi cations à respecter pour obtenir le rendement maximal du produit acheté. Dans tous les cas, les indications sui- vantes sont assujetties au respect d’éventuelles lois et réglementations nationales, régionales et communales en vigueur dans le pays où... -
Page 96: Installation Hydraulique
6.3 Installation hydraulique Le raccordement à l’installation hydraulique et l’installationmême doivent être effectués par un personnel qualifié, dans le respect des lois et des normes en vigueur dans le pays d’installation du poêle. Vérifier que tous les organes de contrôle et de sécurité... - Page 97 ITALIANO ENGLISH DEUTSCH FRANÇAIS ESPAÑOL Chaudière à pellets JP 6.3.1 Description circuit hydraulique (Fig. 17 ÷ Fig. 20) A) Manomètre B) Reniflard C) Vase d’expansion fermé D) Soupapes d’arrêt pour enlèvement du kit hydraulique E) Circulateur F) Soupape anticondensat G) Alimentation eau chaude vers l’installation (G 3/4”M) H) Retour eau froide depuis l’installation (G 3/4”M)
-
Page 98: Modalité De Chargement/Remplissage Fluide Installation Chaudière (Fig. 21 ÷ Fig. 23)
Ouvrir alors la vanne d’évent (B) (Fig. 18), ouvrir 6.3.2 Raccordements hydrauliques (Fig. 17 ÷ Fig. le robinet de bypass présent sur la vanne an ticondensat (N), en laissant couler l'eau de l’ins • Brancher l’appareil à l’installation de chauffage tallation jusqu'au remplissage de la chaudière. -
Page 99: Branchement Électrique
ITALIANO ENGLISH DEUTSCH FRANÇAIS ESPAÑOL CONFIGURATION INITIALE En fonction du type d’installation, il est néces saire de programmer la configuration idéale pour le bon fonctionnement. Il est possible de choisir parmi quatre configura tions différentes : by pass ouvert by pass fermé Description Configuration Fig. -
Page 100: Configuration 1 - Thermostat Ambiant
Configuration 1 - Thermostat ambiant °C Thermostat extérieur ARIA 25,8 °C Composants de la chaudière Dans la configuration 1, l’appareil est commandé Dans cette configuration, l’appareil par un thermostat (ou chronothermostat) exté s’éteint quand le thermostat externe rieur qui allume et éteint l’appareil en fonction de est satisfait ou modulera la puissance la température programmée. -
Page 101: Branchement Électrique À Un Thermostat Ambiant
ITALIANO ENGLISH DEUTSCH FRANÇAIS ESPAÑOL 7.1.1 Branchement électrique à un thermostat ambiant Le thermostat extérieur doit être branché aux deux bornes utilisées pour la sonde ambiante, situées au dos de l’appareil. Débrancher la sonde et raccorder les deux contacts du thermostat (Fig. -
Page 102: Configuration 2 - Sonde Ambiante
7.2 Configuration 2 - Sonde ambiante Sonde température ambiante Composants de la chaudière 7.2.1 Branchement électrique sonde ambiante La configuration 2 est la configuration programmée par défaut pour cet ap- L’appareil sort de l’usine avec la sonde ambiante pareil. Dans ce cas, il n’est pas néces- déjà... -
Page 103: Configuration 3 - Accumulation Avec Serpentin
ITALIANO ENGLISH DEUTSCH FRANÇAIS ESPAÑOL 7.3 Configuration 3 - Accumulation avec serpentin Panneau solaire Sonde accumulation Composants de la chaudière Programmer la configuration 3 quand on désire 7.3.1 Branchement électrique à une brancher l’appareil à une accumulation avec Accumulation avec serpentin serpentin. -
Page 104: Configuration 4 - Accumulation Sans Serpentin
7.4 Configuration 4 - Accumulation sans serpentin Sonde accumulation Composants de la chaudière Programmer la configuration 4 quand on désire 7.4.1 Branchement électrique à une brancher l’appareil à une accumulation sans Accumulation sans serpentin serpentin. Dans ce cas, il suffit de déplacer la sonde de L’appareil s’allume en fonction de la température température ambiante à... -
Page 105: Premier Démarrage
ITALIANO ENGLISH DEUTSCH FRANÇAIS ESPAÑOL 7.5 premier démarrage Appuyer sur l'icône pour accéder au menu principal. Brancher l'appareil au réseau électrique, posi Appuyer sur l'icône pour accéder au menu tionner l’interrupteur d'allumage situé au dos de Programmations. l'appareil sur « I ». Puissance Fig. - Page 106 Programmer l’heure : 7.5.1 Programmation logiciel Accéder menu configuration Paramètres l’installation : Temps Paramètres Date Installer menu Combustible Menu de service Mode écologique Verrouillage écran Antigel Langue Fig. 34 Infos Fig. 38 Temps Appuyer sur ON : le mot de passe apparaît, pro grammer 54 et appuyer sur OK pour confirmer.
-
Page 107: Affichage Réinitialiser
ITALIANO ENGLISH DEUTSCH FRANÇAIS ESPAÑOL Choisir la configuration de l’appareil en fonction L’afficheur se remet à zéro pendant du type d’installation. quelques secondes. Configurations L’afficheur visualise le logo et une barre verte d’avancement : Thermostat externe Room sensor Coil accumulator Non-coil accumulator Fig. -
Page 108: Maintenance
MAINTENANCE Les opérations de maintenance doivent être effectuées par un centre d’assistance technique autorisé. Avant d’effectuer toute opération de maintenance, prendre les précautions suivantes : • S'assurer que toutes les parties de l’appareil soient froides. • S'assurer que les cendres soient complètement éteintes. •... -
Page 109: Programme De Contrôle Et De Maintenance
ITALIANO ENGLISH DEUTSCH FRANÇAIS ESPAÑOL 8.3 programme de contrôle et de maintenance À CHAQUE TOUTES LES TOUTES LES TOUS LES TOUS LES MISE EN SEMAINES 2 SEMAINES MOIS MARCHE Brasier Tiroir/compartiment cendre Vitre Chaudière Collecteur de fumées (Fig. 47) Joint de la porte et du brasier (*) Conduit d’évacuation des fumées (*) -
Page 110: Démolition Et Élimination
DÉMOLITION ET ÉLIMINATION La démolition et la mise au rebut de l’appareil sont exclusivement à la charge du propriétaire qui devra agir dans le respect des lois en vigueur dans son pays en matière de sécurité et de respect et protection de l’environnement. - Page 111 ITALIANO ENGLISH DEUTSCH FRANÇAIS ESPAÑOL ÍNDICE 1 PREMISA GENERAL Simbología Destino de uso Finalidad y contenido del manual Conservación del manual Actualización del manual Generalidades Directivas de referencia principales Responsabilidad del fabricante Asistencia técnica y mantenimiento 1.10 Piezas de repuesto 1.11 Placa de identificación matrícula 1.12 Entrega del aparato...
- Page 112 6 INSTALACIÓN Consideraciones generales Nivelación del aparato Instalación hidráulica 6.4 Modalidad de carga/reintegro fluido a la instalación de la caldera (Fig. 21 ÷ Fig. 23) 125 Conexión eléctrica 7 CONFIGURACIÓN INICIAL Configuración 1 Termostato ambiente Configuración 2 Sonda ambiente Configuración 3 ...
-
Page 113: Premisa General
El manual de instalación es parte integrante del mental importancia están evidenciados por la aparato. siguiente simbología: Deterioro o pérdida Indicación: Indicaciones concernien- En caso de necesidad solicite otra copia a Palazzetti. tes al uso correcto del aparato y las responsabilidades personas Cesión del aparato encargadas. -
Page 114: Directivas De Referencia Principales
La responsabilidad de las obras realizadas para la instalación del aparato no se pueden considerar • falta de mantenimiento; a cargo de Palazzetti; la misma está, y perma • eventos excepcionales. nece, a cargo del instalador, el cual tiene la res... -
Page 115: Entrega Del Aparato
ITALIANO ENGLISH DEUTSCH FRANÇAIS ESPAÑOL El número de matrícula debe indicarse siempre las precauciones de seguridad dispuestas por la para cualquier tipo de solicitud relativa al aparato. ley y en especial: • no operar en condiciones adversas; 1.12 Entrega del aparato •... -
Page 116: Características Del Combustible
• no realizar ningún tipo de limpieza; Tocar la puerta sólo cuando el aparato esté frío. • no descargar las cenizas; En caso de incendio en la chimenea, apagar el aparato con el procedimiento de extinción • no abrir la puerta del fogón; indicado. -
Page 117: Almacenaje Del Pellet
ITALIANO ENGLISH DEUTSCH FRANÇAIS ESPAÑOL Prestar atención que los niños no jueguen con Está prohibido usar el aparato como in- los componentes del embalaje (por ej. películas cinerador de residuos. y poliestireno): 3.2 Almacenaje del pellet ¡Peligro de asfixia! Durante las operaciones de movimiento, levanta El pellet debe ser conservado en un miento y desembalaje del aparatos es absoluta... -
Page 118: Transporte
4.2 Transporte Asegurarse que la carretilla elevadora tenga una capacidad superior al peso del aparato para levantar. El conductor de los medios de elevación tendrá toda la responsabilidad del levantamiento de las cargas. Prestar especial cuidado a la protec- ción adecuada de suelos de madera o parqué... -
Page 119: Lugar De Instalación
ITALIANO ENGLISH DEUTSCH FRANÇAIS ESPAÑOL • debe usar guantes y zapatos de protección de Contemplar la llegada de la línea eléctrica en accidentes; cercanía del aparato para la conexión del cable de alimentación. • debe asegurarse de que el área afectada por las fases de montaje y desmontaje esté... -
Page 120: Racor De Humos
Si no es posible hacer la toma de aire exterior en el local, es posible hacer el agujero exterior en un local adyacente siempre y cuando sea per manentemente comunicante con una rejilla de tránsito (Fig. 8 - C = Contenedor, R = Rejilla , p = Puerta). -
Page 121: Descarga De Techo Por Medio De Chimenea Tradicional
ITALIANO ENGLISH DEUTSCH FRANÇAIS ESPAÑOL los componentes que constituyen el sistema de evacuación de los humos deben ser declarados idóneos a las condiciones específicas de funciona- miento y provistos de marca CE. Es obligatorio realizar un primer tramo vertical de 1,5 metros mínimos para Fig. -
Page 122: Instalación
INSTALACIÓN Consideraciones generales En los siguientes párrafos se describen algunas indicaciones que se deben respetar para obtener el rendimiento máximo del producto adquirido. Las siguientes indicaciones quedan sujetas al cumplimiento de eventua- les leyes y normativas nacionales, re- gionales y comunales vigentes en el país donde se realiza la instalación del aparato. -
Page 123: Instalación Hidráulica
ITALIANO ENGLISH DEUTSCH FRANÇAIS ESPAÑOL 6.3 Instalación hidráulica La conexión a la instalación hidráulica y la insta lación misma deben ser realizadas, por personal cualificado, respetando las leyes y las normas vigentes en el país de instalación. Asegurarse que hayan sido instalados correcta mente todos los órgano de control y seguridad incluidos los que se han suministrado (válvulas de seguridad y descarga térmica). - Page 124 Caldera de pellet JP 6.3.1 Descripción del circuito hidráulico (Fig. 17 ÷ Fig. 20) A) Manómetro B) Válvula de ventilación C) Vaso de expansión cerrado D) Válvulas de interceptación para remoción kit hidráulico E) Circulador F) Válvula anticondensación G) Envío agua caliente a la instalación (G 3/4”M) H) Retorno agua fría de la instalación (G 3/4”M) I) Descarga instalación (G 1/2"M) J) Descarga válvula de seguridad...
-
Page 125: Modalidad De Carga/Reintegro Fluido A La Instalación De La Caldera (Fig. 21 ÷ Fig. 23)
ITALIANO ENGLISH DEUTSCH FRANÇAIS ESPAÑOL Luego abrir la válvula de ventilación (B) (Fig. 18), 6.3.2 Conexiones hidráulicas (Fig. 17 ÷ Fig. 20) abrir el grifo de derivación en la válvula anticon • Conectar el aparato al sistema de calefacción a densación (N), permitiendo así... -
Page 126: Conexión Eléctrica
CONFIGURACIÓN INICIAL Dependiendo del tipo de instalación, es nece sario establecer la configuración ideal para el correcto funcionamiento. Puedes elegir entre cuatro configuraciones diferentes: by pass abierto by pass cerrado Descripción Configuración Termostato ambiente Fig. 23 Sonda ambiental (por defecto) 6.5 Conexión eléctrica Acumulación con serpentina Simplemente conectar el aparato al sistema eléc... -
Page 127: Configuración 1 - Termostato Ambiente
ITALIANO ENGLISH DEUTSCH FRANÇAIS ESPAÑOL Configuración 1 - Termostato ambiente °C Termostato externo ARIA 25,8 °C Componentes incluidos en la caldera En la configuración 1 el aparato se controla me En esta configuración el aparato se diante un termostato externo (o cronotermosta apaga cuando el termostato externo to) que enciende y apaga el aparato en funciona... -
Page 128: Conexión Eléctrica A Un Termostato Ambiente
7.1.1 Conexión eléctrica a un termostato ambiente El termostato externo debe conectarse a los dos bornes utilizados para la sonda ambiente, presentes en la parte posterior del aparato. Des conectar la sonda y conectar los dos contactos del termostato (Fig. 25). 22.15 20.3 °C Fig. -
Page 129: Configuración 2 - Sonda Ambiente
ITALIANO ENGLISH DEUTSCH FRANÇAIS ESPAÑOL 7.2 Configuración 2 - Sonda ambiente Sonda de temperaturas ambiente Componentes incluidos en la caldera 7.2.1 Conexión eléctrica de la sonda ambiente La configuración 2 es la configuración por defecto para este aparato. No es El aparato sale de la fábrica con la sonda am... -
Page 130: Configuración 3 - Acumulación Con Serpentina
7.3 Configuración 3 - Acumulación con serpentina Panel solar Sonda acumulación Componentes incluidos en la caldera Establecer la configuración 3 cuando quiera 7.3.1 Conexión eléctrica a una Acumulación con conectar el aparato a una acumulación con serpentina serpentina. En este caso, basta con desplazar la sonda de El aparato se controla (encendido y apagado) por temperatura ambiente en el aparato y extender... -
Page 131: Configuración 4 - Acumulación Sin Serpentina
ITALIANO ENGLISH DEUTSCH FRANÇAIS ESPAÑOL 7.4 Configuración 4 - Acumulación sin serpentina Sonda acumulación Componentes incluidos en la caldera Establecer la configuración 4 cuando quiera 7.4.1 Conexión eléctrica a una Acumulación sin conectar el aparato a una acumulación sin serpentina serpentina. -
Page 132: Primera Puesta En Marcha
7.5 primera puesta en marcha Presionar el icono para acceder al menú principal. Conectar el aparato a la red eléctrica, poner el Presionar el icono para entrar en el menú interruptor de encendido de la parte trasera del configuraciones. aparato en "I". Potencia Fig. -
Page 133: Configuración Del Software
ITALIANO ENGLISH DEUTSCH FRANÇAIS ESPAÑOL Configurar la hora: 7.5.1 Configuración del software Acceder al menú de configuración de la Parámetros instalación: Tiempo Parámetros Fecha Installer menu Combustible Menú Servicio Modo ecológico Bloqueo de pantalla Anti-hielo Idioma Fig. 34 Info Fig. 38 Tiempo Pulsar ON: aparece la contraseña, configurar 54 y pulsar OK para confirmar. - Page 134 Elegir la configuración del aparato según el tipo La pantalla se reiniciará durante unos de instalación. segundos. Configuraciones En la pantalla aparece un logotipo y una barra verde de avance: Termostato externo Room sensor Coil accumulator Non-coil accumulator Fig. 41 Configu- Descripción ración...
-
Page 135: Mantenimiento
ITALIANO ENGLISH DEUTSCH FRANÇAIS ESPAÑOL MANTENIMIENTO Las operaciones de mantenimiento deben ser realizadas por parte de un centro de asistencia técnico autorizado. Antes de realizar cualquier operación de mantenimiento adoptar las siguientes precauciones: • Asegurarse que todas las partes del aparato estén frías. •... -
Page 136: Programa De Control Y Mantenimiento
8.3 programa de control y mantenimiento CADA CADA CADA 2 1 MES 1 AÑO ENCENDIDO SEMANA SEMANAS Brasero Cajón/Compartimiento cenizas Vidrio Caldera Colector humos (Fig. 47) Guarniciones puerta y brasero (*) Conducto de evacuación de humos (*) Ventiladores (*) (*) A cargo de un centro de asistencia técnico habilitado. Fig. -
Page 137: Desguace Y Eliminación
ITALIANO ENGLISH DEUTSCH FRANÇAIS ESPAÑOL DESGUACE Y ELIMINACIÓN El desguace y la eliminación del aparato corren a cargo y están bajo la responsabilidad exclusiva del propietario que deberá actuar en cumplimiento de las leyes vigentes en el propio País en materia de seguridad, respeto y cuidado del medio ambiente. - Page 140 Ankündigung zu ändern, um sie zu verbessern, ohne ihre grundlegenden Eigenschaften zu beeinträchtigen. Palazzetti se réserve le droit de modifi er ses produits à tout moment et sans préavis afi n de les améliorer sans en compromettre les caractéristiques essentielles.