
Manuels Connexes pour Doro AFTI 25


Sommaire des Matières pour Doro AFTI 25
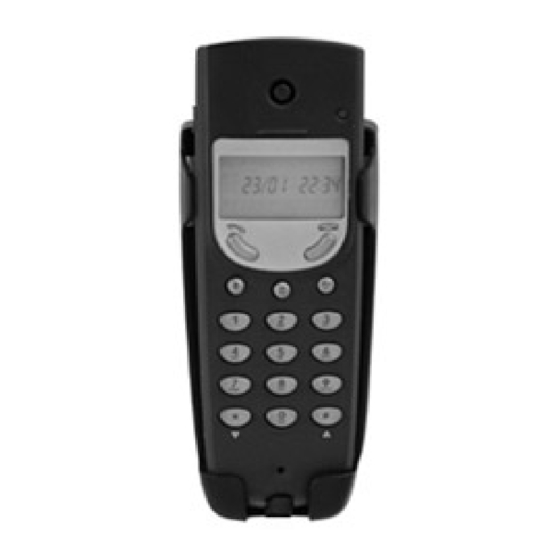
- Page 1 English AFTI 25 French Telephone with Caller ID Téléphone avec Présentation du Numéro User Guide Manuel d'utilisation...
- Page 3 English (see page 4-13) 1 Earpiece Volume Control 6 OK Button 2 Talk Button 7 Menu Button 3 Recall (R) Button 8 Delete/Disconnect Button 4 Scroll (Up) Button and 9 Line/Ringer Signal Indicator 5 Scroll (Down)Button and Français (voir pages 17-27) 1 Réglage du volume 6 Touche conrmation 2 Touche de communication...
-
Page 4: Wall Mounting
1. Secure two screws, vertically positioned 100 mm apart. 2. Position the wall mount bracket on top of the screws and slide it downward into place. The telephone can now be placed in the wall socket after terminating the call using www.doro.com... -
Page 5: Receiving A Call
The handset microphone can be disabled during a call. 1. Press repeatedly until MUTE ? is displayed. Press 2. The display will show UNMUTE ? and will flash so long as the function is active. 3. Press again to re-activate the microphone. www.doro.com... - Page 6 CALLER ID Displays a list of the most recently received numbers. REDIAL Displays a list of the most recently dialled numbers. STORE Allows numbers/names to be stored in the phone book. SETTINGS Set date/time, ringer signal and the text language www.doro.com...
-
Page 7: Important
. The display will show CLEAR ? 4. Press to confirm. Erasing all numbers 1. Press repeatedly until CALLER ID ? is displayed. Press 2. Scroll to any telephone number using 3. Press and hold until CLEAR ALL ? is displayed 4. Press to confirm. www.doro.com... - Page 8 The five most recently dialled numbers can easily be redialled. 1. Press repeatedly until REDIAL ? is displayed. Press 2. Scroll to the desired telephone number using 3. Press to dial the displayed number or to return to standby mode.. www.doro.com...
-
Page 9: Phone Book
0.......... 0 * .......... Delete/move back #.......... Move forward Dialling Numbers from the Phone Book 1. Press repeatedly until VIP ? is displayed. Press 2. Scroll to the required telephone number using 3. Press , to dial the displayed number. www.doro.com... - Page 10 Erasing Phone Numbers/Names 1. Press repeatedly until VIP ? is displayed. Press 2. Memory location 01 is displayed. 3. Scroll to the desired location using 4. Press . CLEAR ? will be displayed 5. Press to confirm. www.doro.com...
-
Page 11: Ringer Volume
When the ringer is switched off, will be displayed. 1. Press repeatedly until SETTINGS ? is displayed. Press 2. Press repeatedly until is displayed. 3. Scroll to the desired setting using (X=off, =low, =medium and high). Press 4. Press to return to standby mode. www.doro.com... -
Page 12: Setting The Time And Date
Recall Access to additional network services can be gained by using the recall button keys. Contact your network operator for more information. Press the recall button followed by the extension number to when connected to a PBX (TBR only) www.doro.com... -
Page 13: Technical Support
9AM - 5PM Monday-Friday excluding Bank Holidays. Alternatively, E-mail on: tech@doro-uk.com You can contact us in writing: Consumer Support Group, Doro UK Ltd., 22 Walkers Road, North Moons Moat, Redditch, Worcestershire, B98 9HE, (regarding any Spares or Technical query), or Telephoning (Spares only): 01527 584377 Web site: www.doro-uk.com... - Page 14 (As a matter of precaution, we recommend disconnecting the telephone during a thunderstorm). This guarantee does not affect your statutory rights. www.doro.com...
-
Page 15: Consumer Support
As an alternative you can visit our web site for FAQ’s or send an e-mail for a prompt reply. AUSTRALIA NEW ZEALAND DORO Australia Pty Ltd Atlas Gentech (NZ) Limited PO Box 6760 Private Bag 14927... - Page 16 If a charge for local calls is unacceptable, the “DIAL“ button should NOT be used for local calls. Only the 7 digits of the local number should be dialled from your telephone. DO NOT dial the area code digit or the “0“ prefix. www.doro.com...
-
Page 17: Raccordement
2. Insérez les têtes des vis dans les trous du support murale, et poussez-le vers le bas pour le mettre en place. 3. Vous pouvez ainsi mettre le téléphone dans le support murale après avoir terminé la communication avec www.doro.com... -
Page 18: Utilisation
Le micro peut être coupé en cours de communication. UNMUTE ? est affiché et clignote tant que la fonction est active. 1. Une communication de l’extérieur est en cours. 2. Appuyez plusieurs fois sur . MUTE ? s’affiche. Appuyez sur 3. Appuyez sur pour réactiver le micro. www.doro.com... - Page 19 ID), liste des derniers numéros reçus. ENREGISTRER (STORE) vous permet d’enregistrer les noms et numéros dans le répertoire. SELECTIONS vous permet de régler l’heure et date, sélectionner la mélodie de sonnerie et de choisir la langue utilisée par l’afficheur. www.doro.com...
-
Page 20: Présentation Du Numéro L'appelant
2. Appuyez sur . CLEAR ? s’affiche. 3. Validez le réglage avec Effacer tous les numéros 1. Atteignez la position voulue selon l’instruction en dessus. 2. Appuyez sur jusqu’à ce que CLEAR ALL s’affiche. 3. Validez le réglage avec www.doro.com... -
Page 21: Présentation Du Numéro De L'appelant
Vous pouvez aisément rappeler les cinq derniers numéros que vous avez composés. 1. Appuyez plusieurs fois sur . REDIAL? s’affiche. Appuyez sur 2. Appuyez sur pour faire défiler les numéros composés. 3. Appuyez sur pour appeler ou appuyez sur pour retourner au mode repos. www.doro.com... -
Page 22: Répertoire
9.......... W X Y Z 9 0.......... 0 * .......... Effacer/reculer #.......... Avancer Appeler un nom/numéro dans le répertoire 1. Appuyez plusieurs fois sur . VIP ? s’affiche. Appuyez sur 2. Sélectionnez le numéro/nom désiré avec 3. Appuyez sur , pour appeler votre correspondant. www.doro.com... - Page 23 Effacer un numéro de téléphone/nom 1. Appuyez plusieurs fois sur . VIP ? s’affiche. 2. Appuyez sur , la position 01 s’affiche. 3. Sélectionnez le numéro/nom désiré avec 4. Appuyez sur . CLEAR ? s’affiche. 5. Validez le réglage avec www.doro.com...
-
Page 24: Mélodie De Sonnerie
1. Appuyez plusieurs fois sur . SETTINGS ? s’affiche. Appuyez 2. Appuyez plusieurs fois sur s’affiche. 3. Atteignez le réglage voulu (X=silence, =bas, =moyen et [ = haut). Appuyez sur 4. Appuyez sur pour retourner au mode libre. www.doro.com... -
Page 25: Régler L'heure Et La Date
Il peut également vous donner accès à des services additionnels proposés par des opérateurs. Les touches * , # et R vous permettront d’accéder à ces fonctions ou services complémentaires. Pour toute information, adressez-vous directement au fabricant du PABX ou à votre opérateur. www.doro.com... -
Page 26: Dépannage
(-Autorité de Régulation des Télécommunications), de l’effet de la foudre, de surtensions électriques ou électrostatiques, d’une protection insuffisante contre l’humidité, la chaleur ou le gel. En cas de panne, adressez-vous au S.A.V. de votre revendeur ou installateur. www.doro.com... -
Page 27: Pour La France
En tout état de cause, la garantie légale pour vices cachés s’appliquera conformément aux articles 1641 et suivants du Code Civil. Si vous avez des soucis d’utilisation, contactez notre Service d ‘Assistance Téléphonique au 08 92 68 90 18 ( N° Audiotel - 0,34 Euros/mn )). www.doro.com... - Page 30 www.doro.com...