Publicité
Les langues disponibles
Les langues disponibles
Table des Matières
Publicité
Table des Matières

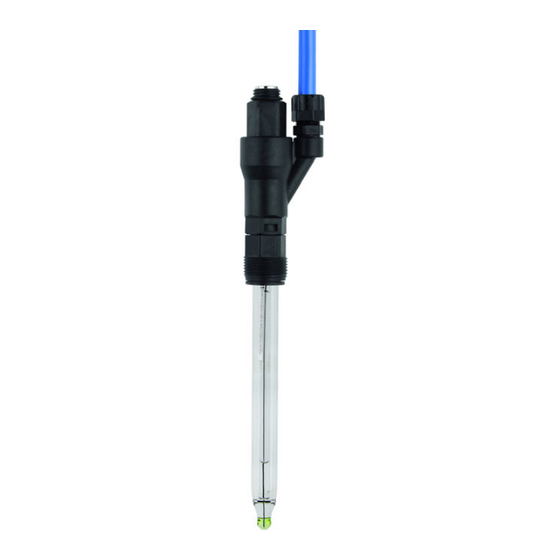
Sommaire des Matières pour JUMO tecLine pH
- Page 1 KCl-Anschluss für Glas-Einstabmessketten KCl connection for glass combination electrodes Raccord à KCl pour électrode combinée en verre Typenzusatz/Extra code/Option 833 B 209791.4 Montageanleitung Installation Instructions Notice de montage V1.00/DE-EN-FR/00475765...
- Page 3 KCl-Anschluss für Glas-Einstabmessketten Typenzusatz 833 B 209791.4 Montageanleitung V1.00/DE/00475765...
- Page 4 Alle erforderlichen Tätigkeiten sind in der vorliegen- den Montageanleitung beschrieben. Sollten trotzdem bei der Inbetriebnahme Schwierigkeiten auftreten, bit- ten wir Sie, keine Manipulationen am Gerät vorzuneh- men. Sie gefährden dadurch Ihren Garantieanspruch! Bitte setzen Sie sich mit der nächsten Niederlassung oder mit dem Stammhaus in Verbindung.
-
Page 5: Montage
2 Montage Der O-Ring (2) darf nicht beschädigt werden! (10) (11) Schlauchverschluss (3) aufschneiden und entfernen um die Einfüllöffnung (4) freizulegen. Einstabmesskette (5) in den KCl-Anschluss (6) einführen. - Page 6 Die Dichtung im KCl-Anschluss (6) kann das Einfüh- ren erschweren. Gegebenenfalls den Elektroden- schaft (5) mit Wasser anfeuchten um das Einführen zu erleichtern. Einstabmesskette (5) mit der Pg 13,5-Verschraubung (1) in den KCl-Anschluss (6) schrauben. Anzugsmoment maximal 3 Nm. Gleitscheibe (10) und O-Ring (11) auf die Einstabmesskette bis zum KCl-Anschluss (6) aufschieben.
- Page 7 2.1 Abmesungen Ø ±0.2 Gleitscheibe O-Ring 10 × 3.5 FPM Pg 13.5...
- Page 8 JUMO GmbH & Co. KG JUMO Mess- und Regelgeräte Ges.m.b.H JUMO Mess- und Regeltechnik AG...
- Page 9 KCl connection for glass combination electrodes extra code 833 B 209791.4 Installation Instructions V1.00/EN/00475766...
-
Page 10: Area Of Application
All necessary actions are described in these installa- tion instructions. However, if any difficulties should still arise during start-up, please do not carry out any manipulations on the unit. You could endanger your rights under the instrument warranty! Please contact the nearest subsidiary or the head office in such a case. - Page 11 2 Installation The O ring (2) must not be damaged ! (10) (11) Cut the tubular seal open (3) and remove it to expose the filler opening (5). Insert the combination electrode (5) into the KCl connection (6).
- Page 12 The seal in the KCl connection (6) may make it more difficult to insert the electrode. If necessary, moisten the electrode shaft (5) with water to facilitate insertion. Screw the combination electrode (5) into the KCl connection (6) by means of the Pg13.5 screwed gland (1). Maximum tightening torque is 3 Nm.
-
Page 13: Dimensions
2.1 Dimensions Ø ±0.2 Washer O-Ring 10 × 3.5 FPM Pg 13.5... - Page 14 JUMO GmbH & Co. KG Street address: Moritz-Juchheim-Straße 1 36039 Fulda, Germany Delivery address: Mackenrodtstraße 14 36039 Fulda, Germany Postal address: 36035 Fulda, Germany Phone: +49 661 6003-0 Fax: +49 661 6003-607 Email: mail@jumo.net Internet: www.jumo.net JUMO Instrument Co. Ltd.
- Page 15 Raccord à KCl pour électrode combinée en verre Option 833 B 209791.4 Notice de montage V1.00/FR/00475767...
-
Page 16: Domaines D'utilisation
Toutes les opérations nécessaires sont décrites dans cette notice de montage. Toutefois si vous rencontrez des difficultés lors de la mise en service, n’effectuez aucune manipulation non autorisée. Vous pourriez compromettre votre droit à la garantie ! Veuillez prendre contact avec nos services. Lisez cette notice de montage avant la mise en ser- vice. - Page 17 2 Montage Il ne faut pas endommager le joint torique (2) ! (10) (11) Inciser le manchon d’obturation (3) et le repousser pour dégager l’orifice de remplissage (4). Introduire l’électrode combinée (5) dans le raccord à KCl (6).
- Page 18 Le joint dans le raccord à KCl (6) peut compliquer l’introduction. Le cas échéant, il faut humidifier le plongeur de l’électrode (5) avec de l’eau pour faciliter son introduction. Visser l’électrode combinée (5) avec le raccord fileté Pg 13,5 (1) dans le raccord à...
- Page 19 2.1 Dimensions Ø ±0.2 Rondelle de glissement Joint torique 10 × 3.5 FPM Pg 13.5...
- Page 20 Internet : www.jumo.fr Service de soutien à la vente : 0892 700 733 (0,337 Euro/min) JUMO Automation S.P.R.L. / P.G.M.B.H. / B.V.B.A. Industriestraße 18 4700 Eupen, Belgique Téléphone : +32 87 59 53 00 Télécopieur : +32 87 74 02 03 E-Mail : info@jumo.be...


