Publicité
Les langues disponibles
Les langues disponibles
Liens rapides
Models with Oscillating Handle (Part No. 061245A)
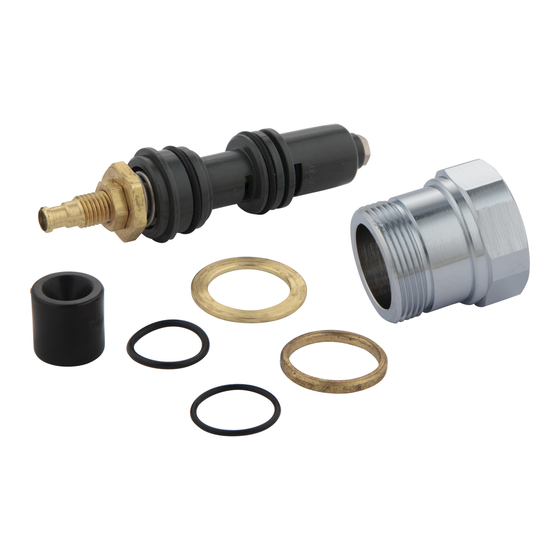
Note: Two O-rings, one 13/16" O.D. and a smaller 3/4" O.D. are packaged loose with this repair kit.
Read the following instructions to determine use, if necessary, of each.
1) Turn off water supply.
2) Loosen set screw securing bonnet.
3) Remove the following and keep for re-use: - handle
4) Remove and DISCARD the following:
- existing TEMPUS II cartridge
- nylon spacer
5) Install new cartridge. (If cartridge shoulder cannot be pushed to within
1/16" of body, remove cartridge and install cartridge spacer over O-ring
and re-install.) Secure with new capnut.
6) If metering cartridge cannot be installed into body, remove TOP O-ring
and replace with 13/16" O.D. O-ring (supplied loose).
7) Place nylon spacer and fibre washer over stem and re-install spring,
handle and bonnet.
8) Secure bonnet with set screw.
9) Turn on water supply.
10) If water drips after cartridge is shut-off, install 3/4" O.D. (packaged
separately) O-ring over end of metering cartridge against shoulder.
NOTE: Volume is factory preset to 0.5 U.S. gallons / 1.9 litres. For less
volume, reduce push button/handle travel by changing position of adjustment
nuts (tighten clockwise).
CAUTION: DO NOT OVERTIGHTEN CAPNUT. Tighten to 12 ft-lbs (max).
Models with Push Button (Part No. 061241A)
Note: Two O-rings, one 13/16" O.D. and a smaller 3/4" O.D. are packaged
loose with this repair kit.
Read the following instructions to determine use, if necessary, of each.
1) Turn off water supply.
2) Remove existing TEMPUS II cartridge and push button and discard.
3) Install new TECK cartridge. (If cartridge shoulder cannot be pushed
to within 1/16" of body, remove cartridge and install cartridge spacer
over O-ring and re-install.) Secure with new capnut.
4) If metering cartridge cannot be installed into body, remove TOP O-ring
and replace with 13/16" O.D. O-ring (supplied loose).
5) Place new push button onto cartridge and secure with set screw.
6) Turn on water supply.
7) If water drips after cartridge is shut-off, install 3/4" O.D. (packaged
separately) O-ring over end of metering cartridge against shoulder.
NOTE: Volume is factory preset to 0.5 U.S. gallons / 1.9 litres. For less
volume, reduce push button/handle travel by changing position of adjustment
nuts (tighten clockwise).
CAUTION: DO NOT OVERTIGHTEN CAPNUT. Tighten to 12 ft-lbs (max).
350 South Edgeware Road
St. Thomas, Ontario, Canada N5P 4L1
Tel: 1-800-567-3300 (ENG.)
Tél: 1-800-265-9425 (FR.)
RETROFIT INSTALLATION
- handle bonnet
- spring
Page 1
URINAL
Urinal Valve Body
Existing TEMPUS II Cartridge
Nylon Spacer
DISCARD
Urinal Valve Body
New Metering Cartridge
Cartridge
Shoulder
Adjustment Nuts
Top O-Ring (See 6)
Locate 3/4" O.D. O-Ring here (See 10)
Cartridge Spacer (See 5)
(Retrofit Kit only)
Urinal Valve Body
Top O-Ring (See 4)
Locate 3/4" O.D. O-Ring here (See 7)
Urinal Valve Body
Box 40980, 55 East 111th Street,
Indianapolis, Indiana 46280
Tel: (317) 848-1812
Website: www.deltacommercialfaucets.com
Handle
Spring
Bonnet
Handle
KEEP FOR USE
WITH NEW CARTRIDGE
New Capnut
New Nylon Spacer
Handle
Handle
Spring
Bonnet
New Fibre Washer
TEMPUS II Metering Cartridge
Push Button
DISCARD
Adjustment Nuts
Cartridge Shoulder
New Push
Button
New Capnut
New Metering Cartridge
Cartridge Spacer (See 3)
(Retrofit Kit only)
209209 Rev. A
Publicité

Sommaire des Matières pour Delta 061245A
- Page 1 URINAL RETROFIT INSTALLATION Models with Oscillating Handle (Part No. 061245A) Note: Two O-rings, one 13/16” O.D. and a smaller 3/4” O.D. are packaged loose with this repair kit. Read the following instructions to determine use, if necessary, of each. 1) Turn off water supply.
- Page 2 POUR LA CARTOUCHE DE MODIFICATION (URINOIR) Modèles à manette oscillante (Pièce N° 061245A) Remarque : Deux joints toriques (emballés à même) sont fournis avec cette trousse de modification. L’un a un diamétre ext de 13/16 po, l’autre, plus petit a 3/4 po. Lire les instructions afin d’en connaître l’utilisation, si nécessaire.
- Page 3 ACTUALIZADO (URINARIO) Modelos con manija oscilante (No. de pieza 061245A) Nota: Dos anillos “O”, uno de 13/16” D.E. y uno más pequeño de 3/4” D.E. están embalados sueltos en este juego de reparación. Lea las siguientes instrucciones para determinar el uso, si es necesario, de cada uno.


