Samsung DVD-VR355 Manuel D'instructions
Masquer les pouces
Voir aussi pour DVD-VR355:
- Manuel d'instructions (260 pages) ,
- Manuel d'instructions (86 pages)
Table des Matières
Publicité
Les langues disponibles
Les langues disponibles
Liens rapides
Publicité
Table des Matières
Dépannage

Manuels Connexes pour Samsung DVD-VR355


Sommaire des Matières pour Samsung DVD-VR355
- Page 1 Instruction Manual DVD-VR355 www.samsung.com/ca English Français AK68-01343A(00)
-
Page 2: Getting Started
Getting Started Warning ■ This unit can be used only where the power supply is AC 120V, 60Hz. It cannot be used elsewhere. TO REDUCE THE RISK OF ELECTRIC SHOCK, ■ This DVD Recorder & VCR is designed and DO NOT REMOVE THE COVER(OR BACK). manufactured to respond to the Region NO USER-SERVICEABLE PARTS ARE INSIDE. - Page 3 • Exterior interference such as lightning and static Precaution electricity can affect normal operation of this recorder. If this occurs, turn the DVD Recorder & VCR off and on again with the POWER button, or disconnect and then ▌ Important Safety Instructions reconnect the AC power cord to the AC power outlet.
- Page 4 • This unit can play back DVD±R discs recorded and • For MP3 fi les recorded with a VBR(Variable Bit Rates), fi nalized with a Samsung DVD video recorder. It may not from 80 Kbps to 320 Kbps, the sound may cut in and out.
-
Page 5: Copy Protection
• You cannot play a DVD-RAM in most DVD players due (Download Center at www.samsung.com/ca) to compatibility issues. • If disc compatibility problems continue, or there is an • Only DVD-RAM standard Version 2.0 discs can be issue upgrading your recorder, contact the Call Center at played in this unit. - Page 6 Contents Getting Started System Setup ■ Warning ..............2 ■ On-Screen Menu Navigation ........28 ■ Precaution ............... 3 ■ Auto Clock Set ............28 Important Safety Instructions ........3 ■ Manual Clock Set ............ 29 Handling Cautions ........... 3 ■...
- Page 7 Editing ■ Playing Back an Audio CD (CD-DA)/MP3 ....49 Buttons on the Remote Control Used for Audio CD ■ Playing the Title List ..........69 (CD-DA)/MP3 Playback .......... 49 ■ Basic Editing (Title List) ........... 70 Playing an Audio CD (CD-DA) ....... 49 Renaming(Labeling) a Title ........
-
Page 8: General Features
DivXNetworks, Inc and are used under license. Creating DVD video titles using DVD±RW/DVD±R discs With the DVD-VR355, you can create your own DVD video titles on 4.7 GB DVD±RW/DVD±R or 8.5GB DVD±R discs. HDMI (High Defi nition Multimedia Interface) HDMI reduces picture noise by allowing a pure digital video/audio signal path from the DVD Recorder &... - Page 9 All rights reserved; No part or whole of this user’s manual quality mode), SP (standard quality mode), LP (long may be reproduced or copied without the prior written recording mode), and EP (extended mode). permission of Samsung Electronics Co. English - 9...
- Page 10 ▌ Step 4 : Playing Unpacking To start playback, select the title you want to play from the title list. ▌ Accessories A DVD consists of sections called titles, and sub sections called chapters. Check for the supplied accessories below. During recording, a title is created between two points where you start and stop recording.
-
Page 11: Preparing The Remote Control
3. Press and hold the TV button and enter the two-fi gure code simultaneously corresponding to the brand of your television by pressing the appropriate number buttons. Brand Codes Brand Codes SAMSUNG 01,14,15,23,31 NEWSAN DAEWOO NOBLEX EMERSON PANASONIC 12,24 GRADIENTE... -
Page 12: Tour Of The Remote Control
▌ Tour of the Remote Control You can control part of another manufacturer’s TV functions with this remote control. • Buttons that can be controlled on your TV : TV POWER, INPUT SEL., TV VOL +/-, CH/TRK ( / ), TV MUTE, 0~9, 100+ Button. -
Page 13: Front Panel Display
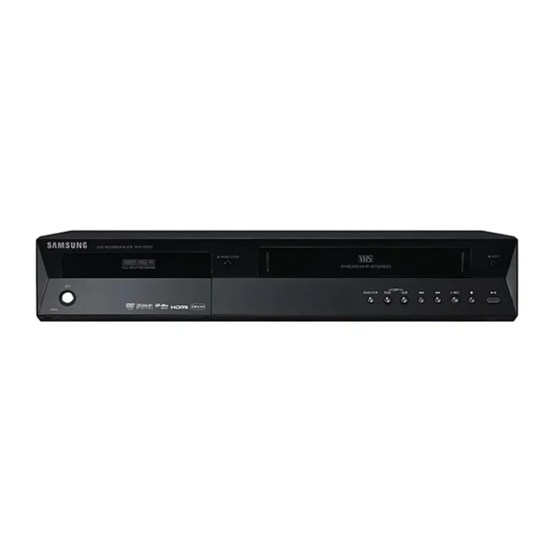
Description ▌ Front Panel 1. DVD DECK 9. P.SCAN BUTTON 2. DVD OPEN/CLOSE BUTTON 10. FRONT PANEL DISPLAY 3. VCR DECK 11. DVD/VCR SELECT BUTTON 4. VCR EJECT BUTTON 12. COPY BUTTON 5. POWER BUTTON 13. CH ( ) BUTTON 6. -
Page 14: Rear Panel
▌ Rear Panel 10 11 The fan always revolves when the power is on. Ensure a minimum of 4” clear space on all sides of the fan when installing the product. 1. VIDEO INPUT JACK (AV 1 IN) 8. AUDIO OUT JACKS (AV OUT) 2. -
Page 15: Connecting & Setting Up
Connecting & Setting Up Connecting the Antenna Cable There are several ways to connect your DVD Recorder & VCR. Select the antenna connection that best suits you below. ▌ Antenna + DVD Recorder & VCR + TV : No Cable box You can record non-scrambled channels by selecting the channel on the DVD Recorder &... - Page 16 ▌ Antenna + Cable box + DVD Recorder & VCR + TV : Cable box with many scrambled channels You can record channels by selecting the channel on the cable box. You cannot record one channel while watching another channel. Be sure that the cable box is turned on. English - 16...
- Page 17 ▌ Antenna + DVD Recorder & VCR + Cable box + TV : Cable box with a few scrambled channels You can record non-scrambled channels by selecting the channel on the cable box. You cannot record scrambled channels that require a cable box. English - 17...
- Page 18 Please check the logo (If your TV has an ■ If you use an HDMI cable to connect a Samsung logo, then it supports Anynet+ function.) TV to the DVD recorder & VCR, you can operate the recorder using the TV remote control. (This is only available with SAMSUNG TVs that support Anynet+(HDMI-CEC).) (See page 39)
- Page 19 Press the input selector on your TV remote control until the DVI signal from the DVD Recorder & VCR appears on your TV screen. ■ To set the HDMI output resolution (480p/720p/ ■ Why does Samsung use HDMI? 1080i), see page 34. Analog TVs require an analog video/audio signal. However, when playing a DVD, the data ■...
-
Page 20: Connecting The Video Cable
■ The Component jacks will not output video resolutions above 480p. To view 720p and 1080i, connect the DVD-VR355 to your TV with an HDMI- HDMI cable. With HDMI connected, press the P.SCAN button to alternate between all available resolutions. (See page 34) - Page 21 ▌ Connecting to an S-Video Input Jacks Connect an S-Video cable(not supplied) between the S-VIDEO OUT jack on DVD Recorder & VCR and S-VIDEO IN jack on your TV. • You will enjoy high quality images. S-Video separates ■ S-Video and Component video output are the picture element into black and white (Y) and color available only if your TV supports S-Video input or (C) signals to present clearer images than regular video...
- Page 22 ▌ Connecting to a Video Input Jacks Connect a video(yellow) cable between the VIDEO(yellow) OUT jack on DVD Recorder & VCR and VIDEO(yellow) IN jack on the TV. • You will enjoy regular quality images. This connection outputs the 480i resolution to your TV. •...
-
Page 23: Connecting To Your Tv
Connecting the Audio Cable Select one of the Audio connections on the following pages. ▌ Connecting to your TV This connection will use your TV’s speakers. English - 23... - Page 24 ▌ Connecting to a Stereo Amplifi er with Analog Input Jacks If your stereo amplifi er only has AUDIO INPUT jacks(L and R), use the AUDIO OUT (AV OUT) jacks. Front (L) speaker Front (R) speaker English - 24...
- Page 25 ▌ Connecting to an AV Amplifi er with a Digital Input Jack If your AV amplifi er has a Dolby Digital or DTS decoder and a digital input jack, use this connection. To enjoy Dolby Digital or DTS sound, you will need to set up the audio settings. (See page 32) Manufactured under license from Dolby Laboratories.
-
Page 26: Connecting External Devices
Connecting External Devices This allows you to connect your DVD Recorder & VCR to other external devices and view or record their outputs. ▌ Connecting a VCR, cable box/satellite receiver (Set top box) or DVD player to the AV 1 IN or S-VIDEO IN Jacks Connecting a VCR or external device to AV 1 IN jacks of the DVD Recorder &... -
Page 27: Connecting A Camcorder
▌ Connecting a Camcorder You can record from connected equipment, such as a camcorder by using the AV2 IN or DV IN jacks on front of the DVD Recorder & VCR. (See page 60) ■ If the Input is not selected automatically, press the INPUT SEL. -
Page 28: System Setup
System Setup On-Screen Menu Navigation DVD-Recorder Timer Record The on-screen menus allow you to enable or disable various No Disc functions on your DVD Recorder & VCR. Timer Rec. Timer Record ► Press the MENU button to open the on-screen menu and then use Setup Scheduled Record List ►... -
Page 29: Daylight Saving
▌ Clock Data CH DVD-Recorder Clock Data CH Press the ▲▼ buttons to select a channel that carries a time signal, No Disc then press the ENTER button. Timer Rec. Select Auto to set the channel automatically. Select channel : Auto Setup MOVE... -
Page 30: Channel Set
Channel Set DVD-Recorder Channel Set This feature allows you to manually set the DVD Recorder & VCR’ No Disc s tuner band to Antenna or Cable, whichever you connected to the Timer Rec. Antenna Antenna/Cable TV : Antenna ► Antenna In jack during initial setup. Cable TV Setup Auto Channel Memory... -
Page 31: Channel Add/Delete
Channel Add/Delete DVD-Recorder Channel Add/Delete Use this feature if Auto Channel Memory missed a channel that you No Disc would like to add or if you wish to remove a channel. Timer Rec. Select channel : Setup 1. With the unit in Stop mode/No Disc mode, press the MENU button. 2. -
Page 32: Setting Up The Language Options
Setting Up the Language Options Language If you set the language options in advance, they will come up DVD-Recorder No Disc automatically every time you watch a movie. Timer Rec. Audio Original ▲ Setup Subtitle : Automatic English ► 1. With the unit in Stop mode/No Disc mode, press the MENU button. Français Disc Menu : English... -
Page 33: Setting Up The Video(Display) Options
▌ Dynamic Compression DVD-Recorder Audio This is only active when a Dolby Digital signal is detected. No Disc • On : When the Movie soundtracks are played at low volume or from Timer Rec. Digital Output : PCM ► Setup : Off ►... -
Page 34: Noise Reduction
MOVE ENTER RETURN EXIT • Connect the DVD-VR355 to your TV via HDMI or DVI. Set your TV's input to HDMI or DVI. • Press the P.SCAN button while the unit is in stop mode to select the output resolution. -
Page 35: Setting Up The Parental Control
Setting Up the Parental Control DVD-Recorder Parental Control The Parental Control function works in conjunction with DVDs that have No Disc been assigned a rating - which helps you control the types of DVDs that Timer Rec. Password √ your family watches. There are up to 8 rating levels on a disc. Setup 1. -
Page 36: Auto Repeat
VCR Setting This function allows you to set up the VCR. 1. With the unit in Stop mode/No Disc mode, press the MENU button. 2. Press the ▲▼ buttons to select Setup, then press the ENTER or ► button. 3. Press the ▲▼ buttons to select System, then press the ENTER or ► button. -
Page 37: Video Input
Video Input DVD-Recorder System You can watch video from an external component through the No Disc AV 1(Composite) or S-video input jacks. Timer Rec. ► Video Input AV 1 : AV 1 ► Setup 1. With the unit in Stop mode/No Disc mode, press the MENU button. DVD EP Mode Time : 6 Hours ►... -
Page 38: Automatic Chapter Creator
Automatic Chapter Creator DVD-Recorder System DVD-RW(V) Title List ► Video Input : AV 1 ► (V mode) Disc Manager DVD EP Mode Time : 6 Hours ► Timer Rec. A DVD-Video consists of ‘Titles’ and ‘Chapters’. Chapter Creator : Off ►... - Page 39 System No Disc a Samsung TV remote control, by connecting the DVD Recorder & Timer Rec. ► VCR to a SAMSUNG TV using an HDMI Cable. (see page 18) (This is Video Input : AV 1 ► Setup only available with SAMSUNG TVs that support Anynet+.)
-
Page 40: Region Code (Dvd-Video Only)
Playback This section introduces basic functions of playback Disc types that can be played by disc type. Disc Disc Recorded Disc Shape Max. Playing Time Read the following information before playing a disc. Types Logo content or minute or minute Single sided(5”) Region code (DVD-Video only) Double sided(5”) -
Page 41: Discs That Cannot Be Played
▌ Discs That Cannot be Played • DVD-Video with a region number other than “1” or “ALL” • 3.9 GB DVD-R Disc for Authoring. • A DVD±R/DVD-RW(V) disc which has been recorded and not fi nalized in a different manufacturer's recorder. •... -
Page 42: Using The Disc Menu And Title Menu
Using the Disc Menu and Title Menu Some discs contain a dedicated menu system that allows you to select special functions for title, chapters, audio track, subtitles, fi lm previews, information on characters, etc. ▌ For DVD-VIDEO Discs Disc Menu : Press the DISC MENU button to enter the disc menu of the disc. •... -
Page 43: Skipping Chapters Or Tracks
▌ Skipping Chapters or Tracks During playback, press the l ◄ ◄ or ► ► l button on the remote control. • If you press the l ◄ ◄ button If you press the l ◄ ◄ button, it moves to the beginning of the chapter, track or marker(DVD-RAM, DVD-RW(VR mode) ). -
Page 44: Repeat Playback
Using the ANYKEY button The ANYKEY functions allows you to easily search for a desired scene by accessing title, chapter or time. You can also change the subtitle and audio settings and set some features including Repeat, Angle and Zoom. ▌... -
Page 45: Selecting The Subtitle Language
▌ Playing a Certain Section Repeatedly 1. Press the ANYKEY button during playback. DVD-VIDEO 2. Press the ▲▼ buttons to select Repeat. Title 1/28 Chapter 00:00:01 3. Press the ◄► button to select A-B, then press the ENTER button. Time Subtitle D 5.1CH Audio... -
Page 46: Selecting The Audio Language
Selecting the Audio language Audio languages may not work depending on the disc type. This is DVD-VIDEO only available during playback. Title 1/28 Chapter You can also operate this function by pressing the AUDIO button on 00:00:01 Time the remote control. Subtitle D 5.1CH Audio... -
Page 47: Using The Bookmarks
Zooming-In 1. Press the ANYKEY button during playback. 2. Press the ▲▼ buttons to select Zoom, then press the ENTER button. ) will be displayed. 3. Press ▲▼◄ ► buttons to move to the area you want to enlarge. 4. Press the ENTER button. Each time the ENTER button is pressed, the picture is enlarged up to 4X (four times the normal size). - Page 48 Using the Markers (VR mode) ▌ Setting Markers -- -- -- -- -- -- -- -- N : 2 Marker 1. Press the MARKER button during playback. 2. Press the ENTER button when the desired scene appears. • The number 01 is displayed and the scene is memorized. 3.
- Page 49 Playing Back an Audio CD (CD-DA)/MP3 ▌ Buttons on the Remote Control Used for Audio CD(CD-DA)/MP3 Playback 1. l ◄ ◄ button : Returns to the beginning of the current track when pressed during playback. If pressed again, your DVD Recorder & VCR moves to and plays the previous track.
-
Page 50: Playing An Mp3 Disc
▌ Playing an MP3 Disc Music List SONGO1 01/11 1. Insert an MP3 disc into the disc tray. Title 2. Press the ▲▼ buttons to select the Disc Navigation, and then press ROOT SONGO1 the ENTER or ► button. SONGO2 0:00:15 ►... - Page 51 Play Option Mode Music List TRACK 1 01/15 1. During Stop, Press the ANYKEY button. Title Length TRACK 1 00:03:50 The Play option will be highlighted. PLAY MODE TRACK 2 00:04:00 Repeat : Off TRACK 3 00:03:49 2. Press the ◄► buttons to select a desired Play Option, then press the 0:00:01 TRACK 4 00:03:47...
- Page 52 5-1. If you press the ► ll button, the Slide Show Speed screen will appear. Press the ◄► buttons to set the slide show speed, then press the DVD-RW(VR) ENTER button. 5-2. Press the ENTER button with a picture selected in the Album screen Slide Show Speed and select a display mode (Album screen ( ), Slide show (...
- Page 53 ■ This DVD Recorder & VCR can play the following video compression formats. - MPEG4 Codec format : DivX 3.11 DivX 4.x DivX 5.x - Audio format : .MP3, .MPEG, .PCM, .AC3, .DTS. ■ Supported subtitle fi le formats: .smi, .srt, .sub, .psb, .txt (The subtitle fi...
-
Page 54: Slow Motion
Skip In Play mode, press F.ADV/SKIP button to cue ahead exactly 30 seconds. Press F.ADV/SKIP button repeatedly up to 4 times to cue ahead 2 minutes. Slow motion In Still mode, press ► ► button for slow motion. Press the ► ► button repeatedly to play slow motion speed at 1/10, 1/7, 1/5 times. -
Page 55: Recording
This recorder can record on the following discs. DVD-RAM DVD-RW DVD-R DVD+RW DVD+R • DVD±RWs and DVD-RAMs are rewritable. • DVD±Rs are non-rewritable. ▌ Compatibility between Samsung and other manufacturer's Recorders. Disc Recording Recording Additional Recording in Finalizing Types format Device... -
Page 56: Recording Formats
▌ Recording Formats DVD-RAM Since available functions differ depending on the disc type, select a disc that best fi ts your preference. When you insert an unused disc, the following message appears. Unformatted Disc • DVD-RAM : Use after formatting the disc. Do you want to format this disc? •... -
Page 57: Unrecordable Video
Unrecordable Video Pictures with copy protection cannot be recorded on this DVD Recorder & VCR. When the DVD Recorder & VCR receives a copy guard signal while recording, recording stops and the following message (to the left) You cannot record copy protected movie. appears on the screen. -
Page 58: Before You Start
Recording the Current Channel you are watching Before you start 1. Check to make sure the antenna cable is connected. 2. Check the remaining time on the disc. DVD-RAM/DVD±RW/+R discs should be formatted or initialized in advance before beginning recording. (See page 56.) 3. -
Page 59: Recording From External Equipment You Are Watching
Recording from External Equipment you are Watching 1. Power on your DVD Recorder & VCR and switch to AV In mode by Recordable Time 00:26 pressing the INPUT SEL. button on the remote control. The front panel display changes in the following sequence depending on the Video input setting in the menu. - Page 60 Recording Through the DV Input Jack You may control your Camcorder using the IEEE1394 (DV) interface. Follow these directions to record onto a disc or tape from a camcorder that has a DV output jack. 1. Connect the DV output jack of your camcorder to the DV input jack on the front of your DVD Recorder &...
-
Page 61: Making A One Touch Recording (Otr)
Making a One Touch Recording (OTR) One-Touch Recording (OTR) allows you to add recording time in preset increments up to 4 hours by pressing the REC button repeatedly. 1. Press the CH/TRK ( ) buttons or number buttons to select the channel to record. -
Page 62: Making A Timer Recording
Making a Timer Recording DVD-Recorder Timer Record DVD-RAM(VR) Title List Timer Record ► Playlist Scheduled Record List ► Disc Manager The clock (Setup – Clock Set) must be set before proceeding with a Timer Rec. timer recording. (See page 29) Setup Copy 1. -
Page 63: Editing The Scheduled Record List
Recording mode (VCR) AUTO : Select when you want to set video quality automatically. The auto quality depends on remaining time of VCR tape. SP : Standard Play, for best picture quality. SLP : Super Long Play, for maximum recording time (3 times SP). 7. -
Page 64: Deleting The Scheduled Record List
Deleting the Scheduled Record List DVD-Recorder Scheduled Record List Scheduled Record List DVD-Recorder Follow these directions to delete a title from the timer record list. DVD-RAM(VR) Current Time 12:27 AM DVD-RAM(VR) Current Time 12:27 AM 1. Press the MENU button. No. -
Page 65: Before Starting
Basic VCR Recording Before starting 1. Check TV channel and Antenna connections. 2. Check the remaining time on the tape. You can record a TV show in progress by inserting a blank tape and pressing the (REC) button. You can even add time in preset increments up to 4 hours by pressing the (REC) button repeatedly. - Page 66 Check Remaining Time 1. Press the INFO button on the remote control. -RAM STOP STOP The following information will be displayed. 00:01:06 00:01:32 (Current deck status, recording speed, remaining time, input channel, Rem 00:26 Rem 01:41 current time.) AV 1 AV 1 Mon Jan 01.
- Page 67 Copy to DVD or VCR You can copy from the DVD to VCR or VCR to DVD. Check the remaining time on the tape and Disc. ▌ To Copy from DVD to VCR DVD-RAM(VR) Edit Copylist JAN/01/2007 No. Title Length Edit 01 JAN/01/2007 12:0 00:00:11 Play √...
- Page 68 ▌ To Copy from VCR to DVD DVD-Recorder VCR-->DVD 1. With the unit in Stop mode, press the MENU button in stop mode. DVD-RAM(VR) 2. Press the ▲▼ buttons to select Copy, then press the ENTER or ► No. Start Edit 01 00 : 00: 37 00:03:45...
-
Page 69: Playing The Title List
Editing This section introduces basic functions of DVD editing and explains both, edit functions for recording on a disc and edit functions for the entire disc. Playing the Title List Title List DVD-RAM(VR) JAN/01/2007 Title Length Edit 01 JAN/01/2007 12:00 00:00:11 ►... -
Page 70: Basic Editing (Title List)
▌ Recording on Free Space Title List DVD+RW This function is only available with DVD+RW discs. Free Space If existing titles are deleted, new free space will be created. No. Title Length Edit 01 JAN/01/2007 12:00 00:00:11 When you operate the free space function, on-air TV images will ►... -
Page 71: Locking(Protecting) A Title
▌ Locking(Protecting) a Title DVD-RAM(VR) Title List 5/31 JAN/01/2007 Follow these instructions to lock a title to protect it from accidental Title Protection: deletion. JAN/01/2007 12:00 AM AV1 1. Press the TITLE LIST button. The Title List screen is displayed. JAN/01/2007 2. -
Page 72: Deleting A Section Of A Title
▌ Deleting a Section of a Title (VR mode) DVD-RAM(VR) Edit Title List Follow these instructions to delete a section of a Title List title. Title List No. 05 1. Press the TITLE LIST button. The Title List screen is displayed. Start 2. - Page 73 ▌ Editing a Chapter DVD+RW Chapter Edit You can make your own chapters on DVD+RWs and edit them using the Chapter Edit menu. Chapter : 1/1 Show 00:00:00 ► 1. Press the TITLE LIST button. The Title List screen is displayed. Delete Hidden Delete All...
- Page 74 Hiding a Chapter DVD+RW Chapter Edit Follow steps 1 to 3 on page 73 4. Select a chapter you want to hide using the playback related buttons. • Playback related buttons: (► II,I ◄ ◄,► ► I,◄ ◄,► ►). 5. Press the ◄► buttons to select Hidden, and then press the ENTER Chapter : 2/4 Hidden button.
-
Page 75: Advanced Editing (Playlist)
Advanced Editing (Playlist) ▌ Creating a Playlist Make Scene DVD-RAM(VR) Scene No. 003 Start (VR mode) Title List : 1/6 00:00:02 00:00:00 Follow these instructions to create a new playlist title from a 00:00:10 ► recorded title. Start Make Return 1. -
Page 76: Editing A Scene For The Playlist
▌ Renaming a Playlist Title DVD-Recorder Rename DVD-RAM(VR) Dolphin (VR mode) Follow these instructions to rename a playlist title, i.e. to edit the title of a playlist title. Save Back Space Space Delete Clear 1. Press the PLAY LIST button with the disc stopped. MOVE ENTER RETURN... - Page 77 Modifying a Scene (Replacing a Scene) DVD-Recorder Edit Scene Follow steps 1 to 3 on page 76. DVD-RAM(VR) 4. Press the ▲▼◄► buttons to select the scene you want to modify, Scene No. 2 / 7 Playlist No. Play then press the ENTER button. Modify 5.
-
Page 78: Deleting A Scene
Adding a Scene Follow steps 1 to 3 on page 76. DVD-Recorder Edit Scene DVD-RAM(VR) 4. Press the ▲▼◄ ► buttons to select the scene that will have a new Scene No. 3 / 3 Playlist No. Play scene inserted before it, then press the ENTER button. Modify A yellow selection window is displayed on the scene to be added as the 01 00:00:03... -
Page 79: Disc Manager
▌ Copying a Playlist Title to the VCR DVD-Recorder Edit Playlist 1. Press the PLAY LIST button with the disc stopped. DVD-RAM(VR) No. Title Length Edit The Edit Playlist screen is displayed. 01 JAN/01/2007 12:00 00:00:11 ► 02 JAN/01/2007 12:30 00:00:09 ►... -
Page 80: Disc Protection
▌ Disc Protection DVD-Recorder Disc Manager DVD-RAM(VR) Title List Disc Name ► Disc Protection : Protected Playlist ► Disc Protect allows you to protect your discs from being formatted Disc Format ► Disc Manager Delete All Title Lists ► or deleted due to unintended operations. Timer Rec. -
Page 81: Finalizing A Disc
▌ Finalizing a disc DVD-Recorder Disc Manager DVD-RW(VR) Title List Disc Name ► After you record titles onto a DVD-RW/DVD±R disc with your DVD Disc Protection : Not Protected Playlist ► Recorder & VCR, it needs to be fi nalized before it can be played back Disc Format : DVD-VR ►... -
Page 82: Delete All Title Lists
▌ Delete All Title Lists DVD-Recorder Disc Manager DVD-RAM(VR) Title List Disc Name ► Playlist Disc Protection : Not Protected ► Disc Format ► Disc Manager 1. With the unit in Stop mode, press the MENU button. Do you want to delete all title lists? Delete All Title Lists ►... -
Page 83: Reference
Reference Troubleshooting (DVD-VIDEO/DVD-RAM/DVD±RW/DVD±R) If your product malfunctions, go through the check points below before contacting a Samsung authorized service center, Problem Explanation/Solution • Check whether the power cord is securely plugged into the power outlet. No power. • Did you press the power button of your DVD Recorder & VCR. -
Page 84: Troubleshooting (Dvd)
Other problems • Turn the unit off and on. • If your problem still persists, contact your nearest Samsung service center. • Check that the Video output is HDMI enabled. No HDMI output. • Check the connection between the TV and the HDMI jack of the DVD Recorder &VCR. - Page 85 Troubleshooting (VCR) Before contacting a Samsung authorized service center, perform the following simple checks. Problem Explanation/Solution • Check that the power plug is connected to a wall outlet. No power • Have you pressed the POWER button? • A video cassette can only be inserted with the window side up and the You cannot insert a video cassette safety tab facing you.
- Page 86 Problems and Solutions (Display error Message) Before contacting a Samsung authorized service center, perform the following simple checks. Problem Explanation / Solution You cannot record a copy protected movie. • You can’t record the video since it is protected by copyright.
- Page 87 • The model and serial number on the rear of your DVD Recorder & VCR • The warranty information • A clear description of the problem Then contact your nearest SAMSUNG authorized service center. Call 1-800-SAMSUNG for a center near you. English - 87...
-
Page 88: Audio Output
Specifi cations Power requirements 120V AC, 60Hz Power consumption 28 Watts Weight 8.75 lb General Dimensions 16.9 in(W) x 10.6 in(D) x 3.1 in(H) Operating temp. +41°F to +95°F Other conditions Keep level when operating. Operate in less than 75% humidity 1.0 V p-p at 75Ω... - Page 89 SECA will repair or replace the product at its option. All warranty repairs must be performed by a SECA Authorized Service Center. (The name and address of the location nearest you can be obtained by calling toll free: 1- 800- SAMSUNG) LABOR PARTS...
- Page 90 Contact SAMSUNG WORLD WIDE If you have any questions or comments relating to Samsung products, please contact the SAMSUNG customer care center. Comment contacter Samsung dans le monde Si vous avez des suggestions ou des questions concernant les produits Samsung, veuillez contacter le Service Consommateurs Samsung.
- Page 91 HEADQUARTERS SAMSUNG ELECTRONICS CANADA, INC. 55 STANDISH COURT MISSISSAUGA, ONTARIO L5R 4B2 CANADA TEL: 1-800-SAMSUNG(1-800-7267864) www.samsung.com/ca English Français AK68-01343A(00)
- Page 92 Manuel d’instructions DVD-VR355 www.samsung.com/ca English Français AK68-01343A(00)
-
Page 93: Mise En Route
Mise en route Cet appareil est conforme à la réglementation de la FCC Avertissement (Commission fédérale des communications des États-Unis) lorsqu’il est branché à d’autres équipements à l’aide de câbles et de connecteurs blindés. N’utilisez que des câbles POUR RÉDUIRE LES RISQUES D'ÉLECTROCUTION, NE DÉMONTEZ PAS LE COUVERCLE OU LE PANNEAU et des connecteurs blindés afi... -
Page 94: Précautions
• Ne placez pas de pot à fl eurs rempli d’eau ni aucun objet Précautions métallique de petite dimension sur l’enregistreur. • N'introduisez jamais les doigts à l'intérieur du plateau de ▌ Remarques importantes sur la sécurité disque. • N’insérez aucun autre objet que des disques dans le plateau à... -
Page 95: Rangement Des Disques
• Ne pas apposer d’étiquette ni de vignette autocollante • La plage du débit qui peut être lue s’étend de 56 à 320 kbit/s. sur les disques. (N’utilisez pas de disque comportant des • L’appareil peut prendre en charge jusqu’à 1000 fi chiers morceaux apparents de ruban adhésif ou de restants et dossiers. -
Page 96: Lecture Et Enregistrement De Disques Dvd+Rw
• Cet appareil peut lire des disques DVD±R enregistrés à • La plupart des disques DVD sont codés afi n de les l’aide d'un magnétoscope-DVD Samsung. Il est possible protéger contre la copie. Pour cette raison, vous devez qu’il ne prenne pas en charge certains disques DVD±R, brancher votre enregistreur DVD avec magnétoscope... - Page 97 Table des matières Mise en route ■ Raccordement d’appareils périphériques ....26 Raccord d’un magnétoscope, boîtier décodeur/ ■ Avertissement ............2 récepteur satellite (décodeur) ou lecteur DVD aux ■ Précautions ............. 3 prises AV 1 IN ou S-VIDEO IN ....... 26 Remarques importantes sur la sécurité...
- Page 98 Modifi cations ■ Sélection de la langue de sous-titrage ....45 ■ Sélection de la langue ..........46 ■ Lecture de la Liste de Titres ........69 ■ Changement de l’angle de caméra ......46 ■ Fonctions de modifi cations de base Liste de Titres .. 70 ■...
-
Page 99: Caractéristiques De Base
Le balayage progressif produit une image vidéo à haute défi nition et sans scintillement. La technologie est basée sur Le DVD-VR355 vous permet d’enregistrer et de lire des un processeur de conversion numérique analogique à 10 vidéos de haute qualité sur des disques DVD-RAM/DVD bits, 54 MHz qui gère des circuits de séparation 2D Y/C et... -
Page 100: Utilisation De L'enregistreur Dvd Avec Magnétoscope
Tous droits réservés. Toute reproduction du présent guide, LP (mode enregistrement long), EP (mode vitesse lente) partiellement ou dans sa totalité, est interdite sans le et FR (mode enregistrement fl exible). consentement écrit de Samsung Electronics Co. Français - 9... -
Page 101: Déballage
▌ Étape 4 : lecture Déballage Sélectionnez le titre souhaité dans la liste des titres pour commencer la lecture. ▌ Accessoires Un DVD est composé de sections qu'on nomme des Titles (titres) et de Subsections (sous-titres) qu’on nomme des Vérifi ez la présence de tous les accessoires indiqués chapitres. -
Page 102: Préparation De La Télécommande
3. Appuyez longuement sur le touche TV et saisissez simultanément le code à deux chiffres correspondant à la marque de votre téléviseur à l’aide des touches numériques appropriés. Marque Codes Marque Codes SAMSUNG 01,14,15,23,31 NEWSAN DAEWOO NOBLEX EMERSON PANASONIC 12,24 GRADIENTE... -
Page 103: Aperçu De La Télécommande
▌ Aperçu de la télécommande Cette télécommande vous permet de régler certaines fonctions des téléviseurs d’une autre marque. • Touches pouvant être contrôlées sur votre téléviseur : TV POWER, INPUT SEL., TV VOL +/-, CH/TRK ( / ), TV MUTE, 0~9, touche 100+. 10. -
Page 104: Affi Cheur Du Panneau Avant
Description ▌ Panneau avant 1. Plateau de disques DVD 8. PRISE D’ENTRÉE DV 2. OUVERTURE ET FERMETURE DU 9. TOUCHE P.SCAN PLATEAU DE DISQUES DVD 10. AFFICHEUR DU PANNEAU AVANT 3. COMPARTIMENT À CASSETTE VIDÉO DU 11. SÉLECTION DVD/MAGNÉTOSCOPE MAGNÉTOSCOPE 12. -
Page 105: Panneau Arrière
▌ Panneau arrière 10 11 Ventilateur Les pales du ventilateur tournent sans arrêt lorsque l'appareil est sous tension. Prévoyez un dégagement de 4 pouces de chaque côté du ventilateur lorsque vous installez l'appareil. 1. PRISE D’ENTRÉE VIDÉO (AV 1 IN) 9. -
Page 106: Raccordement Et Confi Guration
Raccordement et confi guration Raccordement du câble d’antenne Il existe plusieurs façons de raccorder votre graveur de DVD avec magnétoscope. Sélectionnez ci-dessous le type d'antenne souhaité. ▌ Antenne + Graveur DVD avec magnétoscope + téléviseur : Sans câblosélecteur Vous pouvez enregistrer les canaux non brouillés en sélectionnant la chaîne sur le graveur DVD. Utilisez aussi cette méthode si vous visionnez les chaînes sans câblosélecteur. - Page 107 ▌ Antenne + Câblosélecteur + Graveur DVD avec magnétoscope + Téléviseur : Câblosélecteur à plusieurs canaux brouillés. Vous pouvez enregistrer des chaînes en les syntonisant à partir du câblosélecteur. Il est impossible d’enregistrer une chaîne tout en visionnant une autre chaîne. Assurez-vous que le câblosélecteur est allumé. Au mur ENTRÉE SORTIE...
- Page 108 ▌ Antenne + Graveur DVD avec Magnétoscope + Câblosélecteur + Téléviseur : Câblosélecteur à quelques chaînes brouillées. Vous pouvez enregistrer des chaînes non brouillées en les syntonisant à partir du câblosélecteur. Il est impossible d’enregistrer des canaux brouillés qui nécessitent un boîtier décodeur. Au mur Câble de Blaster IR (compris)
-
Page 109: Raccord Hdmi/Dvi À Votre Téléviseur
Si vous utilisez un câble HDMI pour raccorder ■ Veuillez vérifi er la présence du logo un téléviseur Samsung au graveur DVD avec ( si votre téléviseur possède le logo magnétoscope, il devient alors possible d’utiliser il peut accueillir la fonction Anynet+.) la télécommande du téléviseur pour contrôler... -
Page 110: Connexion À Un Téléviseur (Prise Dvi)
■ Pour régler la résolution de sortie HDMI ■ Pourquoi Samsung utilise-t-il le HDMI ? (480p/720p/1080i), voir la page 34. Les téléviseurs analogiques requièrent un signal vidéo/audio analogique.Toutefois,lorsque vous lisez ■ HDMI ( High Defi nition Multimedia Interface) un DVD,les données transmises au téléviseur sont... -
Page 111: Raccordement Du Câble Vidéo
■ Les prises de sortie Component ne sortiront pas les résolutions de plus de 480p. Pour visionner en mode 720p et 1080i, raccordez le DVD-VR355 au téléviseur à l’aide d’un câble HDMI-HDMI. Une fois le câble HDMI raccordé, appuyez sur le bouton P.SCAN pour basculer entre toutes les... -
Page 112: Raccordement À La Prise D'entrée S-Vidéo
▌ Raccordement à la prise d’entrée S-vidéo Raccordez un câble S-vidéo (non fourni) entre la prise S-VIDEO OUT (SORTIE S-VIDÉO) du graveur DVD avec magnétoscope et la prise S-VIDEO IN (ENTRÉE S-VIDÉO) du téléviseur. Câble S-Video (non compris) • Vous pourrez profi ter d’images de haute qualité. ■... -
Page 113: Raccordement À Une Prise D'entrée Vidéo
▌ Raccordement à une prise d’entrée vidéo Raccordez un câble vidéo (jaune) entre la prise d’entrée VIDEO OUT (SORTIE VIDÉO) (jaune) du graveur DVD avec magnétoscope et la prise d’entrée VIDEO IN (ENTRÉE VIDÉO) (jaune) du téléviseur. Câble AUDIO/VIDEO • Vous pourrez profi ter d’images de qualité. •... -
Page 114: Raccordement Du Câble Audio
Raccordement du câble audio Sélectionnez une connexion audio sur les pages suivantes. ▌ Raccordement à un téléviseur Ce raccordement utilise les haut-parleurs de votre téléviseur. Câble AUDIO/VIDEO Français - 23... -
Page 115: Raccordement À Un Amplifi Cateur Stéréo À Prises D'entrée Analogiques
▌ Raccordement à un amplifi cateur stéréo à prises d’entrée analogiques Utilisez les prises AUDIO OUT (SORTIE AV) si votre amplifi cateur stéréophonique ne possède que les prises AUDIO INPUT (L & R) (ENTRÉE AUDIO) (G et D). Câble AUDIO/VIDEO rouge blanc Haut-parleur... -
Page 116: Raccordement À Un Amplifi Cateur Av À Prises D'entrée Numériques
▌ Raccordement à un amplifi cateur AV à prises d’entrée numériques Utilisez ce raccordement si votre amplifi cateur AV possède un décodeur numérique Dolby Digital ou DTS et une prise d’entrée numérique. Vous devez régler les conditions audio pour profi ter du son numérique Dolby Digital ou DTS. -
Page 117: Raccordement D'appareils Périphériques
Raccordement d’appareils périphériques Vous pouvez raccorder le graveur DVD et magnétoscope à des appareils périphériques et visualiser ou enregistrer leurs contenus de sortie. ▌ Raccord d’un magnétoscope, boîtier décodeur/récepteur satellite (décodeur) ou lecteur DVD aux prises AV 1 IN ou S-VIDEO IN Raccordement d’un magnétoscope ou d’un appareil périphérique aux prises AV 1 IN (ENTRÉE AV) du graveur DVD avec magnétoscope. -
Page 118: Raccord À Un Caméscope
▌ Raccord à un caméscope L’enregistrement à partir d’un périphérique (caméscope) est possible grâce aux prises AV2 IN (ENTRÉE) ou DV IN (ENTRÉE) situées sur le devant du graveur DVD avec magnétoscope. Câble Câble DV AUDIO/VIDEO (non compris) Caméscope (Voir la page 60) ■... -
Page 119: Configuration Du Système
Confi guration du système Navigation dans le Menu de l'écran DVD-Recorder Enregistrer par Minuterie Le Menu de l’écran permet d’activer et de désactiver certaines Pas De Disque fonctions de l’enregistreur DVD avec magnétoscope. Enr.par minut Enregistrer par Minuterie ► Appuyez sur la touche MENU pour accéder à l’écran des menus puis Paramétrer Liste d’Enregistrements Programmée ►... -
Page 120: Canal Données Horloge
▌ Canal Données Horloge DVD-Recorder Canal Données Horloge Sélectionnez un canal dont le signal contient la date et l’heure en Pas De Disque déplaçant la barre de sélection à l’aide des touches ▲▼, puis appuyez Enr.par minut sur ENTER. Sélectionnez Automatique pour trouver automatiquement Sélectionner un canal : Auto Paramétrer... -
Page 121: Réglage Des Chaînes
Réglage des chaînes DVD-Recorder Réglage des chaînes Cette fonction vous permet de régler manuellement le syntoniseur Pas De Disque de l’enregistreur DVD avec magnétoscope sur Antenne ou Câble TV, Enr.par minut Antenne Antenne/Câble TV : Antenne ► selon l’élément que vous avez branché à la prise Antenna In lors du Câble TV Paramétrer Mèmoire Canal Auto... -
Page 122: Canal De Sortie
Ajouter/Supprimer Canal DVD-Recorder Ajouter/Supprimer Canal Utilisez cette fonction pour ajouter des chaînes qui n’ont pas été Pas De Disque détectées par la fonction Mèmoire Chaîne Auto ou pour supprimer Enr.par minut une chaîne détectée. Sélectionner un canal : Paramétrer 1. Lorsque l’appareil est en mode Stop (Arrêt) ou Pas de disque, appuyez sur la touche MENU. -
Page 123: Configuration Des Options De Langue
Confi guration des options de langue Langue Si vous avez préalablement réglé les options de langue, celles- DVD-Recorder Pas De Disque ci seront rappelées automatiquement à chaque fois que vous Enr.par minut Audio Original ▲ visionnerez un fi lm. Sous-Titre : Automatic English Paramétrer... -
Page 124: Compression Dynamique
▌ Compression Dynamique DVD-Recorder Audio Cette option n’est active que lorsque le système détecte un signal Pas De Disque Dolby Digital. Enr.par minut Sortie Numérique : PCM ► • Oui : Lorsque le volume de la bande sonore du fi lm est faible ou si les haut- : Non Paramétrer ►... -
Page 125: Réduction Bruit 3D
ENTERZ REVENIR SORTIE • Raccordez le DVD-VR355 à votre téléviseur à l’aide d’une connexion HDMI ou DVI. Réglez l ’entrée de votre téléviseur sur HDMI ou DVI. • Pendant que l ’appareil est en mode Stop,appuyez sur la touche P.SCAN pour sélectionner l ’une des résolutions de sortie... -
Page 126: Confi Guration De La Fonction Contrôle Parental
Confi guration de la fonction Contrôle Parental DVD-Recorder Contrôle Parental La fonction contrôle parental peut être utilisée avec les DVD qui Pas De Disque comportent un classement permettant de choisir les DVD que votre Enr.par minut Utiliser le Code ► famille regarde. -
Page 127: Confi Guration Du Magnétoscope
Confi guration du magnétoscope Cette fonction vous permet de confi gurer le magnétoscope. 1. Lorsque l’appareil est en mode Stop (Arrêt) ou aucun disque, appuyez sur la touche MENU. 2. Sélectionnez Paramétrer en déplaçant la barre de sélection à l’aide des touches ▲▼, puis appuyez sur ENTER ou sur ►. -
Page 128: Entrée Vidéo
Entrée vidéo Vous pouvez regarder une vidéo à partir d'un composant externe via DVD-Recorder Système Pas De Disque la prise d'entrée AV 1 (Composite) ou S-Video. Enr.par minut ► AV 1 Entrée vidéo : AV 1 ► Paramétrer 1. Lorsque l’appareil est en mode Stop (Arrêt) ou aucun disque, appuyez Temps DVD en Mode EP : 6 Heures S-Vidéo ►... -
Page 129: Créateur De Chapitre Automatique
Créateur de chapitre Automatique DVD-Recorder Système DVD-RW(V) Liste ► de Titres (mode V) Gestion. Entrée vidéo : AV 1 ► de Disque Temps DVD en Mode EP : 6 Heures ► Enr.par minut Cette fonction ne peut être utilisée qu’avec les disques DVD-RW Créateur de chapitre : Non ►... -
Page 130: Enregistrement Rapide
5. Sélectionnez Activé à l’aide des touches ▲▼, puis appuyez sur ENTER ou sur la touche ►. Utilisation d’Anynet+(HDMI-CEC) 1. Raccordez le graveur à un téléviseur SAMSUNG à l’aide d’un câble HDMI. (Voir la page 18) 2. Réglez Anynet+(HDMI-CEC) sur "Oui" sur le graveur DVD avec magnétoscope. -
Page 131: Code De Région
Lecture Cette section décrit les fonctions de lecture de base Les types de disque pris en charge sont les suivants selon le type de disque utilisé. Lisez attentivement les instructions ci-dessous avant Type de Nature du Format du Durée de lecture Logo disque contenu... -
Page 132: Disques Non Compatibles
▌ Disques non compatibles • Les DVD-Vidéo dont le code de région est différent de “ 1 ” et de “ ALL ”. • Les disques DVD-R de 3,9 Go pour système auteur. • Un DVD±R/DVD-RW(V) enregistré et non fi nalisé sur un enregistreur d'une marque différente. -
Page 133: Utilisation Du Disc Menu Et Du Title Menu
Utilisation du Disc Menu et du Title Menu Certains disques comportent un système de menus spécifi que qui permet d’utiliser des fonctions spéciales pour certains éléments : titres, chapitres, pistes audio, sous-titres, bandesannonces, personnages, etc. ▌ Avec un disque DVD-Vidéo Disc Menu : Appuyez sur la touche DISC MENU pour accéder au menu spécifi... -
Page 134: Saut Vers L'avant De 30 Secondes
▌ Sauts de chapitre ou de piste Appuyez sur la touche l ◄ ◄ ou ► ► l de la télécommande pendant qu’une lecture est en cours. • Si vous appuyez sur l ◄ ◄ Appuyez sur la touche l ◄ ◄ pour revenir au début du chapitre, de la piste ou du repère (avec un DVD-RAM ou un DVD-RW en mode VR). -
Page 135: Utilisation De La Touche Anykey
Utilisation de la touche ANYKEY La fonction ANYKEY vous permet de retrouver rapidement la scène de votre choix à partir d’un titre, d’un chapitre, d’une piste ou d’une position temporelle. Vous pouvez également l’utiliser pour modifi er un sous-titre ou des paramètres audio, de même que pour régler certaines fonctions dont la répétition, l’angle et le niveau de zoom. -
Page 136: Lecture En Boucle D'une Partie Du Disque
▌ Lecture en boucle d’une partie du disque 1. Appuyez sur la touche ANYKEY durant une lecture. DVD-VIDEO 2. Sélectionnez Répétition en déplaçant la barre de sélection à l’aide des Titre 1/28 Chapitre touches ▲▼. 00:00:01 Temps Sous-titre 3. Sélectionnez A-B en déplaçant la barre de sélection à l’aide des Audio D 5.1CH Répétition... -
Page 137: Sélection De La Langue
Sélection de la langue La prise en charge d’une langue dépend du type de disque utilisé. Vous DVD-VIDEO devez lire le disque pour vérifi er si une langue peut être appliquée. Titre 1/28 Chapitre Cette fonction peut aussi être activée en appuyant sur la touche AUDIO 00:00:01 Temps de la télécommande. -
Page 138: Zoom Avant
Zoom avant 1. Appuyez sur la touche ANYKEY durant une lecture. 2. Sélectionnez Zoom en déplaçant la barre de sélection à l’aide des touches ▲▼ puis appuyez sur ENTER. L’icône ( ) apparaît. 3. Utilisez les touches ▲▼ et ◄ ► pour déplacer la loupe dans la zone à agrandir. -
Page 139: Utilisation Des Marqueur
Utilisation des Marqueur (mode VR) ▌ Réglage des marqueurs -- -- -- -- -- -- -- -- N : 2 Marqueur 1. Appuyez sur la touche MARKER durant une lecture. 2. Lorsque la scène voulue apparaît, appuyez sur la touche ENTER. •... -
Page 140: Lecture D'un Cd Audio (Cd-Da)/Mp3
Lecture d’un CD audio (CD-DA)/MP3 ▌ Touches de la télécommande servant à la lecture de CD audio (CD-DA)/MP3 1. Touche l ◄ ◄ : Retour au début d’une piste si elle est en cours de lecture. En appuyant une seconde fois sur cette touche, l’enregistreur DVD avec magnétoscope passe à... -
Page 141: Lecture D'un Cd Mp3
▌ Lecture d’un CD MP3 Liste de Musique SONGO1 01/11 1. Insérez un disque MP3 sur le plateau. Titre 2. Appuyez sur les touches ▲▼ pour sélectionner Navigation de Disque, ROOT SONGO1 puis appuyez sur ENTER ou la touche ►. SONGO2 0:00:15 ►... -
Page 142: Mode Options De Lecture
Mode Options de lecture Liste de Musique 1. Pendant le mode Stop (Arrêt), appuyez sur le touche ANYKEY. TRACK 1 01/15 L’option Lecture s’affi che en surbrillance. Titre Longu TRACK 1 00:03:50 PLAY MODE 2. Appuyez sur les touches ◄► pour choisir l'option de lecture souhaitée, TRACK 2 00:04:00 Répétition : Non... -
Page 143: Lecture D'un Fi Chier Mpeg4
5-1. Si vous appuyez sur la touche ► ll l’écran de vitesse du diaporama apparaît. Appuyez sur les touches ◄► pour régler la vitesse de DVD-RW(VR) défi lement des diapositives, puis appuyez sur ENTER. 5-2. Sélectionnez une image à l’écran Album, puis appuyez sur ENTER et vitesse diaporama sélectionnez un mode d’affi... -
Page 144: Utilisation Du Magnétoscope
■ Ce graveur DVD avec magnétoscope peut lire les formats de compression vidéo suivants. - Format du codec MPEG4 : DivX 3.11 DivX 4.x DivX 5.x - Format audio : .MP3, .MPEG, .PCM, .AC3, .DTS. ■ Formats de fi chier sous-titre pris en charge : .smi, .srt, .sub, .psb, .txt, .ass(le fi... -
Page 145: Lecture S-Vhs
Saut En mode de lecture, appuyez sur la touche F.ADV/SKIP pour repositionner la bande exactement l’équivalent de 30 secondes vers l’avant. En appuyant à plusieurs reprises sur la touche F.ADV/SKIP (jusqu’à quatre fois), vous pourrez repositionner la bande l’équivalent de deux minutes vers l’avant. Lecture au ralenti En mode de pause, appuyez sur la touche ►... -
Page 146: Disques Inscriptibles
■ Non terminé - Ceci vous permet d’ajouter un enregistrement sur un disque DVD-RW déjà enregistré par le DVD-VR355. - La fi n de l’enregistrement d’un disque DVD-RW enregistré sur PC au moyen du mode d’enregistrement par disque entier (DAO) ne peut être défaite. -
Page 147: Formats D'enregistrement
▌ Formats d’enregistrement DVD-RAM Puisque les fonctions disponibles varient selon le type de disque, choisissez un disque adapté à vos préférences. Le message suivant s'affi che lorsque vous insérez un disque vierge. • DVD-RAM : À utiliser après le formatage du disque. Disque non formaté. -
Page 148: Vidéo Ne Pouvant Être Enregistrée
Vidéo ne pouvant être enregistrée Les images protégées contre la copie ne peuvent être sauvegardées sur cet enregistreur DVD avec magnétoscope. Si cet enregistreur Lorsque le graveur DVD avec magnétoscope reçoit un signal de protection contre la copie en cours d’enregistrement, cet Vous ne pouvez pas enregistrer de film protégé... -
Page 149: Enregistrement De La Chaîne Active
Enregistrement de la chaîne active Avant de commencer 1. Assurez-vous que le câble d’antenne est connecté. 2. Vérifi ez la durée d’enregistrement restante sur le disque. Les disques DVD-RAM/DVD±RW/+R doivent être formatés ou initialisés au préalable avant de débuter l’enregistrement. (Reportez-vous à... -
Page 150: Enregistrement À Partir D'un Appareil Périphérique En Cours De Visionnement
Enregistrement à partir d’un appareil périphérique en cours de visionnement 1. Mettez votre enregistreur DVD avec magnétoscope sous tension et Durée enregistrable 00:26 appuyez sur la touche INPUT SEL. de votre télécommande jusqu’à ce que le mode AV IN soit activé. L’affi... -
Page 151: Enregistrement Au Moyen D'une Prise D'entrée Dv
Enregistrement au moyen d'une prise d'entrée DV Vous pouvez commander votre caméscope en utilisant l’interface IEEE 1394 (DV). Suivez les instructions ci-dessous pour enregistrer sur disque ou sur bande vidéo le contenu d’un caméscope doté d’une prise de sortie DV. 1. -
Page 152: Enregistrement Immédiat (Otr)
Enregistrement immédiat (OTR) L’enregistrement immédiat (OTR) vous permet d’ajouter des enregistrement en incréments pré réglés jusqu’à un maximum de 4 heures en appuyant plusieurs fois sur la touche REC. 1. Sélectionnez le canal diffusant le contenu que vous souhaitez enregistrer à l'aide des touches CH/TRK ( ) ou des touches numériques de la télécommande. -
Page 153: Enregistrer Par Minuterie
Enregistrer par Minuterie DVD-Recorder Enregistrer par Minuterie DVD-RAM(VR) Liste Enregistrer par Minuterie de Titres ► Liste Liste d’Enregistrements Programmée ► de Lecture Vous devez régler l’horloge avant de pouvoir activer le Timer Recording Gestion. de Disque (l’enregistrement par minuterie) (Mise en marche initiale – Clock Set Enr.par minut (Réglage de l’horloge). -
Page 154: Modifi Cation À La Liste D'enregistrements Programmée
Mode d’enregistrement (sur VCR) AUTO : Réglage automatique de la qualité de l’image. La qualité automatique dépend du temps restant sur la cassette vidéo. SP : Enregistrement à vitesse normale, qui offre la meilleure qualité d’image. SLP : Enregistrement à vitesse lente, pour une durée maximale (trois fois celle du mode SP). -
Page 155: Suppression De La Liste D'enregistrements Programmée
Suppression de la Liste d’Enregistrements Programmée DVD-Recorder Scheduled Record List Suivez les instructions ci-dessous pour supprimer un titre dans la Liste d’Enregistrements Programmée DVD-Recorder DVD-RAM(VR) Temps Courant 12:27 AM DVD-RAM(VR) Current Time 12:27 AM liste des enregistrements programmés. No. To Source Date Démar. Fin Mode Éditer No. -
Page 156: Fonctions De Base D'enregistrement Avec Le Magnétoscope
Fonctions de base d’enregistrement avec le magnétoscope Avant de commencer l’enregistrement 1. Vérifi ez les connexions de l’antenne et des canaux du téléviseur. 2. Vérifi ez la durée d’enregistrement disponible sur la bande vidéo. Vous pouvez enregistrer une émission en cours simplement en insérant une cassette vidéo vierge et en appuyant sur la touche (REC). -
Page 157: Vérifi Cation De La Durée Restante
Vérifi cation de la durée restante 1. Appuyez sur la touche INFO de la télécommande. -RAM ARRÉT ARRÉT L’information suivante s'affi che. 00:01:06 00:01:32 ( l’état actuel du lecteur, la vitesse d’enregistrement, la durée restante, Rem 00:26 Rem 01:41 le canal source, l’heure actuelle.) AV 1 AV 1 Lun Jan 01. -
Page 158: Copie Du Dvd Au Magnétoscope Et Inversement
Copie du DVD au magnétoscope et inversement Vous pouvez copier du lecteur DVD vers le magnétoscope ou du magnétoscope vers le lecteur DVD. Vérifi ez le temps restant sur la bande et le disque. ▌ Copie du DVD au magnétoscope DVD-RAM(VR) Liste de Titres JAN/01/2007... -
Page 159: Copie Du Magnétoscope Au Dvd
▌ Copie du magnétoscope au DVD DVD-Recorder VCR-->DVD 1. Lorsque l’appareil est en mode Stop (Arrêt), appuyez sur la touche MENU. DVD-RAM(VR) 2. Sélectionnez Copier en déplaçant la barre de sélection à l’aide des No. Démarrage Fin Édit 01 00 : 00: 37 00:03:45 Lecture ►... -
Page 160: Lecture De La Liste De Titres
Modifi cations Cette section présente les fonctions de base de modifi cation et explique à la fois les fonctions de modifi cation pour un enregistrement sur un disque et les fonctions de modifi cation pour la totalité du disque. Lecture de la Liste de Titres Liste de Titres DVD-RAM(VR) JAN/01/2007... -
Page 161: Enregistrement Sur Espace Libre
▌ Enregistrement sur espace libre Liste de Titres DVD+RW Cette fonction n'est disponible qu'avec les DVD+RW. Un nouvel Espace libr espace libre est créé lorsque des titres existants sont supprimés. No. Titre Longu Édit 01 JAN/01/2007 12:00 00:00:11 Lorsque vous utilisez la fonction Free space, les images télévisées en ►... -
Page 162: Verrouillage D'un Titre Par Mesure De Protection
▌ Verrouillage d’un titre par mesure de protection DVD-RAM(VR) Liste de Titres 5/31 JAN/01/2007 Protection du Titre : Suivez les instructions ci-dessous pour verrouiller un titre afi n d'éviter qu'il ne soit supprimé par erreur. JAN/01/2007 12:00 AM AV1 JAN/01/2007 1. -
Page 163: Suppression D'une Partie D'un Titre
▌ Suppression d'une partie d’un titre (mode VR) DVD-RAM(VR) Éditer la Liste de Titres Suivez les instructions ci-dessous pour supprimer une partie de titre Liste de Titres No. 05 dans la Liste de Titres. Démar. 1. Appuyez sur la touche TITLE LIST. L’écran Liste de Titres s’affi che. 2. -
Page 164: Modifi Cation D'un Chapitre
▌ Modifi cation d’un chapitre DVD+RW Édition de chapitres Mais il vous est aussi possible de créer vos propres chapitres sur les DVD+RW et de les modifi er à l'aide du menu Édition de chapitres. Chapitre : 1/1 Afficher 1. Appuyez sur la touche TITLE LIST. La Liste de Titres s’affi che. 00:00:00 ►... -
Page 165: Cacher D'un Chapitre
Cacher d’un chapitre DVD+RW Édition de chapitres Suivez les étapes 1 à 3 à la page 73 4. Sélectionnez un chapitre que vous souhaitez cacher à l’aide des touches de lecture appropriées. • Touches de lecture: (► II,I ◄ ◄,► ► I,◄ ◄,► ►). Chapitre : 2/4 Masqué... -
Page 166: Modifi Cations Avancées (Liste De Lecture)
Modifi cations avancées (Liste de Lecture) ▌ Création d’une Liste de Lecture Faire une Scène DVD-RAM(VR) Scène No. 003 Démar. (mode VR) Liste de Titres : 1/6 00:00:02 00:00:00 Suivez les instructions ci-dessous pour créer un nouveau titre de 00:00:10 ►... -
Page 167: Modifi Cation Du Nom D'un Titre Dans La Liste De Lecture
▌ Modifi cation du nom d’un titre dans la Liste de Lecture DVD-Recorder Renommer DVD-RAM(VR) Dolphin (mode VR) Suivez les instructions ci-dessous pour renommer un titre dans la Liste de Lecture, c'est-à-dire pour modifi er son nom. Enreg. 1. Appuyez sur le touche PLAY LIST, lorsque le disque est arrêté. Espace Libre Espace Suppr. -
Page 168: Modifi Cation (Remplacement) D'une Scène
Modifi cation (remplacement) d’une scène DVD-Recorder Éditer Scène Suivez les étapes 1 à 3 à la page 76. DVD-RAM(VR) 4. Appuyez sur les touches ▲▼◄► pour sélectionner la scène que vous Scène No. 2 / 7 Liste de lect. No. 3 Lect. -
Page 169: Ajout D'une Scène
Ajout d’une scène Suivez les étapes 1 à 3 à la page 76. DVD-Recorder Éditer Scène DVD-RAM(VR) 4. Appuyez sur les touches ▲▼◄► pour sélectionner la scène qui suivra Scène No. 3 / 3 Liste de lect. No. 3 Lect. immédiatement la scène à... -
Page 170: Copie D'un Titre De La Liste De Lecture Sur Une Bande Vidéo
▌ Copie d’un titre de la Liste de Lecture sur une bande vidéo DVD-Recorder Éditer la Liste de Lecture 1. Appuyez sur le touche PLAY LIST, lorsque le disque est arrêté. DVD-RAM(VR) No. Titre Longu Édit L’écran Éditer la Liste de Lecture s’affi che. 01 JAN/01/2007 12:00 00:00:11 ►... -
Page 171: Protection Du Disque
▌ Protection du Disque DVD-Recorder Gestionnaire de Disque DVD-RAM(VR) Liste Nom du Disque de Titres ► Liste Protection du Disque : Protégé ► de Lecture Gestion. La fonction Protection du Disque permet de verrouiller un disque Format du Disque ► de Disque Supprimer Toutes les Listes de Titres Enr.par minut... -
Page 172: Finalisation Du Disque
▌ Finalisation du disque DVD-Recorder Gestionnaire de Disque DVD-RW(VR) Liste Nom du Disque de Titres ► Liste Lorsque vous avez fi ni d’enregistrer des titres sur un disque DVD-RW Protection du Disque : Non Protégé ► de Lecture Gestion. ou DVD-R à l’aide de l’enregistreur DVD avec magnétoscope, vous Format du Disque : DVD-VR ►... -
Page 173: Suppression De Toutes Les Listes De Titres
▌ Suppression de toutes les Listes de Titres DVD-Recorder Gestionnaire de Disque DVD-RAM(VR) Liste de Titres Nom du Disque ► Liste Protection du Disque : Non Protégé ► de Lecture Gestion. 1. Lorsque l’appareil est en mode Stop (Arrêt), appuyez sur la touche MENU. Format du Disque Souhaitez-vous supprimer toutes ►... -
Page 174: Outils De Référence
Dépannage (DVD-VIDEO/DVD-RAM/DVD±RW/DVD±R) Si votre appareil ne fonctionne pas correctement, faites les vérifi cations décrites ci-dessous avant de communiquer avec un centre de service autorisé Samsung. Problème Cause possible et solution • Vérifi ez si le cordon d’alimentation est introduit à fond dans la prise de courant Absence d’alimentation. -
Page 175: Dépannage (Dvd)
• Mettez l’appareil hors tension, puis remettez-le à nouveau sous tension. • Si le problème persiste, communiquez avec le centre de service Samsung le plus proche. • Vérifi ez la connexion entre le téléviseur et la prise HDMI de l’enregistreur DVD. -
Page 176: Dépannage (Vcr)
Dépannage (VCR) Faites les vérifi cations décrites ci-dessous avant de communiquer avec un centre de service autorisé Samsung. Problème Cause possible et solution • Assurez-vous que le cordon d’alimentation est branché à fond dans la Pas d’alimentation. prise de courant murale. -
Page 177: Problèmes Et Solutions (Affi Chage Des Messages D'erreur)
Problèmes et solutions (Affi chage des messages d’erreur) Effectuez ces simples vérifi cations avant de contacter votre Centre de services autorisé Samsung. Problème Explication ou Solution Vous ne pouvez pas enregistrer un fi lm • Il vous est défendu d’enregistrer la vidéo puisqu’elle est protégée protégé... - Page 178 • Le numéro de modèle et le numéro de série situés à l’arrière du graveur DVD avec magnétoscope • Les renseignements sur la garantie • Une description claire du problème Contactez ensuite votre Centre de services autorisé SAMSUNG le plus près de chez-vous. Composez 1-800- SAMSUNG pour localiser un centre près de chez vous. Français - 87...
-
Page 179: Fiche Technique
Fiche technique Caractéristiques d’alimentation 120V ca. 60Hz Consommation électrique 28 Watts Poids 8,75 lb Généralités Dimensions 430 mm(L) x 270 mm(P) x 80 mm(H) Températures de fonctionnement de 5 °C à 35 °C (de 41 °F à 95 °F) Maintenez l’appareil à l’horizontale lorsque vous le faites fonctionner. Autres conditions Fonctionne à... -
Page 180: Garantie Limitée À L'acheteur Initial
GARANTIE LIMITÉE À L’ACHETEUR INITIAL Samsung Electronics Canada Inc. (SECA) garantit ce produit contre tout défaut de fabrication. SECA garantit aussi que si cet appareil ne fonctionne pas convenablement durant la période de garantie SECA se réservera le droit de réparer ou de remplacer l’appareil défectueux. - Page 181 Contact SAMSUNG WORLD WIDE If you have any questions or comments relating to Samsung products, please contact the SAMSUNG customer care center. Comment contacter Samsung dans le monde Si vous avez des suggestions ou des questions concernant les produits Samsung, veuillez contacter le Service Consommateurs Samsung.
- Page 182 SIÈGE SOCIAL SAMSUNG ELECTRONICS CANADA, INC. 55 STANDISH COURT MISSISSAUGA, ONTARIO L5R 4B2 CANADA TEL: 1-800-SAMSUNG(1-800-7267864) www.samsung.com/ca English Français AK68-01343A(00)