Thermor 200L Notice D'utilisation Et D'installation
Masquer les pouces
Voir aussi pour 200L:
- Notice d'utilisation (50 pages) ,
- Notice d'utilisation (52 pages)
Table des Matières
Publicité
Les langues disponibles
Les langues disponibles
Liens rapides
Publicité
Chapitres
Table des Matières

Manuels Connexes pour Thermor 200L


Sommaire des Matières pour Thermor 200L
- Page 2 SCHÉMA ÉLECTRIQUE POUR LA MAINTENANCE DE VOTRE CHAUFFE-EAU THERMODYNAMIQUE ELECTRIC DIAGRAM SCHAKELSCHEMA VOOR DE SERVICEBEURT VAN UW THERMODYNAMISCHE WATERVERWARMER ESQUEMA ELÉCTRICO PARA EL MANTENIMIENTO DEL CALENTADOR DE AGUA TERMODINÁMICO DIAGRAMA DOS CIRCUITOS PARA A MANUTENÇÃO DO SEU ESQUENTADOR TERMODINÂMICO SCHEMA ELECTRIQUE SONDE AIR ELECTRIC DIAGRAM AIR SENSOR...
- Page 3 Manuel à conserver, même après l’installation du produit. AVERTISSEMENTS Cet appareil n’est pas prévu pour être utilisé par des personnes (y compris les enfants) dont les capacités physiques, sensorielles ou mentales sont réduites, ou des personnes dénuées d’expérience ou de connaissance, sauf si elles ont pu bénéficier, par l’intermédiaire d’une personne responsable de leur sécurité, d’une surveillance ou d’instructions préalables concernant l’utilisation de l’appareil.
- Page 4 AVERTISSEMENTS 3/ Si l’appareil doit être installé dans un local ou un emplacement dont la température ambiante est en permanence à plus de 35°C, prévoir une aération de ce local. 4/ Dans une salle de bain ne pas installer ce produit dans les volumes V0, V1 et V2. Si les dimensions ne le permettent pas, Ils peuvent néanmoins être installés dans Le volume V2.
- Page 5 AVERTISSEMENTS RACCORDEMENT ELECTRIQUE Avant tout démontage du capot, s’assurer que l’alimentation est coupée pour éviter tout risque de blessure ou d’électrocution. L’installation électrique doit comporter en amont de l’appareil un dispositif coupure omnipolaire (disjoncteur, fusible) conformément aux règles d’installation locales en vigueur (disjoncteur différentiel 30mA).
-
Page 6: Table Des Matières
Sommaire PRESENTATION 1. Recommandations importantes 2. Contenu de l’emballage 3. Manutention 4. Principe de fonctionnement 5. Caractéristiques techniques 6. Dimensions – structure 7. Nomenclature INSTALLATION 1. Mise en place du produit 2. Installation en configuration ambiant (sans gaine) 3. Installation en configuration gainée (2 conduits) 4. -
Page 7: Recommandations Importantes
Présentation Installation Utilisation Entretien Garantie Présentation du produit 1. Recommandations importantes 1.1. Consignes de sécurité Les travaux d’installation et de service sur les chauffe-eau thermodynamiques peuvent présenter des dangers en raison de hautes pressions et de pièces sous tension électrique. Les chauffe-eau thermodynamiques doivent être installés, mis en service et entretenus par un personnel formé... -
Page 8: Manutention
Présentation Installation Utilisation Entretien Garantie 3. Manutention Le produit intègre plusieurs poignées afin de faciliter la manutention jusqu’au lieu d’installation. Pour transporter le chauffe-eau jusqu'au lieu d'installation utiliser les poignées inférieures et les poignées supérieures. Position acceptée Positions interdites Respecter les recommandations de transport et de manutention figurant sur l'emballage du chauffe- eau. -
Page 9: Caractéristiques Techniques
Présentation Installation Utilisation Entretien Garantie 5. Caractéristiques techniques Modèle 200L 200L C 270L 270L C Dimensions ( Hauteur x Largeur x Profondeur) 1617 x 620 x 665 1957 x 620 x 665 Poids à vide Capacité de la cuve Raccordement eau chaude / eau froide ¾... -
Page 10: Dimensions - Structure
Présentation Installation Utilisation Entretien Garantie 6. Dimensions / structure È Réf MODELE Sortie condensats 1166 1166 1525 1525 Hauteur totale 1617 1617 1957 1957 Entrée eau froide Sortie eau chaude 961 1300 1300 Largeur totale Profondeur totale 60° Entraxe bouches Entrée échangeur Dimensions en mm... - Page 11 Présentation Installation Utilisation Entretien Garantie 7. Nomenclature Bouche orientable 11 Ensemble bornier 21 Colonne de façade Capot arrière 12 Capot avant 22 Bouchon bas de colonne Filtre 13 Compresseur 23 Filerie ACI Condensateur 15μF 14 Jaquette compresseur 24 Carte de régulation Détendeur 15 Couvercle jaquette 25 Filerie compresseur...
-
Page 12: Installation
: située au-dessus de la sortie eau chaude doit être accessible à tout moment. 200L : 1750mm 270L : 2070mm Avant le remplissage, le chauffe-eau doit être mis de niveau en le calant si Fixer chauffe besoin. - Page 13 Présentation Installation Utilisation Entretien Garantie 2. Installation en configuration non gainée. Intérieur/Intérieur Local non chauffé à température supérieure à 5°C et isolé des pièces chauffées de l’habitation. Paramètre « Gainage » à mettre sur « Intérieur/Intérieur » Local conseillé = enterré ou semi enterré, pièce où la température est supérieure à...
-
Page 14: Installation En Configuration Gainée (2 Conduits)
Présentation Installation Utilisation Entretien Garantie 3. Installation en configuration gainée (2 conduits). Extérieur/Extérieur Local au minimum hors gel (T > 1°C). Paramètre « Gainage » à mettre sur « Extérieur/Extérieur » Local conseillé : volume habitable (les déperditions thermiques du chauffe- eau ne sont pas perdues), à... -
Page 15: Installation En Configuration Semi-Gainée (1 Conduit Au Rejet)
Présentation Installation Utilisation Entretien Garantie 4. Installation en configuration semi – gainée (1 conduit au rejet). Local non chauffé à température supérieure à 5° C et isolé des pièces Intérieur/Extérieur chauffées de l’habitation. Paramètre « Gainage » à mettre sur « Intérieur/Extérieur ». Local conseillé... -
Page 16: Configurations Interdites
Présentation Installation Utilisation Entretien Garantie 5. Configurations interdites • Chauffe-eau puisant l’air d’une pièce chauffée. • Raccordement sur la VMC. • Raccordement sur les combles. • Gainage sur l’air extérieur à l’aspiration et refoulement de l’air frais à l’intérieur. • Raccordement à un puits canadien. •... -
Page 17: Raccordement Hydraulique
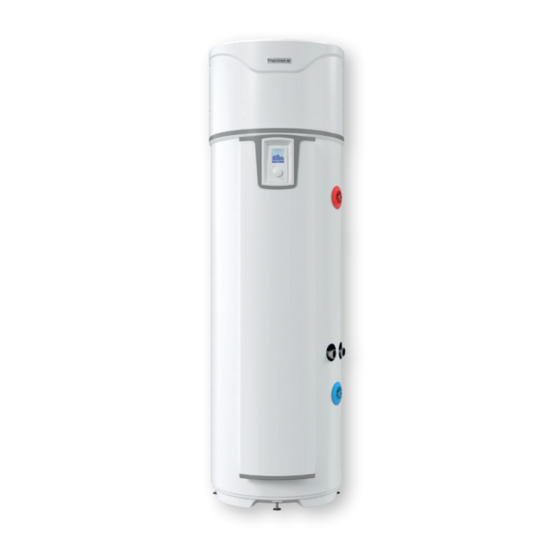
Présentation Installation Utilisation Entretien Garantie 6. Raccordement hydraulique L'usage d'un bouclage sanitaire est vivement déconseillé : une telle installation provoque une destratification de l'eau dans le ballon et a pour conséquence un fonctionnement plus important de la pompe à chaleur ainsi que de la résistance électrique L’entrée d’eau froide est repérée par une collerette bleue et la sortie d’eau chaude par une collerette rouge. - Page 18 Présentation Installation Utilisation Entretien Garantie 6.2. Raccordement eau chaude Ne pas raccorder directement aux canalisations en cuivre le raccord eau chaude. Il doit être obligatoirement équipé d’un raccord diélectrique (fourni avec l’appareil). En cas de corrosion des filetages du raccord eau chaude non équipé de cette protection, notre garantie ne pourrait être appliquée.
- Page 19 Présentation Installation Utilisation Entretien Garantie Qualité de l’eau Les caractéristiques de l’eau du circuit primaire utilisée dès la mise en service, et pour la durée de vie des chaudières seront conformes aux valeurs suivantes : • Lors du remplissage d’une installation neuve, ou lorsque celle-ci a été complètement vidangée, l’eau de remplissage doit être conforme aux caractéristiques suivantes : TH <...
- Page 20 Présentation Installation Utilisation Entretien Garantie 6.5. Evacuation des condensats Le refroidissement de l’air circulant au contact de l’évaporateur entraîne la condensation de l’eau contenue dans l’air. L’écoulement de l’eau condensée à l’arrière de la pompe à chaleur doit être conduit par des tuyaux en plastique depuis la pompe à chaleur afin d’évacuer les condensats. Selon l’humidité...
-
Page 21: Raccordement Aéraulique
Présentation Installation Utilisation Entretien Garantie 7. Raccordement aéraulique Lorsque le volume de la pièce où est installé votre chauffe-eau thermodynamique est inférieur à 20m , son raccordement à des gaines d’air de diamètre 160 mm est possible. Si les gaines d’air ne sont pas isolées, de la condensation peut apparaître sur celles-ci lors du fonctionnement. - Page 22 Présentation Installation Utilisation Entretien Garantie 7.1. Longueurs de gaines autorisées. Configurations types Gainage Extérieur/Extérieur Sorties / Entrées d’air Toiture Murale Toiture Murale Toiture Murale Gaine galva semi- rigide isolé Ø160mm 12 m 12 m 10 m Longueurs Max. Gaine PEHD Ø160mm L1 + L2 28 m 26 m...
-
Page 23: Raccordement Électrique
Présentation Installation Utilisation Entretien Garantie 8. Raccordement électrique Se référer au schéma de raccordement électrique situé en avant dernière page. Le chauffe-eau ne peut être mis sous tension qu’après son remplissage en eau. Le chauffe-eau doit être alimenté électriquement de façon permanente. Le chauffe-eau ne peut être branché... -
Page 24: Raccordement Des Équipements Optionnels
Présentation Installation Utilisation Entretien Garantie 9. Raccordement des équipements optionnels Avant toute intervention, veillez à mettre l’appareil hors tension. Pour accéder au bornier client, se reporter aux indications de démontage du capot avant Un passage de câble est spécifiquement prévu pour les raccordements. Veillez à l’utiliser. Il est préconisé... - Page 25 Présentation Installation Utilisation Entretien Garantie Onduleur Panneaux PV MP POWER Boitier de Signal 230V~ - 50Hz raccordement 3G 2,5mm² 3G 1,5mm² 2x 0,75mm² 9.2. Raccordement à une chaudière. Alimentation électrique Pour les appareils équipés d’un échangeur interne qui seront couplés à une chaudière, il est nécessaire de connecter la chaudière au chauffe-eau.
- Page 26 Présentation Installation Utilisation Entretien Garantie 9.3. Raccordement à une station solaire. Il est possible de connecter une station solaire thermique au Alimentation électrique chauffe eau (appareil avec échangeurs en mode « solaire»). Dans cette configuration, le chauffe-eau fonctionne uniquement lorsqu'il reçoit un signal de la station solaire. A réception du signal, la PAC démarrera s'il y a un besoin de chauffe et que les plages de fonctionnement et d'air le permettent.
-
Page 27: Mise En Service
Présentation Installation Utilisation Entretien Garantie 10. Mise en service 10.1. Remplissage du chauffe-eau ❶ Ouvrir le ou les robinets d’eau chaude. ❷ Ouvrir le robinet d’eau froide situé sur le groupe de sécurité (s’assurer que le clapet de vidange du groupe est en position fermée). - Page 28 Présentation Installation Utilisation Entretien Garantie 10.3. Les réglages de l’installation. Accéder à nouveau aux différents réglages de l’installation : Paramétrages • Date et heure Régler le jour puis valider. Procéder de la même façon pour le mois, l’année, l’heure et les minutes. Valider ou non le changement d’heure automatique •...
- Page 29 Présentation Installation Utilisation Entretien Garantie • Photovoltaïque/Smart-grid : Ce paramètre permet d’activer le couplage du produit avec une installation photovoltaïque. Ce mode de fonctionnement se traduit par la mise en marche forcée de la pompe à chaleur lorsqu’un signal, provenant de l’installation photovoltaïque, est reçu par le chauffe-eau.
- Page 30 Présentation Installation Utilisation Entretien Garantie 10.6. Choix du mode de fonctionnement Mode L’appui sur la touche permet d’accéder au menu En mode AUTO : Ce mode de fonctionnement gère de façon automatique le choix de l’énergie qui permet de faire le meilleur compromis entre confort et économies.
-
Page 31: Utilisation
Présentation Installation Utilisation Entretien Garantie Utilisation 1. Panneau de commandes. Visualiser les informations Suivre les instructions Accéder aux réglages MENU Verrouiller les réglages Naviguer Diminuer/Augmenter les valeurs Valider Revenir à l’écran précédent 2. Description des pictogrammes. Appoint électrique en cours de Marche forcée enregistrée fonctionnement Pompe à... -
Page 32: Le Menu Principal
Présentation Installation Utilisation Entretien Garantie 3. Le menu principal. Naviguer dans le MENU Accéder aux Suivre les instructions Diminuer Augmenter Valider réglages affichées à l’écran les valeurs les valeurs Augmenter la production d’eau chaude ponctuellement : Régler le nombre de jours de fonctionnement du BOOST (de 1 à 7). A la fin de la durée choisie, le chauffe-eau reprend son fonctionnement initial. -
Page 33: Les Modes De Fonctionnement
Présentation Installation Utilisation Entretien Garantie 4. Les modes de fonctionnement. 4.1 Les modes en installation « Thermodynamique seul » : AUTO: La température de consigne est automatiquement ajustée entre 50 et 62°C selon le profil de consommation des jours précédents. Le chauffe eau choisit de préférence la pompe à chaleur pour fonctionner. -
Page 34: Entretien
Présentation Installation Utilisation Entretien Garantie Entretien, Maintenance et Dépannage 1. Conseils à l’utilisateur. Une vidange du chauffe-eau est nécessaire dans le cas où le mode absence ne peut être utilisé ou dès lors que l’appareil est mis hors tension. Procéder de la façon suivante : ❶... -
Page 35: Ouverture Du Produit Pour Maintenance
Présentation Installation Utilisation Entretien Garantie L’accès à la vis de réglage du détendeur par un personnel non frigoriste est interdit. Tout réglage du détendeur sans avis favorable du constructeur peut conduire à une non prise sous garantie du produit. Il est déconseillé de toucher au réglage du détendeur avant d’avoir épuisé toutes les autres solutions de réparation. -
Page 36: Diagnostique De Panne
Présentation Installation Utilisation Entretien Garantie 4. Diagnostic de panne. En cas d’anomalie, absence de chauffe ou dégagement de vapeur au soutirage, coupez l’alimentation électrique et prévenez votre installateur. Les opérations de dépannage doivent être réalisées exclusivement par un professionnel. 4.1. Affichage de codes d’erreur. L'alarme peut être suspendue ou réarmée en appuyant sur OK. - Page 37 Présentation Installation Utilisation Entretien Garantie Code affiché Cause Conséquence Dépannage Vérifier les connexions du compresseur (repère R1), Ouverture du pressostat, du condensateur de démarrage pressostat ou Arrêt PAC. Erreur 25 (15mF) et de la vanne gaz chauds (Repère T2). sécurité thermique Chauffe en ELEC.
- Page 38 Présentation Installation Utilisation Entretien Garantie Panne constatée Cause possible Diagnostic et dépannage Plus de chauffe Pas d’alimentation électrique du Vérifier la présence de tension Pas d’eau chaude chauffe eau : fusible, câblage… sur les fils d’alimentation Vérifier les paramètres de l’installation (voir les plages de fonctionnement) Quantité...
-
Page 39: Garantie
Présentation Installation Utilisation Entretien Garantie Garantie 1. Champs d’application de la garantie. Sont exclues de cette garantie les défaillances dues à : • Des conditions d’environnement anormales : • Dégâts divers provoqués par des chocs ou des chutes au cours des manipulations après départ usine. -
Page 40: Conditions De Garantie
Présentation Installation Utilisation Entretien Garantie 2. Conditions de garantie. Le chauffe-eau doit être installé par une personne habilitée conformément aux règles de l’art, aux normes en vigueur et aux prescriptions de nos services techniques. Il sera utilisé normalement et régulièrement entretenu par un spécialiste. Dans ces conditions, notre garantie s’exerce par échange ou fourniture gratuite à... -
Page 41: Déclaration De Conformité
Présentation Installation Utilisation Entretien Garantie 3. Déclaration de conformité. DECLARATION DE CONFORMITE DIRECTIVE RED 2014/53/UE (*) Par la présente SATE déclare que l'équipement référencé ci-dessous est conforme aux exigences essentielles de la directive RED 2014/53/UE. La déclaration de conformité UE complète de cet équipement est aussi disponible sur demande, auprès de notre service après-vente (voir adresse et coordonnées en fin de notice). - Page 43 Keep the manual, even after the product has been installed. WARNINGS This product is not intended for use by persons (including children) whose physical, sensory or mental capacities are reduced, or persons without experience or knowledge, unless they have been given instructions & monitored previously when using the appliance by a person responsible for their safety.
- Page 44 WARNINGS 3/ If the appliance is to be installed in a room or location where the ambient temperature is permanently above 35°C, provide ventilation in the room. 5/ Do not use volumes V0, V1 or V2 if installing this product in a bathroom. Volume V2 can, however, be used if the dimensions cannot accommodate another size.
- Page 45 WARNINGS ELECTRICAL CONNECTION Before taking off the cover, make sure that the power is turned off to prevent injury or electric shock. The electrical installation must include an omnipolar cut-off device (circuit-breaker, fuse) upstream of the appliance, complying with local installation rules in force (30mA differential circuit breaker).
- Page 46 Contents OVERVIEW 1. Important recommendations 2. Content of the packaging 3. Handling 4. Operating principle 5. Technical characteristics 6. Dimensions – structure 7. Glossary INSTALLATION 1. Positioning the product 2. Installation in ambient configuration (without ducting) 3. Installation in ducted configuration (2 ducts) 4.
-
Page 47: Important Recommendations
Overview Installation Maintenance Warranty Product overview 1. Important recommendations 1.1. Safety instructions Installation and service work on thermodynamic water heaters can be hazardous due to high pressures and live parts. Thermodynamic water heaters must be installed, commissioned and maintained by trained and qualified personnel only. -
Page 48: Handling
Overview Installation Maintenance Warranty 3. Handling The product incorporates several handles making it easier to move to the location where it will be installed. To transport the water heater to the installation location use the lower and upper handles. Acceptable position Prohibited positions Follow the transport and handling recommendations on the water heater's packaging. -
Page 49: Technical Characteristics
Overview Installation Maintenance Warranty 5. Technical characteristics Model 200L 200L C 270L 270L C Dimensions (Height x Width x Depth) 1617 x 620 x 665 1957 x 620 x 665 Weight empty Tank capacity Hot water/cold water connection ¾ ʺ M... -
Page 50: Dimensions/Structure
Overview Installation Maintenance Warranty 6. Dimensions/structure È MODEL COIL COIL Condensate outlet 1166 1166 1525 1525 Total height 1617 1617 1957 1957 Cold water inlet Hot water outlet 961 1300 1300 Total width Total depth 60° Inlet dimensions Exchanger inlet Dimensions in mm... - Page 51 Overview Installation Maintenance Warranty 7. Glossary Directional inlet 11 Terminal assembly 21 Front column Rear cover 12 Front cover 22 Lower column cap Filtered 13 Compressor 23 ACI wiring Capacitor 15μF 14 Compressor jacket 24 Regulation board Expansion valve 15 Jacket cover 25 Compressor wiring Hot gases valve assembly 16 Column rail mounting...
-
Page 52: Installation
Minimum height needed from floor to The identification label ceiling to install the product: located above the hot water outlet must be accessible at all times. 200L: 1750mm 270L: 2070mm Before filling, the water heater must be levelled wedging Attach the water necessary. - Page 53 Overview Installation Maintenance Warranty 2. Installation in a non-ducted configuration. Interior/Interior Unheated location at temperatures above 5°C and isolated from the heated rooms of the house. "Ducting" setting to be set to "Interior/Interior" Recommended location = underground or semi-underground, room where the temperature is higher than 10°C all year round.
-
Page 54: Installation In Ducted Configuration (2 Ducts)
Overview Installation Maintenance Warranty 3. Installation in ducted configuration (2 ducts). Exterior/Exterior Location is at least frost-free (T > 1°C). "Ducting" setting to be set to "Exterior/Exterior" Recommended location: living space (the thermal losses of the water heater are not lost), near the outer walls. Avoid placing the water heater and/or the ducts close to bedrooms for sound comfort. -
Page 55: Installation In Semi-Ducted Configuration (1 Discharge Duct)
Overview Installation Maintenance Warranty 4. Installation in semi–ducted configuration (1 discharge duct). Unheated location at temperatures above 5°C and isolated from the Interior/Exterior heated rooms of the house. "Ducting" setting to be set to "Interior/Exterior" Recommended location = underground or semi-underground, room where the temperature is higher than 10°C all year round. -
Page 56: Prohibited Configurations
Overview Installation Maintenance Warranty 5. Prohibited configurations • Water heater drawing air from a heated room. • Connection to the CMV. • Connection to the attic. • Ducting for suction of outside air and discharge of fresh air inside. • Connection to a Canadian well. •... -
Page 57: Hydraulic Connection
Overview Installation Maintenance Warranty 6. Hydraulic connection The use of a sanitary loop is strongly discouraged: this type of installation causes a destratification of the water in the heater and results in the increased operation of the heat pump as well as the electrical resistance The cold water inlet is marked by a blue collar and the hot water outlet by a red collar. - Page 58 Overview Installation Maintenance Warranty 6.2. Hot water connection Do not connect the hot water connection directly to the copper pipes. It must be equipped with a dielectric connection (supplied with the appliance). In case of corrosion of the threads of the hot water connection not equipped with this protection, our warranty will not apply.
- Page 59 Overview Installation Maintenance Warranty Water quality The characteristics of the primary circuit water used from the time of commissioning, and for the working life of the boilers, will conform to the following values: • When filling a new installation, or when an installation has been completely emptied, the water used for filling should conform to the following values: TH <...
- Page 60 Overview Installation Maintenance Warranty 6.5. Condensate removal The circulating air cools in contact with the evaporator and causes the water contained in the air to condensate. The flow of condensed water at the back of the heat pump must be carried away from the heat pump by plastic pipes in order to drain the condensates.
-
Page 61: Air Duct Connection
Overview Installation Maintenance Warranty 7. Air duct connection When the volume of the room where your thermodynamic water heater is installed is less than 20m , it can be connected to air ducts with a diameter of 160mm. If the air ducts are not insulated, condensation may appear on them during operation. - Page 62 Overview Installation Maintenance Warranty 7.1. Lengths of permitted ducts. Standard configurations Exterior/Exterior ducting Air Outlets/Inlets Roof Wall Roof Wall Roof Wall Semi-rigid galvanised duct Ø160mm 12 m 12 m 10 m Lengths Max. HDPE duct Ø 160 mm L1 + L2 28 m 26 m 16 m...
-
Page 63: Electrical Connection
Overview Installation Maintenance Warranty 8. Electrical connection Refer to the electrical wiring diagram on the next to last page. The water heater can only be turned on after it has been filled with water. The water heater must be permanently powered by electricity. The water heater can only be connected and operated on a single-phase 230V AC grid. -
Page 64: Connection Of Optional Equipment
Overview Installation Maintenance Warranty 9. Connection of optional equipment Before any operation, make sure to turn the appliance off. Refer to the disassembly instructions on the front cover for accessing the customer's terminal block. A cable bushing is specifically provided for connections. Be sure to use it. The use of a 2x0.5mm²... - Page 65 Overview Installation Maintenance Warranty Inverter PV panels MP POWER AC connection Signal 230V~ - 50Hz 3G 25mm² 3G 15mm² 2x 075mm² 9.2. Boiler connection Power supply For appliances equipped with an internal heat exchanger that will be coupled to a boiler, the boiler must be connected to the water heater.
- Page 66 Overview Installation Maintenance Warranty 9.3. Connection to a solar station. A solar heating station can be connected to the water heater Power supply (unit with heat exchangers in "solar" mode). In this configuration, the water heater only operates when it receives a signal from the solar station.
-
Page 67: Start-Up
Overview Installation Maintenance Warranty 10. Start-up 10.1. Filling the water heater ❶ Open the hot water taps. ❷ Open the cold water tap on the safety unit (make sure that the unit drain valve is in the closed position). Close the hot water taps after filling is completed. The water heater is now full of water. ❸... - Page 68 Overview Installation Maintenance Warranty 10.3. Installation settings. Re-access the installation's different settings: Settings • Date and time Set the day and confirm. Proceed in the same way for the month, the year, the hour and the minutes. Validate or not the automatic time change •...
- Page 69 Overview Installation Maintenance Warranty • Photovoltaic/Smart-grid: This setting allows you to activate the connection of the product with a photovoltaic system. The operation results in the forced start of the heat pump when a signal from the photovoltaic system is received by the water heater.
- Page 70 Overview Installation Maintenance Warranty 10.6. Choice of operating mode Mode Pressing the key accesses the menu In AUTO mode: This operating mode automatically manages the choice of energy that ensures the best compromise between comfort and savings. The water heater analyses the consumptions from the previous days to adapt hot water production to the actual needs.
-
Page 71: Use
Overview Installation Maintenance Warranty 1. Control panel. Review the information Follow the instructions Access the settings MENU Lock the settings Navigate Decrease/Increase the values Validate Return to the previous screen 2. Description of pictograms. Electrical backup currently Recorded forced operation operating Heat pump currently operating Recorded/ongoing absence... -
Page 72: The Main Menu
Overview Installation Maintenance Warranty 3. The main menu. Navigate the MENU Access the Follow the instructions on Decrease Increase Validate settings the screen the values the values Occasionally increase the production of hot water: Set the number of days of BOOST operation (from 1 to 7). The water heater resumes its initial operation at the end of the selected time period. -
Page 73: Operating Modes
Overview Installation Maintenance Warranty 4. Operating modes. 4.1 Modes in "Thermodynamics only" installation: AUTO: The setpoint temperature is thus automatically adjusted between 50 and 62° C depending on the consumption history. The water heater preferentially selects the heat pump to operate. The electrical backup can be activated automatically in support. -
Page 74: Maintenance
Overview Installation Maintenance Warranty Servicing, Maintenance and Troubleshooting 1. Tips for the user. The water heater ishould be drained if the absence mode cannot be used or when the appliance is switched off. Proceed as follows: ❶ Cut the power supply. ❷... -
Page 75: Opening The Product For Maintenance
Overview Installation Maintenance Warranty Access to the regulator adjusting screw by non-refrigeration personnel is prohibited. Any adjustment of the regulator without approval from the manufacturer may lead to voiding of the warranty for this product. It is not recommended to touch the regulator setting until you have exhausted all other repair solutions. -
Page 76: Troubleshooting
Overview Installation Maintenance Warranty 4. Fault diagnostic. In the event of a fault, or when no heat or steam is issued from the filling point, switch off the power supply and inform your installer. Troubleshooting operations must be carried out exclusively by a professional. 4.1. - Page 77 Overview Installation Maintenance Warranty Code displayed Cause Consequence Troubleshooting Check the connections of the compressor (mark Pressure switch HP stopped. R1), the pressure switch, the start capacitor (15mF) Error 25 opening or thermal Heating in ELEC. and the hot gas valve (Mark T2). Check the compressor safety resistances of the compressor coils.
- Page 78 Overview Installation Maintenance Warranty Fault observed Possible cause Diagnostics and troubleshooting No more heat No power supply to the water Check the presence of voltage on No hot water heater: fuse, wiring ... the power cables Check the installation settings (see the operating ranges) Not enough hot water Hot water heater not large enough...
-
Page 79: Warranty
Overview Installation Maintenance Warranty Warranty 1. Scope of the warranty. This warranty does not cover failures due to: • Abnormal environmental conditions: • All types of damage caused by shaking or the appliance falling during handling after leaving the factory. •... -
Page 80: Warranty Conditions
Overview Installation Maintenance Warranty 2. Warranty conditions. The water heater must be installed by an authorised person in accordance with industry practices, the standards in force and the instructions from our technical services. It must be used normally and regularly serviced by a specialist. Under these conditions, our warranty is exercised by exchange or free supply to our Distributor or Installer of the parts deemed defective by our technicians, or if necessary of the appliance, excluding labour or transportation costs and any extended warranty. -
Page 81: Certificate Of Conformity
Overview Installation Maintenance Warranty 3. Certificate of conformity. DECLARATION OF CONFORMITY DIRECTIVE RED 2014/53/EU (*) SATE hereby declares that the equipment referenced below complies with the essential requirements of the RED 2014/53/EU Directive. The complete EU declaration of conformity concerning this equipment is also available on request from our after-sales service (see address and contact details at the end of the instructions). - Page 83 Bewaar deze handleiding, zelfs na de installatie van het product. WAARSCHUWINGEN Dit apparaat is niet bedoeld om te worden gebruikt door personen (kinderen inbegrepen) met fysieke, sensoriële of mentale beperkingen, of door personen met onvoldoende ervaring of kennis, tenzij ze kunnen genieten, door de tussenkomst van een persoon, verantwoordelijk voor hun veiligheid, van bewaking of voorafgaandelijke instructies betreffende het gebruik van het apparaat.
- Page 84 WAARSCHUWINGEN 4/ In een badkamer dit product niet installeren in de volumes V0, V1 en V2. Als de afmetingen geen andere mogelijkheid bieden, kan het product echter in volume V2 geïnstalleerd worden. 5/ Het apparaat in een toegankelijke ruimte plaatsen. 6/ De afbeeldingen voor installatie raadplegen in het hoofdstuk “Installatie”.
- Page 85 WAARSCHUWINGEN ELEKTRISCHE AANSLUITING Alvorens het deksel te demonteren, controleren of de stroomvoorziening onderbroken is, om ieder risico op letsel of elektrocutie te vermijden. De elektrische installatie moet stroomopwaarts van het apparaat over een meerpolige hoofdstroomonderbreker (werkschakelaar, zekering) beschikken conform plaatselijk geldende installatievoorschriften (differentieelschakelaar 30mA).
- Page 86 Inhoudsopgave PRESENTATIE 1. Belangrijke instructies 2. Inhoud van de verpakking 3. Behandeling 4. Werkingsprincipe 5. Technische kenmerken 6. Afmetingen – structuur 7. Benaming INSTALLATIE 1. Plaatsing van het product 2. Installatie in de omgevingsconfiguratie (zonder mantel) 3. Installatie in de configuratie met mantel (2 leidingen). 4.
-
Page 87: Belangrijke Instructies
Presentatie Installatie Gebruik Onderhoud Garantie Presentatie van het product 1. Belangrijke instructies 1.1. Veiligheidsvoorschriften De installatie- en onderhoudswerkzaamheden aan de thermodynamische waterverwarmers kunnen gevaarlijk zijn als gevolg van de hoge druk en de onder elektrische spanning staande onderdelen. De thermodynamische waterverwarmers mogen uitsluitend geïnstalleerd, in dienst gesteld en onderhouden worden door hiervoor opgeleid en gekwalificeerd personeel. -
Page 88: Behandeling
Presentatie Installatie Gebruik Onderhoud Garantie 3. Behandeling Het product is voorzien van een aantal handgrepen hanteren vergemakkelijken op de installatieplaats. Om de ketel te verplaatsen naar de plaats van installatie, de onderste en bovenste handgrepen gebruiken. Toegestane positie Verboden posities Respecteer de aanbevelingen voor transport en behandeling op de verpakking van de waterverwarmer. -
Page 89: Technische Kenmerken
Presentatie Installatie Gebruik Onderhoud Garantie 5. Technische kenmerken Model 200L 200L C 270L 270L C Afmetingen (hoogte x breedte x diepte) 1617 x 620 x 665 1957 x 620 x 665 Leeg gewicht Inhoud van de kuip Aansluiting warm water / koud water ¾... -
Page 90: Afmetingen - Structuur
Presentatie Installatie Gebruik Onderhoud Garantie 6. Afmetingen / structuur È 200. 270. MODEL Uitlaat condenswater 1166 1166 1525 1525 Totale hoogte 1617 1617 1957 1957 Inlaat koud water Uitlaat warm water 1300 1300 Totale breedte Totale diepte Tussenruimte 60° monden Inlaat warmtewisselaar Afmetingen in mm... - Page 91 Presentatie Installatie Gebruik Onderhoud Garantie 7. Benaming Richtbare mond 11 Klemmenbord compleet 21 Kolom voorpaneel Achterkap 12 Voorkap 22 Deksel onderzijde kolom Filter 13 Compressor 23 ACI-bedrading Condensator 15μF 14 Mantel compressor 24 Regelkaart Ontspanner 15 Deksel mantel 25 Compressorbedrading Klep hete gassen compleet 16 Rail ondersteuning kolom Bedrading 1 sensor waterreservoir...
-
Page 92: Installatie
Minimum hoogte van vloer tot plafond Het typeplaatje boven die nodig is om te voldoen aan het de warmwateruitgang product: moet te allen tijde toegankelijk zijn. 200L: 1750mm 270L: 2070mm Voorafgaand aan het vullen, moet de waterverwarmer Zet de waterpas worden gezet,... - Page 93 Presentatie Installatie Gebruik Onderhoud Garantie 2. Installatie met configuratie zonder mantel. Binnen/Binnen Onverwarmde ruimte bij temperatuur boven de 5°C en geïsoleerd van de verwarmde vertrekken van de woning. Parameter "Mantel" instellen op "Intern/Intern" Aanbevolen ruimte = ingegraven of half ingegraven, waar de temperatuur boven de 10ºC is gedurende het hele jaar.
-
Page 94: Installatie In De Configuratie Met Mantel (2 Leidingen)
Presentatie Installatie Gebruik Onderhoud Garantie 3. Installatie in de configuratie met mantel (2 leidingen). Lokaal minimaal vorstvrij (T > 1°C). Buiten/Buiten Parameter "Mantel" op "Extern/Extern" Aanbevolen ruimte: bewoonbaar volume (warmteverlies van de waterverwarmer gaat niet verloren), in de buurt van buitenmuren. Vermijd de nabijheid bij slaapkamers voor de waterverwarmer de boiler en/of leidingen vanwege geluidshinder. - Page 95 Presentatie Installatie Gebruik Onderhoud Garantie 4. Installatieconfiguratie met halve mantel (1 leiding naar afvoer). Onverwarmde ruimte bij temperatuur boven de 5°C en geïsoleerd van Binnen/Buiten verwarmde delen in de ruimte. Parameter "Mantel" op "Intern/Extern" zetten. Aanbevolen ruimte = ingegraven of half ingegraven, waar de temperatuur boven de 10ºC is gedurende het hele jaar.
-
Page 96: Verboden Configuraties
Presentatie Installatie Gebruik Onderhoud Garantie 5. Verboden configuraties • Waterverwarmers die lucht aanzuigen uit een verwarmde ruimte. • Aansluiting op de mechanische ventilatie. • Aansluiting op de ruimte onder het dak. • Mantel op de buitenlucht bij de aanzuiging en uitblazen van koele lucht binnen. •... -
Page 97: Hydraulische Aansluiting
Presentatie Installatie Gebruik Onderhoud Garantie 6. Hydraulische aansluiting Het gebruik van een sanitair circuit wordt ten stelligste afgeraden: een dergelijke installatie veroorzaakt destratificatie van het water in de boiler en zorgt dat de warmtepomp en de elektrische weerstand harder moeten werken De koudwaterinlaat wordt aangegeven met een blauwe kraag en de warmwateruitlaat met een rode kraag. - Page 98 Presentatie Installatie Gebruik Onderhoud Garantie 6.2. Aansluiting warm water De aansluiting voor warm water niet rechtstreeks aansluiten op koperen leidingen. Deze moet verplicht worden voorzien van een diëlektrische aansluiting (meegeleverd met het apparaat). In geval van corrosie van de schroefdraden van aansluitingen voor warm water die niet uitgerust zijn met deze beveiliging is onze garantie niet geldig.
- Page 99 Presentatie Installatie Gebruik Onderhoud Garantie Kwaliteit van het water De karakteristieken van het primaire circuitwater dat wordt gebruikt vanaf het opstarten en gedurende de levensduur van de ketels moeten voldoen aan de volgende waarden: • Bij het vullen van een nieuwe installatie of wanneer deze volledig leeg is, moet het vulwater aan de volgende kenmerken voldoen: TH <...
- Page 100 Presentatie Installatie Gebruik Onderhoud Garantie 6.5. Condensafvoer Door het afkoelen van de lucht die bij contact met de verdamper circuleert, condenseert het in de lucht aanwezige vocht. Het wegstromen van het gecondenseerde water aan de achterkant van de pomp moet geleid worden door plastic leidingen vanaf de warmtepomp om de condens af te voeren.
-
Page 101: Aansluiting Ventilatie
Presentatie Installatie Gebruik Onderhoud Garantie 7. Aansluiting ventilatie Wanneer het volume van het vertrek waar uw thermodynamische waterverwarmer geïnstalleerd is, minder dan 20 m is, kan deze aangesloten worden op luchtmantels met een diameter van 160 mm. Als de luchtmantels niet geïsoleerd zijn, kan hier tijdens de werking condens op verschijnen. U moet derhalve altijd voor geïsoleerde luchtmantels kiezen. - Page 102 Presentatie Installatie Gebruik Onderhoud Garantie 7.1. Toegestane mantellengtes. Standaard configuraties Mantels Buiten/Buiten Luchtuitlaten / -inlaten Muur Muur Muur Half stijve verzinkte geïsoleerde mantel Ø 12 m 12 m 10 m 160 mm Max. lengtes Mantel PEHD Ø 160 L1 + L2 28 m 26 m 16 m...
-
Page 103: Elektrische Aansluiting
Presentatie Installatie Gebruik Onderhoud Garantie 8. Elektrische aansluiting Raadpleeg het elektrische bedradingsschema dat zich tegenover de laatste pagina bevindt. De waterverwarmer mag pas na met water gevuld te zijn ingeschakeld worden. De waterverwarmer moet permanent van stroom voorzien worden. De waterverwarmer mag enkel aangesloten worden en werken op een eenfasig wisselstroomnet 230V. De waterverwarmer aansluiten met een stijve kabel met geleiders met een doorsnede van 1,5 mm². -
Page 104: Aansluiten Van Optionele Uitrustingen
Presentatie Installatie Gebruik Onderhoud Garantie 9. Aansluiten van optionele uitrustingen Alvorens werkzaamheden uit te voeren, het apparaat uitschakelen. Zie voor de toegang tot het klemmenbord voor de klant de aanwijzingen voor het demonteren van de voorkap Er is een speciale kabeldoorvoer voor de aansluitingen. Zorg dat deze gebruikt wordt. Het is aan te raden een meerdradige kabel 2x0,5mm²... - Page 105 Presentatie Installatie Gebruik Onderhoud Garantie Ondulator PV-panelen MP POWER Aansluitingska Signaal 230V~ - 50Hz stje AC 3G 2,5mm² 3G 1,5mm² 2x 0,75mm² 9.2. Aansluiting op een ketel. Voor de apparaten uitgerust met een interne warmtewisselaar die aan een ketel gekoppeld zullen worden, moet de ketel Stroomvoorziening worden aangesloten op de waterverwarmer.
- Page 106 Presentatie Installatie Gebruik Onderhoud Garantie 9.3. Aansluiting op een zonnestation. mogelijk thermisch zonnestation Stroomvoorziening waterverwarmer aan te sluiten (apparaat met warmtewisselaars in de “zonne”-modus). In deze configuratie werkt de waterverwarmer enkel wanneer deze een signaal van het zonnestation ontvangt. Na het signaal ontvangen te hebben, start de warmtepomp als er behoefte aan verwarming is en als het Zonne-aansluiting werkings- en luchtbereik dit toestaan.
-
Page 107: Indienststelling
Presentatie Installatie Gebruik Onderhoud Garantie 10. Indienststelling 10.1. Het vullen van de waterverwarmer ❶ Open de warmwaterkra(a)n(en). ❷ Open de koudwaterkraan op de veiligheidsgroep (controleer of de aftapklep van de groep in de gesloten stand staat). ❸ Sluit de warmwaterkranen zodra hier water uit begint te stromen. De waterverwarmer zit vol met water. ❹... - Page 108 Presentatie Installatie Gebruik Onderhoud Garantie 10.3. De instellingen van de installatie. Opnieuw de verschillende instellingen van de installatie aanpassen: Parametreringen • Datum en tijd Stel de dag in en bevestig. Ga op dezelfde manier te werk voor de maand, het jaar, de uren en de minuten. Valideer al dan niet de automatische verandering van zomer- in wintertijd en omgekeerd •...
- Page 109 Presentatie Installatie Gebruik Onderhoud Garantie • Fotovoltaïsch / Smart-Grid: Deze instelling laat toe de koppeling van het product met een fotovoltaïsche installatie te activeren. Deze werkingsmodus leidt tot de geforceerde inschakeling van de warmtepomp als een signaal van de fotovoltaïsche installatie wordt ontvangen door de waterverwarmer. De regeling keert automatisch terug naar de eerder gekozen modus na het ontbreken van het signaal van het fotovoltaïsche station.
- Page 110 Presentatie Installatie Gebruik Onderhoud Garantie 10.6. Keuze van de werkingsmodus Modus Een druk op de toets geeft toegang tot het menu In de modus AUTO: Deze werkingsmodus beheert automatisch de energiekeuzes die het beste compromis geven tussen comfort en energiebesparing. Het toestel analyseert het verbruik van de vorige dagen om de productie van warm water aan te passen aan de behoeften.
-
Page 111: Gebruik
Presentatie Installatie Gebruik Onderhoud Garantie Gebruik 1. Bedieningspaneel. Weergeven informatie Volg de instructies Toegang tot instellingen MENU Vergrendelen instellingen Navigeren Verhogen / verlagen waarden Bevestigen Keer terug naar het vorige scherm 2. Beschrijving van de pictogrammen. Extra elektrische warmtetoevoer Geforceerde werking geregistreerd tijdens werking Warmtepomp in werking Geen geregistreerde werking /... -
Page 112: Het Hoofdmenu
Presentatie Installatie Gebruik Onderhoud Garantie 3. Het hoofdmenu. Navigeren door het menu Toegang tot Volg de instructies op het De waarden De waarden Bevestigen instellingen scherm verlagen verhogen Verhogen van de warmwaterbereiding op specifieke momenten: Instellen van het aantal dagen van de werking van de BOOST (1 tot 7). Na afloop van de gekozen tijd herneemt de verwarming opnieuw de oorspronkelijke werking. -
Page 113: De Werkingsmodi
Presentatie Installatie Gebruik Onderhoud Garantie 4. De werkingsmodi. 4.1 De installatiemodi "Enkel thermodynamisch": AUTO: De ingestelde temperatuur wordt automatisch aangepast tussen de 50 en 62ºC, afhankelijk van het verbruiksprofiel van de voorgaande dagen. De waterverwarmer wordt bij voorkeur gekozen gecombineerd met de warmtepomp voor de werking. -
Page 114: Adviezen Aan De Gebruiker
Presentatie Installatie Gebruik Onderhoud Garantie Onderhouden reparatie 1. Adviezen aan de gebruiker. Het aftappen van de waterverwarmer is nodig in het geval dat de functie afwezigheid niet kan worden gebruikt of wanneer het apparaat wordt uitgeschakeld. Ga als volgt te werk: ❶... -
Page 115: Het Product Openen Voor Onderhoud
Presentatie Installatie Gebruik Onderhoud Garantie De toegang tot de afstelschroef van de ontspanner is verboden voor monteurs die geen koelspecialist zijn. Bij een afstelling van de ontspanner zonder voorafgaande toestemming door de fabrikant kan de garantie van het product geannuleerd worden. Het is af te raden aan de instelling van de ontspanner te komen voor u alle andere reparatieoplossingen geprobeerd heeft. - Page 116 Presentatie Installatie Gebruik Onderhoud Garantie 4. Storingsdiagnose. In geval van een storing, gebrek aan verwarming of het vrijkomen van stoom bij onderdruk, schakel de elektrische voeding uit en waarschuw uw installateur. Werkzaamheden in verband met het verhelpen van storingen mogen alleen worden uitgevoerd do een vakman.
- Page 117 Presentatie Installatie Gebruik Onderhoud Garantie Weergegeven code Oorzaak Gevolg Storingen verhelpen De aansluitingen van de compressor (nummer R1), van Opening pressostaat de pressostaat, van de startcondensator (15mF) en van of thermische Uitschakeling WP. Fout 25 de klep voor hete gassen (nummer T2) verifiëren. De beveiliging ELEK verwarming weerstanden van de spoelen van de compressor...
- Page 118 Presentatie Installatie Gebruik Onderhoud Garantie Geconstateerde storing Mogelijke oorzaak Diagnose en verhelping storing Geen verwarming meer Geen stroomvoorziening voor de Verifiëren of er spanning op de Geen warm water waterverwarmer: zekering, voedingsdraden staat bekabeling... De parameters van de installatie verifiëren (zie de werkingsgebieden) Onvoldoende hoeveelheid warm water Te kleine waterverwarmer De tijdsduur van de...
-
Page 119: Garantie
Presentatie Installatie Gebruik Onderhoud Garantie Garantie 1. Toepassingsgebied van de garantie. Deze garantie geldt niet voor defecten als gevolg van: • Abnormale omgevingsvoorwaarden: • Schade als gevolg van schokken of valpartijen tijdens hantering na het vertrek uit de fabriek. • Plaatsing van het apparaat op een plek die wordt blootgesteld aan vorst of slechte weersomstandigheden (vocht, agressieve atmosfeer, slechte ventilatie). -
Page 120: Garantievoorwaarden
Presentatie Installatie Gebruik Onderhoud Garantie 2. Garantievoorwaarden. De waterverwarmer moet geïnstalleerd worden door een hiertoe bevoegde persoon in overeenstemming met de regels van goed vakmanschap, de geldende normen en de voorschriften van onze technische diensten. Hij moet op normale wijze gebruikt worden en regelmatig onderhouden worden door een specialist. Onder die voorwaarden werkt onze garantie door middel van het ruilen of gratis leveren aan onze Verdeler of Installateur van door onze diensten als defect erkende onderdelen of, in het voorkomende geval, van het apparaat, met uitzondering van de arbeidskosten, de voorrijdkosten en enige vergoeding voor... -
Page 121: Conformiteitsverklaring
Presentatie Installatie Gebruik Onderhoud Garantie 3. Conformiteitsverklaring. CONFORMITEITSVERKLARING RED-RICHTLIJN 2014/53/EU (*) Hierbij verklaart SATE dat de apparatuur met de hieronder vermelde referentie voldoet aan de essentiële eisen van de RED-richtlijn 2014/53/EU. De complete EU-conformiteitsverklaring van deze apparatuur is eveneens op aanvraag verkrijgbaar bij onze servicedienst (zie adres en contactgegevens aan het einde van de handleiding). - Page 123 Conserve este manual incluso después de instalar el producto. ADVERTENCIAS Este aparato no debe ser utilizado por personas (incluidos niños) con capacidades físicas, sensoriales o mentales reducidas ni por personas sin la experiencia o el conocimiento necesario, salvo que hayan recibido la formación requerida o estén supervisadas por un responsable que garantice su seguridad.
- Page 124 ADVERTENCIAS 3. Si el aparato se va a instalar en un local con una temperatura ambiente continua de más de 35 °C, habrá que prever una aireación del local. 4. Este aparato no se debe instalar en los volúmenes V0, V1 y V2 de un cuarto de baño.
- Page 125 ADVERTENCIAS CONEXIÓN ELÉCTRICA Antes de quitar la tapa protectora, asegúrese de que la alimentación esté apagada para evitar el riesgo de lesiones o de electrocución. De conformidad con las normas de instalación locales en vigor, la instalación eléctrica debe incluir un interruptor de corte omnipolar antes del aparato (disyuntor diferencial de 30 mA).
- Page 126 Índice PRESENTACIÓN 1. Recomendaciones importantes 2. Contenido del embalaje 3. Manipulación 4. Principio de funcionamiento 5. Características técnicas 6. Dimensiones - Estructura 7. Nomenclatura INSTALACIÓN 1. Colocación del producto 2. Configuración al aire libre (sin tubo) 3. Configuración conducida (dos tubos) 4.
-
Page 127: Recomendaciones Importantes
Presentación Instalación Utilización Mantenimiento Garantía Presentación del producto 1. Recomendaciones importantes 1.1. Normas de seguridad Las tareas de instalación y mantenimiento de los calentadores termodinámicos pueden resultar peligrosas debido a las altas presiones y a la presencia de piezas bajo tensión eléctrica, por lo que conviene que sean realizadas exclusivamente por personal formado y cualificado. -
Page 128: Manipulación
Presentación Instalación Utilización Mantenimiento Garantía 3. Manipulación El aparato incluye varias asas que facilitan la manipulación del aparato hasta su lugar de instalación. Ayúdese de las asas inferiores y superiores para desplazarlo hasta el lugar deseado. Posición correcta Posiciones incorrectas Respete en todo momento las recomendaciones de transporte y manipulación descritas en el embalaje del calentador de agua. -
Page 129: Características Técnicas
Presentación Instalación Utilización Mantenimiento Garantía 5. Características técnicas Modelo 200 L 200 L C 270 L 270 L C Dimensiones (altura x anchura x profundidad) 1617 x 620 x 665 1957 x 620 x 665 Peso en vacío Capacidad del depósito Conexión agua caliente / agua fría ¾... -
Page 130: Dimensiones - Estructura
Presentación Instalación Utilización Mantenimiento Garantía 6. Dimensiones - Estructura È Modelo 1166 1166 1525 1525 Salida de condensados 1617 1617 1957 1957 Altura total Entrada de agua fría 961 1300 1300 Salida de agua caliente Anchura total Profundidad total 60° Distancia entre bocas Entrada intercambiador... - Page 131 Presentación Instalación Utilización Mantenimiento Garantía 7. Nomenclatura Boca orientable 11 Conjunto de terminales 21 Columna frontal Tapa trasera 12 Tapa delantera 22 Tapón inferior de la columna Filtro 13 Compresor 23 Cableado ACI Condensador 15μF 14 Carcasa compresor 24 Tarjeta de regulación Regulador 15 Tapa carcasa 25 Cableado compresor...
-
Page 132: Instalación
Presentación Instalación Utilización Mantenimiento Garantía Instalación 1. Colocación del producto Instale una cubeta colectora de agua bajo el calentador si lo coloca encima de locales habitados. Altura mínima necesaria de suelo al techo etiqueta para elevar el aparato: identificadora aparato situada encima de la salida de agua caliente tiene que... - Page 133 Presentación Instalación Utilización Mantenimiento Garantía 2. Instalación al aire libre Interior/Interior Local no calentado con una temperatura superior a 5 °C y aislado de los cuartos calefactados del recinto. Poner el parámetro «Revestimiento» en «Interior/Interior» Local recomendado = cubierto o semicubierto, cuarto con temperatura superior a 10°...
- Page 134 Presentación Instalación Utilización Mantenimiento Garantía 3. Instalación con conductos (2 conductos) Exterior/Exterior Local con temperatura mínima antihielo (T > 1°C) Poner el parámetro «Revestimiento» en «Exterior/Exterior» Local recomendado: volumen habitable (sin pérdidas de calor del calentador) cerca de las paredes exteriores. Para un mayor confort acústico, evite colocar el calentador y los conductos cerca de los cuartos de dormir.
- Page 135 Presentación Instalación Utilización Mantenimiento Garantía 4. Instalación semiconducida (1 conducto de evacuación). Local no calentado a temperatura superior a 5° C y aislado de los cuartos Interior/Exterior calentados del recinto. Poner el parámetro «Revestimiento» en «Interior/Exterior» Local recomendado = enterrado o semienterrado, cuarto con temperatura superior a 10°...
-
Page 136: Configuraciones Prohibidas
Presentación Instalación Utilización Mantenimiento Garantía 5. Configuraciones prohibidas • Calentador de agua que tome el aire de un cuarto calefactado • Conexión a la VMC • Conexión a la azotea • Revestimiento en salida de evacuación con aspiración y expulsión de aire fresco en el interior •... -
Page 137: Conexión Hidráulica
Presentación Instalación Utilización Mantenimiento Garantía 6. Conexión hidráulica El uso de un circuito cerrado de agua sanitaria está totalmente desaconsejado: tal instalación provoca una desestratificación del agua en el balón que solicita un mayor funcionamiento de la bomba de calor, así como de la resistencia eléctrica. La entrada de agua fría está... - Page 138 Presentación Instalación Utilización Mantenimiento Garantía 6.2. Conexión de agua caliente No conecte directamente la derivación de agua caliente con las tuberías de cobre para evitar el riesgo de corrosión. Es obligatorio equipar la derivación de agua caliente con un racor dieléctrico (suministrado con el aparato).
- Page 139 Presentación Instalación Utilización Mantenimiento Garantía Calidad del agua Las características del agua del circuito primario utilizado desde la puesta en marcha y para la vida útil de las calderas deberán cumplir con los siguientes valores: • Cuando se llena una nueva instalación, o cuando se ha drenado completamente, el agua de llenado debe cumplir con las siguientes características: TH <...
- Page 140 Presentación Instalación Utilización Mantenimiento Garantía 6.5. Evacuación de los condensados El enfriamiento del aire que circula en contacto con el evaporador provoca la condensación del agua contenida en el aire. La evacuación del agua condensada en la parte posterior de la bomba de calor debe ser conducida por tubos de plástico desde la bomba de calor para drenar los condensados.
-
Page 141: Conexión De Aire
Presentación Instalación Utilización Mantenimiento Garantía 7. Conexión de aire Cuando el volumen de la estancia donde se instala el calentador de agua termodinámico es inferior a 20 m se puede conectar a conductos de aire con un diámetro de 160 mm. Si los conductos de aire no están aislados, puede aparecer condensación durante el funcionamiento. - Page 142 Presentación Instalación Utilización Mantenimiento Garantía 7.1. Longitudes de revestimiento autorizadas Configuraciones Revestimiento exterior/exterior Salidas/Entradas de aire Techo Mural Techo Mural Techo Mural Conducto galvanizado semirrígido aislado 12 m 12 m 10 m Ø160 mm 60 mm Longitude Conducto PEHD Ø Máx.
-
Page 143: Conexión Eléctrica
Presentación Instalación Utilización Mantenimiento Garantía 8. Conexión eléctrica Consulte el esquema de conexión eléctrica incluido en la penúltima página. El calentador de agua solo se debe conectar a la red eléctrica cuando esté lleno de agua. Este aparato está diseñado para estar conectado a una fuente de alimentación ininterrumpida. El calentador de agua se debe conectar a una red de corriente alterna de 230 V monofásica. -
Page 144: Conexión De Equipos Opcionales
Presentación Instalación Utilización Mantenimiento Garantía 9. Conexión de equipos opcionales Antes de cualquier intervención, asegúrese de desconectar el aparato de la red. Para acceder a la regleta de conexión cliente, consulte las instrucciones de desmontaje de la tapa frontal. Hay un paso de cable se específicamente previsto para las conexiones. ¡Utilícelo! Se recomienda usar un cable multihilo de 2x0,5 mm²... - Page 145 Presentación Instalación Utilización Mantenimiento Garantía Inversor Paneles PV MP POWER Caja de Señal 230 V~- 50Hz conexiones 16 A 3G 2,5 mm² 3G 1,5 mm² 2 x 0,75 mm² 9.2. Conexión a una caldera Para equipos equipados con un intercambiador interno y que Alimentación eléctrica vayan a ser acoplados a una caldera es necesario conectar la estación fotovoltaica al...
- Page 146 Presentación Instalación Utilización Mantenimiento Garantía 9.3. Conexión a una estación solar Se puede conectar una estación solar térmica al calentador de Alimentación eléctrica agua (aparato con intercambiadores en modo «solar»). En esta configuración, el calentador de agua solo funciona cuando recibe una señal de la estación solar.
-
Page 147: Puesta En Marcha
Presentación Instalación Utilización Mantenimiento Garantía 10. Puesta en marcha 10.1. Llenado del calentador de agua ❶ Abra la(s) llave(s) de agua caliente. ❷ Abra la llave de agua fría situada en el grupo de seguridad (asegúrese de que la válvula de descarga del grupo esté... - Page 148 Presentación Instalación Utilización Mantenimiento Garantía 10.3. Ajustes de instalación Acceda de nuevo a los distintos ajustes de instalación: Configuración • Fecha y hora Ajuste el día y valide. Proceda del mismo modo para el mes, el año, la hora y los minutos. Validar o no el cambio de hora automático •...
- Page 149 Presentación Instalación Utilización Mantenimiento Garantía • Fotovoltaica/Smart-grid: Este parámetro permite activar el par del aparato con una instalación fotovoltaica. Este modo de funcionamiento activa la puesta en marcha forzada de la bomba de calor cuando el calentador recibe una señal procedente de la instalación fotovoltaica. Si se pierde la señal de la estación fotovoltaica, al cabo minutos se vuelve al modo previamente seleccionado.
- Page 150 Presentación Instalación Utilización Mantenimiento Garantía 10.6. Selección del modo de funcionamiento Modo Pulsando la tecla se accede al menú En modo AUTO: Este modo de funcionamiento gestiona automáticamente la selección de energía que permitirá ahorrar el máximo garantizando al mismo tiempo un confort suficiente de agua caliente. El calentador analiza los consumos de los días anteriores para adaptar la producción de agua caliente a las necesidades.
-
Page 151: Utilización
Presentación Instalación Utilización Mantenimiento Garantía Utilización 1. Panel de control Leer las informaciones Seguir las instrucciones Acceder a los ajustes MENÚ Bloquear los ajustes Navegar Disminuir/Aumentar los valores Validar Volver a la pantalla anterior 2. Descripción de pictogramas Resistencia eléctrica funcionando... Marcha forzada registrada Bomba de calor funcionando... -
Page 152: El Menú Principal
Presentación Instalación Utilización Mantenimiento Garantía 3. El menú principal Navegar por el MENÚ Acceder a los Seguir las instrucciones de la Disminuir Aumentar Validar ajustes pantalla los valores los valores Aumentar la producción de agua caliente puntualmente: Ajustar el número de días de funcionamiento del BOOST (de 1 a 7). Al finalizar la duración elegida, el calentador recupera su funcionamiento inicial. -
Page 153: Modos De Funcionamiento
Presentación Instalación Utilización Mantenimiento Garantía 4. Modos de funcionamiento 4.1 Los modos con instalación «Termodinámica solo»: AUTO: La temperatura de consigna se regula automáticamente entre 50 y 62°C según el perfil de consumo de los días anteriores. El calentador selecciona preferentemente la bomba de calor para funcionar. La resistencia eléctrica se puede activar automáticamente como apoyo. -
Page 154: Mantenimiento
Presentación Instalación Utilización Mantenimiento Garantía Limpieza, Mantenimiento y Reparación 1. Consejos de uso Vacíe el calentador si el modo ausencia está inactivo o en cuanto apague el aparato. Proceda del siguiente modo: ❶ Corte la alimentación eléctrica. ❷ Cierre la llave de agua fría. ❸... -
Page 155: Apertura Del Producto Para Mantenimiento
Presentación Instalación Utilización Mantenimiento Garantía Queda prohibido el acceso al tornillo de ajuste del manorreductor a toda persona que no sea frigorista. Cualquier ajuste del manorreductor sin previo acuerdo por parte del fabricante podría anular la garantía del producto. De manera general, se desaconseja ajustar el manorreductor sin haber agotado antes todas las demás soluciones de reparación disponibles. -
Page 156: Diagnóstico De Avería
Presentación Instalación Utilización Mantenimiento Garantía 4. Diagnóstico de avería En caso de anomalía, falta de calor o liberación de vapor durante el llenado, corte la alimentación eléctrica y contacte con su instalador. Las operaciones de reparación deben ser realizadas exclusivamente por un profesional. 4.1. - Page 157 Presentación Instalación Utilización Mantenimiento Garantía Código mostrado Causa Consecuencia Solución Compruebe las conexiones del compresor (ref. R1), del Apertura presostato Parada BDC. presostato, del condensador de arranque (15 mF) y de Error 25 o seguridad térmica Calentamiento la válvula de gases calientes (ref. T2). Compruebe las compresor ELEC.
- Page 158 Presentación Instalación Utilización Mantenimiento Garantía Avería constatada Cause posible Diagnóstico y solución Fallo de calentamiento Fallo de alimentación eléctrica del Verifique la presencia de tensión en Fallo de agua caliente calentador de agua: fusible, cableado... los cables de alimentación. Compruebe los parámetros de la instalación (ver rangos...
-
Page 159: Garantía
Presentación Instalación Utilización Mantenimiento Garantía Garantía 1. Alcance de la garantía Quedan excluidos de esta garantía los defectos debidos a: Condiciones ambientales anormales: Danos provocados por choques o caídas en el transcurso de manipulaciones tras la salida de fábrica. Instalación del aparato en un lugar expuesto a heladas o a la intemperie (ambientes humedos, agresivos o mal ventilados). -
Page 160: Condiciones De Garantía
Presentación Instalación Utilización Mantenimiento Garantía 2. Condiciones de garantía El calentador de agua debe ser instalado por una persona autorizada según las buenas prácticas, las normativas vigentes y las indicaciones de nuestros servicios técnicos. Deberá ser utilizado de manera correcta y revisado periódicamente por un técnico cualificado. En estas condiciones, nuestra garantía cubrirá... -
Page 161: Declaración De Conformidad
Presentación Instalación Utilización Mantenimiento Garantía 3. Declaración de conformidad DECLARACIÓN DE CONFORMIDAD DIRECTIVA RED 2014/53/UE (*) SATE declara por la presente que el equipo mencionado a continuación cumple con los requisitos esenciales de la directiva RED 2014/53/UE. También puede solicitar la declaración completa de conformidad de la UE de este equipo a nuestro servicio posventa (ver información de contacto al final de las instrucciones). - Page 163 Deve guardar o manual, mesmo após a instalação do produto. ADVERTÊNCIAS Este aparelho não é indicado para ser usado por pessoas (incluindo crianças) cujas capacidades físicas, sensoriais ou mentais sejam reduzidas, ou pessoas sem experiência ou conhecimento, salvo se puderem beneficiar, por intermédio de uma pessoa responsável pela sua segurança, de uma supervisão ou de instruções prévias relativas à...
- Page 164 ADVERTÊNCIAS 3/ Se o aparelho for instalado num local cuja temperatura ambiente for sempre superior a 35ºC, deve prever um arejamento do local. 4/ Numa casa de banho, não deve instalar este produto nos volumes V0, V1 e V2. Se as dimensões não o permitirem, podem mesmo assim ser instalados no volume V2.
- Page 165 ADVERTÊNCIAS LIGAÇÕES ELÉTRICAS Antes de desmontar a cobertura, deve garantir que a alimentação foi cortada para evitar o risco de lesão ou eletrocução. A instalação elétrica deve comportar a montante do aparelho um dispositivo de corte monopolar (disjuntor, fusível) conforme as regras de instalação locais em vigor (disjuntor diferencial de 30 mA).
- Page 166 Sumário APRESENTAÇÃO 1. Recomendações importantes 2. Conteúdo da embalagem 3. Manutenção 4. Princípio de funcionamento 5. Características técnicas 6. Dimensões - estrutura 7. Nomenclatura INSTALAÇÃO 1. Colocação do produto 2. Instalação em configuração ambiente (sem tubagem) 3. Instalação na configuração com tubagem (2 condutas) 4.
-
Page 167: Recomendações Importantes
Apresentação Instalação Utilização Manutenção Garantia Apresentação do produto 1. Recomendações importantes 1.1. Instruções de segurança Os trabalhos de instalação e de reparação dos esquentadores termodinâmicos podem apresentar perigos devido a altas pressões e peças sob tensão elétrica. Os esquentadores termodinâmicos devem ser instalados, colocados em serviço e mantidos por pessoal formado e qualificado. -
Page 168: Manutenção
Apresentação Instalação Utilização Manutenção Garantia 3. Manutenção O produto integra várias pegas para facilitar a manutenção até ao local da instalação. Para transportar o esquentador até ao local da instalação, usar as pegas inferiores e as pegas superiores. Posição aceite Posições proibidas Respeitar as recomendações de transporte e de manutenção que figuram na embalagem do esquentador. -
Page 169: Características Técnicas
Apresentação Instalação Utilização Manutenção Garantia 5. Características técnicas Modelo 200 L 200 L C 270 L 270 L C Dimensões (altura x largura x profundidade) 1617 x 620 x 665 1957 x 620 x 665 Peso em vazio Capacidade da cuba Ligação à... -
Page 170: Dimensões/ Estrutura
Apresentação Instalação Utilização Manutenção Garantia 6. Dimensões/ estrutura È MODELO ª Saída de condensação 1166 1166 1525 1525 Altura total 1617 1617 1957 1957 Entrada de água fria Saída de água quente 1300 1300 Largura total Profundidade total Distância entre os 60°... - Page 171 Apresentação Instalação Utilização Manutenção Garantia 7. Nomenclatura Bocal orientável 11 Bloco terminal 21 Coluna de fachada Tampa traseira 12 Tampa dianteira Tampa da parte inferior da coluna Filtro 13 Compressor 23 Cabos do ACI Condensador 15μF 14 Capa do compressor 24 Cartão de regulação Redutor de pressão 15 Cobertura da capa...
-
Page 172: Instalação
Apresentação Instalação Utilização Manutenção Garantia Instalação 1. Colocação do produto Instalar obrigatoriamente um depósito de retenção de água por baixo do esquentador quando este estiver posicionado por cima de locais habitados. Altura mínima necessária do solo ao teto A sinalética situada por para elevar o produto: cima da saída da água quente... -
Page 173: Instalação Em Configuração Ambiente (Sem Tubagem)
Apresentação Instalação Utilização Manutenção Garantia 2. Instalação em configuração sem tubagem. Interior/Interior Local não aquecido com uma temperatura superior a 5ºC e isolado das divisões aquecidas da casa. Parâmetro “tubos” a colocar em “Interior/Interior”. Local aconselhado = enterrado ou semienterrado, peça onde a temperatura seja superior a 10 °C todo o ano. -
Page 174: Instalação Na Configuração Com Tubagem (2 Condutas)
Apresentação Instalação Utilização Manutenção Garantia 3. Instalação com configuração com tubagem (2 condutas). Local no mínimo sem gelo (T > 1 °C). Exterior/Exterior Parâmetro “tubos” a colocar em “Exterior/Exterior”. Local aconselhado: volume habitável (o desperdício térmico do esquentador não é perdido), perto de paredes exteriores. Evitar a proximidade de quartos com esquentador e/ou condutas para conforto sonoro. - Page 175 Apresentação Instalação Utilização Manutenção Garantia 4. Instalação com configuração com semitubagem (1 condutas na ventilação). Local não aquecido com uma temperatura superior a 5ºC e isolado das Interior/Exterior divisões aquecidas da casa. Parâmetro “tubos” a colocar em “Interior/Exterior”. Local aconselhado = enterrado ou semienterrado, peça onde a temperatura seja superior a 10 °C todo o ano.
-
Page 176: Configurações Interditas
Apresentação Instalação Utilização Manutenção Garantia 5. Configurações interditas • Esquentador que retira ar de uma divisão aquecida. • Ligação à VMC. • Ligação nos sótãos. • Tubagem para o ar exterior com a aspiração e descarga de ar fresco para o interior. •... -
Page 177: Ligações Hidráulicas
Apresentação Instalação Utilização Manutenção Garantia 6. Ligações hidráulicas Desaconselha-se vivamente a utilização de uma interligação sanitária: esta instalação provoca uma desestratificação da água no depósito e tem por consequência um funcionamento mais intenso da bomba de calor bem como da resistência elétrica. A entrada de água fria é... - Page 178 Apresentação Instalação Utilização Manutenção Garantia 6.2. Ligação da água quente Não ligar diretamente à canalização de cobre a ligação de água quente. Deve ser obrigatoriamente equipado com uma ligação dielétrica (fornecida com o aparelho). Em caso de corrosão das roscas da ligação de água quente não equipada desta proteção, a nossa garantia não poderá...
- Page 179 Apresentação Instalação Utilização Manutenção Garantia Qualidade da água As características da água do circuito primário utilizada desde a colocação em serviço e durante toda a vida útil das caldeiras deverão ser conformes aos seguintes valores: • Aquando do enchimento de uma instalação nova, ou quando esta foi completamente drenada, a água de enchimento deve ser conforme às seguintes características: TH <...
- Page 180 Apresentação Instalação Utilização Manutenção Garantia 6.5. Evacuação da condensação O arrefecimento do ar circulante em contacto com o evaporador desencadeia a condensação da água contida no ar. O escoamento da água condensada na traseira da bomba de calor deve ser conduzida por tubos de plástico a partir da bomba de calor para evacuar a condensação.
-
Page 181: Ligações Aeráulicas
Apresentação Instalação Utilização Manutenção Garantia 7. Ligações aeráulicas Quando o volume da divisão onde está instalado o seu esquentador termodinâmico for inferior a 20 m , é possível a sua ligação aos tubos de ar de 160 mm de diâmetro. Se os tubos de ar não estiverem isolados, pode aparecer condensação nos mesmos durante o funcionamento. - Page 182 Apresentação Instalação Utilização Manutenção Garantia 7.1. Comprimento da tubagem autorizado. Tipos de configuração Tubagem Exterior/Exterior Saída/entrada de ar Cobertura Mural Cobertura Mural Cobertura Mural Tubagem galv. semi- rígido isolado Ø160 12 m 12 m 10 m mm m Comprime ntos Tubagem PEHD Ø160 Máx.
-
Page 183: Ligações Elétricas
Apresentação Instalação Utilização Manutenção Garantia 8. Ligações elétricas Consultar o esquema de ligações elétricas situado na frente da última página. O esquentador não pode ser ligado sem estar cheio de água. O esquentador deve ser alimentado eletricamente de forma permanente. O esquentador apenas pode ser ligado e funcionar numa rede de corrente alternada de 230 V monofásica. -
Page 184: Ligação Dos Equipamentos Opcionais
Apresentação Instalação Utilização Manutenção Garantia 9. Ligação dos equipamentos opcionais Antes de qualquer intervenção, deve desligar o aparelho. Para aceder ao terminal do cliente, deve consultar as indicações de desmontagem da tampa dianteira Está prevista uma passagem para cabos especificamente para as ligações. Deve utilizá-la. Recomenda-se usar um cabo 2 x 0,5 mm²... - Page 185 Apresentação Instalação Utilização Manutenção Garantia Inversor Painéis FV MP POWER Caixa de Sinal 230V~ - 50Hz ligação AC 3G 2,5 mm² 3G 1,5 mm² 2 x 0,75 mm² 9.2. Ligação a uma caldeira. Alimentação elétrica Para os aparelhos equipados com um permutador interno que serão acoplados a uma caldeira, é...
- Page 186 Apresentação Instalação Utilização Manutenção Garantia 9.3. Ligação a uma central solar. É possível ligar uma central de energia solar térmica ao Alimentação elétrica esquentador (aparelho com permutadores no modo “solar”). Nesta configuração, o esquentador funciona apenas quando recebe um sinal da central solar. A receção do sinal leva ao arranque da BdC se houver necessidade de aquecimento e se for permitido pelos intervalos de funcionamento e pelo ar.
-
Page 187: Colocação Em Serviço
Apresentação Instalação Utilização Manutenção Garantia 10. Colocação em serviço 10.1. Enchimento do esquentador ❶ Abrir a(s) torneira(s) de água quente. ❷ Abrir a torneira de água fria situada no grupo de segurança (garantir que a válvula de drenagem está na posição fechada). - Page 188 Apresentação Instalação Utilização Manutenção Garantia 10.3. Configurações da instalação. Aceder novamente às diferentes regulações da instalação: Parametrizações • Data e hora Ajustar o dia e depois, validar. Proceder da mesma forma para o mês, ano, hora e minutos. Validar ou não a alteração da hora automática •...
- Page 189 Apresentação Instalação Utilização Manutenção Garantia • Fotovoltaico/Smart Grid: Este parâmetro permite ativar o acoplamento do produto com uma instalação fotovoltaica. Este modo de funcionamento é traduzido pela colocação em marcha forçada da bomba de calor quando é recebido um sinal, proveniente da instalação fotovoltaica, pelo esquentador. A regulação fica automaticamente no modo anteriormente selecionado se o sinal da estação fotovoltaica for perdido.
- Page 190 Apresentação Instalação Utilização Manutenção Garantia 10.6. Seleção do modo de funcionamento Modo Pressionar o botão permite aceder ao menu Em modo AUTO: Este modo de funcionamento gera de forma automática a escolha da energia que permitirá ter o melhor compromisso entre conforto e economia. O esquentador analisa os consumos nos dias anteriores para adaptar a produção de água quente em função da necessidade.
-
Page 191: Utilização
Apresentação Instalação Utilização Manutenção Garantia Utilização 1. Painel de comandos. Visualizar a informação Seguir as instruções Aceder aos ajustes MENU Bloquear os ajustes Navegar Diminuir/aumentar os valores Validar Voltar ao ecrã anterior 2. Descrição dos pictogramas. Complemento elétrico em Arranque forçado registado funcionamento Bomba de calor em Ausência registada/a decorrer... -
Page 192: O Menu Principal
Apresentação Instalação Utilização Manutenção Garantia 3. Menu principal. Navegar o MENU Aceder aos Seguir as instruções afixadas Diminuir Aumentar Validar ajustes no ecrã os valores os valores Aumentar a produção de água quente pontualmente: Configurar o número de dias de funcionamento do BOOST (de 1 a 7). No final da duração selecionada, o esquentador retoma o funcionamento inicial. -
Page 193: Modos De Funcionamento
Apresentação Instalação Utilização Manutenção Garantia 4. Modos de funcionamento. 4.1 Os modos de instalação “Termodinâmico apenas”: AUTO: A temperatura recomendada é também ajustada automaticamente entre 50 e 62 °C conforme o perfil de consumo dos dias anteriores. O esquentador escolhe preferencialmente a bomba de calor para funcionar. O complemento elétrico pode ser automaticamente ativado como suporte. -
Page 194: Manutenção
Apresentação Instalação Utilização Manutenção Garantia Manutenção e resolução de avarias 1. Conselhos para o utilizador. É necessária a drenagem do esquentador no caso em que o modo de ausência não possa ser usado ou quando o aparelho estiver desligado. Proceder da seguinte forma: ❶... -
Page 195: Abertura Do Produto Para Manutenção
Apresentação Instalação Utilização Manutenção Garantia É proibido o acesso ao parafuso de regulação do redutor de pressão por alguém que não seja técnico de frio. Qualquer ajuste do redutor de pressão sem autorização do fabricante pode levar a uma anulação da garantia do produto. -
Page 196: Diagnóstico De Avaria
Apresentação Instalação Utilização Manutenção Garantia 4. Diagnóstico de avaria No caso de anomalia, ausência de aquecimento ou libertação de vapor na trasfega, corte a alimentação elétrica e previna o seu instalador. As operações de resolução de avarias devem ser realizadas exclusivamente por profissionais. 4.1. - Page 197 Apresentação Instalação Utilização Manutenção Garantia Código Causa Consequência Avaria apresentado Abertura do Verificar as ligações do compressor (marcação R1) do Paragem da BdC. pressostato ou pressostato, do condensador de arranque (15 mF) e da Erro 25 Aquecimento em segurança térmica válvula de gases quentes (marcação R2).
- Page 198 Apresentação Instalação Utilização Manutenção Garantia Avaria constatada Causa possível Diagnóstico e resolução Mais aquecimento Sem alimentação elétrica do Verificar a presença de tensão nos Sem água quente esquentador: fusível, cabos... cabos de alimentação Verificar parâmetros instalação (ver os intervalos de funcionamento) Quantidade de água quente Subdimensionamento do...
-
Page 199: Garantia
Apresentação Instalação Utilização Manutenção Garantia Garantia 1. Campo de aplicação da garantia. Estão excluídas desta garantia as avarias devidas a: • Condições ambientais anormais: • Desgastes diversos provocados por colisões ou quedas durante manipulações após a saída da fábrica. • Posicionamento do aparelho num local com gelo ou a intempéries (ambientes húmidos, agressivos ou mal ventilados). -
Page 200: Condições Da Garantia
Apresentação Instalação Utilização Manutenção Garantia 2. Condições da garantia. O esquentador deve ser instalado por uma pessoa qualificada conforme as regras da instalação, as normas em vigor e as prescrições dos nossos serviços técnicos. Será normalmente utilizado e mantido regularmente por um especialista. Nestas condições, a nossa garantia é... -
Page 201: Declaração De Conformidade
Apresentação Instalação Utilização Manutenção Garantia 3. Declaração de conformidade. DECLARAÇÃO DE CONFORMIDADE DIRETIVA RED 2014/53/UE (*) Pelo presente, a SATE declara que o equipamento referenciado abaixo cumpre as exigências essenciais da diretiva RED 2014/53/UE. A declaração de conformidade da UE completa deste equipamento encontra-se também disponível sob pedido, junto do nosso serviço pós-venda (ver morada e contactos no final do manual). - Page 204 U0640021 B...