
Manuels Connexes pour PERFECTPRO WORK-STATION


Sommaire des Matières pour PERFECTPRO WORK-STATION
- Page 1 INSTRUCTION MANUAL MANUEL DE L'UTILISATEUR GEBRUIKSAANWIJZING BEDIENUNGSANLEITUNG...
-
Page 2: Table Des Matières
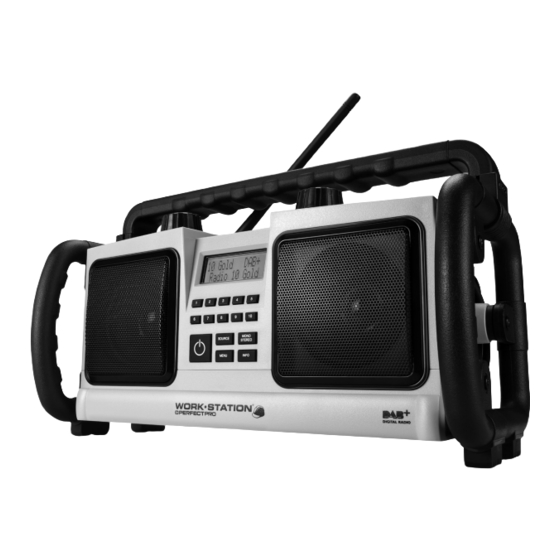
CONTENTS IMPORTANT SAFETY INSTRUCTIONS Read these instructions. IMPORTANT SAFETY INSTRUCTIONS …………………....……………….. P.2 Keep these instructions. Heed all warnings. CONTROLS ………………………………………………………....…………… P.3 Follow all instructions. Clean only with dry cloth. POWER SUPPLY …………………………………………....………………….. P.5 Do not block any ventilation openings. Install in accordance with the instructions. GENERAL FUNCTIONS …………………………………....………………….. - Page 3 Front View Back View LCD display 11. Battery cover fixtures Preset buttons 12. Battery compartment Power On/Off 13. Power cord storage Audio source button Menu button Side View Info button Mono/Stereo button Top View Volume/Tone control 14. Aux-in socket and Rubber cover Rubber DAB/FM antenna 10.
-
Page 4: Power Supply
POWER SUPPLY GENERAL FUNCTIONS Battery operation Switching on and off Press the On/Off button to turn the radio on or in standby. 1. To open the battery compartment, first turn the battery cover fixtures anti-clockwise to loosen and pull down the battery cover. Switching among DAB / FM / AUX IN modes Insert 6 x D size (UM-1) battery with the correct polarity into the compartment. -
Page 5: Using The Radio For The First Time
USING THE RADIO FOR THE FIRST TIME DAB MODE (DAB/DAB+) 1. Place the radio on a flat surface. Operating the radio – DAB Carefully extend the antenna located on the top of the radio. Adjust the antenna so it is vertically extending above the radio. Carefully extend the antenna. Press the On/Off button to switch on the radio. Plug the AC power cord into the AC socket. -
Page 6: Fm Mode
Finding new stations – DAB FM MODE From time to time, new stations may become available. You may proceed to find new stations as follows: Operating the radio – FM seek station In DAB mode, press the Menu button, “Full scan” shows on the display. Press the Tuning knob, the radio will perform a scan of the Band III DAB Press the On/Off button to turn on the radio. -
Page 7: Preset Stations
Scan sensitivity setting – FM Press the Time Set knob to confirm, the day flashes on the display. Rotate the Time Set knob to set the current day. The radio will normally scan all stations from FM broadcasts including the weaker Press the Time Set knob to confirm, the month flashes. signals. However, you may wish the Auto-scan to find only those stations with strong Rotate the Time Set knob to set the current month. enough signals to give good reception. -
Page 8: Tone (Bass/Treble Settings)
Press the Menu button, and then rotate the Tuning knob until the display shows Press the Tuning knob to confirm your choice. The display menu will change to the “System”. chosen language. Press the Tuning knob; rotate the Tuning knob until the display shows “Loudness”. Rotate the Tuning knob to select between “Loudness On” or “Loudness Off”. Press the Tuning knob to confirm the setting and return to normal display. -
Page 9: Backlight
BACKLIGHT TECHNICAL SPECIFICATIONS When the radio is in operation or in standby, pressing any button will illuminate the LCD Technical data display for approx. 10 seconds. This device is noise-suppressed according to the applicable EU directives. This product fulfills the European directives 2006/95/EC, 2005/32/ EC and 2004/108/EC. ATP PASSCODE This device conforms to the safety regulation DIN EN 60065 (VDE 0860) and therefore the international safety regulation IEC 60065. - Page 10 CONTENU CONSIGNES DE SECURITE IMPORTANTES Lisez ces consignes. Conservez ces consignes. Respectez ces avertissements. CONSIGNES DE SECURITE IMPORTANTES .......... P.2 Suivez ces consignes. Nettoyez seulement avec un chiffon sec. COMMANDES .................. P.3 Ne bloquez aucune ouverture de ventilation. Installez selon les consignes. N'installez pas à...
- Page 11 Vue de face Vue arrière Écran LCD Boutons de préréglage (1-10) 11. Supports de fixation de couvercle des piles Touche On/Off Compartiment des piles Touche Source Rangement pour le cordon d’alimentation Touche Menu Touche Info Vue latérale Touche Mono/Stereo Vue du dessus 14. Prise d’entrée auxiliaire et couvercle en caoutchouc Bouton de Volume Antenne souple 10.
-
Page 12: Alimentation Electrique
ALIMENTATION ELECTRIQUE FONCTIONS Fonctionnement à piles Allumage et extinction de la radio Appuyez sur la touche ON/OFF pour allumer la radio ou remettre celle-ci en mode 1. Pour ouvrir le compartiment des piles, tournez d'abord les supports de fixation du Standby (Veille). couvercle des piles dans le sens inverse des aiguilles d'une montre pour desserrer et tirer vers le bas le couvercle des piles. -
Page 13: Premiere Utilisation De La Radio
PREMIERE UTILISATION DE LA RADIO MODE DAB Posez la radio sur une surface stable et plane. Utilisation de la radio en mode DAB Relevez l’antenne souple située au-dessus de la radio. Orientez l’antenne verticalement par rapport à la radio. Relevez l’antenne souple située au-dessus de la radio. Orientez l’antenne 3. Insérez la fiche du cordon d’alimentation dans une prise de courant. La radio verticalement par rapport à... -
Page 14: Mode Fm
Affichage en mode – DAB Réglages Dynamic Range Control (DRC) en mode DAB En mode DAB, la radio est capable d’afficher diverses informations. La fonction DRC permet de rendre des sons doux plus audibles lorsque la radio est utilisée dans un environnement ou un endroit particulièrement bruyant. a. Texte défilant Affiche des messages de la station DAB que vous écoutez, sous la forme d’un texte défilant. En mode DAB, appuyez sur la touche Menu. “Full scan” (Balayage complet) sera b. Force du signal Affiche la force du signal de réception de la station ensuite affiché à l’écran. -
Page 15: Preselection De Stations
Recherche manuelle de stations en mode FM Tournez le bouton de Fréquence pour sélectionner “All stations” (Toutes les stations) ou “Strong stations” (Stations au signal fort). Le réglage standard est “All Appuyez sur la touche ON/OFF pour allumer la radio. stations”... -
Page 16: Faire Fonctionner La Radio - Entree Auxiliaire
Tournez le bouton de Fréquence pour régler le jour exact. SONORITE Appuyez sur le bouton de Fréquence pour confirmer, les chiffres correspondant aux mois clignoteront ensuite à l’écran. Appuyez sur la touche Loudness (Sonorité) pour obtenir une compensation dans les Tournez le bouton de Fréquence pour régler le mois exact. basses et hautes fréquences. -
Page 17: Selection De La Langue
SELECTION DE LA LANGUE REINITIALISATION DU SYSTEME La radio peut être réglée de façon à ce que l’affichage soit dans la langue de votre Lorsque la radio ou l’affichage ne fonctionne pas correctement ou en l’absence choix. d’affichage, suivez la procédure ci-dessous. Appuyez sur la touche ON/OFF pour allumer la radio. Appuyez sur la touche ON/OFF pour allumer la radio. Appuyez sur la touche Menu et tournez le bouton de Fréquence jusqu‘à ce que Appuyez sur la touche Menu et tournez le bouton de Fréquence jusqu’à... -
Page 18: Protection Par Code Pin (Systeme Atp)
PROTECTION PAR CODE PIN (SYSTEME ATP) INFORMATIONS La radio Handsfree est équipée d’un système de protection contre le vol (système ATP). Données techniques Lorsque le système ATP est activé, un code PIN est nécessaire pour déverrouiller et La radio est déparasitée conformément aux directives EU en vigueur. Ce produit satisfait aux directives européennes 2006/95/CE, 2005/32/ utiliser la radio. CE et 2004/108/CE. La radio satisfait à la réglementation en matière de sécurité DIN EN Appuyez sur la touche ON/OFF pour allumer la radio. 60065 (VDE 0860) et dès lors à la réglementation internationale en Appuyez sur la touche Menu. - Page 19 INHOUD BELANGRIJKE ALGEMENE VEILIGHEIDSINSTRUCTIES Lees deze instructies. Bewaar deze instructies goed. Neem alle waarschuwingen in acht. BELANGRIJKE ALGEMENE VEILIGHEIDSINSTRUCTIES………....…….. P.2 Volg alle aanwijzingen op. Reinig het uitsluitend met een droge doek. BEDIENINGSELEMENTEN………………………………………....……….… P.3 Blokkeer geen ventilatieopeningen en plaats het toestel volgens de instructies. STROOMBRONNEN ………………………………………………....…….…..
- Page 20 Voorkant Achterkant LCD display Voorkeuze-toetsen (1-10) 11. Batterijen compartiment sluitingen Aan/uit toets 12. Batterijen compartiment Audiobron keuzetoets 13. Stroomkabel-opberghaken Menu toets Info toets Zijkant Mono/Stereo toets Van boven 14. Aux-ingang en rubberen afdekking Volume draaiknop / Toonregeling Flexibele antenne 10. Frequentie draaiknop...
-
Page 21: Stroombronnen
STROOMBRONNEN ALGEMENE FUNCTIES De radio aan en uit zetten Gebruik met batterijen Druk op de Aan/Uit toets om de radio in te schakelen of terug op standby te zetten. Om het batterijvak te openen draait u eerst de bevestigingen van de batterijklep Kiezen tussen DAB / FM of AUX IN modus. -
Page 22: Eerste Gebruik Van De Radio
EERSTE GEBRUIK VAN DE RADIO DAB MODUS Plaats de radio op een vlakke ondergrond. Bediening van de radio - DAB 2. Zet de antenne, die zich bovenop de radio bevindt, rechtop. Steek de stekker in het stopcontact. De radio zal vanzelf opstarten en enkele 1. Zet de antenne rechtop. Druk op de Aan/Uit toets om de radio in te schakelen. seconden in de display “WELCOME TO DIGITAL RADIO”... -
Page 23: Fm Modus
Nieuwe stations zoeken - DAB FM MODUS Van tijd tot tijd kunnen er nieuwe zenders beschikbaar zijn. Om deze te vinden: Bediening van de radio – FM In DAB modus, druk op de Menu toets, de display geeft aan “Full scan”. Druk op de Frequentie draaiknop, de radio scant de frequenties van de DAB Band Automatische zenderzoek functie - FM III. -
Page 24: Voorkeuze Zenders Instellen
Scan gevoeligheid instelling – FM HANDMATIG DE KLOK INSTELLEN De radio scant normaal alle FM zenders inclusief diegene met een zwakker signaal. De klok kan alleen handmatig worden ingesteld, wanneer de radio is uitgeschakeld. U kunt de scan functie echter ook instellen dat deze alleen de zenders met een sterk Wanneer er 5 seconden lang geen toetsen worden ingedrukt, verlaat de radio de signaal voor een goede ontvangst vindt. -
Page 25: Loudness
Opmerking: Gebruik de AUX-IN ingang nooit in de regen of in een vochtige omgeving METALEN TELESCOPISCHE ANTENNE om te voorkomen dat er vocht binnendringt in de radio! Hou de rubberen afdekking altijd gesloten in deze omstandigheden. U kan deze additionele antenne gebruiken op locaties waar het radiosignaal (FM/DAB/ DAB+) zwak tot zeer zwak is. -
Page 26: Systeem Reset
7. Om de pincode te deactiveren, selecteert u "Disable", zoals eerder getoond. En SYSTEEM RESET voert u de vorige pincode om het ATP slot uit te schakelen. Als de radio niet correct functioneert of b.v. de weergave in de display ontbreekt, geheel Wanneer ATP is ingeschakeld en er drie keer een onjuiste pincode wordt ingevoerd, of gedeeltelijk, voer dan de volgende procedure. -
Page 27: Informatie
Stroombron INFORMATIE Netstroom: AC 230 V ~, 50/60Hz Technische data Dit apparaat is ontstoord volgens de geldende EUrichtlijnen. Batterijen: Dit product voldoet aan de Europese richtlijnen 2006/95/EG, 6 x 1,5V (Alkaline maat IEC LR20 / UM-1 / D-maat) 2005/32/EG en 2004/108/EG. Dit apparaat voldoet aan de regelgeving inzake veiligheid DIN EN Batterijen voor back up: 60065 (VDE 0860) en dus de internationale regelgeving inzake... - Page 28 INHALTSVERZEICHNIS WICHTIGE SICHERHEITSHINWEISE Lesen Sie diese Hinweise. Bewahren Sie diese Hinweise auf. WICHTIGE SICHERHEITSVORKEHRUNGEN ............ P.2 Beachten Sie alle Warnungen. Befolgen Sie alle Anweisungen.. GERÄTEÜBERSICHT ................. P.3 Reinigen Sie es nur mit einem trockenen Tuch. STROMVERSORGUNG ..............P.5 Blockieren Sie keine der Belüftungsöffnungen. Stellen Sie es gemäß der Anweisungen auf.
- Page 29 Vorderansicht Rückansicht LCD-Display 11. Befestigungen Batterieabdeckung Speichertasten (1-10) 12. Batteriefach Ein-/Ausschalttaste 13. Anschluβkabel-Aufnahme Source Taste Menu Taste Info Taste Seitenansicht Mono/Stereo Taste Draufsicht 14. Aux-Ein Buchse und Gummi-Abdeckung Lautstärkeregler Gummi Antenne 10. Tuningregler...
-
Page 30: Stromversorgung
STROMVERSORGUNG ALLGEMEINE FUNKTIONEN Batteriebetrieb Ein- und ausschalten Drücken Sie die Ein-/Ausschalttaste, um das Gerät ein- oder in Standby 1. Zum Öffnen des Batteriefaches drehen Sie zuerst die Befestigungen der umzuschalten. Batterieabdeckung entgegengesetzt zum Uhrzeigersinn, um diese zu lösen, und ziehen Sie die Batterieabdeckung herunter. Umschalten zwischen den Modi DAB / UKW / AUX-IN 2. Setzen Sie 6 Batterien der Gröβe D (UM-1) mit der richtigen Polung ins Batteriefach Mit der Taste SOURCE schalten Sie zwischen den einzelnen Modi um. -
Page 31: Erstmaliger Gebrauch Des Radios
ERSTMALIGER GEBRAUCH DES RADIOS DAB-MODUS 1. Stellen Sie das Radio auf einen flachen Untergrund. Radiobetrieb – DAB 2. Ziehen Sie die Antenne oben am Gerät vorsichtig aus. Richten Sie die Antenne vertikal über dem Radio aus. 1. Ziehen Sie die Antenne vorsichtig aus. Drücken Sie die Ein-/Ausschalttaste, um Schließen Sie das Netzkabel an eine Steckdose (AC) an. Das Radio wird das Radio einzuschalten. eingeschaltet und im Display erscheint einige Sekunden lang die Anzeige Stellen Sie mit der Taste SOURCE das Frequenzband DAB ein. -
Page 32: Ukw-Modus
Neue Sender auffinden - DAB UKW-MODUS Von Zeit zu Zeit wird es neue Sender geben. Suchen Sie Sender wie folgt: Radiobetrieb – Sendersuche UKW Drücken Sie im DAB-Modus die Taste MENU. Im Display erscheint die Anzeige „Full scan“. Schalten Sie das Radio mit der Ein-/Ausschalttaste ein. Drücken Sie TUNING. Das Radio führt einen Scan aller Band III DAB-Kanäle durch. Stellen Sie mit der Taste SOURCE den UKW-Modus ein. -
Page 33: Bedienung Des Radios - Aux Ein
RDS-Daten aufrufen Im AUX-IN-Modus wird der automatische Stromsparmodus aktiviert. Erfolgt am Aux- Eingang innerhalb von 15 Minuten keine Signaleingabe*, schaltet das Handsfree Radio Drücken Sie, wenn Sie einen UKW-Sender mit RDS-Daten anhören, wiederholt die automatisch den Standby-Modus ein. Drücken Sie die Ein-/Ausschalttaste, um das Taste INFO, um durch die Daten zu scrollen. -
Page 34: Lautheit
Drücken Sie TUNING zum Bestätigen. Die Tagesanzeige beginnt zu blinken. Drehen Sie den Lautstärkeregler, um den Hochton entsprechend einzustellen. Drehen Sie TUNING zur Einstellung des Datums. Drücken Sie den Lautstärkeregler, um Ihre Einstellungen zu bestätigen und zur Drücken Sie TUNING zur Bestätigung. Die Monatsanzeige beginnt zu blinken. normalen Anzeige zurückzukehren. -
Page 35: Systemrückstellung
Drücken Sie TUNING. Drehen Sie TUNING, bis im Display die Anzeige „SW ATP PASSWORT version“ erscheint. Drücken Sie TUNING, um die Software-Version anzuzeigen. Dieses Radio verfügt über eine Diebstahlsicherung (ATP). Ist ATP aktiviert, müssen Sie Drücken Sie TUNING, um zum vorhergehenden Menü zurückzukehren und drücken zum Einschalten des Radios ein Passwort eingeben. -
Page 36: Informationen
INFORMATIONEN Technische Daten Dieses Gerät ist gemäß geltenden EU-Richtlinien geräuschgedämpft. Das Produkt entspricht den Europäischen Richtlinien 2006/95/EC, 2005/32/EC und 2004/108/EC. Dieses Gerät entspricht der Sicherheitsnorm DIN EN 60065 (VDE 0860) und somit der internationalen Sicherheitsnorm IEC 60065. Das Gehäuse des Geräts darf unter keinen Umständen geöffnet werden.