Publicité
Les langues disponibles
Les langues disponibles
Liens rapides
Installatie- en gebruikershandleiding
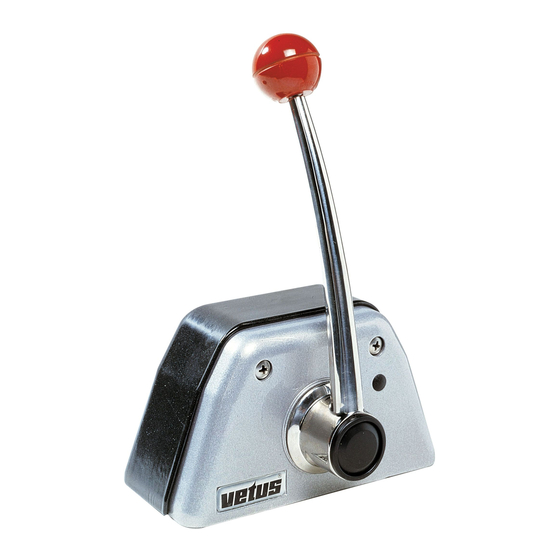
Mechanische motorafstandsbediening
Installation and user manual
Mechanical remote engine control
Installations- und Benutzerhandbuch
Mechanische Motor-Fernbedienung
Installation and user manual
Mechanical remote engine control
RCTOPB
RCTOPTB
SICO
RCTOPBG
RCTOPTBG
SICOG
Copyright © 2022 Vetus b.v. Schiedam Holland
NEDERLANDS
ENGLISH
DEUTSCH
FRANÇAIS
ESPAÑOL
ITALIANO
Manuel d'Installation et d'utilisation
Télécommande mécanique pour moteur
Manual de instalación y usuario
Mando a distancia mecánico para motores
Manuale d'installazione e d'uso
Telecomandi meccanici per motori
RCTOPS
RCTOPTS
SISCO
2
4
6
8
10
12
RCTOPSG
RCTOPTSG
SISCOG
030606.07
Publicité

Sommaire des Matières pour Vetus RCTOPB
- Page 1 Installations- und Benutzerhandbuch Manuale d’installazione e d’uso Mechanische Motor-Fernbedienung Telecomandi meccanici per motori Installation and user manual Mechanical remote engine control RCTOPB RCTOPBG RCTOPS RCTOPSG RCTOPTB RCTOPTBG RCTOPTS RCTOPTSG SICO SICOG SISCO SISCOG Copyright © 2022 Vetus b.v. Schiedam Holland 030606.07...
- Page 2 Het mechanisme is reeds voorzien van een neutraalschakelaar. De neutraalschakelaar verhindert dat de motor kan worden gestart Naast het door Vetus en Morse geleverde kabeltype 33C, is het me- wanneer de keerkoppeling nog ingeschakeld is. chanisme ook geschikt voor kabeltype OS van OMC en kabeltype KM van Mercury.
- Page 3 NEDERLANDS Topmontage: • Teken met behulp van de meegeleverde boormal de te boren be- vestigingsgaten en de uit te zagen opening af. • De twee beugels aan het gedeelte dienen als bevestigings- beugels. Controleer of de bevestigingsgaten overeenkomen met de afgetekende gaten. •...
- Page 4 Also check to make sure the gearbox works correctly. Besides the cable type 33C supplied by Vetus and Morse, the mecha- nism is also suitable for use with cable type OS from OMC and cable Neutral switch type KM from Mercury.
- Page 5 ENGLISH Top mounting: • With the help of the supplied drill pattern,sketch the mounting holes to be drilled and the opening to be sawed out. • The two brackets on part should serve as mounting brackets. Make sure that the mounting holes line up with the sketched holes.
- Page 6 (bei SI(S)CO(G)) vom Mechanismus entfernen (siehe Zeichnung auf der rechten Seite). Leerlaufschalter Außer für den von Vetus und Morse gelieferten 33C-Kabeltyp eig- Der Mechanismus ist bereits mit einem Leerlaufschalter ausge- net sich der Mechanismus für den OS-Kabeltyp von OMV und den stattet.
- Page 7 DEUTSCH Toppmontage: • Mit Hilfe der mitgelieferten Bohrschablone die zu bohrenden Befestigungslöcher und die auszusägende Öffnung anreißen. • Die beiden Bügel am Teil dienen als Befestigungsbügel. Prüfen, ob die Befestigungslöcher mit den angerissenen Löchern korre- spondieren. • Die Löcher bohren und die Öffnung sägen. •...
- Page 8 Vérifier également le bon fonctionnement de l’inverseur. Le dispositif convient pour le type de câble 33C fourni par Vetus et Morse mais aussi pour le type de câble OS d’OMC et le type de câble KM de Mercury.
- Page 9 FRANÇAIS Installation sur le dessus: • A l’aide du modèle fourni, marquer les trous de fixation à percer et les ouvertures à découper. • Les deux étriers de la partie servent de colliers de fixation. Vérifier que les trous de fixation correspondent bien aux trous marqués.
- Page 10 Controle asimismo el funcionamiento adecuado del inversor. Además del tipo de cable 33C suministrado por Vetus y Morse, el mecanismo también es adecuado para el tipo de cable OS de OMC Interruptor neutral y el tipo de cable KM de Mercury.
- Page 11 ESPAÑOL Montaje superior: • Dibuje los agujeros de fijación a taladrar y la apertura a serrar con la ayuda de la plantilla suministrada. • Las dos abrazaderas en la parte sirven de abrazaderas de fijación. Controle si los agujeros de fijación corresponden con los agujeros dibujados.
- Page 12 (vedi disegno nella pagina successiva). Verificare, inoltre, il corretto funzionamento della frizione. Oltre ai cavi tipo 33C, forniti dalla Vetus e dalla Morse, possono essere impiegati anche cavi tipo OS della OMC e KM della Mercury. Dispositivo di protezione I fori di innesto sul meccanismo sono numerati.
- Page 13 ITALIANO Montaggio superiore: • Con l’ausilio della sagoma fornita, segnare la posizione dei fori e dell’apertura da praticare. • Le due staffe della parte servono per fissare il meccanismo. Controllare che i fori delle staffe corrispondano alle posizioni segnate. • Praticare i fori con il trapano e praticare l’apertura segnata con una sega.
- Page 14 Aansluitschema 030606.07 Mechanical remote engine control...
- Page 15 Elektrisch schema’s Elektrischer Schaltpläne Esquemas eléctricos Electrical circuit diagrams Schémas électrique Schemi elettrici NEDERLANDS DEUTSCH ESPAÑOL A Enkele bedieningsstuurstand A Einzelbedienungssteuerstand A Única posición de navegación para activación B Twee bedieningsstuurstanden B Doppelbedienungssteuerstand B Dos posiciones de navegación para activación C Enkele bedieningsstuurstand met C Einzelbedienungssteuerstand mit C Única posición de navegación para...
- Page 16 SISCOG RCTOPSG RCTOPTS 194 (7 ”) 194 (7 ”) 200 (7 ”) 200 (7 ”) RCTOPTSG vetus FOKKERSTRAAT 571 - 3125 BD SCHIEDAM - HOLLAND b. v. TEL.: +31(0)88 4884700 - sales@vetus.nl - www.vetus.com Printed in the Netherlands 030606.07 2021-01...


