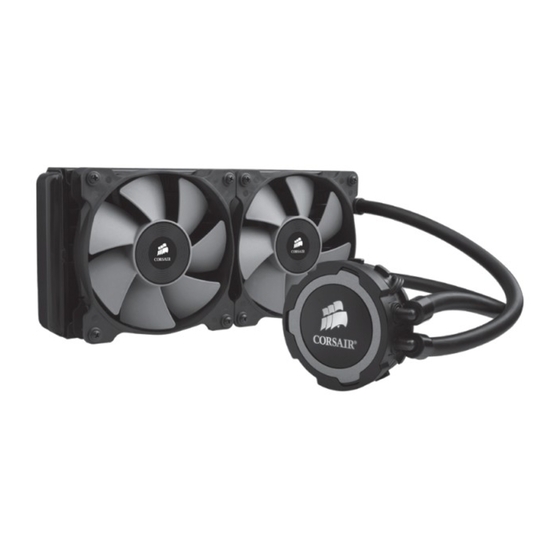
Corsair HYDRO Serie Guide De Démarrage Rapide
Masquer les pouces
Voir aussi pour HYDRO Serie:
- Mode d'emploi (28 pages) ,
- Guide de démarrage rapide (12 pages) ,
- Instructions d'installation (4 pages)
Publicité
Liens rapides
corsair.com
support@corsair.com
EMAIL:
facebook.com/corsairmemory
FACEBOOK:
BLOG:
corsair.com/blog/
USA and CANADA: (800) 205-7657 | INTERNATIONAL: (510) 657-8747 | FAX: (510) 657-8748
46221 Landing Parkway • Fremont • California • 94538 • USA
© 2013 Corsair Components, Inc. All Rights Reserved. The Corsair logo is a registered trademark, and Hydro Series are trademarks of Corsair in the
United States and/or other countries. All other names and products are trademarks and property of their respective owners. Printed in China.
Document Number: 49-001208 rev AA
forum.corsair.com
FORUM:
twitter.com/corsairmemory
TWITTER:
H105 PAGE:
corsair.com/h105
QUICK START GUIDE
GUIDE DE DÉMARRAGE RAPIDE
SCHNELLSTARTANLEITUNG
GUIDA INTRODUTTIVA
GUÍA BREVE DE INICIO
EXTREME-PERFORMANCE 240MM LIQUID CPU COOLER
TM
Publicité

Sommaire des Matières pour Corsair HYDRO Serie
- Page 1 EXTREME-PERFORMANCE 240MM LIQUID CPU COOLER © 2013 Corsair Components, Inc. All Rights Reserved. The Corsair logo is a registered trademark, and Hydro Series are trademarks of Corsair in the United States and/or other countries. All other names and products are trademarks and property of their respective owners. Printed in China.
- Page 2 Replacing the Colored Accent Ring Remplacement de l'anneau de couleur • Auswechseln der Farbigen Einfassung • Sostituzione dell’anello colorato • Sustitución del anillo con detalles de color • To replace the colored accent ring, use a small flathead • Per sostituire l'anello colorato, utilizzare un cacciavite screwdriver to pry out the default metallic grey ring at piatto per estrarre l'anello metallico grigio in dotazione three corners, located as shown in figure 1.
- Page 3 Included Hardware Contenu du co ret • Im Lieferumfang enthaltene Hardware • Hardware incluso • Hardware incluido • Highlighted parts are for Intel installation only Les sections en surbrillance concernent uniquement l'installation Intel Die markierten Passagen beziehen sich nur auf die Intel Parti evidenziate solo per l'installazione di Intel Componentes de instalación solamente para Intel Intel...
- Page 4 Installing the Intel Backplate Installation de la plaque arrière Intel • Installation der Intel-Rückwand • Installazione della piastra posteriore Intel • Instalación de la placa de soporte para Intel • Intel LGA 1366 • For LGA 115X installation, slide the backplate pins inside. •...
- Page 5 Installing the Intel Stando Screws Installing the Fans and Radiator Installation des vis d'entretoise Intel • Installation der Intel-Abstandhalter • Installation des ventilateurs et du radiateur • Lüfter und Kühler einbauen • Installazione delle viti del supporto Intel • Instalación de los tornillos del separador para Intel • Installare la ventola e il radiatore •...
- Page 6 Installing the Pump Unit Connect Power to the Fans and Pump Installation de la pompe • Montage der Pumpe • Installazione dell'unità pompa • Branchement des ventilateurs et de la pompe à l'alimentation • Lüfter und Pumpe anschließen • Instalación de la unidad de bomba • Collegamento delle ventole e della pompa all'alimentazione •...
- Page 7 Included Hardware Contenu du co ret • Im Lieferumfang enthaltene Hardware • Hardware incluso • Hardware incluido • Highlighted parts are for AMD installation only Les sections en surbrillance concernent uniquement l'installation AMD Die markierten Passagen beziehen sich nur auf die AMD Parti evidenziate solo per l'installazione di AMD Componentes de instalación solamente para AMD x1 INTEL MOUNTING BRACKET...
- Page 8 Installing the AMD Stando Screws Installation des vis d'entretoises AMD • Installation der AMD-Abstandhalter • Installazione delle viti del supporto AMD • Instalación de los tornillos del separador para AMD • • Remove the stock AMD top mounting bracket(s) shown. •...
- Page 9 Installing the AMD Mounting Bracket Installation du support de fixation AMD • Installation der AMD-Montagehalterung • Installazione della sta a di montaggio AMD • Instalación del soporte de montaje para AMD • figure 1 Note: The Intel mounting bracket must be removed from Nota: La sta a di montaggio Intel deve essere rimossa the pump before installing the AMD mounting bracket.
- Page 10 Installing the Fans and Radiator Installing the Pump Unit Installation de la pompe • Montage der Pumpe • Installazione dell'unità pompa • Installation des ventilateurs et du radiateur • Lüfter und Kühler einbauen • Instalación de la unidad de bomba • Installare la ventola e il radiatore •...
- Page 11 Connect Power to Fans and Pump Branchement des ventilateurs et de la pompe à l'alimentation • Lüfter und Pumpe anschließen • Collegamento delle ventole e della pompa all'alimentazione • Conexión de la alimentación a los ventiladores y la bomba • •...
- Page 12 4. Il radiatore va montato con il manicotto rivolto verso l'alto o verso il basso? Per un ra reddamento ottimale, Corsair consiglia di montare il radiatore con il manicotto rivolto verso il basso. 1. Comment savoir dans quelle direction le flux d'air du ventilateur se déplace ? Une flèche située sur le côté...


