
Manuels Connexes pour Lupine Betty R


Sommaire des Matières pour Lupine Betty R
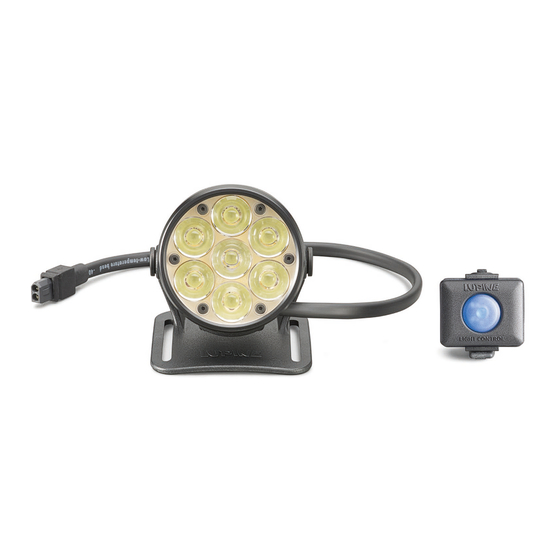
- Page 1 Betty R Betty R 7/14 Betty RX 7/14 Betty R MANUEL D’UTILISATION/ OWNERS MANUAL...
-
Page 2: Table Des Matières
Données techniques Dernière consignee English Read this manual before using Mounting 28–29 Mounting Accessoires 30–31 Mounting Batteries Operation 33–37 Bluetooth Remote 38–39 Customizing brightness levels 40–41 Special Functions 42-44 Charging Product care and storage Troubleshooting Technical data 48-49 Miscellaneous Betty R... -
Page 3: D'abord Lire, Ensuite Allumer
Réaction exothermique: Le boîtier du Betty R peut devenir chaud, veillez donc toujours à le conserver à une distance su sante des maté- riaux in ammables. L'utilisation à l'abri (sans refroidissement, par exemple par le vent) est toujours possible, elle n'endommage pas le projecteur. -
Page 4: Montage
Attacher la lampe seulement dans la bonne position, tirer sur le ruban velcro aussi loin que possible et le xer. Grâce à la rallonge incluse, la batterie peut être portée dans le maillot ou dans le sac à dos. Betty R... - Page 5 Le ruban frontal classique (article nr. 1043) et notre ruban frontal„Heavy Duty“ (article nr. 1046): pour l’utilisation sportive dans des forêts obscures comme par exemp- le une course d’orientation nocturne. HD Ruban frontal: www.lupine.de (article nr. 207) Betty R...
-
Page 6: Accessoires De Montage
Des- serrer d’abord les écrous letés puis les resserrer avec 2Nm. Fermer le trou taraudé libre avec le bouchon d’aération fourni. Collier pour mettre la tige et fermer. Betty R... -
Page 7: Peppi V4 (Alu) Et V5 (Polyamid)
être monté sur bâton de ski. Peppi V5 Support pour guidon manuel Adaptateur GoPro: Notre Wilma peut être monté avec un support CNC spécialement fabriqué par nos soins, pour un placement standard GoPro. voir: www.lupine.de (article nr. 1070) Betty R... - Page 8 éviter à plus forte raison des déplacements par glissade au niveau du côté intérieur. L’explication du montage de la batterie sur le cadre se trouve aussi dans une vidéo du service d’aide sur notre site web! Betty R...
-
Page 9: Affichage De Capacité
DL’a chage de capacité s’éteint de lui-même à nouveau après quelques secondes. Si ce n’est pas le cas, la lampe arrière est éventuellement activée et les 5 LED rouges ne signi ent nullement, que la batterie est encore chargée complètement. Betty R... -
Page 10: Initialisation & Affichage De Tension
Un refroidissement réduira la performance à réglage continu, pour éviter une surchau e des LED et de l‘électronique. La réduction est a chée via le statut LED et ainsi seulement 4 ou 5 LED bleus brillent par exemple en cas de longue route. 10 Betty R... -
Page 11: Fonctions Spéciales (Par Exemple Sos)
Quand la LED leur clignote 4 fois et pour nir le LED vert clignote 6 fois, 4,6 Ah ont été prélevés de la batterie. D’abord les LED bleus clignotent une fois par Ah, puis les LED verts une fois par 1/10 de Ah. Betty R... -
Page 12: Affichages Sur Le Dessus De La Lampe
Utilisation Affichages sur le dessus de la lampe: La capacité restante de la batterie est a chée sur chaque batterie Lupine SmartCore (voir page 9). De plus, la Backlight (Eclairage arrière) de la tête de la lampe devient rouge quand la capacité... -
Page 13: Batterie Vide Et Réservoir De Secours
Un nouvel allumage n’est plus possible ou seule- rouge/bleu ment en branchant à nouveau la batterie et abime toujours la batterie! A l’état déchargé, existe le danger du déchargement le plus profond, chargez donc la batterie à nouveau dés que possible. Betty R... -
Page 14: Bluetooth
Les émetteurs sont enregistrés par ordre dans la tête de la lampe puis à nouveau e acés. Si on veut brancher sa tête de lampe à nouveau exclusivement sur un émetteur, il peut alors être nécessaire de relier un émetteur jusqu’à 3 fois avec la tête de lampe. 14 Betty R... -
Page 15: Activer/Désactiver Durablement La Lumière Led Sur Le Bouton Radio
T5 pour vis Torx. Mettre le nouveau bouton de cellule CR 2032 comme sur l’image et fer mer à nouveau le boîtier. Resserrer les vis pour que la jointure bleue visible soit comprimée. Tourne-vis T5 Torx: (article nr. 137) Betty R... -
Page 16: Adapter Les Niveaux De Luminosité
SOS alpin* * pendant l’utilisation, aucun signal LED n’est affiché Flash* ** Ceci est affiché pendant le fonctionnement par une lam- pe LED verte (version spéciale du LED central rouge : 0,8 W) 0.3W Center-LED** Réglage d’usine 16 Betty R... -
Page 17: Réglage D'usine
Jusqu’à l’épuisement de la batterie ou à la pression des touches, un signal SOS est émis. L’utilisation abusive est punissable! Flash 15hz: Ce mode est extrêmement irritant et ne peut en aucun cas être utilisé à mauvais escient. Center LED: La LED moyenne produit une faible lumière. Betty R... -
Page 18: Fonctions Spéciales
Flash* 0.3W Center-LED** * N’est pas a ché par un LED lors du fonctionnement ** Ceci est affiché pendant le fonctionnement par une lampe LED verte (version spéciale du LED central rouge : 0,8 W) Réglage d’usine 18 Betty R... -
Page 19: Affichage De Capacité Alternatif Sur Le Dessus De La Lampe
Attention! Si la tête de lampe est séparée de la 16 Ah batterie, cet a chage ne fonctionne plus. Chargez 18 Ah à nouveau la batterie entièrement, pour utiliser l‘a chage. 20 Ah Désactiver l’affichage de capacité de la batterie Betty R... -
Page 20: Modifier L'avertissement De Batterie Vide
Presser la touche jusqu’à ce que cinq LED rouges brillent. Lâcher la touche Pour terminer, vous devez séparer la tête de la lampe une fois de la batterie et tous les réglages d’usine sont à nouveau activés. 20 Betty R... -
Page 21: Chargement
La tension de charge en volts (V) Attention! Avec ce chargeur, seules les batteries rechargeables Li-ion peuvent être chargées. Ce n’est PAS approprié pour le chargement de batte- ries Ni-MH! Ne pas utiliser de piles sèches! – Danger d‘explosion! Betty R... -
Page 22: Entretien & Stockage
à nouveau. Le letage n ne supporte aucune manipu- lation inappropriée – c‘est pourquoi un soin tout particulier est nécessaire ici! Fermez le couvercle entièrement en tournant. Module Bluetooth: Le boîtier du module Bluetooth sur la partie inférieure peut seulement être ouvert par nous. 22 Betty R... -
Page 23: Correction D'erreurs
Le chargeur est défectueux Changer de chargeur. Batterie inappropriée Utiliser la batterie Lupine originale. L’a chage a été réinitialisé. Vider entièrement La batterie Smartcore n’a che que la batterie avec la lampe et 20 % après chargement. -
Page 24: Données Techniques
Temps de chargement: Betty R 7/X7: 6.6 Ah 7.2 V Li-Ion Betty R 7/X7: 2 h 45 Min. Betty R 14/X14: 13.2 Ah 7.2 V Li-Ion Betty R 14/X14: 5 h 30 Min. Contenu: Domaine d’opération: FCC ID: QDS-BRCM1078 -25 °C – +70 °C... -
Page 25: Réglementation
La batterie fait néanmoins exception. Par ailleurs, les droits de garantie perdent leur validité en cas d’utilisation non conforme aux dispositions en vigueur ou de modi cation de tout type. DECLARATION DE CONFORMITY DE LA CE: www.lupine.de/CE EC DECLARATION OF CONFORMITY: www.lupine.de/CE Betty R... -
Page 26: English
Index English Read this manual before using Mounting 28–29 Mounting Accessoires 30–31 Mounting Batteries Operation 33–37 Operation Remote control 38–39 Customizing brightness levels 40–41 Special Functions 42-44 Charging Product care and storage Troubleshooting Technical data 48-49 Notes 26 Betty R... -
Page 27: Water Resistance
Water resistance: All Betty R components are waterproof and can of course be used under extremely severe conditions. The lamp complies with IP protection class 68 but is NOT a diving lamp and is NOT suitable for use under water. -
Page 28: Mounting
Mounting Helmet bracket: The Lupine helmet bracket can be attached to virtually any helmet that has ventilation slits. The bracket is easy to mount. For further information, see the text and pictures on the pages that follow. Helpful hints: Normally the two straps are too long. However, only shorten them after mounting and removing the bracket once, because once you’ve snipped off the extra length,... - Page 29 The regular black headbelt ( Art.No. 205) and our “Heavy Duty” headbelt: The headbelt hd is the first choice for orienteering and other fast runners. Have a look at www.lupine.de (Art. No. 207) Have a look at www.lupine.de (Art. No. 207) Betty R...
-
Page 30: Mounting Accessoires
Mounting Accessoires Handlebar mounting: For mounting the Betty R on a handlebar, two optional CNC Quick Release mounts are available. Have a look at www.lupine.de Art.No. 825 for Ø 25.4 mm Art.No. 831 for Ø 31.8 mm Art.No. 834 for Ø 31.8 mm For mounting, please first loosen the bolts on the helmet mount/headband. - Page 31 Mountset: Quickrelease mount and Peppi V4 are both available with the mountset. Have a look at: www.lupine.de (Art.No. 764 for Ø 25.4 mm/Art. No. 763 for Ø 31.8 mm) GoPro Adapter: Have a look at: www.lupine.de (Art.No. 144) Betty R...
-
Page 32: Mounting Batteries
Use the strap which most closely matches your tube size. For a demonstration of how to mount the battery on a bicycle frame, see the video on our Website (click “Support”). 32 Betty R... -
Page 33: Operation
Note: The capacity indicator will fade out within a few seconds. If it does not, eventually the taillight was activated and the 5 glowing LEDs do by far not mean the battery is fully charged. Betty R... - Page 34 LEDs: e.g., after a period of low airflow conditions, 4 of the 5 blue status LEDs will be lit, indicating that the power has been reduced from 45W to 34W in order to protect the unit from heat damage. 34 Betty R...
- Page 35 LED blinks once for each 1/10 of an Ah. For example, if the blue LED blinks four times and then the green LED blinks six times, this means that 4.6 Ah were discharged from the battery. Betty R...
- Page 36 Operation Lamphead display: The remaining capacity will be shown in detail on any Lupine Smartcore battery (see page. 33). Additionally, the LEDs on the back of the lamp-head change color to indicate decreasing voltage. When battery voltage drops below a certain level, the Backlight LED changes from blue to green.
- Page 37 Safety advisory: When the battery is completely discharged ( all 5 red LEDs blink with a red backlight on), the light will shut down after flashing a few times. In such a case, you should stop riding your bicycle immediately. Betty R...
-
Page 38: Bluetooth Remote
“first in first out” principle. If you want to use only one transmitter again to control your lamp, it might be necessary to connect this transmitter up to 4 times with the lamp until all other codes in the list will have been overwritten. 38 Betty R... - Page 39 T5 torx screw driver. Insert the new CR 2032 button cell as shown and close the transmitter again. Tighten the screws until the blue sealing is visibly squeezed. T5 torx screw driver: (Art.No. 137) Betty R...
-
Page 40: Customizing Brightness Levels
45 W brightness level SOS* RVLR* * Will not be signalised by status LED Alpine SOS* ** If in use, shown by green LED (In special version with Red LED: 0.8W) Flash* 0.3W Center-LED ** Default setting 40 Betty R... -
Page 41: Default Setting
Alpine SOS will continue until the battery is empty. Improper use of the SOS signal is punishable by law. Flash 15hz: (Disorientation) This mode is extremely irritating and may by no means be misused. Center: Low beam made by the center LED only. Betty R... -
Page 42: Special Functions
SOS* RVLR* Alpine SOS* Flash* 0.3W Center-LED ** * If in use, shown by green LED ** Will not be signalised by status LED In special version with XP-E2 LED 0.8W Default setting 42 Betty R... - Page 43 12 Ah 14 Ah Attention! When the lamp-head is disconnected 16 Ah from a battery, the indicator will not work correctly 18 Ah until the battery is fully recharged. 20 Ah Disable indicator Betty R...
- Page 44 6.2 V 6.9 V 6.5 V 7.1 V 6.8 V Recover factory settings: Press and hold the button until 5 LEDs turn on. release the button. Disconnect the battery, and all factory settings will be restored. 44 Betty R...
-
Page 45: Charging
Current in amperes (A) Charged in capacity in Ah Warning! This charger is to be used to charge rechargeable Li-Ion batteries only. It is NOT suitable for charging NiMH batteries! Do NOT use non-rechargeable batteries. – Risk of explosion! Betty R... -
Page 46: Product Care And Storage
Product care and storage Plug contacts: Normally the plug contacts are maintenance free. However, if you use your Betty R light in humid, salt- air, environments, it’s advisable to apply a thin layer of Lupine Dutch Grease to the contacts every so often to prevent oxidation. -
Page 47: Troubleshooting
Keep battery warm. temperature. Faulty charger. Replace charger. Unsuitable battery. Use original Lupine battery. The indicator was reseted. Discharge the battery with Even after charging only your light and fully charge it the 20% LED will light up afterwards. -
Page 48: Technical Data
Charging time: Battery capacity; nominal voltage: Betty R 7/X7: 2 h 45 min. Betty R 7/X7: 6.6 Ah 7.2 V Li-Ion Betty R 14/X14: 5 h 30 min. Betty R 14/X14 13.2 Ah 7.2 V Li-Ion 48 Betty R... -
Page 49: Operating Temperature
Calculated values often differ considerably from the actual light output. Our lumen values are measured in our own calibrated integrating sphere. The measurement takes place after 30 seconds, the so called ANSI method. Measurement of light output Betty R... -
Page 50: Notes
We recommend that you inform yourself about the relevant laws in this domain in your country. The mounting technique, as well as the design of Betty R lamps and the Remote control are protected by European and US patents. - Page 51 Changes or modifications not expressly approved by the party responsible for compliance could void the user's authority to operate the equipment. Contains: FCC ID: QDS-BRCM1078 IC: 4324A-BRCM1078 DECLARATION DE CONFORMITY DE LA CE: www.lupine.de/CE EC DECLARATION OF CONFORMITY: www.lupine.de/CE Betty R...
- Page 52 Lupine Lighting Systems GmbH Winnberger Weg 11 92318 Neumarkt Germany Phone: +49 (0) 91 81 - 50 94 90 Fax: +49 (0) 91 81 - 50 94 915 E-mail: info @lupine.de 52 Betty R...