Publicité
Les langues disponibles
Les langues disponibles
Liens rapides
MATERIALS
A
1
Cross Bar
B
4
M12 x 130 x 1.75 Bolts, Lock Washers, Ø 50 Flat Washers, Ø 25 Flat Washers, Nuts, Bushes ( Ø19 x 100 long)
C
1
Side Bracket (R.H. Side)
D
1
Side Bracket (L.H. Side)
E
6
M12 x 40 x 1.75 Bolts, Lock Washers, Ø 25 Flat Washers and Nuts
F
4
Existing M10 Bolts and Washers
ZE
1
Electrical Plate Bracket
ZP
1
Retractable Electrical Plate Kit
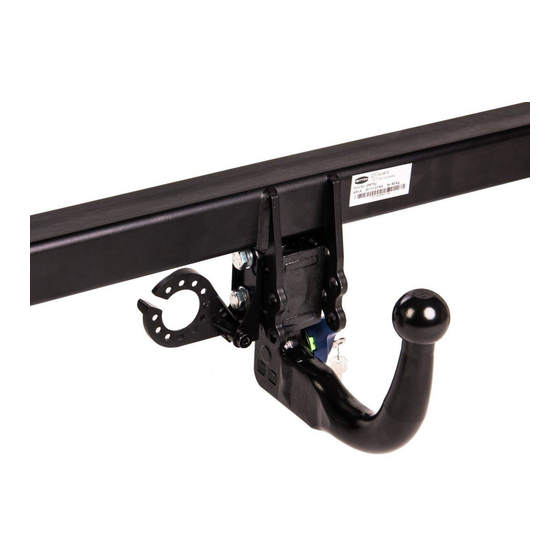
For use with either
J16A Flange neck option – ZF3008. Note: This towbar must be used with either a Witter Towball (part number Z11) or Class
A50-1 or A50-X towball dimensionally Conforming to A50-1 with a 'D' and 'S' value greater than or equal to that of the towbar.
J16AQ Detachable neck option – ZQ3008. Please refer to ZQ fitting instructions for installation
J16AQF Detachable neck option – ZQF3008. Please refer to ZQF fitting instructions for installation
NOTE – this towbar can be fitted without the removal of the bumper, however, this will require considerable deformation
of the bottom edge of the bumper.
FITTING
1.
Remove both silencers.
2.
Remove fasteners from lower edge of bumper.
3.
Remove boot flooring and pull out each boot side trim to reveal two dimples on each side of the vehicle. Drill Ø19
through boot floor only for fasteners/bushes (B). Note: on some newer models the holes may already be present. Take
care not to short out battery.
4.
Remove the bracing bracket from each chassis rail. (located between end of chassis rails and rear panel) (3 screws
each bracket). Retain the screws securing it to the chassis rail (fasteners (F))
5.
Temporarily assemble Side Brackets (C & D) to chassis rails using fasteners (F) and mark exhaust heat shield using
edges of Side Brackets.
6.
Remove Side Brackets and heat shields.
7.
Remove and trim heat shields so that Side Brackets (C & D) fit directly to chassis faces without sandwiching the heat
shield material.
8.
Locate the two dimples in the bottom face of each chassis rail from under the vehicle and drill Ø13.
9.
Re-fit each exhaust heat shield after trimming.
10.
Assemble Side Brackets (C & D) to bottom of each chassis rail using fasteners and bushes (B) and existing fasteners
(F). (Insert bushes though boot floor taking care not to loose in the chassis).
11.
Cut bumper as shown.
12.
Pull down bottom edge of bumper and insert Cross Bar (A) into void or see Bumper Removal instructions.
13.
Secure Cross Bar (A) to the vehicle rear panel and Side brackets (C & D) using fasteners (E). (Note: It may be
necessary to bend the centre metal bumper securing tag upwards to clear the detachable housing)
14.
Assemble the chosen Neck (ZQ or ZF), Electrical Plate Bracket (ZE) and Electrical Plate (ZP) to Cross Bar (A) using
fasteners in the Neck kit.
15.
Fully Tighten all Fasteners starting with fasteners (B).
16.
Re-fit exhaust silencers, internal boot trim, and fasteners to bottom edge of bumper.
Bumper Removal instruction - 4 plastic screws on lower edge, one 8mm bolt at the base of each wheel arch and 2 x 8mm
bolts securing each wheel arch liner. Through the access hole under the light cluster remove one nut from each side of the
car. Remove the rear light clusters by first removing the 2 plastic plugs then the plastic surround, 3 x nuts inside the boot space
then disconnect the harness. Pull the bumper outward from the wheel arch to release the clips running along the top edge of
the bumper. Disconnect harness for reversing sensors.
Recommended torque settings:
Grade 8.8 bolts: M8 - 24Nm, M10 - 52 Nm, M12 - 80 Nm, M14 - 130 Nm, M16 - 200 Nm
M12 – 120Nm, M10 – 70Nm M8- 35Nm
Grade 10.9:
Fitting
Instructions
µW0001J16AU-FIT$041301090000KÄ
W0001J16AU-FIT$041301090000
TOWBAR
For Jaguar XF
2008-
Jaguar XF Sportbrake
2012-
J16AU
For
J16A
J16AQ
J16AQF
Publicité

Sommaire des Matières pour Witter J16AU
- Page 1 For use with either J16A Flange neck option – ZF3008. Note: This towbar must be used with either a Witter Towball (part number Z11) or Class A50-1 or A50-X towball dimensionally Conforming to A50-1 with a ‘D’ and 'S' value greater than or equal to that of the towbar.
- Page 2 BUMPER CUT µW0001J16AU-FIT$031202290000hÄ W0001J16AU-FIT$031202290000...
- Page 3 Pour utiliser avec J16A Rotule standard– ZF3008. Remarque : Cet attelage doit être utilisé avec une boule de remorquage Witter (référence produit Z11) ou une boule de remorquage Classe A50-1 ou A50-X se conformant dimensionnellement à A50-1 avec une valeur ‘D’...


