Table des Matières
Publicité
Les langues disponibles
Les langues disponibles
Liens rapides
Publicité
Chapitres
Table des Matières

Manuels Connexes pour Thule Cadence


Sommaire des Matières pour Thule Cadence
- Page 1 Thule Cadence Instructions 51100986...
-
Page 2: Table Des Matières
CONTENTS IntroductIon addItIonal InformatIon Manual Intended Use 6.1 Accessories Carrier Intended Use 6.2 Service and Care 1.3 Specifications 6.3 Storage 6.4 Wear and Tear Parts descrIPtIon Included safety 3.1 Symbols and Instructions 3.2 General Safety Instructions GettInG started 4.1 Included Components 4.2 Unfolding the Carrier 4.3 Folding the Carrier 4.4 Installing the Wheels 4.5 Removing the Wheels 4.6 Installing the wheel deflectors 4.7 Cycling 4.7.1... -
Page 3: Introduction
INTRODUCTION Thank you for choosing a Thule Cadence. Your new carrier offers quality, safety features and comfort. PLEASE NOTE: Thule Child Transport Systems Ltd. retains all rights to this Owner’s Manual. No text, details, or illustrations from this manual may be reproduced, distributed, or become the subject of unauthorized use for commercial purposes, nor may they be made available to others. The manual for using this carrier may be downloaded from www.thule.com. Great care has been taken in assembling this manual. Nevertheless, should you discover any errors, we would be grateful if you could bring them to our attention. Thule Child Transport Systems Ltd. info@thule.com www.thule.com 105 - 5760 9th Street SE Calgary, AB T2H 1Z9 Canada 51100986 - A... -
Page 4: Manual Intended Use
Use as intended Any use that goes beyond the above is not The carrier is intended for use within the recommended. performance ranges specified for the carrying of children in daylight hours, on sidewalks, light traffic Use not recommended is primarily the conveying of public roads, and smooth paths. people together with animals, use of this carrier on rough off-road terrain, use for commercial purposes, Luggage may also be carried in the storage areas overloading, excessive speed and improper repair intended for that purpose, provided the children in of defects or modifications. the carrier are not put at risk. The manufacturer is not liable for damages arising from use that is not recommended – this is at the risk of the user. 1.3 sPecIfIcatIons Cadence Maximum Passenger Weight 22kg / 49lb Maximum Load Carrying Capacity Including Passenger(s) 45kg / 100lb and Cargo Combined Number of child(ren) 1 or 2 ........................................Dimensions without handlebars (Length x Width x Height) 91x 77 x 67cm 35 x 30 x 26in ........................................Dimensions folded (Length x Width x Height) 94 x 77 x 28cm 37 x 30 x 11in ........................................Weight of Thule child carrier without conversion kits 10kg / 22lb ........................................ -
Page 5: Parts Description
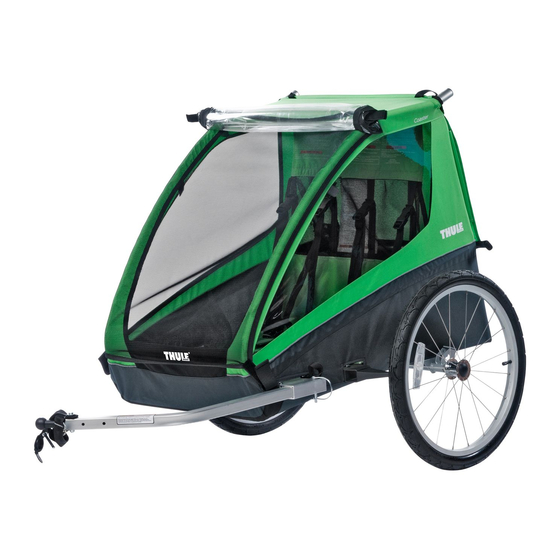
PARTS DESCRIPTION Included Thule Cadence chassis Bicycle trailer kit Two 20 inch wheels 51100986 - A... -
Page 6: Safety
SAFETY The safe use of this Thule child carrier is vital to the enjoyment of it. For that reason it is extremely important that you familiarize yourself with the safety instructions in this manual and follow them whenever you use this Thule child carrier. - Page 7 • Follow the instructions that came with your Thule child carrier for proper child placement. • Child must be old enough to wear a helmet and to sit upright unattended when trailering. Consult a pediatrician if child is less than one year old. • Child's head, including helmet, must not project above the upper frame. • Always consult your bicycle owner's manual and/or specialist retailer to find out the limitations or conditions when towing a Thule child carrier with your bicycle. • Never leave your child unattended in the Thule child carrier. • Only park the Thule child carrier on flat surfaces. • Have your bicycle checked by a qualified bicycle mechanic before attaching it to this trailer kit. • M aximum capacity for this Thule child carrier is 45Kg/100lb including children and cargo. • Cyclist must be an experienced, strong rider. • Never ride a bicycle at night without adequate lighting. Obey all local legal requirements for lighting. • Before each ride, ensure the attached Thule child carrier does not interfere with braking, pedaling, or steering of the bicycle. 51100986 - A...
-
Page 8: Getting Started
GETTING STARTED 4.1 Included comPonents Verify that your carrier was packaged with the following items: • Cadence Chassis • Bicycle trailer kit • Two 20 inch Wheels • The Owner's Manual NOTICE Store your carrier and its components in a safe dry place so that when they are needed, they are in the best possible condition. 51100986 - A... -
Page 9: Unfolding The Carrier
4.2 unfoldInG the carrIer 4.3 foldInG the carrIer With two hands, pull or release the auto-lock discs on both sides of the back frame. With the locks released, give the back frame a sharp push down and inwards. (See image 3) With one hand on the upper frame and the other hand on the carrier axle, push the two halves together. WARNING Care must be taken when folding and unfolding this Thule child carrier to prevent finger entrapment. To avoid injury ensure that your child is kept away when unfolding and folding this product. With one hand on the upper frame and the other hand on the lower frame, pull the two halves apart. (See image 1) With one hand on the upper frame and the other hand on the back frame, pull the back frame rearward until the auto-lock discs engage (See image 2) Verify that the carrier's frame is locked by giving the back frame a push inwards. WARNING Ensure that all the locking devices are engaged before use. 51100986 - A... -
Page 10: Installing The Wheels
4.4 InstallInG the Wheels Press and hold the wheel release button on a wheel. 4.6 InstallInG the Wheel deflectors Insert the wheel axle into an axle socket. (See image 1) Release the wheel release button. Press the wheel fully into the axle socket. Verify that the wheel is securely attached to the carrier by giving it a sharp pull. Repeat for the other wheel. Using a tire pressure gauge check the air pressure in each tire. The minimum recommended tire pressure is 30 psi (2.1 bar) and the maximum is 35 psi (2.5 bar). If air pressure is too low in either one of the tires fill them up using a bicycle tire pump. WARNING Before each journey make sure that both of the wheels are securely locked in the carrier axle. 4.5 removInG the Wheels Press and hold the wheel release button on a wheel. (See image 2) Pull the wheel out of the carrier axle. Repeat for the other wheel. Install wheel deflector on the lower frame in front of the wheels where there's a hole in the fabric (See image 3) Align the hole on the wheel deflector to hole on the frame. Insert bolt from the top through the aligned holes. -
Page 11: Cycling
4.7 cyclInG 4.7.1 InstallIng the safety flag Insert the flagpole into the metal or plastic collar on the safety flag. Insert the flagpole through the sleeve on the left hand side of the body. (see image 1) 4.7.2 InstallIng the ezhItch wIth a QuIck-Release Verify that the quick release skewer is compatible with your bicycle. Completely unscrew and remove the quick-release knob from the quick release skewer. Remove one of the springs from the quick-release skewer. Insert the quick-release skewer through the ezHitch™. (See image 2) Insert the quick-release skewer into the bicycle axle from the left side pointing right. Replace the spring back onto the quick-release skewer, narrow end pointing inwards, towards the bicycle. Close the quick-release lever. Replace and tighten the quick release knob until thumb tight. Open the quick-release lever. (See image 3) Tighten the quick-release knob another full turn. Close the quick-release lever. (See image 4) Verify that the bicycle wheel is securely attached to the bicycle by giving it a sharp pull. WARNING The quick-release knob must be tightened on the quick-release skewer completely with at least two screw threads showing past the end of the quick-release knob to ensure the rear... -
Page 12: Installing The Ezhitch Tm On A Solid Axle
Make sure that the hitch arm is correctly attached and secured to the Thule child carrier. Any kind of incorrect assembly may lead to the Thule child carrier becoming separated from the bicycle. -
Page 13: Attaching The Carrier To Your Bicycle
Pull the rubber tab down over the protruding end of the reason. Failure to install the hitch’s back up security pin to secure it on the ezHitch™. (See image 3) safety strap may lead to the Thule child carrier becoming separated from the bicycle. Loop the back-up safety strap around the bicycle frame and hook the clip onto the D-ring. (See image 4) WARNING The hitch arm load shall be no less than 0.1kg/0.22lb and no greater than 8kg/17.6lb. -
Page 14: Removing The Carrier From Your Bicycle
4.7.6 ReMovIng the caRRIeR fRoM youR BIcycle Unlatch the back-up safety strap from the bicycle frame. (See image 1) Pull the rubber tab off of the end of the security pin. Pull the security pin up out of the ezHitch™. Pull the hitch ball forward out of the ezHitch™. 51100986 - A... -
Page 15: Use & Features
USE & FEATURES usInG the tWo-In one cover To improve the air flow inside the carrier; roll up the plastic window. Use the elastic rings at the top of the cover to keep the window up. (See image 1) To keep the elements out of the carrier; unroll the plastic window. Use the velcro at the bottom of the cover to keep the window closed. To open the cover; undo the velcro on the front corner of each carrier's cover. To close the cover; pull down the front of the cover and attach each corner using the velcro. (See image 2) WARNING The user of this Thule child carrier must be aware of exposure hazards such as wind chill and heat exhaustion, either by prolonged exposure in colder temperatures, or by extended periods in warmer temperatures without adequate ventilation or hydration. WARNING When this Thule child carrier is used as a cycle trailer, the weather cover should be closed to prevent debris from entering the carrier. 51100986 - A... -
Page 16: Adjusting The Shoulder Harness
5.2 adJustInG the shoulder harness Open the two-in-one cover. Loosen all of the belt adjustments. Undo the buckle on the waist belt and the tri-buckle on the shoulder harness. Seat your child(ren). Slide the shoulder belt height adjustment located on the vertical web straps, in the seat back, to the same height as your child(ren)'s shoulders. (See image 1) Lift up the crotch strap and connect the tri-buckle to the shoulder belts. (See image 2) Adjust the system using the crotch strap and shoulder length adjustments until the tri-buckle is positioned over their lower chest. Buckle the waist belt(s) around their hips. The waist belt goes in front of the crotch belt and the buckle should be centered. (See image 3) Snugly tighten all belts. WARNING This seat unit is not suitable for children under one year. NOTICE When seating a single child in the carrier always seat the child on the right side. 51100986 - A... -
Page 17: Using The Sunscreen
5.3 usInG the sunscreen 5.4 storaGe To enclose the back of Thule child carrier, roll the back flap down the back of the carrier. Use the velcro at the bottom of the back flap to keep it closed. To shade inside the child compartment; roll the back flap down the front of the carrier. Use the velcro at the bottom of the sunscreen to keep it closed. (See image 1) To completely open up the front and back of the Thule child carrier, roll the back flap up. Use the elastic rings at the top of the back flap to keep it up. Your carrier is equipped with the following storage compartments: One large cavity in the back. (See image 2) One small mesh pocket inside the carrier at the front. (See image 3) WARNING Do not carry extra children or bags on this Thule child carrier. 51100986 - A... -
Page 18: Additional Information
ADDITIONAL INFORMATION 6.1 accessorIes 6.2 servIce and care There are numerous accessories that are compatible with Regularly inspect your Thule child carrier and accessories your Thule child carrier. for damage and signs of wear. Metal Components • Thule Baby Supporter • Thule Bunting Bag Check for any dents or cracks. Do not use the Thule child • Thule Axle-Mount ezHitch carrier if any metal components are cracked or damaged. • Thule Internal Hub Hitch Adapter Fasteners • Thule 12mm Axle Adapter Regularly examine the Thule child carrier to see if any of • Thule Storage Cover the fasteners are bent, broken, missing or loose. Tighten • Thule Rain Cover any loose fasteners and replace any damaged or missing fasteners. Contact your local dealer or visit our website: Fabric www.thule.com for more information. Examine the fabric regularly for tears, worn spots or any other signs of damage. Any holes in the fabric could allow a child's hand to come into contact with the wheels or road surface. -
Page 19: Storage
Storage Storing this Thule child carrier properly will reduce the amount of wear, especially to the fabric. Type of Use Hard cornering, fast acceleration and braking all contribute to premature wear of various components especially brakes and tires. Weather Various weather conditions affect individual components differently. Direct sunlight prematurely wears the fabric, windows and rubber wheels. Salt in the air or on the road affects the wheel rims and fabric floor. Dirt and mud can get into moving parts and contribute to wear as well. Extreme use of this carrier can lead to premature wear. The way this Thule child carrier is used and cared for will greatly affect how quickly it wears. Thule Child Transport Systems Ltd. info@thule.com www.thule.com 105 - 5760 9th Street SE Calgary, AB T2H 1Z9 Canada 51100986 - A... - Page 20 Thule Cadence Instructions 51100986...
- Page 21 CONTENU IntroductIon InformatIons supplémentaIres Utilisation prévue du guide Accessoires Utilisation prévue du transporteur Service et entretien 1.3 Spécifications Rangement Usure descrIptIon des pIèces Inclus sécurIté Symboles et instructions Instructions de sécurité générales démarrage Pièces comprises Déplier le transporteur Plier le transporteur Installer les roues Retirer les roues 4.6...
-
Page 22: Introduction
INTRODUCTION Nous vous remercions d’avoir choisi la remorque Thule Cadence. Votre nouveau transporteur allie qualité, sécurité et confort. REMARQUE : Thule Child Transport Systems Ltd. conserve tous les droits de ce guide de l’utilisateur. Aucun texte, détail ni aucune illustration du présent guide ne peut être reproduit, distribué ni faire l’objet d’un emploi non autorisé à des fins commerciales, ni être mis à la disposition d’autrui. Il est possible de télécharger le guide d’utilisation de ce transporteur à www.thule.com. Nous avons procédé avec soin à l’élaboration de ce guide. Toutefois, si vous y découvrez des erreurs, nous vous serions reconnaissants de bien vouloir nous en faire part. Thule Child Transport Systems Ltd. info@thule.com www.thule.com 105 - 5760 9th Street SE Calgary (Alberta), T2H 1Z9 Canada 51100986 - A... -
Page 23: Utilisation Prévue Du Guide
Il est possible de transporter des bagages dans les zones Le fabricant n’est pas responsable en cas de dommages de rangement, à condition que cela n’entraîne aucun découlant de toute utilisation non recommandée; cela risque pour les enfants dans le transporteur. étant aux risques de l’utilisateur. Si le transporteur pour enfants est utilisé lorsque la visibilité est réduite, au crépuscule ou durant la nuit, il est fortement recommandé d’utiliser un jeu d’éclairage de sécurité fonctionnel approuvé. spécIfIcatIons Cadence Poids maximal des passagers 22 kg/49 lb Capacité de chargement maximale, y compris les passagers et les bagages 45 kg/100 lb Nombre d’enfants 1 ou 2 ........................................Dimensions sans guidon (longueur x largeur x hauteur) 91 x 77 x 67 cm 35 x 30 x 26 po ........................................Dimensions lorsque plié (longueur x largeur x hauteur) 94 x 77 x 28 cm 37 x 30 x 11 po... -
Page 24: Description Des Pièces
DESCRIPTION DES PIÈCES Inclus Cadre du Thule Cadence Trousse de remorque pour vélo Deux roues de 50,8 cm (20 po) 51100986 - A... -
Page 25: Sécurité
SÉCURITÉ Une utilisation sécuritaire de ce transporteur pour enfants Thule est essentielle pour en profiter de façon optimale. Ainsi, il est extrêmement important de pas- ser en revue les instructions de sécurité de ce guide et de les respecter au moment d’utiliser le transporteur pour enfants Thule. - Page 26 • Consultez toujours le guide de l’utilisateur de votre vélo ou un détaillant spécialisé afin de connaître les limites ou conditions à respecter pour remorquer un transporteur pour enfants Thule à l’aide d’un vélo. • Ne laissez jamais votre enfant sans surveillance dans le transporteur pour enfants Thule. • Garez uniquement le transporteur pour enfants Thule sur des surfaces planes. • Faites vérifier votre vélo par un mécanicien de bicyclettes qualifié avant de le fixer à cette trousse de remorque. • L a capacité maximale de ce transporteur pour enfants Thule est de 45 kg (100 lb), y compris les enfants et les bagages. • Le cycliste doit être fort et expérimenté. • Ne faites jamais de vélo la nuit sans un jeu d’éclairage adéquat. Respectez toutes les exigences prévues par les lois locales liées à l’éclairage. • Avant chaque promenade, assurez-vous que le transporteur pour enfants Thule n’interfère pas avec les freins, les pédales ou la direction du vélo. 51100986 - A...
-
Page 27: Démarrage
DÉMARRAGE pIèces comprIses Assurez-vous que l’emballage du transporteur contient ce qui suit : • Cadre du Cadence • Trousse de remorque pour vélo • Deux roues de 50,8 cm (20 po) • Guide de l’utilisateur AVIS Rangez votre transporteur et ses pièces dans un endroit sec et sécuritaire, afin qu’ils soient dans le meilleur état possible lorsque vous en aurez besoin. -
Page 28: Déplier Le Transporteur
(Consultez l’image 3.) Placez une main sur le cadre supérieur et l’autre main sur l’essieu du transporteur, puis ramenez les deux sections ensemble. AVERTISSEMENT Prenez toutes les mesures nécessaires pour éviter tout coincement de doigt au moment de plier et déplier ce transporteur pour enfants Thule. Pour éviter toute blessure, tenez votre enfant à l’écart au moment de plier ou déplier ce produit. Placez une main sur le cadre supérieur et l’autre main sur le cadre inférieur, puis tirez en éloignant les deux sections. (Consultez l’image 1.) Placez une main sur le cadre supérieur et l’autre main sur le cadre arrière, puis tirez ce dernier vers l’arrière jusqu’à ce que les disques à verrouillage automatique s’enclenchent. (Consultez l’image 2.) -
Page 29: Installer Les Roues
4.4 Installer les roues Maintenez enfoncé le bouton de dégagement sur la roue. 4.6 Installer les déflecteurs de roue Insérez l’essieu de roue dans l’emboîtement de l’essieu. (Consultez l’image 1.) Relâchez le bouton de dégagement de la roue. Poussez entièrement la roue dans l’emboîtement de l’essieu. Assurez-vous que la roue est bien fixée au transporteur en tirant d’un coup sec. Répétez le processus pour l’autre roue. À l’aide d’un manomètre, vérifier la pression d’air de chaque pneu. La pression recommandée minimale pour chaque pneu est de 2,1 bars (30 psi), sans dépasser 2,5 bars (35 psi). Si la pression est insuffisante dans un pneu, gonflez-le à l’aide d’une pompe à vélo. AVERTISSEMENT Avant chaque promenade, assurez-vous que les deux roues sont bien fixées dans l’essieu du transporteur. 4.5 retIrer les roues Maintenez enfoncé le bouton de dégagement sur la roue. (Consultez l’image 2.) Sortez la roue de l’essieu du transporteur. Répétez le processus pour l’autre roue. Installez le déflecteur de roue sur le cadre inférieur, devant les roues, où le tissu est percé. (Consultez l’image 3.) Alignez le trou du déflecteur de roue avec celui du cadre. -
Page 30: Mode Vélo
4.7 mode vélo 4.7.1 Installer le drapeau de sécurIté Insérez le mât dans la collerette en métal ou en plastique du drapeau. Insérez le mât dans la pochette située du côté gauche. (Consultez l’image 1.) 4.7.2 Installer le dIsposItIf ezHItcH à dégageMent rapIde Assurez-vous que la tige à dégagement rapide est compatible avec votre vélo. Dévissez complètement le bouton à dégagement rapide et retirez-le de la tige à dégagement rapide. Retirez l’un des ressorts de la tige à dégagement rapide. Insérez la tige à dégagement rapide dans le dispositif ezHitch™. (Consultez l’image 2.) Insérez la tige à dégagement rapide dans l’essieu du vélo, à partir du côté gauche vers la droite. Replacez le ressort dans la tige à dégagement rapide, l’extrémité étroite pointant vers l’intérieur, vers le vélo. Fermez le levier à dégagement rapide. Replacez et serrez le bouton à dégagement rapide avec les doigts. Ouvrez le levier à dégagement rapide. (Consultez l’image 3.) Serrez le bouton à dégagement rapide en lui faisant faire un tour de plus. -
Page 31: I Nstaller Le Dispositif Ezhitch
En ce qui a trait aux moyeux intégrés, référez- vous aux guides d’instruction fournis avec la trousse d’adaptateur de fixation pour moyeu Assurez-vous que le bras de serrage n’est pas intégré Thule pour avoir des précisions au endommagé ni usé, car cela pourrait compromettre sujet de l’installation. l’utilisation sécuritaire du bras d’attelage. Positionnez le bras d’attelage à l’avant du transporteur pour enfants Thule, la boule d’attache pointant vers l’avant... -
Page 32: Fixer Le Transporteur À Votre Vélo
Si la sangle de Formez une boucle à l’aide de la sangle de sécurité de sécurité de secours n’est pas installée, secours autour du cadre du vélo et accrochez l’attache à le transporteur pour enfants Thule pourrait l’anneau en D. (Consultez l’image 4.) se détacher du vélo. AVERTISSEMENT La charge du bras d’attelage ne doit pas être inférieure à 0,1 kg (0,22 lb) ni supérieure à... -
Page 33: Retirer Le Transporteur De Votre Vélo
4.7.6 retIrer le transporteur de votre vélo Décrochez la sangle de sécurité de secours du cadre du vélo. (Consultez l’image 1.) Retirez la languette de caoutchouc de l’extrémité de la goupille de sécurité. Retirez la goupille de sécurité du dispositif ezHitch™. Retirez la boule d’attache du dispositif ezHitch™ en tirant vers l’avant. 51100986 - A... -
Page 34: Utilisation Et Caractéristiques
Pour protéger l’intérieur du transporteur des intempéries, déroulez la fenêtre de plastique vers le bas. Utilisez le velcro au bas de la protection pour maintenir la fenêtre fermée. Pour ouvrir la protection, détachez le velcro situé sur le coin avant de chaque protection du transporteur. Pour fermer la protection, tirez l’avant de la protection vers le bas et fixez chaque coin à l’aide du velcro. (Consultez l’image 2.) AVERTISSEMENT L’utilisateur de ce transporteur pour enfants Thule doit connaître les dangers liés à l’exposition aux éléments météorologiques, comme le refroidissement causé par le facteur éolien et l’épuisement par la chaleur pouvant survenir si l’on est exposé de façon prolongée à des températures froides ou chaudes, sans une ventilation ou une hydratation adéquate. AVERTISSEMENT Lorsque ce transporteur pour enfants Thule est utilisé en mode remorque, la toile de protection doit être fermée afin d’éviter que tout débris n’y entre. -
Page 35: Régler Le Harnais D'épaule
régler le HarnaIs d’épaule Ouvrez la protection deux-en-une. Desserrez tous les réglages de ceinture. Détachez la boucle de la ceinture ventrale et la boucle de fixation sur le harnais d’épaule. Asseyez l’enfant. Faites coulisser le réglage de hauteur de la ceinture d’épaule situé sur les sangles verticales, dans le dossier du siège, à la hauteur des épaules de l’enfant. (Consultez l’image 1.) Levez la sangle d’entrejambe et raccordez la boucle de fixation aux ceintures d’épaule. (Consultez l’image 2.) Réglez le système à l’aide des réglages de longueur des sangles d’épaule et d’entrejambe, jusqu’à ce que la boucle de fixation soit sur la partie inférieure de la poitrine de l’enfant. Attachez la ceinture ventrale autour de ses hanches. La ceinture ventrale doit être devant la ceinture d’entrejambe et la boucle doit être centrée. (Consultez l’image 3.) Serrez bien toutes les ceintures. AVERTISSEMENT Ce siège ne convient pas aux enfants d'un an. AVIS Si vous asseyez un seul enfant dans le transporteur, celui-ci doit toujours être assis du côté... -
Page 36: Utiliser Le Pare-Soleil
5.4 rangement Pour protéger l’arrière du transporteur du soleil, déroulez le rabat arrière vers l’arrière du transporteur. Utilisez le velcro au bas du rabat arrière pour le maintenir fermé. Pour protéger l’intérieur du compartiment pour enfant, déroulez le rabat arrière vers l’avant du transporteur. Utilisez le velcro au bas du pare-soleil pour le maintenir fermé. (Consultez l’image 1.) Pour ouvrir complètement l’avant et l’arrière du transporteur, roulez le rabat arrière vers le haut. Utilisez les anneaux élastiques au haut du rabat arrière pour le maintenir ouvert. Votre transporteur est doté des compartiments de rangement suivants : Une grande cavité à l’arrière. (Consultez l’image 2.) Une pochette en filet à l’intérieur, à l’avant du transporteur. (Consultez l’image 3.) AVERTISSEMENT Ne transportez pas d’enfants ni de bagages supplémentaires dans ce transporteur pour enfants Thule. 51100986 - A... -
Page 37: Informations Supplémentaires
INFORMATIONS SUPPLÉMENTAIRES accessoIres 6.2 servIce et entretIen Plusieurs accessoires sont compatibles avec votre transporteur Vérifiez régulièrement votre transporteur pour enfants Thule et pour enfants Thule. ses accessoires connexes afin de vous assurer qu’ils ne sont pas endommagés ni usés. • Siège de maintien pour bébé Thule Pièces métalliques • Nid d’ange Thule • Dispositif ezHitch Thule Vérifiez s’il y a présence de fissures ou de bosselures. N’utilisez • Adaptateur de fixation pour moyeu intégré Thule pas le transporteur pour enfants Thule si une pièce métallique • Adaptateur pour essieu Thule de 12 mm est fissurée ou endommagée. • Housse de rangement Thule Attaches •... -
Page 38: Rangement
à leur usure. Des conditions d’utilisation extrêmes peuvent contribuer à une usure prématurée du transporteur. La façon avec laquelle ce transporteur pour enfants Thule est utilisé et entretenu a une grande incidence sur la rapidité de son usure. Thule Child Transport Systems Ltd. info@thule.com www.thule.com 105 - 5760 9th Street SE Calgary (Alberta), T2H 1Z9 Canada 51100986 - A...