Dirt Devil AquaClean Mode D'emploi
Masquer les pouces
Voir aussi pour AquaClean:
- Mode d'emploi (206 pages) ,
- Mode d'emploi (42 pages) ,
- Mode d'emploi (178 pages)
Table des Matières
Publicité
Les langues disponibles
Les langues disponibles
Liens rapides
Publicité
Table des Matières

Manuels Connexes pour Dirt Devil AquaClean


Sommaire des Matières pour Dirt Devil AquaClean
- Page 1 Bedienungsanleitung Dampfmopp Operating Manual Steam mop Mode d'emploi Appareil de nettoyage à vapeur Bedieningshandleiding Stoomborstel Manual de instrucciones Mopa de vapor Istruzioni per l'uso Scopa a vapore Kullanim Klavuzu Buharlı mop Roya-14969 • A5 • 21.03.2011...
- Page 2 Bedienungsanleitung ..............4 - 27 Operating Manual ................. 28 - 51 Mode d'emploi ................52 - 75 Bedieningshandleiding..............76 - 99 Manual de instrucciones .............. 100 - 123 Istruzioni per l'uso ................ 124 - 147 Kullanim Klavuzu ................148 - 171...
-
Page 4: Technische Daten
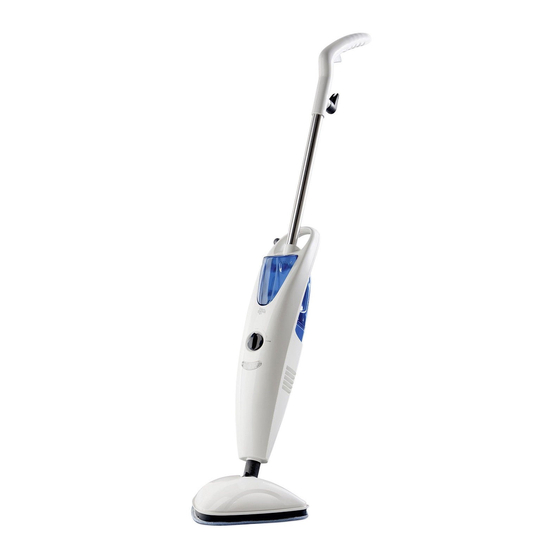
Übersicht Vielen Dank! Übersicht Wir danken Ihnen für den Kauf des Universal-Dampfreinigers AquaClean und das entgegenge- brachte Vertrauen. Lieferumfang (Abb. 1) 1 Handgriff 14*Teppichgleitsohle, optional* 2 Aufwickelvorrichtung oben 15 Mikrofaser-Reinigungstuch (2 Stück, mit Clip zur Befestigung des Stromkabels 90 % Polyester, 10 % Polyamid) -
Page 5: Table Des Matières
Inhaltsverzeichnis 1 Sicherheitshinweise ..............6 zur Bedienungsanleitung ..................... zu bestimmten Personengruppen................zu Heißdampf und heißen Geräteteilen............... zum optional mitgelieferten Desinfektionsmittel ............zur Stromversorgung ....................zur bestimmungsgemäßen Verwendung ..............10 2 Montieren................... 11 Auspacken........................11 Montieren........................12 3 Tanks füllen ................15 Wassertank füllen ...................... -
Page 6: Sicherheitshinweise
1 Sicherheitshinweise 1.1 zur Bedienungsanlei- Die Nichtbeachtung dieser Anleitung kann zu Verlet- Sicherheitshinweise zungen oder Schäden am Gerät führen. Für Schäden, tung die durch Nichtbeachtung dieser Bedienungsanleitung entstehen, übernehmen wir keine Haftung. „ Lesen Sie diese Bedienungsanleitung vollständig durch, bevor Sie mit dem Gerät arbeiten. „... -
Page 7: Zu Heißdampf Und Heißen Geräteteilen
1 Sicherheitshinweise „ 1.3 zu Heißdampf und hei- Richten Sie den Dampfuß niemals auf Personen, Tiere oder Pflanzen. Richten Sie den Dampfuß stets nach unten ßen Geräteteilen auf den zu reinigenden Untergrund. Achten Sie selbst dann darauf, dass zu keiner Zeit Körperteile unter den Dampfuß gelangen können. -
Page 8: Zum Optional Mitgelieferten Desinfektionsmittel
1 Sicherheitshinweise „ 1.4 zum optional mitgelie- Bewahren Sie das Desinfektionsmittel für Kinder unzu- gänglich auf. Bei Verschlucken besteht Vergiftungsgefahr! ferten Desinfektions- „ mittel Das Desinfektionsmittel ist gesundheitsschädlich. Hal- ten Sie es insbesondere von Augen und Schleimhäuten fern. Füllen Sie es vorsichtig in den Desinfektionsmittel- tank. -
Page 9: Zur Stromversorgung
1 Sicherheitshinweise „ 1.5 zur Stromversorgung Das Gerät wird mit elektrischem Strom betrieben, dabei besteht grundsätzlich die Gefahr eines elektrischen Schlags. Achten Sie daher besonders auf Folgendes: - Achten Sie darauf, dass der Dampffuß im Betrieb stets auf dem zu reinigenden Untergrund aufliegt. Le- gen Sie das Gerät niemals auf die Seite oder betrei- ben es gar in der Luft! Anderenfalls könnte Flüssigkeit in den Motor laufen und zum Kurzschluss führen! -
Page 10: Zur Bestimmungsgemäßen Verwendung
1 Sicherheitshinweise „ 1.6 zur bestimmungsge- Das Gerät darf nur im Haushalt eingesetzt werden. Es ist für eine gewerbliche Nutzung nicht geeignet. mäßen Verwendung „ Setzen Sie den Dampfmopp ausschließlich im Haushalt zum Reinigen von normal verschmutzten, ebenen Hartbö- den (z. B. Fliesen, Steinböden, Linoleum und anderen glatten, versiegelten Flächen) ein, die der hohen Tempera- tur, dem Druck und der Feuchtigkeit des Heißdampfes standhalten. -
Page 11: Montieren
2 Montieren 2.1 Auspacken 1. Packen Sie das Gerät und alle Zubehörteile aus. Montieren 2. Überprüfen Sie den Inhalt auf Vollständigkeit und Un- versehrtheit. Informationen zum Lieferumfang ZSeite 4, „Übersicht“. ACHTUNG: Versenden Sie das Gerät grundsätzlich in der Original- verpackung, damit es keinen Schaden nimmt. Heben Sie dazu die Verpackung auf. -
Page 12: Montieren
2 Montieren 2.2 Montieren 1. Stellen Sie den Dampffuß auf eine ebene Fläche. 2. Drehen Sie die vormontierte Kreuzschlitzschraube mit einem Kreuzschlitzschraubendreher aus dem Adapter am Dampffuß (Abb. 2). 3. Schieben Sie die Mittelkonsole kräftig in den Adapter am Dampffuß, bis es nicht mehr weiter geht. HINWEIS: Die Vorbohrung im Adapter muss durch die Bohrung der Mittelkonsole sichtbar sein (Abb. - Page 13 2 Montieren 5. Halten Sie das Gerät am Transportgriff gut fest und zie- hen Sie den Wassertank nach oben aus der Konsole (Abb. 5). 6. Drehen Sie die vormontierte Sicherungsschraube aus der Mittelkonsole (Abb. 6).
- Page 14 2 Montieren 7. Setzen Sie nun den Stiel von oben kräftig in die Aufnah- me der Mittelkonsole (Abb. 7), bis es nicht mehr weiter geht. HINWEIS: Die Bohrung im Stiel muss durch die Bohrung der Mittel- konsole sichtbar sein. Anderenfalls wird es Ihnen nicht gelingen, die Schraube vollständig durchzustecken.
-
Page 15: Tanks Füllen
3 Tanks füllen 3.1 Wassertank füllen Tanks füllen ACHTUNG: Ziehen Sie vorher den Stecker aus der Steckdose. Ande- renfalls kann das Gerät möglicherweise trockenlaufen und beschädigt werden. 1. Bringen Sie das Gerät in Leerlaufstellung, indem Sie den Stiel aufrichten, bis er ungefähr rechtwinklig zum Dampffuß... -
Page 16: Desinfektionsmitteltank Füllen
3 Tanks füllen 3.2 Desinfektionsmitteltank füllen WARNUNG: Gefahr für die Gesundheit! Verwenden Sie nur das mit- gelieferte oder durch Nachbestellung von uns erworbene Desinfektionsmittel. Das Gerät ist für dieses Desinfekti- onsmittel ausgelegt und getestet. Mischen Sie dieses Desinfektionsmittel nicht. Andere Mittel können den Gebrauch des Geräts unsicher machen. -
Page 17: Dampfreinigen
4 Dampfreinigen 4.1 Bevor Sie mit dem Dampfreinigen WARNUNG: Dampfreinigen begin- Verletzungsgefahr! Prüfen Sie Gerät und Stromkabel vor jeder Benutzung. Ein beschädigtes Gerät darf nicht ver- wendet werden. ACHTUNG: Prüfen Sie vor Beginn der Reinigung, ob der jeweilige Untergrund für die Dampfreinigung geeignet ist. Beach- ten Sie immer die Reinigungshinweise der Hersteller. -
Page 18: Stromkabel Rasch Abwickeln
4 Dampfreinigen 4.2 Stromkabel rasch WARNUNG: abwickeln Gefahr eines elektrischen Schlags! Wickeln Sie das Stromkabel stets komplett ab. Anderenfalls besteht die Gefahr, dass Sie die Reichweite überschätzen, das Stromkabel strapazieren und womöglich beschädigen. 1. Drehen Sie die obere Aufwickelvorrichtung um 180° ge- gen den Uhrzeigersinn nach unten (Abb. -
Page 19: Dampfreinigen Mit Zugabe Von Desinfektionsmittel
4 Dampfreinigen 8. Bewegen Sie das Gerät zum Dampfreinigen langsam vor und zurück. HINWEIS: Falls die Dampfbereitschaftsanzeige erlischt, können Sie weiterarbeiten. Nur wenn der produzierte Dampf nicht länger ausreicht, sollten Sie die Dampftaste loslassen (Abb. 18/1) und warten, bis die Dampfbereitschaftsan- zeige (Abb. -
Page 20: Auffrischen Von Teppichen
4 Dampfreinigen 4.5 Auffrischen von Tep- ACHTUNG: pichen Beachten Sie stets die Reinigungshinweise des Teppich- herstellers. Prüfen Sie vor Beginn der Reinigung zusätz- lich, ob der Teppich für die Dampfreinigung geeignet ist. HINWEIS: Ihr Dampfmopp dient nicht zur Tiefenreinigung von Tep- pichen oder zur Beseitigung hartnäckiger Verschmut- zungen. -
Page 21: Nach Dem Gebrauch
5 Nach dem Gebrauch 5.1 Stromkabel aufwickeln Nach dem Gebrauch WARNUNG: Stolpergefahr! Wickeln Sie unmittelbar nach Beendigung des Saugvorgangs das Stromkabel auf. Anderenfalls stellt das Kabel eine Stolperquelle dar. 1. Falls noch nicht geschehen, drehen Sie die obere Auf- wickelvorrichtung um 180° im Uhrzeigersinn bis zum Anschlag. -
Page 22: Mikrofaser-Reinigungstuch Pflegen
5 Nach dem Gebrauch 5.2 Mikrofaser-Reini- WARNUNG: gungstuch pflegen Verbrühungsgefahr! Das Gerät läuft nach. Selbst nach- dem Sie den Stecker aus der Steckdose gezogen haben, steht noch Heißdampf zur Verfügung. ACHTUNG: Nehmen Sie das Mikrofaser-Reinigungstuch, unmittelbar nachdem es abkühlt ist, vom Dampffuß. Anderenfalls können sich Keime und Schimmel bilden. -
Page 23: Wartung
6 Wartung 6.1 Wasserfilterkartusche Im Leitungswasser Ihres Haushalts befinden sich stets ge- Wartung ringe Mengen an Kalk. Aus diesem Grund haben wir eine kontrollieren/tauschen Wasserfilterkartusche verbaut, in der sich die Kalkpartikel abscheiden sollen, bevor das Wasser das Gerät durchläuft. „ Kontrollieren Sie die Wasserfilterkartusche (Abb. -
Page 24: Gehäuse Reinigen
6 Wartung 6.2 Gehäuse reinigen WARNUNG: Verletzungsgefahr! Bevor Sie das Gerät reinigen, schal- ten Sie das Gerät aus und ziehen Sie den Stecker, ZKapitel 4.6, „Gerät in Leerlaufstellung bringen“. ACHTUNG: Verwenden Sie keine Reinigungsmittel, Scheuermittel oder Alkohol, da diese das Gehäuse beschädigen kön- nen. -
Page 25: Problembehebung
7 Problembehebung 7.1 Bevor Sie das Gerät einsenden Problembehebung Bevor Sie Ihren zuständigen Royal-Vertragshändler, Royal-Servicepartner oder Ihren Fachmarkt kontaktieren, prüfen Sie anhand der folgenden Tabelle, ob Sie das Problem selbst beseitigen können. WARNUNG: Verletzungsgefahr! Verwenden Sie niemals ein defektes Gerät! Bevor Sie auf Problemsuche gehen, schalten Sie das Gerät aus, bringen Sie es in Leerlaufstellung und ziehen Sie den Stecker aus der Steckdose, ZKapitel 4.6, „Gerät in Leerlaufstellung bringen“. -
Page 26: Zubehör- Und Ersatzteilliste
0318004 Teppichgleitsohle 0319002 3er-Set Desinfektionsmittel 7.3 Bezugsquellen Zubehörteile sowie Ersatzteile können nachbestellt wer- den. Diese erhalten Sie: „ im Dirt Devil Onlineshop unter www.dirtdevil.de „ per E-Mail unter Ersatzteilshop@dirtdevil.de „ oder bei den Firmen: Service-Versand Service Center Ina Riedmüller Feuerbach KG Frankenstraße 34... -
Page 27: Garantie
8 Garantie 8.1 Garantiebedingungen Garantie Wir übernehmen für das von uns vertriebene Gerät eine Garantie von 24 Monaten ab Kaufda- tum. Innerhalb dieser Garantiezeit beseitigen wir nach unserer Wahl durch Reparatur oder Austausch des Gerätes oder des Zubehörs (Schäden an Zubehörteilen führen nicht automatisch zum Um- tausch des kompletten Gerätes) unentgeltlich alle Mängel, die auf Material- oder Herstellungsfehlern beruhen. -
Page 28: Scope Of Delivery (Fig. 1)
Overview Thank you! Overview Thank you for buying the universal steam cleaner AquaClean and for your confidence in us. Scope of delivery (Fig. 1) 1 Handle 14*Carpet glider base, optional* 2 Upper cable storage device 15 Micro-fibre cleaning cloth (2 units,... - Page 29 List of contents 1 Safety instructions..............30 Concerning the Operating Manual................30 Re: Certain groups of person ..................30 Concerning hot steam and hot parts of the appliance ..........31 Concerning the optionally supplied disinfectant ............32 Concerning the power supply ..................33 Re: Appropriate Use ....................
-
Page 30: Safety Instructions
1 Safety instructions 1.1 Concerning the Oper- Violation of these instructions may cause injury or Safety instructions damage the appliance. We take no responsibility for ating Manual damage due to violation of these operating instruc- tions. „ Read this operating manual completely before working with the appliance. -
Page 31: Concerning Hot Steam And Hot Parts Of The Appliance
1 Safety instructions „ 1.3 Concerning hot steam Never direct the steam base at persons, animals, or plants. Always point the steam base downwards towards and hot parts of the the surface to be cleaned. Even then, take care that parts appliance of your body never get under the steam base. -
Page 32: Concerning The Optionally Supplied Disinfectant
1 Safety instructions „ 1.4 Concerning the option- Keep the disinfectant inaccessible to children. If they swallow any, there is a danger of poisoning! ally supplied disinfect- „ The disinfectant is harmful to health. Keep it away from the eyes and mucous membranes in particular. Carefully pour it into the disinfectant tank. -
Page 33: Concerning The Power Supply
1 Safety instructions „ 1.5 Concerning the power The appliance is operated with electrical power which means there is always a risk of electric shock. So please supply observe the following in particular: - Make sure that the steam base is always on the sur- face to be cleaned during operation. -
Page 34: Re: Appropriate Use
1 Safety instructions „ 1.6 Re: Appropriate Use This appliance may only be used in households. It is not suitable for industrial or commercial use. „ Only use the steam mop in households for cleaning nor- mally dirty, flat hard floors, e. g. tiles, stone floors, linoleum, and other smooth, coated surfaces, that can withstand the high temperature, pressure and moisture of hot steam. -
Page 35: Assembly
2 Assembly 2.1 Unpacking 1. Unpack the appliance and all its accessories. Assembly 2. Check the contents for completeness and possible damage. Information regarding scope of delivery ZPage 28, “Overview”. ATTENTION: Always transport/send the appliance in its original pack- aging to avoid transport damage. Keep the packaging for such an event. -
Page 36: Assembly
2 Assembly 2.2 Assembly 1. Place the steam base on a flat surface. 2. Screw the pre-installed cross-head screw out of the adapter on the steam base using a cross-head screw- driver (Fig. 2). 3. Push the central console powerfully into the adapter on the steam base as far as it will go. - Page 37 2 Assembly 5. Hold the appliance firmly by the carrying handle and pull the water tank up and out of the console (Fig. 5). 6. Screw the pre-installed safety screw out of the central console (Fig. 6).
- Page 38 2 Assembly 7. Now powerfully insert the handle into the central con- sole from the top (Fig. 7) until it will go no further. NOTE: The hole in the handle must be visible through the hole of the central console. Otherwise, it will not be possible to get the screw all the way through.
-
Page 39: Filling The Tanks
3 Filling the tanks 3.1 Filling the water tank Filling the tanks ATTENTION: First, pull the plug out of the plug socket. Otherwise, the appliance might run without water and get damaged. 1. Put the appliance into the neutral position by straighten- ing the handle until it is at about 90°... -
Page 40: Filling The Disinfectant Tank
3 Filling the tanks 3.2 Filling the disinfectant tank WARNING: Health hazard! Only use the disinfectant supplied or ordered from us. The device has been designed for and tested with this disinfectant. Do not mix this disinfectant. Other products may make using the appliance unsafe. WARNING: Health hazard! Always make sure you store the disinfect- ant in a place that is inaccessible to children, particularly... -
Page 41: Steam Cleaning
4 Steam cleaning 4.1 Before starting steam Steam cleaning WARNING: cleaning Danger of injury! Check appliance and power cord before each use. A damaged appliance must never be used. ATTENTION: Before starting cleaning, check whether the surface to be cleaned is suitable for steam cleaning. Always follow the cleaning recommendations of the material manufactur- ers. -
Page 42: Uncoiling The Power Cord Quickly
4 Steam cleaning 4.2 Uncoiling the power WARNING: cord quickly Danger of electric shock! Always completely uncoil the power cord. Otherwise there is a danger of underestimat- ing the reach of the appliance, over-exerting the power cord, and possibly damaging it. 1. -
Page 43: Steam Cleaning With The Addition Of Disinfectant
4 Steam cleaning 8. To steam-clean, move the appliance back and forth slowly. NOTE: If the steam ready indicator goes out, you can continue working. Only if the steam produced is no longer suffi- cient, should you release the steam button (Fig. 18/1) and wait until the steam ready indicator (Fig. -
Page 44: Refreshing Carpets
4 Steam cleaning 4.5 Refreshing carpets ATTENTION: Always comply with the cleaning instructions of the man- ufacturer of the carpet. Before starting cleaning, check whether the particular floor surface is suitable for steam cleaning. NOTE: Your steam mop is not suitable for deep cleaning carpets or for removing stubborn stains. -
Page 45: After Use
5 After use 5.1 Winding up the power After use WARNING: cord Danger of tripping! Wind up the power cord as soon as you have finished cleaning. Otherwise the power cord is a tripping hazard. 1. If this has not yet been done, turn the upper cable stor- age device clockwise through 180°... -
Page 46: Taking Care Of The Micro-Fibre Cleaning Cloth
5 After use 5.2 Taking care of the WARNING: micro-fibre cleaning Danger of scalding! The appliance continues to run. cloth Even after you have pulled the mains plug from the socket, hot steam will continue to be available. ATTENTION: As soon as it has cooled off, remove the micro-fibre cleaning cloth from the steam base. -
Page 47: Maintenance
6 Maintenance 6.1 Checking/replacing the There is always a small quantity of lime in your home’s tap Maintenance water. For this reason we have installed a water filter car- water filter cartridge tridge which is designed to remove the lime particles before the water runs through the appliance. -
Page 48: Cleaning The Housing
6 Maintenance 6.2 Cleaning the housing WARNING: Danger of injury! Before you clean the appliance, switch off the appliance and unplug the mains plug, ZChapter 4.6, “Putting the device into the neutral position”. ATTENTION: Do not use cleaning or scouring agents or alcohol, as these might damage the appliance's housing. -
Page 49: Troubleshooting
7 Troubleshooting 7.1 Before you send in the appliance Troubleshooting Before contacting your authorised Royal dealer, Royal service partner or appliance market, first follow the procedure in the following table to check if you can solve the problem yourself. WARNING: Danger of injury! Never use a defective appliance! Always switch off the appliance, put it into the neutral position, and disconnect it from the mains before starting troubleshooting ZChapter 4.6, “Putting the device into the neutral position”. -
Page 50: Accessories And Spare Parts
Set of 3 bottles of disinfectant 7.3 Supply sources Accessory parts and spare parts can be reordered. You can get these: „ at the Dirt Devil online shop at www.dirtdevil.de „ by e-mailing Ersatzteilshop@dirtdevil.de „ or from the companies: ZPage 172, “International Serv- ice”... -
Page 51: Warranty
8 Warranty 8.1 Warranty conditions Warranty We offer a warranty of 24 months from the date of purchase for the appliances we sell. Within this warranty period, we will correct all defects free of charge that are due to material or man- ufacturing faults, either by repair work or replacing the appliance or accessories, at our discretion (damage to accessory parts does not automatically lead to the entire appliance being replaced). -
Page 52: Vue D'ensemble
Vue d’ensemble Merci beaucoup ! Vue d’ensemble Nous vous remercions pour l'achat de cet appareil de nettoyage universel à vapeur AquaClean et pour votre confiance. Matériel fourni à la livraison (Ill. 1) 1 Poignée 14* Semelle glissante pour tapis, en option* 2 Dispositif supérieur d'enroulement du cordon... - Page 53 Sommaire 1 Consignes de sécurité.............. 54 concernant ce mode d'emploi..................54 concernant certains groupes de personnes ..............54 concernant la vapeur chaude et les pièces de l'appareil soumises à échauffement ... 55 produit de désinfection fourni en option à la livraison..........55 concernant l’alimentation électrique ................
-
Page 54: Consignes De Sécurité
1 Consignes de sécurité 1.1 concernant ce mode Le non respect de ce mode d'emploi peut entraîner des Consignes de sécurité blessures ou des dommages à l'appareil. Nous décli- d'emploi nons toute responsabilité pour des dommages résul- tant du non respect de ce mode d'emploi. „... -
Page 55: Concernant La Vapeur Chaude Et Les Pièces De L'appareil Soumises À Échauffement
1 Consignes de sécurité „ 1.3 concernant la vapeur Ne dirigez jamais la semelle diffusant la vapeur vers des personnes, des animaux ou des plantes. Dirigez la se- chaude et les pièces melle diffusant la vapeur toujours vers le bas et sur la sur- de l'appareil soumises face à... -
Page 56: Concernant L'alimentation Électrique
1 Consignes de sécurité Comportement en cas d'urgence, c'est-à-dire après une manipulation incorrecte du produit de désinfec- tion : „ Au cas où le produit est entré en contact avec les yeux : - Au cas où vous portez des verres de contact, retirez- les immédiatement. -
Page 57: Concernant Une Utilisation De L'appareil Conforme Aux Instructions
1 Consignes de sécurité - Déroulez toujours complètement le cordon d'alimen- tation avant d'utiliser l'appareil. Assurez-vous que le cordon d'alimentation n'est pas plié, coincé, écrasé ou encore en contact direct avec une source de cha- leur. - Ne plongez jamais l'appareil dans de l'eau ou tout autre liquide, conservez-le à... - Page 58 1 Consignes de sécurité Toute autre utilisation est considérée comme non conforme et est interdite. Cette interdiction concerne en particulier : „ Le nettoyage de : - personnes, animaux ou plantes ainsi que les vête- ments qui sont encore portés sur le corps. - surfaces salies par des substances dangereuses pour la santé.
-
Page 59: Montage
2 Montage 2.1 Déballage 1. Déballez l'appareil et tous les accessoires. Montage 2. Vérifiez si le contenu est bien complet et ne présente aucuns dommages. Informations relatives aux pièces fournies à la livraison ZPage 52, "Vue d’ensemble". ATTENTION: Expédiez l'appareil uniquement dans son emballage d'origine afin d'éviter tout dommage. - Page 60 2 Montage 5. Maintenez l'appareil bien fermement par sa poignée et retirez depuis le haut le réservoir d'eau hors de sa console (Ill. 5). 6. Retirez de la console centrale la vis de sécurité prémon- tée (Ill. 6).
- Page 61 2 Montage 7. Placez maintenant énergiquement depuis le haut le manche dans son logement situé sur la console centra- le (Ill. 7), et ce jusqu'à ce qu'il soit en butée. REMARQUE: L'orifice sur le manche doit être visible à travers l'orifice de la console centrale.
-
Page 62: Remplissage Des Réservoirs
3 Remplissage des réservoirs 3.1 Remplissage du réservoir d'eau Remplissage des réservoirs ATTENTION: Débranchez d'abord la fiche de la prise de courant. Vous risquez sinon de faire fonctionner l'appareil à sec et de l'endommager. 1. Placez maintenant l'appareil en position de repos en déplaçant le manche jusqu'à... -
Page 63: Remplissage Du Réservoir Pour Produits De Désinfection
3 Remplissage des réservoirs 3.2 Remplissage du réservoir pour produits de désinfection AVERTISSEMENT: Danger pour la santé ! Utilisez seulement le produit de désinfection fourni à la livraison ou commandé ultérieu- rement chez nous. L'appareil a été conçu et testé pour fonctionner avec ce produit de désinfection. -
Page 64: Nettoyage À La Vapeur
4 Nettoyage à la vapeur 5. Replacez maintenant le bouchon de fermeture du ré- servoir en le vissant à nouveau complètement sur le ré- servoir du produit de désinfection (Ill. 14). 6. Remettez en place le réservoir pour produit de désin- fection dans sa console en appuyant énergiquement sur celui-ci (Ill. -
Page 65: Dérouler Rapidement Le Cordon D'alimentation
4 Nettoyage à la vapeur 4.2 Dérouler rapidement le AVERTISSEMENT: cordon d'alimentation Risque d'électrocution ! Déroulez toujours complètement le cordon d'alimentation. Il y a sinon un risque de suresti- mer le rayon d'action, avec une sollicitation excessive du cordon d'alimentation qui pourrait éventuellement être endommagé. -
Page 66: Nettoyage À La Vapeur Sans Emploi D'un Produit De Désinfection
4 Nettoyage à la vapeur 4.3 Nettoyage à la vapeur AVERTISSEMENT: sans emploi d'un pro- Danger d'échaudures ! Dirigez le jet de vapeur toujours duit de désinfection vers le bas et sur la surface à nettoyer. Ne posez jamais l'appareil latéralement alors qu'il est en service. Une utili- sation en position horizontale ou même au-dessus de la tête est interdite. -
Page 67: Nettoyage À La Vapeur Avec Emploi D'un Produit De Désinfection
4 Nettoyage à la vapeur 8. Déplacez lentement l'appareil de nettoyage à vapeur vers l'avant et vers l'arrière pour procéder au nettoyage à la vapeur. REMARQUE: Au cas où l'indication de disponibilité de vapeur s'éteint, vous pouvez continuer à travailler. C'est seulement lors- que la vapeur produite n'est plus suffisante qu'il faut relâ- cher la touche de vapeur (Ill. -
Page 68: Rafraîchissement De Tapis
4 Nettoyage à la vapeur 4.5 Rafraîchissement de ATTENTION: tapis Observez toujours les indications de nettoyage du fabri- cant du tapis. Vérifiez encore avant le début du nettoyage si le tapis à nettoyer supporte un nettoyage à la vapeur. REMARQUE: Votre appareil de nettoyage à... -
Page 69: Après Utilisation
5 Après utilisation 5.1 Enroulement du cor- Après utilisation AVERTISSEMENT: don d'alimentation Risque de trébucher ! Enroulez le cordon d'alimentation dès que vous avez terminé d'aspirer. Des personnes ris- quent sinon de trébucher sur le câble. 1. Au cas où vous ne l'auriez pas déjà fait, tournez le dis- positif supérieur d'enroulement du câble de 180°... -
Page 70: Entretien Du Chiffon De Nettoyage En Microfibres
5 Après utilisation 5.2 Entretien du chiffon de AVERTISSEMENT: nettoyage en microfi- Danger d'échaudures ! L'appareil continue à être opéra- bres tionnel quand il vient d'être déclenché. Même si vous avez retiré la fiche de la prise, il y a encore de la vapeur chaude à... -
Page 71: Entretien
6 Entretien 6.1 Contrôle / échange de L'eau distribuée à votre domicile contient toujours de fai- Entretien bles quantités de calcaire. C'est pour cette raison que nous la cartouche de filtra- avons intégré une cartouche de filtration d'eau dans laquel- tion d'eau le les particules de calcaire se déposent avant que l'eau ne traverse l'appareil. -
Page 72: Nettoyage Du Boîtier De L'appareil
6 Entretien 6.2 Nettoyage du boîtier de AVERTISSEMENT: l'appareil Risque de blessures ! Avant de nettoyer l'appareil, étei- gnez-le et débranchez-le, ZChapitre 4.6, "Placer l'appa- reil en position de repos". ATTENTION: N'utilisez en aucun cas des produits de nettoyage, des détergents ou de l'alcool, car cela peut endommager le boîtier. -
Page 73: Élimination Des Anomalies
7 Élimination des anomalies 7.1 Avant l'envoi de l'appareil Élimination des anomalies Avant de prendre contact avec un commerçant agréé Royal‚ le service après-vente Royal ou un com- merce spécialisé, veuillez vérifier, en vous aidant du tableau ci-dessous, si vous ne pouvez pas re- médier vous-même à... -
Page 74: Liste Des Accessoires Et Des Pièces De Rechange
7.3 Fournisseurs Vous pouvez commander ultérieurement les pièces de re- change et les accessoires. Vous pouvez les acheter auprès : „ du magasin en ligne de Dirt Devil sous www.dirtdevil.de „ par E-mail adressé à Ersatzteilshop@dirtdevil.de „ ou auprès des entreprises suivantes : ZPage 172, "In- ternational Service"... -
Page 75: Garantie
8 Garantie 8.1 Conditions de garantie Garantie Nous assurons une garantie de 24 mois sur votre appareil à compter de la date d'achat. Pendant la garantie, nous nous réservons le droit de réparer ou de remplacer l'appareil ou ses ac- cessoires gratuitement (des accessoires endommagés n'impliquent pas forcément le remplacement de l'appareil) afin de remédier à... - Page 76 (deutscher Mobilfunkhöchstpreis 0,42 €/Minute) Bluepoint-Service SAGL Le Cygne electronic service spol. s r.o. Royal Appliance Espana, SL Via Cantonale 14 Jablonecká 722/8 Royal, Dirt Devil, Stellar 6917 Barbengo 190 00 Praha 9 C/Cronos, Nº 20 , Portal 2 ,3º 13 SWITZERLAND ýESKÁ REPUBLIKA 28037 Madrid Tel.
- Page 77 NUR GÜLTIG MIT RECHNUNGSKOPIE! VALID ONLY INCLUDING A COPY OF THE PURCHASE SLIP! VALABLE UNIQUEMENT AVEC UNE COPIE DE LA FACTURE! ALLEEN GELDIG MET KOPIE VAN DE REKENING! ¡VÁLIDO SÓLO CON COPIA DE FACTURA! VALIDO SOLO SE CORREDATO DA UNA COPIA DELLA FATTURA! SADECE FATURA SURETø...
- Page 78 Royal Appliance International GmbH Jagenbergstraße 19 41468 Neuss Germany +49 (0) 2131 - 60 90 0 +49 (0) 2131 - 60 90 60 95 info@dirtdevil.de www.dirtdevil.de...