Chapitres
Table des Matières

Manuels Connexes pour Videotec Medusa


Sommaire des Matières pour Videotec Medusa
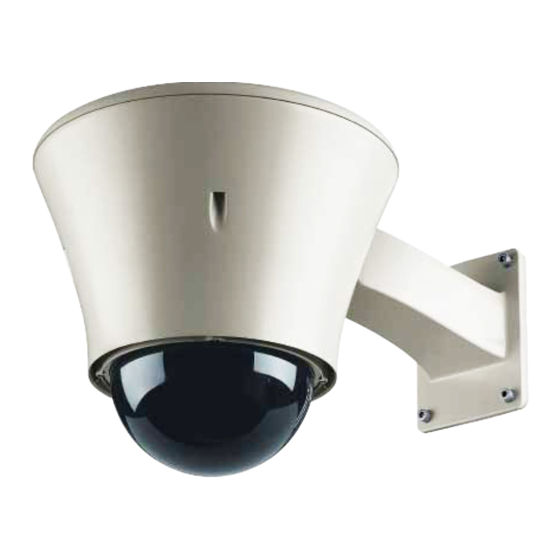
- Page 1 MEDUSA Universal dome housing for discreet surveillance English - Instructions manual Italiano - Manuale di istruzioni Francais - Manuel d'instructions Deutsch - Bedienungslanleitung...
- Page 3 MEDUSA Universal dome housing for discreet surveillance English - Instructions manual...
-
Page 4: Table Des Matières
Contents ENGLISH 1 About this manual ......................3 1.1 Typographical conventions ..........................3 2 Notes on copyright and information on trademarks..........3 3 Safety rules ........................3 4 Identification ........................ 4 4.1 Product description and type designation ....................4 4.2 Product markings ..............................4 5 Preparing the product for use .................. -
Page 5: About This Manual
1 About this manual 3 Safety rules Before installing and using this unit, The manufacturer declines all responsibility please read this manual carefully. Be sure for any damage caused by an improper use to keep it handy for later reference. of the appliances mentioned in this manual. -
Page 6: Identification
Housing packing A wide range of accessories is available, including: • MEDUSA housing universal adapter plate for the various speed • Housing equipment: dome models, PTC fan heater (single or triple) and thermostat, camera power supply, sun •... -
Page 7: Installing And Assembling
6.2 Installation 6 Installing and assembling 6.2.1 Installing the housing Only specialised personnel should be allowed to install and assemble the device. This operation must be carried out with the power supply disconnected. 6.1 Assembly Attach the bracket firmly at the chosen spot. 6.1.1 Assembling the plate Remove the housing cover by undoing with the cable glands... -
Page 8: Universal Adapter
Remove the universal adapter for the Crimp the various connectors onto the cables. speed dome from the aluminium ring, by undoing the three screws. Attach the adapter ring inside the housing using the 4 M4 screws supplied. Take great care not to pinch or damage the cables there. - Page 9 UNIVERSAL ADAPTER Fixed plate Moving plate Spacer plate (Fig. 11) (Fig. 9) (Fig. 10) Speed Dome Letter Number Axis 2130* PM10 213* PM11 231/232* TK-C676** VN-V685U/VN-V686U PM12 TK-C685E/TK-C686E PM13 Panasonic BB-HCM381 WV-CS9500 WV-NS202E* Sanyo VCC 9300P Sony SNC RZ50P SNC RZ25P Toshiba IK-WB21A* Tab.
- Page 10 Bringing the adapter close to the ring, connect the crimped cables to the speed dome. Insert the adapter in its seating, turning it to couple it with the screws M3x12mm. Tighten the screws. Fig. 14 Fig. 12 Fasten on fixed plate. Fig.
-
Page 11: Wiring
6.3.1 Wiring Complete the wiring as necessary, depending on the type of power supply to the particular speed dome: IN 230Vac OUT 24Vac Fig. 15 Toroidal camera power supply, IN 230Vac - OUT 24Vac. Blue Black IN 100-240Vac OUT 12Vdc OUT 230Vac OUT 24Vdc* Fig. - Page 12 OUT 24Vac IN 24Vac Fig. 17 Camera power supply, IN 24Vac - OUT 24Vac. IN 24Vac Brown OUT 12Vdc Fig. 18 Camera power supply, IN 24Vac - OUT 12Vdc.
-
Page 13: Earthing
6.3.2 Earthing 6.3.4 Fan version If the input voltage is 230Vac, earth the housing The fan version of the housing has two side applying the two supplied cables to the cover and filters on the aluminium body, protected by the body using M3*6T screws and the toothed washers. -
Page 14: Maintaining And Cleaning
9.3 Electrical 7 Maintaining and cleaning Fan assisted heater, Ton 15°C +/-3°C (59°F +/-37°F) 7.1 Window and plastic Toff 22°C +/-3°C (71°F +/-37°F) cover cleaning - IN 24Vac, consumption 24W max - IN 100/240Vac, consumption 44W max Wash with neutral soap and water. Camera power supply included with internal adapter Avoid ethyl alcohol, solvents, - IN 100/240Vac, 50/60Hz, OUT 12Vdc, 3A max... -
Page 15: Technical Drawings
10 Technical drawings Ø 314 Ø 185 Ø 230 A - A Ø 184 B - B Ø 184 C - C Fig. 23 MEDUSA... - Page 16 VIDEOTEC S.p.A. www.videotec.com Printed in Italy MNVCDBH18B_1511_EN...
- Page 17 MEDUSA Custodia a sfera universale per sorveglianza discreta Italiano - Manuale di istruzioni...
- Page 18 Sommario ITALIANO 1 Informazioni sul presente manuale ................3 1.1 Convenzioni tipografiche ............................ 3 2 Note sul copyright e informazioni sui marchi commerciali ........3 3 Norme di sicurezza ....................... 3 4 Identificazione ......................4 4.1 Descrizione e designazione del prodotto ..................... 4 4.2 Marcatura del prodotto ............................
-
Page 19: Informazioni Sul Presente Manuale
1 Informazioni sul 3 Norme di sicurezza presente manuale Il produttore declina ogni responsabilità per eventuali danni derivanti da un Prima di installare e utilizzare questa unità, leggere uso improprio delle apparecchiature attentamente questo manuale. Conservare questo menzionate in questo manuale. Si manuale a portata di mano come riferimento futuro. -
Page 20: Identificazione
Imballaggio custodia può essere da muro, soffitto o da parapetto. • Custodia MEDUSA É disponibile una gamma di accessori quali: piastra • Dotazione per custodia: di adattamento universale adatta ai vari modelli di speed dome, riscaldamento (singolo o triplo) •... -
Page 21: Installazione E Assemblaggio
6.2 Installazione 6 Installazione e assemblaggio 6.2.1 Installazione della custodia Operazione da effettuarsi in L’installazione e l’assemblaggio vanno assenza di tensione. eseguiti solo da personale specializzato Fissare saldamente la staffa utilizzata 6.1 Assemblaggio nel luogo di destinazione. Smontare il coperchio della custodia 6.1.1 Montaggio della svitando le 4 viti nella parte superiore e piastrina con i pressacavi... -
Page 22: Adattamento Universale
Smontare l’adattamento universale per la speed Crimpare sui cavi i vari connettori da utilizzare. dome dall’anello in alluminio svitando le tre viti. Fissare l’anello adattatore all’interno della custodia tramite le 4 viti M4 fornite in dotazione. Attenzione a non pizzicare o rovinare i cablaggi presenti. - Page 23 ADATTAMENTO UNIVERSALE Piastra fissa Piastra mobile Piastra distanziale (Fig. 11) (Fig. 9) (Fig. 10) Speed Dome Lettera Numero Axis 2130* PM10 213* PM11 231/232* TK-C676** VN-V685U/VN-V686U PM12 TK-C685E/TK-C686E PM13 Panasonic BB-HCM381 WV-CS9500 WV-NS202E* Sanyo VCC 9300P Sony SNC RZ50P SNC RZ25P Toshiba IK-WB21A* Tab.
- Page 24 Avvicinando l’adattamento all’anello, connettere i cavi precedentemente crimpati alla speed dome. Inserire l'adattamento nella sede agganciandolo con una rotazione alle viti M3x12mm. Serrare le viti. Fig. 14 Fig. 12 Fissaggio su piastra fissa. Fig. 13 Fissaggio su piastra mobile. La freccia nella parte bassa dell’adattamento deve indicare la parte esterna della custodia.
-
Page 25: Cablaggi
6.3.1 Cablaggi Eseguire i cablaggi necessari, stabiliti in base al tipo di alimentazione della speed dome installata: IN 230Vac OUT 24Vac Fig. 15 Alimentatore toroidale per telecamera, IN 230Vac - OUT 24Vac. Nero IN 100-240Vac OUT 12Vdc OUT 230Vac OUT 24Vdc* Fig. - Page 26 Rosso OUT 24Vac IN 24Vac Fig. 17 Alimentatore per telecamera, IN 24Vac - OUT 24Vac. Rosso IN 24Vac Marrone OUT 12Vdc Fig. 18 Alimentatore per telecamera, IN 24Vac - OUT 12Vdc.
-
Page 27: Cablaggio Di Terra
6.3.2 Cablaggio di terra 6.3.4 Versione ventilata In caso di tensione in ingresso 230Vac eseguire La versione ventilata della custodia presenta due la messa a terra della custodia applicando i due filtri laterali sul corpo in alluminio, protetti dal cablaggi in dotazione su coperchio e corpo tramite tettuccio, mentre nell’anello adattatore sono installati le viti M3*6T e le rosette dentellate. -
Page 28: Manutenzione E Pulizia
9.3 Elettrico 7 Manutenzione e pulizia Riscaldamento con ventola a ciclo continuo, Ton 15°C 7.1 Pulizia del vetro e +/-3°C Toff 22°C +/-3°C delle parti in plastica - IN 24Vac, consumo 24W max - IN 100/240Vac, consumo 44W max Si consigliano saponi neutri diluiti con acqua. Alimentatore per telecamera incluso con adattatore interno Sono da evitare alcool etilico, solventi,... -
Page 29: Disegni Tecnici
10 Disegni tecnici Ø 314 Ø 185 Ø 230 A - A Ø 184 B - B Ø 184 C - C Fig. 23 MEDUSA... - Page 30 VIDEOTEC S.p.A. www.videotec.com Printed in Italy MNVCDBH18B_1511_IT...
- Page 31 MEDUSA Caisson dôme universel pour surveillance discrète Français - Manuel d'instructions...
- Page 32 Sommaire FRANÇAIS 1 À propos de ce mode d’emploi ..................3 1.1 Conventions typographiques ..........................3 2 Notes sur le copyright et informations sur les marques de commerce ....3 3 Normes de securité ....................... 3 4 Identification ........................ 4 4.1 Description et désignation du produit ......................
-
Page 33: Propos De Ce Mode D'emploi
1 À propos de ce 3 Normes de securité mode d’emploi Le producteur décline toute responsabilité pour les dommages éventuels dus à une Avant d’installer et d’utiliser cet appareil, utilisation non appropriée des appareils veuillez lire attentivement ce mode d’emploi. mentionnés dans ce manuel. -
Page 34: Identification
Le caisson est installé avec support Emballage caisson avec passage intérieur des câbles; le support • Caisson MEDUSA peut être pour fixation murale, plafond ou sol. • Dotation pour caisson: La gamme d’accessoires suivante est disponible: plaque d’adaptation universelle adaptée aux... -
Page 35: Installation Et Assemblage
6.2 Installation 6 Installation et assemblage 6.2.1 Installation du caisson Opération à effectuer après avoir L’installation et l’assemblage sectionné la tension d’alimentation. doivent exclusivement être effectués par un personnel spécialisé. Fixer solidement l’étrier utilisé à l’endroit choisi pour l’installation. 6.1 Assemblage Démonter le couvercle du caisson en desserrant les 4 vis de la partie supérieure et 6.1.1 Montage de la platine... -
Page 36: Adaptateur Universel
Démonter l’adaptateur universel pour le speed dome Sertir les différents connecteurs devant de la bague en aluminium en desserrant les trois vis. être utilisés sur les câbles. Fixer la bague d’adaptation à l’intérieur du caisson au moyen des 4 vis M4 fournies. Ne pas pincer ni endommager les câblages. - Page 37 ADAPTATEUR UNIVERSEL Plaque fixe Plaque mobile Plaque d'espacement (Fig. 11) (Fig. 9) (Fig. 10) Speed Dome Lettre Nombre Axis 2130* PM10 213* PM11 231/232* TK-C676** VN-V685U/VN-V686U PM12 TK-C685E/TK-C686E PM13 Panasonic BB-HCM381 WV-CS9500 WV-NS202E* Sanyo VCC 9300P Sony SNC RZ50P SNC RZ25P Toshiba IK-WB21A* Tab.
- Page 38 Approcher l’adaptateur de la bague et connecter les câbles sertis au speed dome. Insérer l’adaptateur dans le logement en le fixant par rotation aux vis M3x12mm. Serrer les vis. Fig. 14 Fig. 12 Fixage sur plaque fixe. Fig. 13 Fixage sur plaque mobile. La flèche en bas de l’adaptateur indique la partie externe du caisson.
-
Page 39: Câblages
6.3.1 Câblages Effectuer les câblages nécessaires en fonction du type d’alimentation du speed dome installé : IN 230Vac OUT 24Vac Fig. 15 Alimentation toroïdale pour caméra, IN 230Vac - OUT 24Vac. Bleu Noir IN 100-240Vac OUT 12Vdc OUT 230Vac OUT 24Vdc* Fig. - Page 40 Rouge OUT 24Vac IN 24Vac Fig. 17 Alimentation pour caméra, IN 24Vac - OUT 24Vac. Rouge IN 24Vac Marron OUT 12Vdc Fig. 18 Alimentation pour caméra, IN 24Vac - OUT 12Vdc.
-
Page 41: Câblage De Terre
6.4 Version ventilée 6.3.2 Câblage de terre En cas de tension en entrée de 230Vac, effectuer La version ventilée du caisson comporte deux la mise à terre du caisson en appliquant les deux filtres latéraux sur sa structure en aluminium câblages fournis sur le couvercle et la structure –... -
Page 42: Entretien Et Nettoyage
9.3 Électrique 7 Entretien et nettoyage Chauffage avec ventilateur à cycle continu, Ton 15°C 7.1 Entretiens de la vitre et +/-3°C Toff 22°C +/-3°C des parties en plastique - IN 24Vac, consommation 24W max - IN 100/240Vac, consommation 44W max Nous conseillons l’emploi de savons Alimentation pour caméra inclus avec l’adaptateur neutres dilués avec de l’eau. -
Page 43: Dessins Techniques
10 Dessins techniques Ø 314 Ø 185 Ø 230 A - A Ø 184 B - B Ø 184 C - C Fig. 23 MEDUSA... - Page 44 VIDEOTEC S.p.A. www.videotec.com Printed in Italy MNVCDBH18B_1511_FR...
- Page 45 MEDUSA Universalkugelgehäuse für diskrete Videoüberwachung Deutsch - Bedienungslanleitung...
- Page 46 Inhaltsverzeichnis DEUTSCH 1 Allgemeines ........................3 1.1 Schreibweisen ................................. 3 2 Anmerkungen zum Copyright und Informationen zu den Handelsmarken .... 3 3 Sichereitsnormen ......................3 4 Identifizierung ......................4 4.1 Beschreibung und Bezeichnung des Produktes ..................4 4.2 Kennzeichnung des Produkts ..........................4 5 Vorbereitung des Produktes auf den Gebrauch ............
-
Page 47: Allgemeines
1 Allgemeines 3 Sichereitsnormen Lesen Sie bitte vor dem Installieren und Der Hersteller lehnt jede Haftung für dem Verwenden dieses Gerätes die eventuelle Schäden ab, die aufgrund Bedienungsanleitung sorgfältig durch. Bewahren unsachgemäßer Anwendung der in diesem Sie sie zum späteren Nachschlagen auf. Handbuch erwähnten Geräte entstanden ist. -
Page 48: Identifizierung
Materialliste übereinstimmt: kabelführung installiert; die Halterung kann für Verpackung des Gehäuses Wand-, Decken- oder Brüstung-Befestigung sein. • MEDUSA Gehäuse Erhältlich ist eine große Auswahl an Zubehör wie die universelle Adapterplatte, welche sich für alle • Lieferumfang für Gehäuses: Speed-Dome-Modelle eignet, die Beheizung (einzeln •... -
Page 49: Installation Und Zusammenbau
6.2 Installation 6 Installation und Zusammenbau 6.2.1 Gehäuseinstallation Diese Tätigkeit muss bei Installation und Zusammenbau unterbrochener Spannungsversorgung sind Fachleuten vorbehalten. vorgenommen werden. 6.1 Zusammenbau Den verwendeten Bügel solide am vorgesehenen Ort befestigen. 6.1.1 Montage des Plättchens Die Gehäuseabdeckung entfernen, indem man deren mit Kabelschellen 4 Schrauben im oberen Teil herausdreht. -
Page 50: Allzweck- Adapter
Den Universal-Adapter für die Speed- Die zu verwendenden Steckverbinder Dome durch Ausdrehen der drei Schrauben auf die Kabel crimpen. vom Aluminiumring entfernen. Den Adapterring mit den 4 zur Lieferung gehörenden Schrauben M4 im Innern des Gehäuses fixieren. Es muss genau darauf geachtet werden, dass die vorhandenen Kabel nicht eingeklemmt oder beschädigt werden. - Page 51 ALLZWECK- ADAPTER Feste Platte Bewegliche Abstandsstückplatte (Fig. 11) (Fig. 9) Platte (Fig. 10) Speed Dome Buchstabe Zahl Axis 2130* PM10 213* PM11 231/232* TK-C676** VN-V685U/VN-V686U PM12 TK-C685E/TK-C686E PM13 Panasonic BB-HCM381 WV-CS9500 WV-NS202E* Sanyo VCC 9300P Sony SNC RZ50P SNC RZ25P Toshiba IK-WB21A* Tab.
- Page 52 Den Adapter dem Ring annähern und die zuvor gecrimpten Kabel an die Speed Dome anschließen. Das Anpassungsglied in seine Aufnahmestelle einfügen und mit einer Drehung an die Schrauben M3x12mm anhängen. Dann die Schrauben festziehen. Fig. 12 Befestigung auf feste Platte. Fig.
-
Page 53: Verkabelungen
6.3.1 Verkabelungen Die nötigen Verkabelungen durchführen, die von der Spannungsversorgung der installierten Speed Dome abhängen: IN 230Vac OUT 24Vac Fig. 15 Toroidales Kameranetzteil, IN 230Vac - OUT 24Vac. Blau Schwarz IN 100-240Vac OUT 12Vdc OUT 230Vac OUT 24Vdc* Fig. 16 Wide Range Kameranetzteil, IN 100-240Vac - OUT 12/24Vdc/230Vac. - Page 54 OUT 24Vac IN 24Vac Fig. 17 Kameranetzteil, IN 24Vac - OUT 24Vac. IN 24Vac Braun OUT 12Vdc Fig. 18 Kameranetzteil, IN 24Vac - OUT 12Vdc.
-
Page 55: Erdverkabelung
6.3.2 Erdverkabelung 6.3.4 Belüftete Ausführung Bei einer Eingangsspannung von 230Vac muss das Die belüftete Gehäuseversion besitzt zwei von Gehäuse geerdet werden. Dazu die beiden zum der Haube geschützte Filter an den Seiten des Lieferumfang gehörenden Kabel mit Schrauben Aluminiumkorpus, während in den Adapterring M3*6T und Zahnscheiben an Abdeckung und zwei zusätzliche Ventilatoren eingebaut sind, Korpus anbringen. -
Page 56: Wartung Und Reinigung
9.3 Elektrik 7 Wartung und Reinigung Heizung mit Lüfter im Dauerbetrieb, Ton 15°C +/-3°C 7.1 Reinigung des Glases Toff 22°C +/-3°C und der Kunststoffteile - IN 24Vac, Verbrauch 24W max - IN 100/240Vac, Verbrauch 44W max Verwässerte neutrale Seifen empfohlen werden. Kameranetzteil im Lieferumfang mit Innenadapter Zu vermeiden sind Äthylalkohol, - IN 100/240Vac, 50/60Hz, OUT 12Vdc, 3A max... -
Page 57: Technische Zeichnungen
10 Technische Zeichnungen Ø 314 Ø 185 Ø 230 A - A Ø 184 B - B Ø 184 C - C Fig. 23 MEDUSA... - Page 58 VIDEOTEC S.p.A. www.videotec.com Printed in Italy MNVCDBH18B_1511_DE...
- Page 59 MEDUSA Универсальная кожухи сфера для видеонаблюдения Русский - Учебник инструкции...
- Page 60 Индекс РУССКИЙ 1 Информация о данном руководстве ............... 3 1.1 Условные обозначения шрифтами ......................3 2 Примечания об авторских правах и информация о торговых марках ..... 3 3 Правила техники безопасности ................3 4 Идентификация ......................4 4.1 Описание и назначение типа .......................... 4 4.2 Маркировка...
-
Page 61: Информация О Данном Руководстве
1 Информация о 3 Правила техники данном руководстве безопасности Перед установкой и использованием данного Производитель снимает с себя устройства необходимо внимательно всякую ответственность за ущерб, прочитать настоящее руководство. причиненный в результате Хранить данное руководство под рукой для использования оборудования не возможности... -
Page 62: Идентификация
разнообразные быстрые поворотные списку материалов, приведённому ниже: устройства (скоростные купольные камеры). Упаковка кожух Кожух устанавливается на опору с внутренней • Кожух MEDUSA прокладкой кабелей; опора может быть настенная, потолочная или парапетная. • Оснащение для кожуха: Доступен набор комплектующих, таких как... -
Page 63: Установка И Сборка
6.2 Установка 6 Установка и сборка 6.2.1 Установка Установка и сборка оборудования предохранительного кожуха должны выполняться только квалифицированным персоналом. Операция должна выполняться при отключенном напряжении. 6.1 Сборка Надежно закрепить кронштейн, 6.1.1 Монтаж пластины с используемый в пункте назначения. кабельными муфтами Демонтировать... -
Page 64: Универсальный Адаптер
Демонтировать универсальный адаптер Зажать на кабелях различные коннекторы, для скоростной купольной камеры из которые будут использоваться. алюминиевого кольца, отвинтив три винта. Закрепить кольцо адаптера внутри кожуха с помощью четырех винтов М4, поставляемых в комплекте. Будьте осторожны, чтобы не прищемить или не повредить кабельную проводку. Fig. - Page 65 УНИВЕРСАЛЬНЫЙ АДАПТЕР Распорная пластина Неподвижная Подвижная пластина (Рис. 9) пластина (Рис. 10) (Рис. 11) Speed Dome Буква Номер Axis 2130* PM10 213* PM11 231/232* TK-C676** VN-V685U/VN-V686U PM12 TK-C685E/TK-C686E PM13 Panasonic BB-HCM381 WV-CS9500 WV-NS202E* Sanyo VCC 9300P Sony SNC RZ50P SNC RZ25P Toshiba IK-WB21A* Tab.
- Page 66 При приближении адаптера к кольцу, подсоединить предварительно обжатые кабели к скоростной купольной камере. Монтировать всё внутрь кожуха, осторожно вставив в соответствующие гнёзда и закрепив три поставленных винта M3*6T. Fig. 12 Крепление к неподвижной пластине. Fig. 14 Fig. 13 Крепление к подвижной пластине. Стрелка...
-
Page 67: Кабельная Проводка
6.3.1 Кабельная проводка Выполнить необходимые проводки, установленные на основании типа питания установленной скоростной купольной камеры: IN 230Vac OUT 24Vac Fig. 15 Тороидальный блок питания для телекамеры, ВХ 230 В пер.т. - ВЫХ 24 В пер. тока. IN 100-240Vac OUT 12Vdc OUT 230Vac OUT 24Vdc* Fig. - Page 68 OUT 24Vac IN 24Vac Fig. 17 Источник питания для телекамеры, ВХ 24 В пер.т. - ВЫХ 24 В пер.т. IN 24Vac OUT 12Vdc Fig. 18 Источник питания для телекамеры, ВХ 24 В пер.т. - ВЫХ 12 В пост.т.
-
Page 69: Проводка Заземления
6.3.2 Проводка заземления 6.3.4 Версия с вентиляцией В случае напряжения на входе 230 В пер.т. Версия с вентиляцией кожуха имеет два выполнить заземление кожуха, установив два боковых фильтра на алюминиевом корпусе, кабелепровода, входящие в комплект, на крышке защищенные с помощью панели, в то время и... -
Page 70: Техническое Обслуживание И Очистка
9.3 Электрическая часть 7 Техническое обслуживание и очистка Нагрев с помощью крыльчатки непрерывного цикла, Ton 15°C +/-3°C Toff 22°C +/-3°C 7.1 Очистка стекла и - ВХ 24 В пер.т., потребление макс. 24 Вт - IN 230 В пер.т., потребление макс. 44 Вт пластмассовых... -
Page 71: Технические Чертежи
10 Технические чертежи Ø 314 Ø 185 Ø 230 A - A Ø 184 B - B Ø 184 C - C Fig. 23 MEDUSA... - Page 72 VIDEOTEC S.p.A. www.videotec.com Printed in Italy MNVCDBH18B_1511_RU...
- Page 74 Email: info@videotec.com Tel. +33 1 60491816 - Fax +33 1 69284736 Email: info.fr@videotec.com Asia Pacific Videotec (HK) Ltd Americas Videotec Security, Inc. Flat 8, 19/F. On Dak Industrial Building, No. 2-6 Wah Sing Street Gateway Industrial Park, 35 Gateway Drive, Suite 100 Kwai Chung, New Territories - Hong Kong Plattsburgh, NY 12901 - U.S.A.