Table des Matières
Publicité
Les langues disponibles
Les langues disponibles
Liens rapides
Publicité
Chapitres
Table des Matières

Manuels Connexes pour Precor Discovery Plate Loaded Serie


Sommaire des Matières pour Precor Discovery Plate Loaded Serie
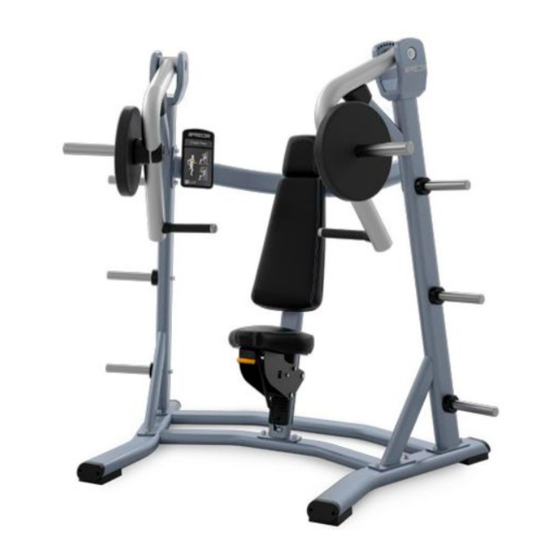
- Page 1 Manuel de l’utilisateur Discovery Plate Loaded™ Line...
-
Page 3: Importantes Consignes De Sécurité Pour Les Propriétaires
N’installez aucun accessoire qui utilisation. Étant donné que la composition des sols varie, veuillez n’aurait pas été approuvé par Precor. L’installation de tels accessoires expose consulter un professionnel du bâtiment pour avoir une fixation appropriée. -
Page 4: Importantes Consignes De Sécurité À L'attention Des Utilisateurs
Importantes consignes de sécurité à l’attention des utilisateurs En cas de douleur ou de symptôme anormal, interrompez immédiatement Il est conseillé de subir un examen médical complet avant de commencer tout votre séance d’entraînement et consultez votre médecin. programme de remise en forme. Si vous avez des étourdissements ou des faiblesses, arrêtez immédiatement les exercices. -
Page 5: Table Des Matières
Table des matières Importantes consignes de sécurité pour les propriétaires ..1 Inspection hebdomadaire ............9 Approbation de sécurité ..............1 Entretien et nettoyage approfondi du garnissage ......9 Inspection et lubrification des roulements et des bagues ..9 Importantes consignes de sécurité à l’attention Vérification et lubrification du réglage du siège ...... -
Page 6: Avant De Commencer
équipements de musculation commerciaux Precor. Si vous utilisez des pièces qui ne sont pas approuvées par Precor, vous risquez d’annuler la garantie limitée Precor. L’utilisation de pièces qui ne sont pas approuvées par Precor peut être à l’origine de blessures. -
Page 7: Demande De Réparations
N° de modèle : N° de série : plus d’informations sur les numéros du service Clientèle ou pour obtenir une liste des centres de maintenance autorisés Precor, visitez le site Web de Date d’achat : Precor, à l’adresse www.precor.com. Pour toute question concernant une partie de l’équipement, cherchez son N°... -
Page 8: Inspection Quotidienne
Vérifiez les étiquettes d’avertissement et d’instructions. Important : Ne remplacez pas le revêtement des coussins et n’utilisez pas de coussins non approuvés par Precor. Nettoyage du garnissage Nettoyage et inspection des châssis Pour retirer les saletés et la transpiration à la surface, nettoyez le garnissage tous les jours avec une solution de savon doux et d’eau dans un flacon... -
Page 9: Vérification Des Étiquettes D'avertissement Et D'instructions
La figure suivante illustre un schéma descriptif contenant des étiquettes avec Vérification des étiquettes d’avertissement le nom de l’équipement et des instructions pour l’exercice. et d’instructions Inspectez quotidiennement les étiquettes d’avertissement et d’instructions pour vous assurer que toutes les informations sont clairement lisibles. Si une partie de l’étiquette n’est pas visible ou est mal collée, remplacez immédiatement l’étiquette (Reportez-vous à... - Page 10 Les produits Precor sont fournis avec une série d’étiquettes d’avertissement standard. Les deux figures ci-dessous présentent des exemples d’étiquettes d’avertissement que vous pouvez voir sur l’équipement en fonction du modèle et de la gamme de produits. Figure 2 : Étiquette d’avertissement indiquant un risque de pincement Figure 3 : Étiquette d’avertissement général apposée sur le cadre de...
-
Page 11: Inspection Hebdomadaire
Effectuez les tâches ci-dessous de manière appropriée pour et des bagues l’appareil que vous entretenez : Precor utilise des roulements de grande qualité, conçus pour les exercices de Entretenez et nettoyez le garnissage de manière approfondie. musculation et dotés d’une durée de vie étendue. Toutes les semaines, ... -
Page 12: Vérification Et Lubrification Du Réglage Du Siège
Vérification et lubrification du réglage du siège Le mécanisme de réglage du siège nécessite une maintenance réduite. Cependant, comme la sécurité du siège est importante pour la sécurité de l’exercice, vous devez vérifier régulièrement le levier du siège pour savoir s’il est mobile lors de l’utilisation. -
Page 13: Inspection Mensuelle
Terminez l’appareil que vous entretenez : par de la peinture pour retouche Precor, si nécessaire. Préservez le brillant de la peinture en enduisant l’équipement d’un produit automobile léger à base de ... - Page 14 Remarques : Manuel de l'utilisateur (Discovery Plate Loaded Line) : Remarques...
- Page 16 Ces caractéristiques sont sujettes à modification sans préavis. www.precor.com AVERTISSEMENT : Precor est reconnu dans le monde entier pour la conception novatrice et maintes fois primée de ses appareils d’entraînement. Precor dépose systématiquement, aux Etats-Unis et dans les autres pays du Precor Incorporated monde, des brevets relatifs à...
-
Page 17: Assembly Guide
Assembly Guide Discovery Plate Loaded™ Line Pulldown... - Page 19 Table of Contents Getting Started ................2 Opening the Boxes ................2 Installation Requirements ..............2 Hardware Kit (not to scale) ..............3 Assembling the Equipment ............7 Stabilizing the Equipment ..............8 Attaching the Side Uprights to the Base Frame ......9 Installing the Crossbar .................9 Installing the Center Upright Assembly ........
-
Page 20: Getting Started
Getting Started Opening the Boxes Installation Requirements WARNING You will need assistance to assemble this unit. DO Open the boxes and remove the packing materials. Be careful to open the NOT attempt assembly by yourself. boxes and assemble the components in the sequence presented in this manual. -
Page 21: Hardware Kit (Not To Scale)
Hardware Kit (not to scale) The following pieces of hardware are provided on a shrink-wrapped card. Each part is labeled on the card for easy reference. Table 1. Hardware kit contents Fasteners Quantity Buttonhead cap screw (M8 x 15 mm) Socket head cap screw (M12 x 35 mm) Socket head cap screw (M5 x 20 mm) Socket head cap screw (M5 x 12 mm) - Page 22 Fasteners Quantity Flat washer (13 mm internal diameter) Flat head cap screw (M10 x 25 mm) Hex head cap screw (⁵₁₆-inch x 1¹₂-inch) Flat head cap screw (M6 x 30 mm) Flat washer (11 mm internal diameter) Socket head cap screw (M10 x 30 mm) Axle mount end Pulldown Assembly Guide: Getting Started...
- Page 23 Fasteners Quantity Roller end cap Flat head cap screw (M12 x 30 mm) ⁵₁₆-inch nylon lock nut Table 2. Other Equipment Parts Part Quantity Roller bar Weight horn Weight storage horn Arm pivot axle Weight horn bumper Pulldown Assembly Guide: Getting Started...
- Page 24 Part Quantity Weight horn end cap Weight storage horn bumper Gas spring Instructional placard Pulldown Assembly Guide: Getting Started...
-
Page 25: Assembling The Equipment
Precor highly recommends that the equipment be bolted to the floor to reduce the risk of toppling due to improper use. Because floor construction varies, consult a professional building engineer for proper fastening. -
Page 26: Stabilizing The Equipment
Stabilizing the Equipment 4. Using the same open-end wrench, turn the positioning bolt to the left or the right to move the adjustable foot to the appropriate level, as shown in Once you have positioned the base frame where you want the equipment to be the following figure. -
Page 27: Attaching The Side Uprights To The Base Frame
Attaching the Side Uprights to the Installing the Crossbar Base Frame Note: Have your assistant hold the crossbar in place while you perform this procedure. Perform the following procedure to attach both side uprights to the base frame. To attach the crossbar to the side uprights: To attach the side uprights to the base frame: 1. -
Page 28: Installing The Center Upright Assembly
2. Place two M12 x 35 mm socket head cap screws and two 13 mm flat Installing the Center Upright Assembly washers into the screw holes in the base frame. Partially tighten the fasteners. Attaching the center upright assembly and the accompanying seat mechanism completes the frame of the equipment. -
Page 29: Installing The Movement Arms
Installing the Movement Arms 4. Check that the axle is properly positioned and centered, then tighten the screws completely. You will need an assistant to hold the movement arms in place while you Important: The screws should be tight enough to prevent the movement arm complete this procedure. -
Page 30: Attaching The Knee Roller Pads
Attaching the Knee Roller Pads 3. Slide a knee roller pad and one end cap onto the roller bar and secure it with one M6 x 30 flat head cap screw. The knee roller pads on this equipment are attached to a roller bar fitted to the Note: There is a small pin on each end of the roller bar and a small hole center upright assembly. -
Page 31: Attaching The Seat Pad
2. Insert four ⁵₁₆-inch x 1¹₂-inch hex head screws with 9mm flat washers into Attaching the Seat Pad the screw holes in the pad, as shown in the following figure. The seat mechanism is preassembled, except for the seat pad and the gas spring. -
Page 32: Connecting The Gas Spring
3. Insert the threaded end of the lower stem through the hole in the small Connecting the Gas Spring bracket on the base frame, as shown in the following figure. The gas spring, which lifts the seat assembly when an exerciser adjusts the seat height, is attached to the seat assembly and the frame through two ball-shaped stems. -
Page 33: Adjusting The Seat Rollers
Adjusting the Seat Rollers 2. Have your assistant press the seat pad down until the back roller contacts the black plastic plate on the back of the frame. After you have installed the gas spring, test the seat. It should not rock from 3. -
Page 34: Attaching Weight Horns To The Movement Arms
Attaching Weight Horns to the Attaching Weight Storage Horns Movement Arms Repeat this procedure as needed to attach all of the weight storage horns to the equipment. The weight horns that attach to the movement arms are slightly larger than the weight storage horns. -
Page 35: Attaching The Instructional Placard And Safety Labels
2. Place the large hole near the bottom of the placard over the button, then Attaching the Instructional Placard and slide the placard downward to lock it into place as shown in the following Safety Labels figure. The equipment includes a metal bracket for the instructional placard. The placard slides over a metal button near the bottom of the bracket. - Page 36 3. Insert an M8 x 15 mm buttonhead screw with 9mm flat washer into the Note: If you are installing labels in a language other than English, remove screw hole near the top of the bracket, as shown in the following figure. the general warning label attached to the equipment.
- Page 37 Notes: Pulldown Assembly Guide: Notes...
- Page 38 Notes: Pulldown Assembly Guide: Notes...
- Page 40 U.S. and foreign patents for both the mechanical construction and the visual aspects of its P.O. Box 7202 product design. Any party contemplating the use of Precor product designs is hereby forewarned that Precor Discovery Plate Loaded™ Pulldown Assembly Guide Woodinville, WA USA 98072-4002 considers the unauthorized appropriation of its proprietary rights to be a very serious matter.