Table des Matières
Publicité
Les langues disponibles
Les langues disponibles
Liens rapides
Micro DE
Montageanleitung
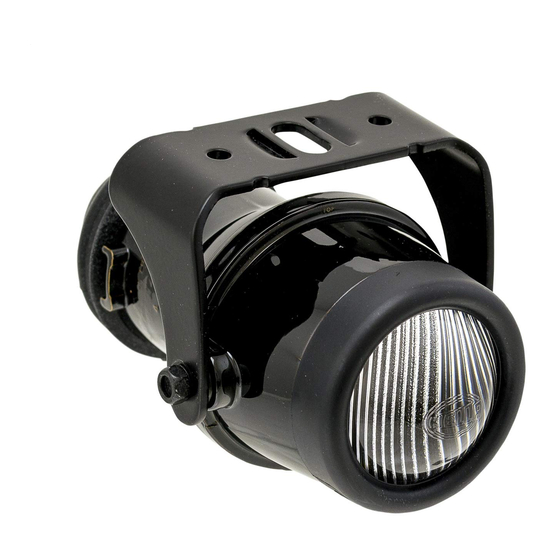
Nebelscheinwerfer
Mounting Instructions
Fog lamps
Instructions de montage
Projecteurs antibrouillard
Monteringsanvisning
Dimstrålkastare
Montagehandleiding
Mistlampen
Instrucciones de montaje
Faros antiniebla
Istruzioni di montaggio
Proiettori fendinebbia
Asennusohjeet
Sumuvalonheittimet
1
Publicité
Table des Matières

Sommaire des Matières pour Hella Micro DE
- Page 1 Micro DE Montageanleitung Nebelscheinwerfer Mounting Instructions Fog lamps Instructions de montage Projecteurs antibrouillard Monteringsanvisning Dimstrålkastare Montagehandleiding Mistlampen Instrucciones de montaje Faros antiniebla Istruzioni di montaggio Proiettori fendinebbia Asennusohjeet Sumuvalonheittimet...
- Page 2 Lieferumfang Le produit et les pièces jointes Volumen del suministro (bei Garnituren) (juego) Kit includes Dotazione di forniture (pour kits) (kit) (with sets) Leveransomfattning Osaluettelo (vid satser) (sarjoissa) De levering (bij sets) 4 cm...
- Page 3 Ø 12 mm...
- Page 5 Ø 8,5 mm 4 Nm 4 Nm...
- Page 6 8 KA 002 309-811 Zubehör Toebehoren Accessories Accesorios Accessoires Accessori Tillbehör Lisätarvikkeet 8 HG 153 152-001...
- Page 7 Technische Änderungen vorbe- DEUTSCH 8 – 9 halten Subject to alteration without ENGLISH 10 – 11 notice Sous réserve de modifi cations FRANÇAIS 12 – 13 techniques Med förbehåll för tekniska SVENSKA 14 – 15 ändringar Technische wijzigingen voorbe- NEDERLANDS 16 –...
-
Page 8: Benötigtes Werkzeug
Zubehör siehe Abb. Seite 6 (Nicht im Lieferumfang enthalten) 1. Montagerahmen 2. Kabelsatz mit Relais Anbaumaße: min. min. min. min. Montage hängend oder stehend möglich. Scheinwerfer dürfen nicht vibrieren, über die Motorhaube ragen und müssen symmetrisch 1200 angebracht sein. = Nicht höher als Abblendlicht montieren •... -
Page 9: Elektrischer Anschluß
(Abb. 3). Ersatz-Glühlampen und Sicherungen im 6. Masseleitung (-) der Batterie wie- 3. Plusleitung mit Glühlampen- Fahrzeug? Wenn Sie Fragen oder Einbau- probleme haben: Rufen Sie den Hella der anschließen. Lichtanlage prüfen, anschluß verbinden und Masse- Kundendienst an. Scheinwerfer ausrichten, Schrauben leitung auf Haltefeder stecken. -
Page 10: Tools Required
Accessories, see Fig. page 6 (not included with kit) 2. Wiring harness with relay 1. Adjusting frame The table shows the possibilities Attachment dimensions: permitted in the various countries: For upright/pendant mounting. Lamps should neither vibrate nor extend higher than the bonnet and must be fi... -
Page 11: Electrical Connection
Push the protecting tube completely leads. If you have any questions or in- over the bare lead connection to the stallation problems: Ring the Hella bulb connector (Fig. 4). Have the fog lamps adjusted at service department. a workshop or service station. -
Page 12: Cotes De Montage
Accessoires : voir fi gure page 6 (non fournis) 1. Support de montage 2. Faisceau de câbles avec relais Cotes de montage : min. min. min. min. Montage vertical ou suspendu. Les projecteurs ne doivent ni vibrer ni dépasser la hauteur du capot et 1200 sont à... -
Page 13: Branchement Électrique
(repère ”TOP” en haut, le peut absorber jusqu’à 80% du doigts nus (fi g. 1-2). lo-go Hella doit être lisible, la 2. Conduire les extrémités des fi ls fl ux lumineux. Vous roulerez plus vidan-ge dirigée vers le bas) en le au travers du passe-câble en caout-... - Page 14 Tillbehör se bild sidan 6 (ingår ej i leveransen) 1. Monteringssarg 2. Kabelsats med relä Monteringsmått: min. min. min. min. Montering kan göras stående eller hängande, ovanför eller under stötfångaren. Extrastrålkastare får inte vibrera och de måste monteras symmetriskt. = Får ej monteras högre än halvljusen. •...
-
Page 15: Elektrisk Anslutning
Ytterligare tips: gummigenomförningarna in i husen. 5. Placera strålkastarna i rätt läge För skyddsslang över den avisole- (”TOP” uppåt, Hella läsbart, avrin- Håll strålkastarglasen rena. rade plusledningen och kläm på ningar nedåt), på de förmonterade Smuts kan reducera ljusutbytet kabelsko (bild 3). -
Page 16: Montage-Afmetingen
Toebehoren zie afb. pagina 6 (worden niet meegeleverd) 1. Montageframe 2. Kabelset met relais Montage hangend of staand Montage-afmetingen mogelijk. Schijnwerpers mogen niet trillen, niet boven de motorkap uitsteken en moeten symmetrisch zijn geplaatst. • Duimstok • Boormachine met boren Noodzakelijk gereedschap: Ø... -
Page 17: Elektrische Aansluiting
Hella klan- Laat de mistlampen in de garage schuiven (afb. 4). Let op kort-slui- tenservice / technische dienst, of bij een service station exact telefoonnr. -
Page 18: Medidas De Montaje
Para accesorios, véase fi g. en pág. 6 (no se incluyen en el suministro) 1. Bastidor de montaje 2. Cableado con relé Medidas de montaje: min. min. min. min. El montaje puede practicarse en posición colgada o de pie. Los faros no deben vibrar, ni quedar más altos que el capó... -
Page 19: Conexión Eléctrica
Hella. los cables. lámpara (fi g. 4). -
Page 20: Istruzioni Di Montaggio
Accessori: vedi foto pagina 6 (da ordinare a parte) 1. Cornice di montaggio 2. Cablaggio con relais Istruzioni di montaggio: min. min. min. min. Montaggio ritto o appeso. Accertarsi che i proiettori non vibri- no, che non sporgano dal paraurti 1200 e che siano montati simmetrica- mente. -
Page 21: Collegamento Elettrico
Un ultimo suggerimento: 5. Portare il proiettore nella corretta attraverso il passafi lo. Ripiegare il posizione (”TOP” in alto, Hella tubo di protezione sul cavo + non Tenete i vetri dei proiettori sempre puliti. leggibile, protezioni in basso) av- isolato e premere la linguetta (vedi Lo sporco può... -
Page 22: Tarvittavat Työkalut
Lisätarvikkeet ks. kuvaa sivulla 6 (eivät kuulu toimitukseen) 1. Asennussanka 2. Johdinsarja releineen Asennusmitat: min. min. min. min. Seisova tai riippuva kiinnitys, joko puskurin ala- tai yläpuolelle: tuke- vasti ja symmetrisesti. Sumuvalojen tulee, mikäli mah- = merkitsee: ei lähivaloa korkeammalle dollista, sijaita enintään 0,40 m etäisyydellä... - Page 23 5. Aseta valonheitin oikeaan asen- 1. Aseta polttimo. Lasikupua ei saa toon (TOP-merkintä aina ylhäällä, koskettaa paljain käsin (kuvat 1-2). Hella-teksti oikeinpäin, vedenpoisto- 2. Vie johdot valonheittimeen kumi- Vielä eräs tärkeä huomautus: reikä alaspäin). suojan läpi. Liitä liitin plusjohtoon ja 6.


